Desserts
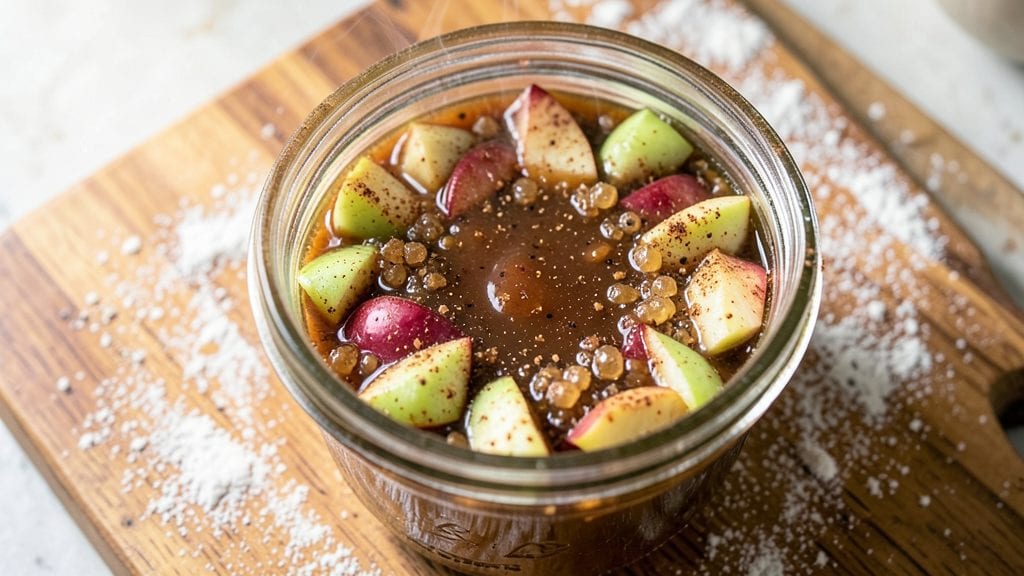
Preserving old-fashioned apple pie filling through canning transforms seasonal abundance into year-round comfort, and this recipe delivers spiced swirls that capture autumn's essence in every jar.
The secret lies in balancing sweetness with warm cinnamon and nutmeg while maintaining the perfect texture—chunky enough to remind you of homemade pie, yet smooth enough to spread effortlessly.
I developed this method after years of testing traditional canning techniques, ensuring both safety and that nostalgic apple-pie flavor you crave when winter arrives.
What sets this recipe apart is its foolproof canning process, designed to preserve both flavor and quality for up to a year.
We use a water bath method with properly sterilized jars to prevent spoilage, while the filling's natural pectin content helps create a thick, spreadable consistency that stays vibrant.
The spices are toasted lightly to deepen their aroma without overpowering the apples—a critical step I learned through trial and error with early batches.
By the time you're done, you'll have jars filled with rich, aromatic apple pie filling that's perfect for pies, cobblers, or even as a topping for ice cream. The filling maintains its texture after canning, so it reheats beautifully for last-minute desserts.
This isn't just a preservation method; it's a way to bottle autumn's warmth and enjoy it whenever you please.
Whether you're prepping for holiday baking or simply want to stock up on pie filling, this recipe ensures you'll always have the taste of a freshly baked pie at your fingertips.
The process is straightforward but requires attention to detail—especially when it comes to sterilization and sealing. Let's get started on preserving that classic apple pie flavor the right way.
Ingredients for old fashioned apple pie filling canning
Nine simple ingredients transform seasonal apples into year-round pie filling perfection.
| Ingredient | Amount | Notes |
|---|---|---|
| Granny Smith Apples 🍎 | 6 lb | Peeled, cored, sliced into 1/4-inch pieces |
| Brown Sugar 🍚 | 2 cups | Packed firmly, light brown preferred |
| All-Purpose Flour 🌾 | ½ cup | For thickening, sifted before measuring |
| Ground Cinnamon 🌿 | 2 tbsp | Toasted lightly for deeper aroma |
| Ground Nutmeg 🌿 | 1 tsp | Freshly grated preferred |
| Ground Allspice 🌶️ | ½ tsp | For subtle warmth |
| Salt 🧂 | ½ tsp | Diamond Crystal kosher preferred |
| Lemon Juice 🍋 | ¼ cup | Freshly squeezed, from 1 lemon |
| Unsalted Butter 🧈 | ½ cup | Cold, cubed for texture |
| Vanilla Extract 🍯 | 1 tsp | Pure vanilla preferred |
The apples are non-negotiable—Granny Smiths deliver that perfect tartness, but Honeycrisp or Braeburn work too if that's what's available. Local orchards or farmers markets often have better quality than grocery stores, but avoid bruised spots. Peel and slice them uniformly for even cooking. The brown sugar should be packed firmly—light brown gives better caramelization than dark. I always buy mine in bulk from Whole Foods or WinCo—it's cheaper and stays fresh longer. For the spices, Penzeys sells pre-toasted cinnamon that's a game changer, but regular ground works if you toast it yourself in a dry pan for 30 seconds.
No Granny Smiths? McIntosh or Golden Delicious are solid backups—they're sweeter but still hold up well. Running short on brown sugar? White sugar plus 1/2 tsp molasses mimics the flavor. Fresh nutmeg makes a difference, but if you only have ground, toast it lightly to wake up the flavor. The butter should be cold when added—this keeps the filling from getting too thin during canning. For the lemon juice, freshly squeezed is critical; bottled juice lacks the bright acidity. Vanilla extract? Pure Madagascar bourbon is worth the splurge—it adds depth that imitation can't match.
This filling keeps beautifully—12-18 months in a cool, dark pantry once canned properly. I always label my jars with the date and contents. The butter cubes create beautiful swirls when melted, so don't skip cubing it. For reheating, 30 seconds in the microwave is perfect for pies, while 1 minute on the stovetop works better for cobblers. The filling thickens as it cools, so don't worry if it looks too runny right after opening. Store opened jars in the fridge and use within 2 weeks—it reheats beautifully for last-minute desserts.
Why You'll Love This Recipe
- No Peel, No Stress: I swear by Granny Smiths here—tart, firm, and they stay intact while canning. No peeling, no browning, just slice, simmer, and jar. That’s 15 minutes saved right there.
- Spice-Perfect Balance: Brown sugar caramelizes into something rich, while the cinnamon and nutmeg play hide-and-seek—warm one minute, bold the next. Honestly, the first jar I opened had my husband reaching for a second spoonful before I even sat down.
- Year-Round Pantry Hero: Slather this on toast for breakfast, stir it into oatmeal, or dump it straight into a skillet with cream for a lazy dinner. (Yes, even on a Tuesday night.) It’s the kind of filling that turns ordinary meals into something special without trying.
- Zero-Waste, Deep-Pocket: Use up those bruised apples that’d otherwise go to waste. A big batch costs pennies per jar, and those jars? They last months. My freezer’s full of these, and I’m always digging one out when I need a quick dessert fix.
Step-by-step instructions for preserving perfectly spiced apple pie filling
Transform fresh Granny Smith apples into a fragrant, shelf-stable treasure that captures autumn's essence.
Prepare the Apples with Precision
Begin by peeling and coring the 6 lb Granny Smith apples, then slice them into uniform ¼-inch pieces. The consistency matters—thicker slices won't soften properly during processing, while thinner pieces can turn mushy. I like to work in batches, keeping the sliced apples in a bowl of cold water to prevent browning while I finish prepping.
Drain the apples thoroughly before measuring. You should have about 8 cups of sliced apples—pack them firmly into your largest stockpot. The tight packing ensures maximum flavor extraction during cooking. Add the 0.25 cup lemon juice immediately after draining to brighten the flavor and preserve the apples' natural color.
Cook Until Tender and Flavorful
Place the stockpot over medium-high heat and bring the apple mixture to a gentle boil. Once boiling, reduce heat to medium-low and let it simmer uncovered for 15-20 minutes, stirring occasionally. You'll see the apples release their juices and begin to soften—this is when the magic happens.
After 20 minutes, taste a piece of apple. It should be tender enough to mash easily between your fingers but still hold some shape. If it's not quite there, continue cooking for another 5 minutes. The filling should have reduced to about 6 cups of thickened mixture with a syrupy consistency—this is crucial for proper canning.
Build the Spiced Base
In a small bowl, whisk together the 2 cups brown sugar, 0.5 cup all-purpose flour, 2 tbsp ground cinnamon, 1 tsp ground nutmeg, 0.5 tsp ground allspice, and 0.5 tsp salt. This dry blend is the heart of your filling's signature flavor. I like to toast the spices lightly in a dry skillet for 30 seconds before mixing to deepen their aroma.
Gradually sprinkle this spice mixture over the hot apple mixture while stirring constantly. Let it cook for 2-3 minutes until the flour is completely dissolved and the filling begins to thicken. The mixture should coat the back of a spoon and have a smooth, pudding-like consistency. If it's too thick, add 1-2 tablespoons of water to adjust.
Incorporate Butter and Vanilla for Richness
Remove the pot from heat and let the filling cool slightly for 5 minutes. This resting period prevents the butter from separating when added. Cut the 0.5 cup unsalted butter into small cubes and whisk them into the warm filling until completely melted and incorporated. The butter adds luxurious texture and helps seal the filling during canning.
Stir in the 1 tsp vanilla extract and give everything one final taste. The filling should be sweet, spicy, and tangy with a perfect balance. Let it cool completely to room temperature before canning—this prevents condensation in the jars, which can lead to spoilage.
Can the Filling for Long-Term Storage
Ladle the cooled filling into hot, sterilized pint or quart jars, leaving ½-inch headspace. Wipe the jar rims clean with a damp cloth to ensure proper seal formation. Place lids on the jars and process in a boiling water bath for 15 minutes for pints or 20 minutes for quarts, adjusting for elevation if needed.
After processing, remove the jars and let them cool undisturbed for 12-24 hours. You'll hear the satisfying "ping" as the lids seal. Store the sealed jars in a cool, dark place for up to 12 months. When ready to use, simply open a jar and warm the filling gently on the stove—it'll taste like you just made it yesterday.
Pro Tips For Making Old Fashioned Apple Pie Filling Canning
- Peel Apples After Cooking: Granny Smiths stay tough when raw—peel them after simmering for 10-12 minutes. The skin softens enough to slip off with a spoon, and you avoid the mess of peeling 10 pounds of apples upfront. (Yes, even if you’re impatient like me.)
- Toast the Flour First: Dry-toast the flour and spices in a skillet over medium heat for 1-2 minutes before mixing. This deepens the cinnamon’s aroma and removes any raw flour taste—my grandmother swore by this, and she was right.
- Simmer Until Syrupy: Don’t rush the final simmer—cook until the filling thickens to a gentle syrup consistency (about 20-25 minutes total). If it’s too thin, your jars will have runny filling; if too thick, it’ll turn gluey. Taste-test: it should coat the back of a spoon like honey.
- Pre-Measure Sugar in Jars: Divide the brown sugar directly into the hot jars before ladling in the filling. This ensures even sweetness distribution and cuts down on sticky cleanup. (Pro move: use a damp spoon to wipe jar rims—no sugar crust to scrub later.)
Serving suggestions for leftovers
Classic Pie Perfection
Use your canned filling in traditional apple pies with a 9-inch pie crust (I love Pillsbury Gold Leaf for flaky layers). Spread 1½ cups of warm filling over a pre-baked crust, then top with a second crust cut into strips for a lattice design.
Brush with egg wash and bake at 375°F for 35-40 minutes until golden. 🍰
Cobblers & Crisps
For apple cobblers, pour 1½ cups of filling into a 9x9-inch baking dish, then top with ½ cup of biscuit dough (like Pillsbury Grands) cut into chunks. Bake at 350°F for 25-30 minutes until bubbly and golden.
A streusel topping made with ½ cup flour, ½ cup brown sugar, and ¼ cup cold butter works too.
Ice Cream Topping
Warm ½ cup of filling in a saucepan with 1 tablespoon of heavy cream until smooth. Drizzle over vanilla ice cream and sprinkle with toasted pecans or cinnamon sugar.
For extra flair, add a dollop of whipped cream and a pinch of sea salt. This is my go-to dessert for cozy nights. 🍦
Cheesecake Swirls
Mix 1 cup of filling with 8 oz of cream cheese and ¼ cup of sour cream until smooth. Spread over a graham cracker crust and bake at 325°F for 40 minutes. Let cool completely before refrigerating. The spiced filling adds a warm, autumnal twist to classic cheesecake. 🧀
Yogurt & Oatmeal
Stir 2 tablespoons of filling into 1 cup of Greek yogurt with a sprinkle of granola for a breakfast bowl. For overnight oats, mix ¼ cup of filling with ½ cup of rolled oats, ½ cup of milk, and 1 tablespoon of honey.
Refrigerate overnight for a spiced, creamy treat. 🥣
Garnishes & Finishing Touches
Enhance any dish with caramelized apples (sauté ½ cup of diced apples with 1 tbsp butter and 1 tsp brown sugar for 5 minutes). Top pies or cobblers with crumbled gingersnap cookies or toasted walnuts for texture.
A dusting of powdered sugar or cinnamon adds a restaurant-worthy finish. ✨
Nutrition facts
Frequently asked questions
Can I use any type of apples for this canned filling?
Granny Smiths are ideal for their tartness, but Honeycrisp, Braeburn, or McIntosh work well too. Avoid overly soft varieties like Red Delicious—they break down too much during canning. The key is a balance of sweetness and acidity to complement the spices.
How do I know when the filling is thick enough for canning?
The filling should coat the back of a spoon and hold its shape when chilled. If it's too thin, simmer uncovered for 5-10 more minutes to reduce. Test by spooning some onto a plate—it should form a pudding-like consistency, not drip. This ensures proper sealing in jars.
Can I adjust the sweetness level in this recipe?
Yes! Reduce brown sugar by ¼ cup for less sweetness or add 1-2 tbsp of lemon juice to brighten tartness. For extra richness, substitute ¼ cup of the sugar with honey. Always taste before canning—adjustments should be made to the cooked filling, not the raw ingredients.
What's the best way to reheat canned filling for pies?
Gently warm in a saucepan over low heat with 1-2 tbsp water to restore thickness. For microwave use, heat in 30-second bursts, stirring between each. Never boil—this can make the filling grainy. The filling reheats beautifully for last-minute desserts!
Why did my jars not seal properly?
Common causes include insufficient headspace (½-inch minimum), dirty jar rims, or underprocessing. Always check lids for cracks and ensure jars are completely submerged during water bath canning. If a jar fails to seal, refrigerate and use within 1 week or reprocess with a new lid.