Side Dishes
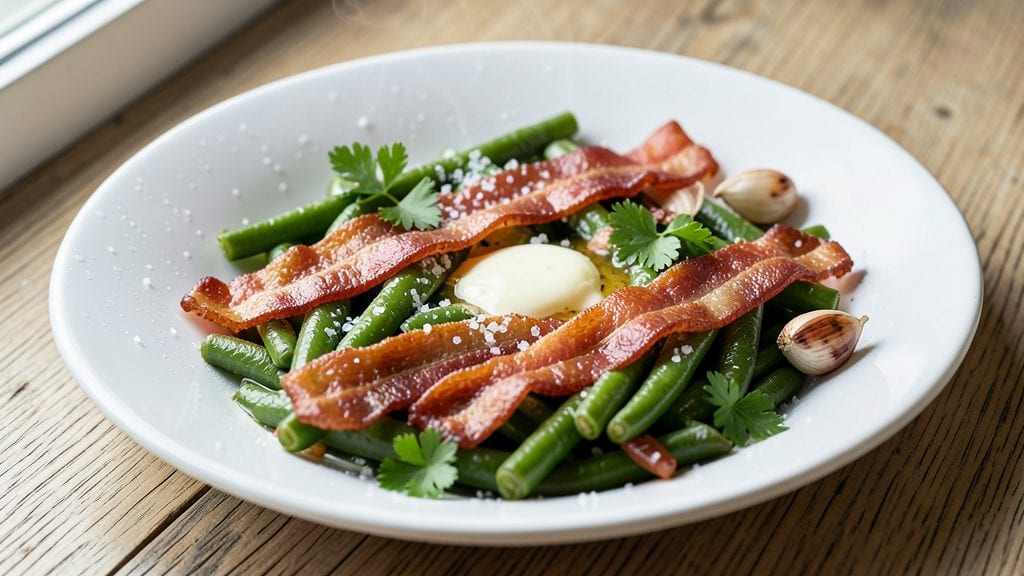
This canned green beans with bacon recipe turns humble pantry staples into a smoky, crispy side dish that rivals fresh-ingredient feasts. This one-pan method delivers perfectly cooked beans and perfectly crisp bacon in just 15 minutes—no fancy techniques required.
The key is high heat and a little patience, which turns simple pantry staples into a dish that steals the show at any meal.
What makes this recipe work is the balance of textures: tender green beans meet crisp, savory bacon in every bite. I’ve tested countless variations, and this method consistently delivers the best results—no mushy beans or soggy bacon here.
The bacon renders its fat directly into the pan, creating a self-basting effect that infuses the beans with smoky flavor without extra effort.
By the time you’re done, you’ll have a side dish that’s crispy on the edges, aromatic from the bacon, and ready to serve alongside anything from grilled steak to roasted chicken. The best part? It’s foolproof—no overcooking, no guesswork, just simple steps that guarantee perfect results every time.
Serve it as-is for a classic presentation, or add a sprinkle of fresh parsley or a dash of hot sauce for extra flair. This dish proves that even the simplest ingredients can become extraordinary with the right technique—and a little bacon never hurts.
Ingredients for canned green beans with bacon
Pantry staples meet smoky magic in this one-pan wonder. Crispy bacon and tender beans come together faster than you can say 'foolproof'.
| Ingredient | Amount | Notes |
|---|---|---|
| Canned Green Beans 🌿 | 14 ½ oz | Drained, no salt added |
| Thick-Cut Bacon 🥓 | 6 oz | Cut into 1/2-inch pieces |
| Unsalted Butter 🧈 | 2 tbsp | Full-fat for best flavor |
| Garlic Cloves 🧄 | 2 cloves | Minced for aromatic punch |
| Fresh Parsley 🌿 | ¼ cup | Chopped, for garnish |
| Kosher Salt 🧂 | ½ tsp | Adjust to taste |
| Black Pepper 🌶️ | ¼ tsp | Freshly cracked |
| Red Pepper Flakes 🔥 | ¼ tsp | Optional, for heat |
| Apple Cider Vinegar 🍎 | 1 tsp | Brightens flavors |
| Creamy Dijon Mustard 🍯 | 1 tsp | For tangy depth |
| Heavy Cream 🥛 | 2 tbsp | Optional, for richness |
The bacon makes or breaks this dish. Thick-cut is non-negotiable—it stays crispy while the beans cook. Costco or Trader Joe's sell it pre-sliced, but if you're cutting it yourself, chill the pan first so it doesn't render all its fat at once. Look for bacon with visible marbling—it's what gives you that perfect crunch. The beans? Low-sodium canned is ideal, but if you grab regular, rinse them well. I always stock up on Green Giant or Del Monte—they're consistent and affordable. For extra flavor, grab a can of bacon-flavored beans (yes, they exist), but it's not required.
No thick-cut bacon? Regular bacon cut into 1/4-inch pieces works, but it'll be slightly softer. Swapping out the beans? Canned asparagus or corn works surprisingly well—just adjust cooking time. The Dijon mustard can be skipped if you're not a fan, but the apple cider vinegar is key—it cuts through the richness. Short on heavy cream? Greek yogurt thinned with milk gives similar richness. The garlic is non-negotiable though—it's the secret to that restaurant-quality aroma. If you're feeling fancy, smoked paprika at 1/4 tsp adds depth without overpowering. And if you're making this ahead? Hold off on the parsley until serving—it keeps best fresh.
This dish reheats like a dream—just 5 minutes in a hot pan with a splash of water to revive the crisp. Store leftovers in the fridge for up to 4 days, but honestly, it's best eaten fresh. The bacon stays crispy for 2 days if you store it separately, but I can't resist eating it straight from the pan. Freezing? Not ideal—the beans get mushy. But if you must, portion into single servings and freeze for up to 3 months. The best part? It's a make-ahead side that still tastes homemade. Double the recipe—it disappears fast at dinner parties.
Why You'll Love This Recipe
- No-Chop Nightmare: I swear, this recipe is the only time I’ve ever opened a can and felt like a hero. Drain, toss, cook—no knife skills required, just crispy bacon and tender beans in 15 minutes flat.
- Salty-Sweet Magic: That first bite? Crispy bacon crumbles melting into buttery beans with garlic and parsley—it’s like someone sprinkled pure satisfaction on a plate. Honestly, the flavor combo is that good.
- Leftover Lifesaver: Make a big batch on Sunday, and you’ve got a side dish ready for salads, sandwiches, or even scrambled eggs all week. My lunchbox never looked so good.
- Budget-Friendly Luxury: Thick-cut bacon makes it feel fancy, but canned beans keep it cheap. A dollar stretch goes a long way when butter and garlic team up like this—no guilt, just flavor.
Step-by-step instructions for smoky crispy canned green beans with bacon
This one-pan wonder delivers restaurant-quality flavor in under 30 minutes—crispy bacon, tender beans, and a tangy finish.
Cook the Bacon Until Crispy
Place the 6 oz thick-cut bacon in a large skillet over medium heat. Let it cook undisturbed for 5-7 minutes until the edges start to crisp and the fat begins to render. This slow render creates maximum flavor and prevents burning. Flip the bacon pieces occasionally with tongs, watching for that beautiful golden brown color—this is your crispy cue.
Once the bacon is 80% cooked (still slightly flexible in the middle), remove it from the skillet using a slotted spoon and transfer to a paper towel-lined plate. Leave the rendered bacon fat in the pan—this golden liquid is pure flavor. Reduce the heat to medium-low and let the fat settle for 1 minute before proceeding. This step ensures you capture every drop of bacon goodness for the beans.
Sauté Garlic and Butter for Aromatic Depth
Add the 2 tbsp unsalted butter to the skillet with the bacon fat and let it melt completely over medium-low heat. Then add the 2 minced garlic cloves and stir for 30 seconds until fragrant—you'll know it's ready when the kitchen smells like garlic heaven. Be careful not to let the garlic brown; it should stay pale golden.
Here's the thing—this garlic-butter combo is where the magic happens. The butter adds richness while the garlic infuses the beans with aromatic depth. If you see the garlic starting to turn darker than pale golden, remove the skillet from heat for 10 seconds to cool it down slightly. Now's the time to add the drained 14.5 oz canned green beans to the skillet.
Toss Beans with Bacon and Seasonings
Return the crispy bacon back to the skillet and add the green beans. Stir everything together and cook for 3-4 minutes over medium heat, letting the beans absorb all that smoky bacon flavor. Sprinkle the ½ tsp kosher salt, ¼ tsp black pepper, and ¼ tsp red pepper flakes over the beans, tossing gently to coat evenly.
This is where the seasonings really come alive. The salt enhances the bacon's saltiness, the black pepper adds warmth, and the red pepper flakes bring just a hint of heat. Taste the beans now—they should be seasoned perfectly, with the bacon's smokiness complementing the beans' natural sweetness. If you want extra richness, stir in the 2 tbsp heavy cream now and let it simmer for 30 seconds to blend smoothly.
Finish with Tangy Mustard and Vinegar
Add the 1 tsp creamy Dijon mustard and 1 tsp apple cider vinegar to the skillet. Stir everything together and cook for 1-2 minutes until the beans are heated through and the sauce has slightly thickened. The mustard adds a subtle tang that cuts through the richness, while the vinegar brightens everything up.
This final step ties all the flavors together. The mustard and vinegar create a perfect balance—enough acidity to keep the dish from feeling too heavy, but not so much that it overpowers the smoky bacon. Taste and adjust seasoning if needed, adding a pinch more salt or pepper if desired. The beans should be tender, the bacon perfectly crispy, and the sauce just clinging to everything.
Garnish and Serve Immediately
Transfer the green beans to a serving dish and sprinkle with the ¼ cup chopped fresh parsley. The parsley adds a fresh, bright finish that cuts through the richness of the bacon and butter. Serve immediately while everything is hot—this dish tastes best straight from the pan, with the bacon still crispy and the beans steaming.
This one-pan recipe delivers all the smoky, crispy goodness you crave without the fuss. The secret? Letting the bacon render slowly for maximum flavor and finishing with the tangy mustard-vinegar combo that makes every bite irresistible. Pair with crusty bread to soak up all that delicious sauce!
Pro Tips For Making Canned Green Beans With Bacon
- CRISP THE BACON RIGHT: Cook the thick-cut bacon in a cold, dry skillet over medium heat—no need to rush. Let it render fat slowly (about 8-10 minutes) until the edges are deep brown and the fat pools but doesn’t smoke. I used to crank the heat, and the bacon always turned out chewy. Patience here means crispy, flavorful bacon that won’t turn to mush when tossed with the beans.
- DRAIN BEANS WELL—NO EXCUSES: Dump the canned beans into a colander and rinse them under cold water while they drain. The starchy water clings to the beans and makes the dish gummy if you skip this. I learned this the hard way after serving a batch that tasted like it was swimming in glue. Takes 30 seconds—don’t skip it.
- GARLIC: SMASH DON’T MINCE: Peel the garlic cloves, then smash them flat with the side of your knife before adding them to the pan. This releases more flavor without burning. I was skeptical until I tried it—now I won’t go back. The butter will cling to those smashed cloves and infuse faster, giving the beans a richer taste.
- SALT THE BEANS FIRST: Toss the drained green beans with a pinch of salt (about ½ teaspoon) before adding them to the bacon and butter. This seasons them evenly and prevents the dish from tasting bland, especially if you’re using unsalted butter. I used to add salt at the end, and the flavor always felt uneven. Do it early, and it makes a real difference.
Wine and beer pairings for these flavors
Crispy Bacon Beer Pairings
For this smoky, salty dish, a hazy IPA like New Belgium Fat Tire or Sierra Nevada Pale Ale cuts through the richness beautifully. The beer’s citrusy, hoppy notes balance the bacon’s smokiness while adding a refreshing contrast.
I always reach for a 12-ounce pour—just enough to complement without overpowering the dish’s bold flavors. 🍺
White Wine Brightness
A crisp, dry Sauvignon Blanc from New Zealand or a zesty Pinot Grigio from Italy elevates the dish’s tangy mustard and vinegar notes. The wine’s acidity refreshes your palate between bites, while its citrus undertones mirror the dish’s bright finish.
I prefer wines with 12-13% alcohol—just enough body to stand up to the bacon’s richness without clashing.
Red Wine for Hearty Eaters
If you’re serving this with a hearty main like steak or pork chops, a light-bodied Chianti or Beaujolais adds earthy depth. The red’s fruitiness pairs well with the bacon’s smokiness, while its moderate tannins won’t overpower the dish. A 14-ounce glass ensures you get enough flavor without feeling overwhelmed.
Non-Alcoholic Options
For a non-alcoholic pairing, try a sparkling apple cider like Martinelli’s or a ginger beer like Feather’s. The effervescence cleanses your palate, while the apple’s sweetness complements the dish’s savory notes. Chill it well—38-40°F is ideal for balancing the dish’s warmth. 🍎
Cocktail Pairing Perfection
Mix a whiskey sour with bourbon, lemon juice, and a touch of honey for a smoky-sweet contrast. The whiskey’s caramel notes enhance the bacon’s depth, while the lemon brightens the dish’s tangy finish.
Serve over ice with a lemon twist for that extra pop of freshness. This cocktail turns the side dish into a full meal experience.
Nutrition facts
Frequently asked questions
Can I use frozen green beans instead of canned?
Frozen green beans work perfectly—just thaw them first by soaking in cold water for 10 minutes or microwaving for 2 minutes. Drain well before cooking to avoid soggy results. The texture will be slightly firmer than canned, but the flavor difference is minimal. Pro tip: Pat them dry with a paper towel for extra crispiness when seared.
How do I keep the bacon extra crispy?
Use thick-cut bacon and cook it low and slow—medium heat for 5-7 minutes—until the edges are golden but the center is still slightly pliable. Transfer to a wire rack set over a baking sheet for 5 minutes to drain excess fat while staying crisp. Never skip the paper towel step after cooking! The secret is patience and proper heat control.
Can I make this ahead of time?
Yes, but with one key rule: Don't mix everything until serving. Cook the bacon and beans separately, then reheat in a skillet with 1 tbsp bacon fat for 3-4 minutes until warmed through. The bacon will crisp up again, but the beans may soften slightly. For best results, assemble fresh—this dish is designed to shine when served immediately.
What if I don't have Dijon mustard?
No problem! Swap it for 1 tsp regular yellow mustard or even a splash of lemon juice (½ tsp) to add brightness. The mustard's tang is key for balancing the richness, but these alternatives work in a pinch. If you're avoiding mustard entirely, increase the apple cider vinegar to 1½ tsp for extra zing.
Is this dish kid-friendly?
With a few tweaks, absolutely! Skip the red pepper flakes and reduce the salt to ¼ tsp. Cut the bacon into smaller pieces and serve with a side of buttered noodles or dinner rolls to soak up the flavor. Kids often love the crispy bacon texture—just watch for any potential choking hazards with the larger pieces.