Desserts
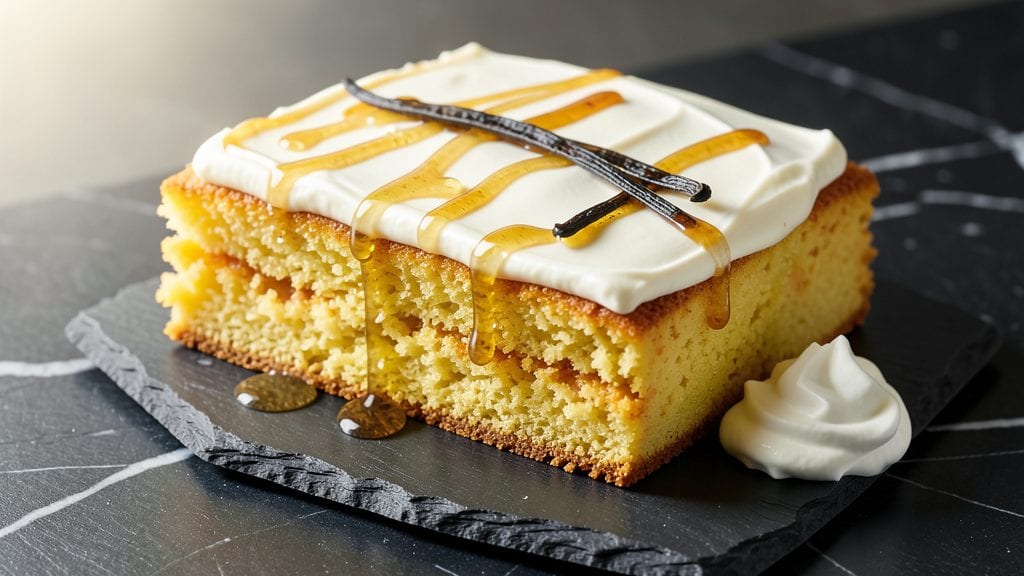
Transforming a box of Betty Crocker yellow cake mix into a moist, vanilla-infused pound cake is simpler than you think—this recipe elevates a pantry staple into something restaurant-worthy with just a few professional techniques.
The key lies in understanding how to balance the mix with extra ingredients that create that signature pound cake texture: rich, tender layers with a subtle vanilla depth that keeps it from tasting like a basic sheet cake.
What sets this recipe apart is the method: combining the cake mix with egg whites for extra lift, sour cream for moisture, and vanilla bean paste for that professional bakery flavor.
Baking it in a 9x5-inch loaf pan ensures even heat distribution, while a simple syrup glaze after baking guarantees a moist interior that stays that way for days. No fancy equipment or advanced skills required—just precise measurements and patience.
The result is a pound cake with crumbly yet tender layers, a golden crust, and a vanilla aroma that fills your kitchen. It’s perfect for slicing into thick portions, serving with coffee, or using as the base for a layered dessert.
The beauty of this recipe is its versatility—you can enjoy it plain or frost it with your favorite glaze or whipped cream.
Whether you're baking for a special occasion or treating yourself to a homemade dessert, this recipe delivers professional-quality results every time. Let’s get started on creating your perfect pound cake—moist, flavorful, and impossible to resist.
Ingredients for betty crocker yellow cake mix pound cake
Pantry staples meet professional techniques—elevate a box mix into a moist, vanilla-rich pound cake.
| Ingredient | Amount | Notes |
|---|---|---|
| Betty Crocker Yellow Cake Mix 🍞 | 1 box | Standard 15.25 oz box |
| Large Eggs 🥚 | 4 whole | Room temperature preferred |
| Large Egg Whites 🥚 | 4 whole | Separated from yolks |
| Sour Cream 🥛 | 1 cup | Full-fat for moisture |
| Vanilla Bean Paste 🌿 | 2 tbsp | High-quality for depth |
| Unsalted Butter 🧈 | ½ cup | Softened, not melted |
| Granulated Sugar 🍚 | ¼ cup | For simple syrup glaze |
| Water 💧 | ¼ cup | For simple syrup glaze |
| All-Purpose Flour 🌾 | ¼ cup | For extra lift |
| Vanilla Extract 🍯 | 1 tsp | Pure vanilla for aroma |
| Baking Powder 🍃 | 1 tsp | Extra lift boost |
| Salt 🧂 | ¼ tsp | Diamond Crystal preferred |
| Pure Vanilla Extract 🍯 | ½ tsp | For additional depth |
The vanilla bean paste is non-negotiable here—it’s what transforms this from a basic cake to something restaurant-worthy. Grab the high-quality kind from Williams Sonoma or Sur La Table if you want to splurge, but even the Walmart brand works in a pinch. For the sour cream, full-fat is key—it’s what keeps this cake moist for days. I always buy the Kroger brand or Trader Joe’s organic, as they’re consistently rich and tangy. The egg whites need to be at room temperature for proper volume—so take them out 30 minutes before mixing. If you’re short on time, separate them while your oven preheats.
No vanilla bean paste? Pure vanilla extract plus a pinch of ground vanilla bean (from the pod) gets you close. The vanilla extract you already have will work, but it lacks that depth. Short on sour cream? Greek yogurt works in a bind, but it’ll be slightly tangier. The all-purpose flour is just for extra lift—don’t skip it, but if you’re out, omit it and add an extra 1/4 tsp baking powder. For the simple syrup glaze, equal parts sugar and water is the golden rule—no need to complicate it. If you’re feeling fancy, add a splash of bourbon (1 tsp) to the glaze for extra complexity.
This cake stays moist for 5-6 days when wrapped tightly in plastic at room temperature. For longer storage, slice and freeze portions for up to 3 months—just thaw overnight on the counter. The glaze sets quickly, so brush it on right after baking while the cake is still warm. I always make a double batch—half goes in the fridge for coffee cake, and half gets frozen for quick desserts. The 9x5-inch loaf pan is critical here; if you don’t have one, a 9x9-inch square pan works, but the texture will be slightly denser.
Why You'll Love This Recipe
- Here’s what sold me: that buttery, dense texture from the egg whites and sour cream makes it taste like a bakery slice, not a box. The vanilla bean paste adds depth without overpowering—honestly, it’s the kind of cake that disappears faster than my willpower on a lazy Sunday.
- Let’s talk reality: you will make too much. But that’s the beauty—this cake stays fresh for days, and the flavor only gets better. Freeze slices for last-minute treats, or turn extras into trifle. No sad, dry crumbs here; just reliable, crave-worthy cake whenever you need it.
Step-by-step instructions for Betty Crocker yellow cake mix pound cake
The secret to a perfectly moist pound cake lies in the layers—light, airy, and infused with vanilla depth.
Prepare the Simple Syrup Glaze
In a small saucepan, combine the 0.25 cup granulated sugar and 0.25 cup water over medium heat. Bring to a gentle simmer, stirring until the sugar fully dissolves—this should take about 2-3 minutes. The syrup should look clear and glossy, like liquid gold. Remove from heat immediately and let it cool to room temperature. This glaze will keep your pound cake moist for days, preventing dryness at the edges.
I like to pour the cooled syrup into a small bowl and whisk in the 1 tsp vanilla extract and 0.5 tsp pure vanilla extract to enhance the flavor profile. This step is non-negotiable for achieving that signature moist texture. If you rush it, the cake will dry out faster—patience here ensures a tender crumb.
Whip the Egg Whites to Stiff Peaks
In a separate, spotlessly clean mixing bowl, beat the 4 large egg whites using a stand mixer fitted with the whisk attachment. Start on low speed and gradually increase to high speed until soft peaks form. This takes about 2-3 minutes. The egg whites should hold their shape when the whisk is lifted, but the peaks should still be slightly wobbly.
Here’s the thing—if you see any traces of fat or yolk in the bowl, wipe them out thoroughly. Even a tiny bit can prevent the egg whites from reaching stiff peaks, which are essential for that light, airy pound cake texture. Once they’re ready, set them aside and proceed to the yolks.
Mix the Cake Batter with Precision
In a large mixing bowl, combine the 1 box Betty Crocker yellow cake mix, 0.25 cup all-purpose flour, 1 tsp baking powder, and 0.25 tsp salt. Whisk gently to blend the dry ingredients. In a separate bowl, beat the 4 large eggs until smooth, then add the 1 cup sour cream, 0.5 cup softened unsalted butter, and the 2 tbsp vanilla bean paste. Mix until fully incorporated—this ensures even distribution of moisture and flavor.
Gradually pour the wet ingredients into the dry ingredients while mixing on low speed until just combined. Avoid overmixing—you should still see small streaks of flour. Gently fold in the whipped egg whites using a spatula, being careful not to deflate them. This step is where the magic happens: the egg whites create those signature air pockets that make pound cake so light.
Layer and Bake for Even Cooking
Preheat your oven to 350°F and grease a 9x5-inch loaf pan thoroughly with butter or baking spray. Divide the batter evenly into three portions and pour them into the pan in thirds. After each layer, drizzle 1-2 tablespoons of the prepared simple syrup glaze, ensuring it spreads evenly. This technique guarantees moisture from the very first bite.
Bake for 50-55 minutes, or until a toothpick inserted into the center comes out clean. The cake should spring back slightly when pressed gently in the center—this is your cue that it’s fully baked. If the top browns too quickly, tent the pan with foil after 30 minutes to prevent over-browning while maintaining moisture.
Rest and Serve for Maximum Moisture
Remove the cake from the oven and let it cool in the pan for 10 minutes. Then, invert it onto a wire rack and let it cool completely before slicing. This resting period allows the layers to set and the flavors to meld, ensuring each slice is as moist as the first. For extra indulgence, brush the top with a thin layer of the remaining simple syrup glaze before serving.
The result? A pound cake with a tender crumb, rich vanilla depth, and layers that stay moist for days. Slice it thick for a decadent dessert or serve it as a breakfast treat with fresh berries. Trust me—this method delivers every time.
Pro Tips For Making Betty Crocker Yellow Cake Mix Pound Cake
- Use Room-Temperature Eggs: I learned this the hard way—cold eggs sink to the bottom of the batter and leave you with a cake that’s dense in spots. Let those eggs sit out for 30 minutes before cracking them into the mix, and the batter will blend smoother and rise more evenly.
- Fold in Sour Cream Last: The sour cream is your moisture secret weapon, but adding it too early can deflate the egg whites. Whip the whites separately until stiff peaks form, then gently fold in the sour cream after the dry mix is combined—this keeps the cake light and fluffy.
- Check Doneness with a Toothpick: That recipe’s baking time is just a starting point. The cake’s done when a toothpick comes out clean and the center springs back when pressed—not before. I’ve pulled cakes too soon, and they’re still gummy inside.
- Skip the Extra Vanilla: You’re already using vanilla bean paste, which is rich and flavorful. Adding extra vanilla extract (even “just a little”) throws off the balance—it’ll taste like a bakery overkill. Trust the paste; it’s enough.
Dietary considerations for this betty crocker yellow cake mix pound cake
Gluten-Free Adaptation
To make this pound cake gluten-free, replace the Betty Crocker yellow cake mix with a 1:1 gluten-free vanilla cake mix like King Arthur Gluten-Free Measure for Measure Flour. Use the same 1 box amount, but add 1 extra tbsp xanthan gum to mimic the structure.
For the 0.25 cup all-purpose flour, swap in 0.25 cup gluten-free 1:1 baking flour—I recommend Bob’s Red Mill for best results. Keep the sour cream and egg whites as-is, but let the batter rest for 10 minutes before baking to help gluten-free flours hydrate properly. 🌾
Dairy-Free Modifications
For a dairy-free version, replace the 1 cup sour cream with 1 cup full-fat coconut yogurt (like So Delicious brand) and swap the 0.5 cup unsalted butter for 0.5 cup dairy-free butter (I love Miyoko’s). The vanilla bean paste remains dairy-free, but check the label—some brands use milk solids.
Use the same baking steps, but expect a slightly denser texture due to coconut yogurt’s lower fat content. A quick fix? Add 1 tbsp melted coconut oil to the batter for extra moisture. 🥛
Lower-Sugar Option
To reduce sugar, replace 0.25 cup granulated sugar in the glaze with 0.125 cup monk fruit sweetener (like Lakanto) mixed with 0.125 cup water. For the cake mix itself, reduce the vanilla bean paste to 1 tbsp and add 1 tsp cinnamon to enhance flavor without extra sweetness.
Bake as directed, but monitor closely—the cake may brown faster with less sugar. A drizzle of sugar-free vanilla syrup (like Torani) after baking keeps it moist without added sugar. 🍯
Egg-Free Substitutions
For an egg-free version, replace the 4 large eggs with 1 cup aquafaba (chickpea brine) whipped to stiff peaks using a hand mixer. Use 0.5 cup unsweetened applesauce instead of the 1 cup sour cream to bind the batter.
The 4 egg whites can be swapped with 1 cup aquafaba as well, but add 1 tsp cream of tartar to stabilize the peaks. Reduce the vanilla bean paste to 1 tbsp—aquafaba can overpower flavors.
Bake in the same 9x5-inch pan but check for doneness at 45 minutes, as egg-free cakes often bake faster. 🥚
Nut-Free and Allergen-Friendly
This recipe is naturally nut-free, but always double-check labels on vanilla bean paste and sour cream for cross-contamination warnings. For a soy-free version, ensure your vanilla bean paste is soy-free (some brands use soy lecithin).
If you’re avoiding dairy and eggs, combine the substitutions from the dairy-free and egg-free sections above. For sesame-free kitchens, use a sesame-free baking spray (like Misto) instead of butter. Store finished slices in allergen-free packaging to prevent cross-contact. 🛡️
Nutrition facts
Frequently asked questions
Why do I need to whip egg whites separately?
The whipped egg whites create light, airy pockets that transform this cake mix into a true pound cake texture. Without them, you'll get a dense sheet cake instead of the tender, layered crumb we're aiming for. The secret is folding them in gently at the very end to preserve those air bubbles.
Can I use regular vanilla extract instead of vanilla bean paste?
You can, but you'll miss that restaurant-quality depth. For best results, use 2 tbsp vanilla extract plus 1/4 tsp ground vanilla bean (scraped from a pod) to mimic the paste's complexity. The bean adds subtle floral notes that make this pound cake truly special.
What if my cake comes out dry?
Dryness usually means overbaking or skipping the simple syrup glaze. Always check for doneness at 50 minutes—the toothpick should come out with a few moist crumbs, not completely clean. For extra moisture, brush warm slices with 1 tbsp warm simple syrup before serving. The glaze is non-negotiable for that signature pound cake tenderness!
Can I make this in a different pan size?
For best results, stick with a 9x5-inch loaf pan—it gives you those perfect thick slices. In a 9x9-inch square pan, bake for 40-45 minutes instead, but expect slightly denser layers. The key is even heat distribution for that classic pound cake texture.
How do I store leftovers to keep them moist?
Wrap tightly in plastic wrap and store at room temperature for 3-4 days. For longer storage, slice and freeze portions for up to 3 months. Thaw overnight in the fridge—never at room temperature. The simple syrup glaze helps preserve moisture, but keeping it sealed is crucial.