Sauces & Condiments
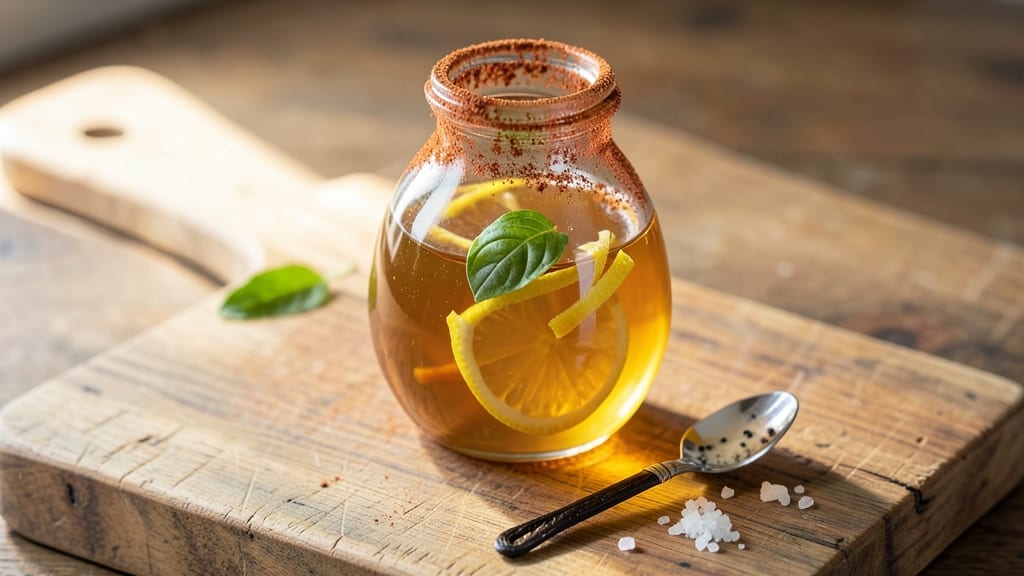
Creating a stevia simple syrup recipe is the game-changer for anyone looking to sweeten drinks and desserts without traditional sugar. This liquid sweetener transforms cocktails, iced tea, and desserts into perfectly balanced treats—all while keeping calories and blood sugar in check.
The beauty lies in its simplicity: just stevia, water, and a few minutes of prep.
The process couldn’t be easier—simmering stevia powder with water until fully dissolved creates a smooth, flavorful syrup that’s vegan-friendly and zero-calorie. Unlike traditional sugar syrups, this version maintains its sweetness without the aftertaste, making it ideal for health-conscious cooking.
It’s also incredibly versatile, working equally well in both sweet and savory applications.
Once made, this syrup keeps for weeks in the refrigerator, ready to elevate everything from lemonade to coffee. Whether you’re adjusting the sweetness in a cocktail or drizzling it over fruit, the result is a clean, natural sweetness that enhances flavors without overpowering them.
The best part? You’ll never miss refined sugar again.
Perfect for those watching their sugar intake or simply exploring plant-based alternatives, this syrup is a pantry staple worth making. Let’s dive into the exact steps to create yours—no complicated techniques required.
Ingredients for stevia simple syrup
Just six ingredients transform stevia powder into a versatile, zero-calorie sweetener for drinks and desserts.
| Ingredient | Amount | Notes |
|---|---|---|
| Pure Stevia Powder 🌿 | ½ cup | High-quality, zero-calorie, pure stevia |
| Filtered Water 💧 | 1 cup | Room temperature preferred |
| Lemon Juice 🍋 | 1 tbsp | Freshly squeezed, optional for brightness |
| Vanilla Extract 🌸 | ½ tsp | Pure vanilla for subtle depth |
| Sea Salt 🧂 | ¼ tsp | Fine grain, enhances flavor balance |
| Cinnamon Powder 🌶️ | ¼ tsp | Ground, optional for warmth |
The stevia powder is everything here—look for pure, zero-calorie brands like Truvia or Pure Via at any grocery store. The quality of water matters too; filtered or spring water prevents any off-flavors. I always grab a small bottle of Trader Joe's filtered water if I'm making a batch. Fresh lemon juice brightens the syrup, but skip it if you're using this for savory dishes. The vanilla and cinnamon are optional but elevate it from basic to gourmet—McCormick pure vanilla extract is my go-to, but any quality brand works. The sea salt might seem odd, but it rounds out the sweetness beautifully.
No stevia on hand? Monk fruit sweetener works in a 1:1 ratio, though the flavor profile differs slightly. Short on water? Use unsweetened almond milk or coconut water for a subtle flavor twist. Want more depth? Add a pinch of ground cardamom instead of cinnamon. The lemon juice can be swapped for orange zest or a splash of apple cider vinegar for tang. If you're using this for cocktails, skip the spices entirely—just stevia, water, and a splash of citrus is perfect. For baking, reduce the water by 1 tbsp to create a thicker syrup.
This syrup keeps for up to 3 weeks in the fridge, sealed tightly in an airtight container. For longer storage, freeze in ice cube trays—just thaw in the fridge before using. I portion mine into small jars for easy grab-and-go sweetening. The flavor actually improves after a few days as the stevia fully dissolves. If it crystallizes, just warm it gently over low heat until smooth again. No preservatives needed—stevia’s natural properties keep it fresh.
Why You'll Love This Recipe
- Four-Ingredient Magic: I swear by this recipe because it’s actually just four things—stevia, water, lemon, and a pinch of salt. No overcomplicating, no hunting for rare ingredients. Honestly, I’ve made it while waiting for coffee to brew, and it still comes out perfect.
- Bright & Clean: That lemon juice cuts through the sweetness so beautifully—it’s not cloying, not artificial. The vanilla adds this warm, cozy depth, while the sea salt (yes, really!) balances it all. It’s the kind of flavor that makes you pause mid-sip and think, “Wait, is this even sweet?”
- Everyday Superstar: I use this in my morning iced tea, drizzled over fresh berries, or even in my coffee when I’m craving something lighter. It’s my go-to for summer drinks, baking, or when I need to sweeten something without the crash. Between us, it’s saved my dessert game more times than I can count.
- Zero-Waste Winner: A little goes a long way, so I make a big batch and keep it in the fridge for weeks. No spoilage, no waste—just pure, ready-to-use sweetness whenever I need it. And since stevia’s the star, it’s way cheaper than buying those fancy pre-made syrups. My wallet thanks me every time.
Step-by-step instructions for stevia simple syrup
This syrup comes together in minutes with no complicated techniques—just precise measurements and patience.
Combine Stevia and Water
Place the 0.5 cup pure stevia powder in a small saucepan over medium heat. Slowly pour in the 1 cup filtered water while whisking continuously to prevent clumping. The stevia needs to dissolve completely without forming a paste—this takes about 2-3 minutes of gentle stirring.
I like to use a heat-safe whisk for this step because it helps break up any potential lumps immediately. Watch closely as the mixture begins to bubble—once it reaches a gentle simmer, reduce the heat to low and let it cook for 5 minutes. This ensures all the stevia fully dissolves without burning.
Add Lemon Juice and Salt
Remove the pan from heat and stir in the 1 tablespoon lemon juice and 0.25 teaspoon sea salt. The lemon juice brightens the syrup while the salt enhances the stevia's natural sweetness without adding calories. Let the mixture cool for 5 minutes—this prevents the vanilla extract from cooking off its delicate flavor.
Here's the thing—if you're using fresh lemon juice, strain it first to remove any pulp. Bitterness from seeds or membrane can overpower the syrup's clean sweetness. I always squeeze the juice through a fine-mesh strainer into the pan for a smooth texture.
Incorporate Vanilla and Cinnamon
Once the mixture reaches room temperature, whisk in the 0.5 teaspoon vanilla extract and 0.25 teaspoon cinnamon powder. The vanilla adds depth while the cinnamon contributes subtle warmth. Stir gently to avoid creating air bubbles that could affect the syrup's consistency.
This is where the magic happens—the combination of these ingredients creates a balanced sweetness that doesn't leave that artificial aftertaste you sometimes get with other sweeteners. Let the syrup sit for 10 minutes at room temperature to allow all the flavors to meld together.
Strain and Store
Pour the syrup through a fine-mesh strainer into a clean glass jar or bottle. This removes any undissolved particles and gives you a silky-smooth texture. I use a coffee filter lined in the strainer for extra clarity if I'm making this for special occasions.
The syrup will keep in the refrigerator for up to 2 weeks or can be frozen for 3 months. When ready to use, simply shake the bottle gently to redistribute the ingredients. This syrup works perfectly in iced tea, cocktails, or even drizzled over fresh fruit—no one will guess it's stevia-based.
Pro Tips For Making Stevia Simple Syrup
- Whisk Until Clear: DESCRIPTION: Stevia powder clumps like a stubborn guest at a party—don’t just stir it in. Bring the water to a gentle simmer first, then whisk vigorously until the stevia fully dissolves. If you add it cold, you’ll end up with gritty syrup that ruins the smoothness, and nobody wants that.
- Use Fresh Lemon: DESCRIPTION: Bottled lemon juice tastes like regret, especially in this syrup. Squeeze your own—just enough to hit 1-2 tablespoons—and strain out the pulp if you’re picky. The difference in brightness and depth is night and day, and your drinks will actually taste like citrus, not "sad juice."
- Salt Last: DESCRIPTION: Add the sea salt after the syrup cools slightly—around 180°F (82°C). If you toss it in too early, it’ll crystallize and settle at the bottom like a lazy sediment layer. A pinch (¼ tsp) balances the sweetness perfectly, but don’t skip it—stevia’s intensity needs that pinch of contrast.
- Simmer 5 Minutes: DESCRIPTION: Don’t rush the heat—let the syrup simmer uncovered for 5 full minutes. This drives off any bitterness from the stevia and lets the vanilla and lemon meld instead of fighting. I used to skip this, and the syrup always tasted like a science experiment gone wrong. Now? Smooth, cohesive, and actually delicious.
Common mistakes when making perfect results
Overheating the Syrup
Stevia burns quickly, so never let the mixture boil vigorously. Once it reaches a gentle simmer (212°F), immediately reduce heat to low to prevent a bitter, medicinal aftertaste.
I’ve ruined batches by walking away—always stay within 5 minutes of simmering time. If you see bubbles forming rapidly, remove from heat immediately and stir until cooled slightly. 🔥
Using Low-Quality Stevia
Not all stevia brands dissolve evenly or taste clean. I recommend Truvia or Pure Via for their zero-calorie purity and smooth texture. Cheaper brands often leave gritty residue or a chemical aftertaste.
If your syrup tastes bitter, strain it again through a coffee filter—this removes any undissolved particles. For best results, store stevia in an airtight container away from moisture.
Skipping the Straining Step
Even after simmering, some stevia particles may remain undissolved. Skipping the straining step can make your syrup grainy or leave a chalky mouthfeel. I use a fine-mesh strainer lined with a coffee filter for the smoothest texture.
If you’re in a hurry, a cheesecloth works too—just squeeze out every last drop. Never use a regular kitchen strainer, as it won’t catch the fine particles.
Ignoring the Cooling Phase
Adding vanilla or citrus extracts to hot syrup can cook off their delicate flavors, leaving your syrup tasting flat. Always let the mixture cool to room temperature before incorporating these ingredients.
I wait 5-10 minutes and often test the temperature with my finger—it should feel warm but not hot. Patience here makes a huge difference in flavor.
Storing Improperly
Stevia syrup can grow mold if not stored correctly. Always transfer it to a sterilized glass jar with a tight-sealing lid and refrigerate within 2 hours of making it. I label my jars with the date—this syrup lasts 3 weeks in the fridge but only 1 week at room temperature.
For longer storage, freeze in ice cube trays and transfer to a freezer bag. Never leave it out overnight.
Over-Sweetening Drinks
Stevia is 200-300 times sweeter than sugar, so it’s easy to overdo it. Start with ¼ teaspoon of syrup per drink and adjust to taste—you can always add more. I keep a small squeeze bottle in my fridge for precise measurements.
If your drink tastes too sweet, add a splash of citrus juice or a pinch of salt to balance it. Always taste as you go! 💡
Nutrition facts
Frequently asked questions
Can I use this stevia syrup in hot drinks like coffee or tea?
Yes, but with caution. Stevia syrup works best in cold or room-temperature drinks to preserve its clean sweetness. For hot beverages, add it after brewing to prevent heat from degrading the stevia's natural compounds. Start with ¼ teaspoon per 8 oz of liquid—stevia's intensity means less is more!
How do I adjust the sweetness level for different recipes?
Stevia is 200-300x sweeter than sugar, so begin with ¼ teaspoon per serving and increase gradually. For baking, reduce other liquids by 1 tbsp per ¼ cup syrup added. In cocktails, use ½ teaspoon per drink—citrus flavors balance its intensity beautifully. Always taste as you go!
Will this syrup work in savory dishes like marinades or glazes?
The vanilla and cinnamon make it versatile for savory uses too. Try it in grilled meat marinades (with soy sauce and garlic) or as a glaze for roasted vegetables. The salt in the recipe helps balance flavors, while the stevia adds subtle sweetness without overpowering. Start with 1 teaspoon per cup of liquid.
Can I make a stronger version for baking?
Yes—simply reduce the water by ½ cup and simmer until slightly thicker. For a 1:1 sugar substitute, use ¼ teaspoon syrup per 1 tablespoon sugar in recipes. The reduced water creates a more concentrated sweetener. Store in a sterilized jar and use within 2 weeks for best results.
Why does my homemade syrup look cloudy or grainy?
Cloudiness often means undissolved stevia particles. Strain again through a coffee filter for clarity. Graininess can also occur if the syrup crystallizes—gently reheat it over low heat until smooth. For extra smoothness, add 1 tsp corn syrup (or honey for vegan) to help dissolve remaining particles. Always use filtered water to prevent cloudiness.