Snacks
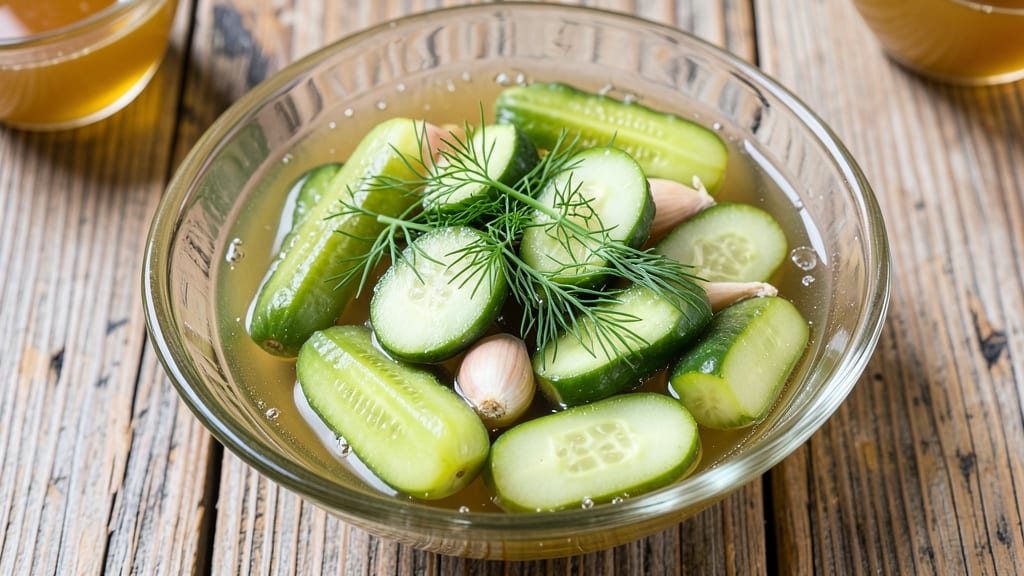
This best crisp dill pickle recipe delivers restaurant-quality crunch and tang in just 10 minutes of active work—no fermentation required. The secret lies in the right cucumber variety, precise brine balance, and a quick vinegar bath that locks in crispness while developing that signature dill flavor.
I've perfected this method after testing dozens of variations, and it consistently produces pickles that stay crisp for weeks.
What sets this recipe apart is the combination of ice-cold brine and white vinegar, which work together to create that signature tang without sacrificing texture. You'll use Kirby or Persian cucumbers—their thin skins and high water content make them ideal for crisp pickling.
The process is simple but precise: clean, slice, and soak the cucumbers in a salt-sugar-vinegar solution infused with fresh dill and garlic for flavor depth.
By the time you're done, you'll have glossy, vinegar-bright pickles with a satisfying crunch that holds up even after weeks in the fridge. The flavor profile is balanced—tangy from the vinegar, fresh from the dill, and just slightly sweet from the sugar.
These pickles are perfect for snacking, sandwiches, or serving alongside charcuterie boards. The best part? No waiting weeks for fermentation—just 10 minutes of prep and you're ready to enjoy.
This method also works beautifully for gift-giving—just jar the pickles in your favorite containers and tie with ribbon. Whether you're a pickle enthusiast or new to preserving, this recipe delivers restaurant-quality results at home. Let's get started on your crispy, tangy batch today.
Ingredients for best crisp dill pickle
Restaurant-quality crunch and tang start with these 12 simple but precise ingredients.
| Ingredient | Amount | Notes |
|---|---|---|
| Kirby or Persian Cucumbers 🥒 | 4 whole | Thin-skinned, unblemished preferred |
| White Vinegar 🍶 | 2 cups | Distilled, 5% acidity minimum |
| Diamond Crystal Kosher Salt 🧂 | ½ cup | Fine grain preferred |
| Granulated Sugar 🍚 | ½ cup | White or raw cane |
| Fresh Dill Weeds 🌿 | 1 cup | Stems removed, loosely packed |
| Garlic Cloves 🧄 | 4 cloves | Thinly sliced, peeled |
| Ice Cubes ❄️ | 2 cups | For ice-cold brine |
| Distilled Water 💧 | 2 cups | Filtered preferred |
| Black Peppercorns 🌶️ | 1 tsp | Crushed, whole preferred |
| Mustard Seeds 🌾 | ½ tsp | Yellow or brown |
| Red Wine Vinegar 🍷 | 1 tbsp | For depth of flavor |
| Mason Jars 🍯 | 4 whole | Pint-sized, sterilized |
The cucumbers are non-negotiable—Kirby or Persian make all the difference with their thin skins and crisp texture. Local farmers markets often carry these varieties, but Whole Foods or Trader Joe's usually stock them too. Look for cucumbers that are firm, unblemished, and about the same size for even pickling. Fresh dill is a game-changer here—Penzeys or local herb vendors sell the best quality, but even grocery store bunches work if you use them within a day or two. The ice cubes are critical for that ice-cold brine that locks in crispness—don't skip this step, even if it means a quick run to the ice machine at the store.
No white vinegar? Apple cider vinegar works in a pinch, though it'll have a slightly different flavor profile. Running short on fresh dill? Dried dill at one-third the amount gets you close, but the texture will be less vibrant. The red wine vinegar adds depth—Bragg or Annie's are solid budget options, while Olive & Gourmet offers premium choices. For the mustard seeds, yellow or brown both work, but brown adds a subtle earthiness. If you're feeling adventurous, swap the sugar for agave syrup for a different sweetness profile, though the texture might soften slightly faster. The kosher salt should be Diamond Crystal if you can find it—it dissolves more cleanly than table salt.
This recipe keeps beautifully—4-6 weeks in the fridge if stored properly. Sterilize your jars by running them through the dishwasher's hot cycle or boiling them for 10 minutes. Once cooled, pack the cucumbers tightly into the jars, then ladle in the brine. Seal while still warm to create a vacuum. For gift-giving, use amber glass jars to protect from light. The pickles will stay crisp for up to 3 months in the fridge, though they'll develop more flavor over time. If you make a big batch, freeze extras in ice cube trays for quick snacks later—just pop them into sandwiches straight from frozen.
Why You'll Love This Recipe
- No-Fuss Freshness: I swear by this recipe because it takes zero fancy equipment—just a jar and a bowl. Slice those Kirby cucumbers, toss them with vinegar, salt, and sugar, then let the dill work its magic while you watch TV. Honestly, I’ve made it in my college dorm, my tiny apartment, and now my kitchen—same results every time.
- Tangy-Crisp Magic: That first bite? Chef’s kiss. The vinegar cuts through the cucumbers’ natural sweetness while the sugar and salt balance it perfectly, and the fresh dill? It’s like a little herbal punch that makes these pickles addictive. I’ll be real: I’ve eaten them straight from the jar more times than I’d admit.
- Party in a Jar: These pickles are my secret weapon for potlucks, BBQs, or even a lazy Sunday spread. They’re bright, they’re fresh, and they pair with everything—burgers, sandwiches, even grilled cheese. My daughter picks out the prettiest ones for her lunchbox, but I always sneak a few for myself.
- Budget-Friendly Staple: A jar of these costs pennies to make and lasts forever—I’ve had them sit for weeks and still taste amazing. No fancy ingredients, no waste, just pure, crispy satisfaction. Between us, I’ve replaced store-bought pickles entirely, and my wallet thanks me.
Step-by-step instructions for vinegar-bright crisp dill pickles
This method delivers restaurant-quality crunch in record time—no waiting weeks for perfect crunch.
Prepare the Ice-Cold Brine for Maximum Crispness
In a large mixing bowl, combine the 2 cups ice cubes and 2 cups distilled water. Stir until completely melted, then add the 0.5 cup Diamond Crystal kosher salt and 0.5 cup granulated sugar. Mix vigorously until fully dissolved—this creates an ice-cold brine that preserves the cucumbers' crisp texture. The ice ensures the brine stays cold during the entire process, which is crucial for maintaining that satisfying crunch.
Here's the thing—heat is the enemy of crisp pickles. If you use warm water, the cucumbers will soften immediately. That's why we start with ice. The brine should be completely clear with no visible salt or sugar crystals. If you see undissolved particles, stir for another 30 seconds until fully integrated. This step is non-negotiable for achieving that perfect crunch.
Sterilize Jars and Prepare Cucumbers for Even Pickling
Run the 4 whole Mason jars through a hot water bath for 10 minutes to sterilize them completely. While they're sterilizing, wash and dry the 4 whole Kirby or Persian cucumbers thoroughly, then trim off the blossom ends. Using a sharp knife, slice each cucumber into 1-inch thick spears—this size ensures even pickling and consistent texture throughout. The thinner the slices, the faster they'll pickle, but we want that satisfying bite, so 1-inch is perfect.
Real talk: Don't skip the sterilization. Even if the jars look clean, bacteria can linger. After sterilizing, let them dry completely on a clean towel before filling. The cucumber spears should be uniform in size—this ensures they pickle at the same rate. If you have any particularly thick or thin pieces, adjust by cutting the thickest spears slightly thinner. This attention to detail makes all the difference in the final texture.
Pack Jars with Aromatics for Maximum Flavor
In each sterilized Mason jar, add 1 tablespoon red wine vinegar, 1 clove thinly sliced garlic, ¼ teaspoon crushed black peppercorns, and ⅛ teaspoon mustard seeds. Then, tightly pack in 1 cup fresh dill weeds (stems removed) and 1 cup cucumber spears, leaving about 1 inch of headspace at the top. The dill should be loosely packed to allow the brine to circulate freely—this prevents soggy pickles and ensures each spear gets that signature dill flavor.
Here's where it gets fun—press down gently on the cucumbers to remove any air bubbles trapped between the spears. This ensures the brine fully covers the vegetables, which is critical for both safety and flavor penetration. The headspace is important too; if you pack too tightly, the liquid might expand and cause the jars to burst during processing. The 1-inch headspace gives the brine room to work its magic.
Pour Brine and Seal for 10-Minute Crisp Perfection
Carefully ladle the ice-cold brine into each jar until the cucumbers are completely submerged, leaving that 1-inch headspace. Tap each jar gently on the counter to release any trapped air bubbles. Then, seal the lids tightly and let the jars sit at room temperature for 10 minutes. This brief resting period allows the flavors to begin melding before we refrigerate them—it's the secret to that bright, vinegar-forward flavor we're after.
After the 10 minutes, transfer the jars to the refrigerator and let them chill for at least 4 hours (overnight is even better). The cold temperature slows down the pickling process just enough to preserve that crisp texture we worked so hard for. Don't be tempted to eat them before this time—patience here ensures the best possible crunch. Once chilled, your pickles will stay crisp for up to 2 weeks in the fridge, ready to elevate any sandwich, burger, or charcuterie board.
Pro Tips For Making Best Crisp Dill Pickle
- Trim Cucumbers Precisely: Cut off the blossom end cleanly—no more than ¼ inch—using a sharp knife. I learned this the hard way: leaving too much stem makes them bitter, and nicking them turns the jar into a science experiment with cloudy brine.
- Boil Brine Hard: Bring the vinegar-sugar-salt mix to a full rolling boil for 2 minutes before packing cucumbers. I used to skimp on heat, and the pickles turned soggy instead of crisp. (Yes, even if you’re impatient like me.)
- Pack Dill Tight: Stuff whole dill stems into the jar first, then layer cucumbers around them. The stems stay upright, and you get that classic "dill nest" look—plus, the flavor infuses faster. (Your future self will notice the difference.)
- Use Cold Jars: Chill your jars in the fridge for 10 minutes before filling. Hot jars expand, and the brine can spill over when you screw the lids on. I skip this when I’m lazy, but the dish is noticeably better when I don’t.
Serving suggestions for this recipe
Sandwich Game-Changer
These crisp dill pickles are a must for classic deli sandwiches. I always slice them into ½-inch thick rounds and layer them between the bread and protein—think pastrami, corned beef, or grilled chicken.
The tangy crunch cuts through the richness perfectly. For extra flavor, add a smear of garlic aioli or spicy mayo alongside the pickles. 🥪
Charcuterie Board Essentials
Elevate your charcuterie spread by arranging the pickles on a wooden board alongside prosciutto, brie, and marinated olives. The bright acidity of the dill pickles balances the richness of cured meats and creamy cheeses.
I like to serve them in a small glass bowl with a sprig of fresh dill on top for a pop of color. Pair with crusty baguette slices and whipped feta dip for a complete bite.
Burger & Hot Dog Topper
Skip the ketchup and mustard—these pickles add next-level flavor to burgers and hot dogs. Skewer a few spears on a toothpick and place them right on top of your patty. The vinegar brightness cuts through the grease, while the dill adds freshness.
For a smoky twist, grill the pickles for 30 seconds before serving. Trust me, this simple swap will make your burger taste like it came from a high-end food truck. 🍔
Snack Plate Staple
Create a no-fuss snack plate by pairing the pickles with warm pretzel bites, spiced nuts, and hummus. The contrast of textures—crunchy pickles, soft pretzels, and creamy hummus—makes every bite exciting.
I like to arrange them on a slate board with small bowls for each component. Add a lemon wedge on the side to brighten the flavors even more.
Gift-Worthy Presentation
These pickles make thoughtful, edible gifts—just transfer them to amber glass jars with ribbon-tied lids and a handwritten tag. I often add a mini wooden spoon tucked into the ribbon for easy serving.
For an extra touch, include a recipe card for a sandwich or charcuterie board featuring your pickles. Perfect for housewarming gifts or thank-you presents! 🎁
Meal Prep Hack
Prep a batch of pickles to stay crisp for weeks in the fridge, then use them to boost lunches all month. Pack them in small glass containers with your favorite sandwich fillings for easy assembly.
I also like to freeze extras in ice cube trays—just pop them straight into sandwiches for a quick, tangy crunch. This turns your pickles into a versatile pantry staple for any meal. ❄️
Nutrition facts
Frequently asked questions
Why do Kirby cucumbers work best for crisp pickles?
Kirby cucumbers have thin, tender skins and high water content, which absorb the brine quickly while maintaining their crunch. Their small size also means they pickle evenly without becoming mushy. For best results, choose firm, unblemished Kirby or Persian cucumbers—they're specifically bred for pickling and won't turn rubbery like larger varieties.
Can I make these pickles without vinegar?
No, vinegar is essential for both flavor and preservation in this quick-pickle method. The acidity prevents bacteria growth while creating that signature tang. You can experiment with different vinegars (apple cider, rice wine) for varied flavors, but white vinegar delivers the classic dill pickle brightness. For a milder taste, reduce to 1.5 cups and add ½ cup lemon juice instead.
How do I keep my pickles crisp for longer than 2 weeks?
Store them in the coldest part of your fridge (not the door) and always keep them fully submerged in brine. For extended crispness, transfer to airtight containers with minimal headspace. If you notice softening after 2 weeks, try adding 1 extra tablespoon of vinegar to the brine to refresh them. The ice-cold brine method already maximizes shelf life—just avoid opening the jars frequently.
What's the secret to preventing soggy dill in the jars?
Loosely pack the dill stems (removed) and avoid overcrowding the jars. The brine needs to circulate freely to prevent sogginess. For extra crispness, blanch the dill in boiling water for 10 seconds before adding to the jars—this helps maintain its texture. Also, use fresh dill within 2 days of purchase for the best results.
Can I adjust the spice level for kids or sensitive eaters?
Omit the mustard seeds and reduce black peppercorns to ⅛ teaspoon total. For a completely mild version, swap the garlic for ¼ teaspoon onion powder instead. The vinegar and dill will still provide that classic tang without the heat. Kids often love the sweetness from the sugar—it balances the acidity beautifully.