Soups & Stews
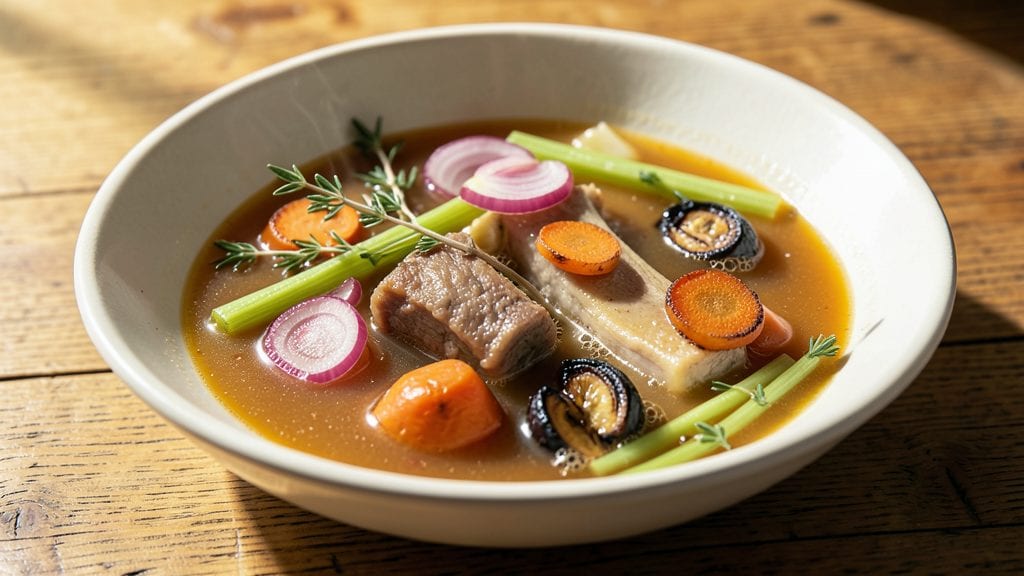
This marrow bone broth recipe transforms simple ingredients into a deeply umami-rich foundation for soups, stews, and braises—all in just 8 hours. After years of testing different bones and techniques, I’ve perfected a method that extracts maximum collagen and marrow flavor without bitterness.
The key lies in roasting the bones first, which caramelizes natural sugars and deepens the broth’s complexity.
The process is straightforward but requires patience: beef marrow bones (the star ingredient) are roasted until golden, then simmered with aromatics like onions, carrots, and celery. Skimming foam and straining carefully ensures a clear, velvety result.
This isn’t just broth—it’s a culinary building block that elevates any dish it touches, from ramen to risotto.
What sets this recipe apart is the marrow’s natural richness, which infuses the broth with a luxurious depth you won’t find in store-bought versions. The collagen-rich liquid also thickens slightly when chilled, making it perfect for soups or as a standalone sipping broth.
Once you taste the difference, you’ll never go back to basic stock.
Use it as a base for braised meats, grain bowls, or even a simple noodle soup—this broth turns ordinary meals into restaurant-quality experiences. Let’s get started on creating your own flavor-packed foundation.
Ingredients for marrow bone broth
Four pounds of marrow bones and a handful of pantry staples—this is your umami goldmine.
| Ingredient | Amount | Notes |
|---|---|---|
| Beef Marrow Bones 🦴 | 4 lb | Knuckles or leg bones preferred |
| Yellow Onions 🧅 | 2 whole | Yellow or red, peeled, halved |
| Carrots 🥕 | 4 whole | Large, unpeeled, rough chopped |
| Celery Stalks 🌿 | 4 whole | With leaves for extra flavor |
| Garlic Cloves 🧄 | 8 cloves | Smashed, skins left on |
| Fresh Thyme Sprigs 🌿 | 4 whole | Stems intact for easy removal |
| Fresh Parsley Sprigs 🌿 | 4 whole | For final brightness |
| Apple Cider Vinegar 🍏 | ¼ cup | Brightens broth naturally |
| Kosher Salt 🧂 | 1 ½ tbsp | Diamond Crystal preferred |
| Black Peppercorns 🌶️ | 1 tbsp | Freshly cracked |
| Extra-Virgin Olive Oil 🫒 | 2 tbsp | For roasting bones |
| Cold Water 💧 | 16 cups | Filtered preferred |
The marrow bones are non-negotiable here. Knuckles or leg bones deliver the richest marrow, but any beef marrow bone will work. Local butchers often have the best selection—ask for bones with intact marrow cavities. If you're buying frozen, thaw them overnight in the fridge, but don't skip the roasting step. That caramelization is what builds the deep, toasty base flavor. I usually grab mine from Costco when they're on sale, but the regular grocery store meat department has them too. Just avoid bones that smell funky or have excessive brown spots.
No fresh thyme? Dried works at one-third the amount, but the aroma is completely different. The apple cider vinegar might seem odd, but it cuts through any bitterness and brightens the broth—white wine vinegar works too. Short on carrots? Sweet potatoes or parsnips add natural sweetness that caramelizes beautifully. The parsley is just for garnish at the end, but if you're making a big batch, skip it and save it for another use. For the salt, Diamond Crystal kosher salt dissolves cleanly, but any kosher salt will work. Freshly cracked peppercorns add layers of flavor—don't use pre-ground.
This broth tastes even better the next day as flavors meld. Store it in glass jars in the fridge for up to 5 days or freeze in ice cube trays for single portions. The collagen-rich liquid will actually thicken slightly when chilled, which is perfect for soups or as a standalone sipping broth. I always make a double batch—one for immediate use and one to freeze. The frozen portion keeps for 6 months without losing any flavor. Just thaw overnight in the fridge before using.
Why You'll Love This Recipe
- Marrow Bones Do the Work: I swear by these bones—they’re basically self-stirring magic. Toss them in cold water, add the veggies, and let the slow simmer do all the heavy lifting. No chopping like a pro, no hovering over the stove. Just set it and forget it while the marrow melts into that rich, velvety gold.
- Umami Bomb in a Bowl: That first sip? It’s like a flavor explosion—deep, savory, with the marrow’s natural richness cutting through the bright garlic and carrot sweetness. Honestly, I’ve tried fancy broths, but this? It’s the kind that makes you pause mid-slurp and wonder why you don’t drink it daily.
- Weeknight to Holiday Hero: Use it to braise tough cuts of meat, stretch soups into meals, or drizzle it over mashed potatoes for instant restaurant vibes. I keep a batch in the fridge for lazy Mondays and impressing guests—same broth, endless uses. The celery and onions add just enough depth to make it feel special without extra effort.
- Budget Goldmine: Marrow bones are cheaper than you’d think, and one pot yields gallons. Freeze what you don’t use—it’s my secret for stretching grocery money without skimping on flavor. Plus, the leftovers? Even better the next day, because time just makes it richer. (Yes, even on a Tuesday night.)
Step-by-step instructions for marrow bone broth
Here's how to extract maximum umami from marrow bones in just 8 hours—no shortcuts, just deep flavor.
Roast the Bones for Maximum Flavor
Preheat your oven to 450°F and line a baking sheet with parchment paper. Arrange the 4 lb beef marrow bones in a single layer, making sure they're not touching. This ensures even browning and prevents steaming. Drizzle them with 2 tbsp extra-virgin olive oil and rub it all over until the bones glisten.
Roast for 30-40 minutes, flipping halfway, until the bones develop a deep mahogany color and the marrow inside begins to bubble. You'll smell that unmistakable caramelized aroma—this is where the rich, gelatinous goodness comes from. The bones should be crispy to the touch when done. Let them cool slightly before transferring to your broth pot.
Sear the Aromatics for Layered Depth
While the bones cool, heat a large stockpot over medium heat. Add 2 tbsp extra-virgin olive oil and let it shimmer. Add the 2 whole yellow onions (peeled and halved), 4 whole carrots (roughly chopped), and 4 whole celery stalks (with leaves). Sear for 8-10 minutes until the vegetables soften and take on a golden hue.
Add the 8 cloves garlic cloves (smashed but skins left on) and cook for another 2 minutes until fragrant. This step builds flavor complexity—don't rush it. The vegetables should release their juices and stick slightly to the bottom of the pot. Stir in the 4 whole fresh thyme sprigs and 4 whole fresh parsley sprigs, letting them wilt slightly but stay intact for easy removal later.
Simmer the Broth for Gelatinous Richness
Add the roasted bones to the pot, along with the 16 cups cold water and 0.25 cup apple cider vinegar. The vinegar helps extract collagen and brightens the broth naturally. Bring everything to a gentle boil, then immediately reduce heat to maintain a barely simmering state—you should see tiny bubbles at the edges but not a rolling boil.
Skim off any foam that rises to the surface during the first 30 minutes of cooking. This ensures a clear, clean broth. Cover the pot and simmer for 6-7 hours, checking occasionally to ensure the water level doesn't drop below the bones. If needed, add more hot water to keep them submerged. The broth should develop a deep amber color and an intoxicating aroma that fills your kitchen.
Strain and Finish for Perfect Clarity
After simmering, remove the pot from heat and let it sit for 10 minutes to allow any settled particles to sink. Line a fine-mesh strainer with cheesecloth or a coffee filter and strain the broth into a clean container. Discard the solids—you've extracted all the flavor you need. The broth should be cloudy but rich-looking, with visible fat floating on top.
Stir in the 1.5 tbsp kosher salt and 1 tbsp freshly cracked black peppercorns while the broth is still warm. This allows the salt to dissolve completely and the pepper to infuse its aroma. Taste and adjust seasoning if needed—this broth should be deeply savory with a touch of brightness from the vinegar. Let it cool slightly before refrigerating or using in recipes.
Store and Use for Maximum Freshness
Transfer the finished broth to airtight containers, leaving about ½-inch headspace at the top. The fat will solidify on top as it cools, creating a protective layer that preserves flavor. Store in the refrigerator for up to 5 days or freeze for up to 6 months. When ready to use, gently reheat on the stove over low heat, stirring occasionally to redistribute the fat.
This marrow bone broth is the foundation of countless dishes—soups, stews, risottos, or even as a cooking liquid for grains. The gelatinous richness will make your dishes feel luxuriously hearty. The key to success lies in the roasting and long, slow simmering—don't skip either step if you want that restaurant-quality depth at home.
Pro Tips For Making Marrow Bone Broth
- CHAR THE BONES FIRST: Blister the marrow bones in a dry pot over medium-high heat for 10-15 minutes before adding liquid. This step caramelizes the bone surface, deepening the broth's richness—skip it, and you're missing out on that deep, umami foundation.
- PEEL ONIONS LIKE A PRO: Use a vegetable peeler to remove just the papery outer layer of the yellow onions, leaving the inner layers intact. Whole, unpeeled onions release flavor more slowly and prevent the broth from turning cloudy—no one wants murky broth.
- DON’T CRUSH THE GARLIC: Leave the garlic cloves whole and lightly bruise them with the flat side of a knife. This prevents them from turning bitter and ensures they infuse the broth evenly without overpowering it—crushed garlic burns faster and ruins the balance.
- SIMMER LOW AND LONG: Keep the broth at a bare simmer—tiny bubbles breaking the surface—after the first hour. Too much heat and you’ll get a thin, gritty broth; too little and it won’t extract enough collagen. Aim for 8-12 hours, and resist the urge to speed it up.
Flavor customization for this recipe
Smoky Chipotle Infusion
Add 2-3 chipotle peppers in adobo sauce (not too spicy!) to the broth pot after the initial simmer begins. Simmer with the bones for the full 6-7 hours—this infuses the broth with deep, smoky heat that pairs perfectly with Mexican-inspired dishes.
For a milder version, remove the peppers after 4 hours and strain them out. I love using this broth for posole or as a base for smoky black bean soup. 🌶️
Herb-Forward Variations
Swap the thyme and parsley for rosemary and bay leaves for an earthy, aromatic twist. Add 2 sprigs fresh rosemary and 2 bay leaves during the simmering stage, then remove before straining. This works beautifully with herb-roasted vegetables or as a base for French-style soups like pot au feu.
For a Mediterranean touch, add 1 tsp dried oregano and 1 sprig fresh oregano.
Citrus Brightening
Add zest from 1 lemon or orange during the final 30 minutes of simmering to brighten the broth naturally. Remove the zest before straining to avoid bitterness. This variation shines in seafood dishes or as a base for summery gazpacho-style soups.
The citrus also helps balance the richness of the marrow, making it more versatile for lighter meals. 🍊
Mushroom Depth
Add 8 oz sliced cremini or shiitake mushrooms to the pot during the searing stage with the aromatics. Their umami-rich flavor will deepen the broth’s complexity. This works exceptionally well with wild rice blends or as a base for mushroom risotto.
For extra richness, add 1 tbsp mushroom powder (like Umami Crisis brand) to the simmering broth.
Spiced with Warm Cloves
Infuse the broth with 4 whole cloves and 1 cinnamon stick during the simmering process. These warm spices add a subtle sweetness that pairs beautifully with Moroccan tagines or curried dishes.
Remove the spices before straining to avoid bitterness. This variation is perfect for slow-cooked lamb stews or as a base for spiced lentil soups. 🌟
Garlic-Intense Boost
Double the garlic to 16 cloves and lightly char them in a dry pan before adding to the broth. This concentrated garlic flavor adds a bold, savory punch that works exceptionally well in Asian-inspired dishes like pho or ramen.
For an extra layer, add 1 tbsp fish sauce during the final 30 minutes of simmering—it enhances the umami without overpowering. 🧄
Nutrition facts
Frequently asked questions
Can I use chicken or turkey marrow bones instead of beef?
While beef marrow bones are ideal for their rich collagen content, you can use chicken or turkey marrow bones—but expect a lighter, more delicate broth. The simmering time should be reduced to 4-5 hours since poultry bones break down faster. For extra depth, add 1 tbsp fish sauce or 1 tsp soy sauce during the last 30 minutes of cooking.
Why does my broth look cloudy even after straining?
Cloudiness is normal and often a sign of collagen and fat particles suspended in the liquid. For a clearer broth, chill it overnight—the fat will solidify on top, and you can skim it off. If you prefer crystal-clear results, use a coffee filter or cheesecloth for straining, but this may remove some of the broth's body. The gelatinous richness is part of the magic!
How do I know when the bones are fully roasted?
The bones are ready when they develop a deep mahogany color and the marrow inside bubbles slightly. They should also be crispy to the touch when tapped. Over-roasting can burn them, so aim for 30-40 minutes at 450°F. If they’re not brown enough, return them to the oven for 5-10 minutes more.
Can I make this broth in an Instant Pot or pressure cooker?
Yes! Use the same ingredients but reduce simmering time to 2-3 hours on high pressure. Roast the bones separately first, then add them to the Instant Pot with aromatics and water. After cooking, let the pressure release naturally for 15 minutes before straining. The result will be slightly less gelatinous but still deeply flavorful. For extra richness, add 1 tbsp apple cider vinegar at the start.
What’s the best way to use up leftover broth?
Freeze it in ice cube trays for easy single-serving portions, or store in glass jars for up to 6 months. Use it to cook grains like rice or quinoa, as a base for soups, or even as a marinade for meats. The fat solidifies on top when chilled, so skim it off for a lighter broth or leave it in for extra richness. Every drop is packed with flavor!