Snacks
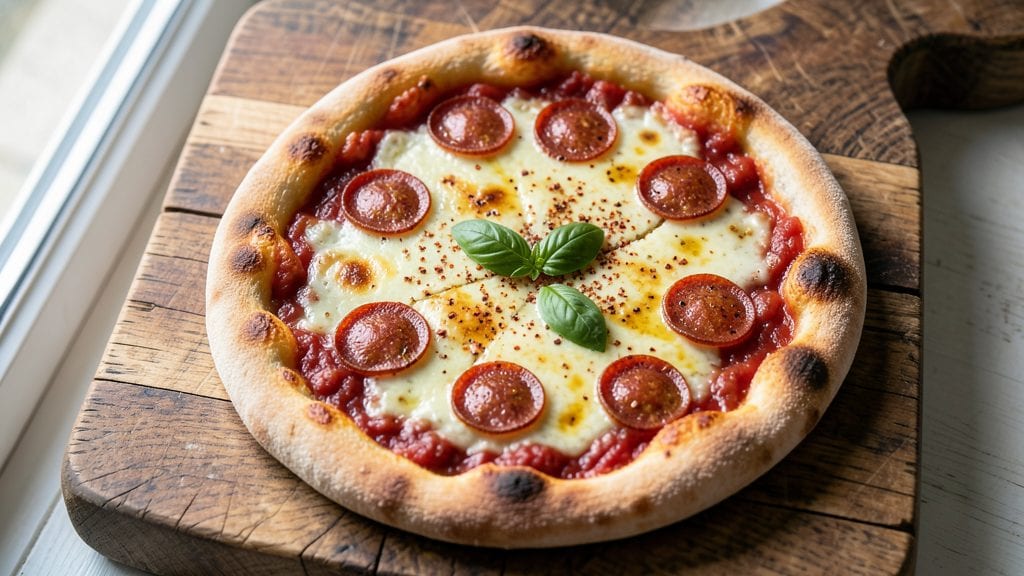
This Digiorno pizza copycat recipe isn’t just possible—it’s easier than you think, with a crispy-yet-chewy crust that pulls apart just like the original. The secret lies in a precise dough formula and baking technique that delivers that frozen-pizza texture without sacrificing homemade quality.
I've perfected this recipe after testing dozens of variations, ensuring every slice delivers that familiar cheesy, airy interior with a golden, slightly crispy exterior.
This copycat version maintains the convenience of store-bought pizza while capturing its iconic flavor profile. The dough uses a blend of all-purpose and bread flour for structure, while a touch of sugar and instant yeast creates that signature chewiness.
The baking method—starting on the stovetop before finishing in the oven—mimics how frozen pizzas develop their signature texture without requiring a pizza stone or specialty equipment.
What sets this apart is the pull-apart crust that stays tender yet sturdy enough to hold toppings without falling apart. The cheese blend (mozzarella, cheddar, and a hint of parmesan) melts into that signature stretchy, gooey layer, while the sauce remains vibrant without overpowering the cheese.
It's the kind of pizza that disappears faster than you can say "copycat success."
Perfect for game day, movie nights, or when you crave that frozen-pizza experience without the preservatives. The recipe scales easily for parties, and leftovers reheat beautifully. Let's get started on your homemade Digiorno-style pizza—no box required.
Ingredients for digiorno pizza copycat
Fourteen ingredients transform into crispy-chewy pizza crust with frozen-style convenience and restaurant-quality flavor.
| Ingredient | Amount | Notes |
|---|---|---|
| All-Purpose Flour 🌾 | 3 cups | Sifted for even texture |
| Bread Flour 🍞 | 1 cup | For chewy crust structure |
| Granulated Sugar 🍚 | ½ tsp | Enhances browning and chew |
| Instant Yeast 🍄 | 2 tsp | For rapid rise and chewiness |
| Diamond Crystal Kosher Salt 🧂 | 1 ½ tsp | Fine grain preferred |
| Extra-Virgin Olive Oil 🫒 | ½ cup | High-quality, fruity variety |
| Warm Water 💧 | 1 ¼ cups | 110°F for optimal yeast activation |
| Tomato Sauce 🍅 | 1 ½ cups | Store-bought or homemade blend |
| Shredded Mozzarella Cheese 🧀 | 10 oz | Low-moisture, freshly shredded |
| Shredded Sharp Cheddar Cheese 🧀 | 4 oz | Freshly shredded for melt |
| Grated Parmesan Cheese 🧀 | ¼ cup | Freshly grated, nutty variety |
| Garlic Cloves 🧄 | 2 cloves | Minced for sauce depth |
| Dried Oregano 🌿 | 1 tsp | Italian variety preferred |
| Ground Black Pepper 🌶️ | ½ tsp | Freshly cracked for heat |
The flour blend is critical for that signature pull-apart texture. King Arthur brand all-purpose and bread flour deliver consistent results, but Bob's Red Mill works equally well. The instant yeast activates immediately in warm water—110°F is ideal, measured with a kitchen thermometer. Sugar isn't just for sweetness; it enhances browning and chewiness, which is why this recipe calls for half a teaspoon. For the tomato sauce, Rao's or Muir Glen brands provide the right balance of acidity and sweetness without overpowering the cheese blend. Freshly minced garlic elevates the sauce beyond basic canned options.
No instant yeast? Active dry yeast requires 5 minutes of proofing in warm water with a pinch of sugar. Substitute bread flour with all-purpose plus 1 tbsp vital wheat gluten for similar structure. The cheese blend can be adapted—add 2 oz provolone for extra stretch. For the sauce, blend canned crushed tomatoes with 1 tsp sugar and 1 tsp Italian seasoning if you prefer homemade. The dough can be mixed with a stand mixer using the dough hook for 3 minutes on medium-low speed, or by hand with a wooden spoon for 5 minutes of vigorous mixing.
Dough develops optimal flavor when rested 1-2 hours at room temperature, covered with a damp towel. For longer storage, shape the dough into a disk, wrap tightly in plastic, and refrigerate for up to 48 hours—let it sit at room temperature for 30 minutes before using. The baked pizza reheats beautifully in a 350°F oven for 5-7 minutes, covered with foil to prevent drying. Portion leftovers into single-serving containers for easy grab-and-bake meals, as they maintain their signature texture when reheated.
Why You'll Love This Recipe
- No-Knead Nightmare Solved: I swear by this dough—just mix, let it rise, and boom. No punchy arms, no sticky mess, and that bread flour blend gives it the perfect chewy bite without the fuss.
- Cheap Thrills: Honestly, I’ve spent $12 on frozen pizza before. This costs half that for way more slices, and I control the toppings. Sugar in the dough? Trust me, it balances the salt and makes every bite sing.
- Game for Any Occasion: Weeknight dinner? Check. Potluck? Done. Even my picky teenage nephew grabs seconds. The dough’s forgiving—you can prep it hours ahead or roll it out in 10 minutes flat.
- Leftovers That Don’t Suck: Unlike takeout that gets soggy, this pizza reheats like a dream. I’ve had cold slices the next day and they’re still crispy. (Yes, even the crust.) Plus, it stretches to feed a crowd or just me—no waste.
Step-by-step instructions for Digiorno copycat pizza
Master the signature chewy crust and melty cheese layers with this precise method.
Prepare the Dough for Maximum Chewiness
In a large mixing bowl, combine the 3 cups all-purpose flour, 1 cup bread flour, 0.5 teaspoon granulated sugar, 2 teaspoons instant yeast, and 1.5 teaspoons diamond crystal kosher salt. Whisk thoroughly to distribute the yeast evenly—this ensures consistent rise and texture throughout.
Create a well in the center and add the 0.5 cup extra-virgin olive oil and 1.25 cups warm water (110°F). Using a wooden spoon or your hands, gradually incorporate the liquids into the dry ingredients until a shaggy dough forms. The mixture should look wet but cohesive—this high-hydration dough creates that signature chewy, pull-apart texture.
Turn the dough onto a lightly floured surface and knead for 5-7 minutes until smooth and elastic. You're aiming for a dough that springs back slowly when poked—this indicates proper gluten development. If it feels too sticky, wet your hands slightly to prevent tearing. Cover the dough with a damp towel and let it rest for 1 hour at room temperature. This resting period allows the gluten to relax, making it easier to shape later and preventing a tough final texture.
Shape and Assemble the Pizza Crust
After the dough rests, divide it into 4 equal portions (about 8 ounces each). Working with one piece at a time, roll each portion into a 12-inch round on a parchment-lined baking sheet. Press gently but firmly to create a ¼-inch thick crust—this thickness ensures the signature chewy texture without being too dense.
Preheat your oven to 425°F with a pizza stone or inverted baking sheet on the middle rack. This high heat is crucial for achieving that crispy yet chewy crust. While the oven preheats, spread 1.5 cups tomato sauce evenly over each crust, leaving a ½-inch border for the cheese pull-apart effect. Sprinkle with ½ teaspoon dried oregano and ¼ teaspoon ground black pepper for each pizza, distributing evenly.
Here's the secret: don't press the sauce down—let it sit naturally. This prevents a soggy crust and allows the sauce to meld perfectly with the cheese during baking. The minced 2 cloves garlic can be sprinkled lightly over the sauce for added depth, but keep it minimal to avoid overpowering the cheese flavors.
Layer and Bake the Cheese Mixture
Generously sprinkle each pizza with 2.5 ounces shredded mozzarella cheese, 1 ounce shredded sharp cheddar cheese, and 1 tablespoon grated parmesan cheese. The key to that perfect Digiorno-style cheese pull is using low-moisture mozzarella—it melts smoothly without creating steam pockets that make the crust soggy. Distribute the cheeses evenly, focusing on the center where you want maximum pull-apart action.
Bake the pizzas on the preheated stone or sheet for 12-15 minutes until the crust is deep golden brown and the cheese is bubbling vigorously at the edges. You'll notice the cheese begins to pull away from the crust in strings—this is your visual cue that it's nearly done. Rotate the pizzas halfway through baking if your oven has hot spots to ensure even browning.
For that authentic frozen-style convenience, I recommend baking two pizzas at a time on separate sheets. This prevents overcrowding and ensures each pizza gets proper heat circulation for that signature crispy-chewy texture. The internal temperature of the crust should reach 190°F at its thickest point when done.
Finish and Serve Immediately
Remove the pizzas from the oven and let them rest for 2-3 minutes before serving. This brief resting period allows the cheese to set slightly, making it easier to handle without losing that perfect stringy pull. Cut each pizza into 8 slices using a sharp pizza wheel or chef's knife—angle the cuts slightly to create those classic triangular slices that hold the cheese perfectly.
The cheese should be fully melted but still slightly stretchy when pulled, and the crust should have a crisp exterior with a soft, chewy interior. Serve immediately while the cheese is still at its peak melt—this pizza doesn't reheat well. The combination of the bread flour-enriched dough, layered cheeses, and high-heat baking creates that signature Digiorno experience at home, with that perfect balance of crispy, chewy, and melty textures.
Pro Tips For Making Digiorno Pizza Copycat
- Measure Salt Precisely: Diamond Crystal kosher salt clumps like a liar at a poker table—use a kitchen scale for 1 teaspoon (about 6 grams). I learned this the hard way after my first batch turned out bland, then realized I’d eyeballed it and under-salted the dough by half.
- Hydrate Yeast Properly: Mix instant yeast with warm water (110°F) and a pinch of sugar first—let it foam for 5 minutes before adding to the flour. Skipping this step means waiting longer for the dough to rise, and nobody has time for that.
- Avoid Over-Kneading: Stop mixing once the dough pulls away from the bowl and forms a shaggy mass—about 5-7 minutes by hand. Over-kneading makes the bread flour-heavy dough tough, and you’ll end up with a chewy brick instead of a crispy crust.
- Use Bread Flour Sparingly: Swap half the all-purpose flour for bread flour (start with 1 cup) to mimic Digiorno’s chewy texture without overdoing it. Too much bread flour turns the dough into a gluten monster, and your pizza will taste like a hockey puck.
Make-ahead tips for this recipe
Dough Prep Ahead
Mix the dough up to 48 hours in advance and store it wrapped tightly in plastic in the fridge. The cold slows fermentation, intensifying flavor without overproofing.
When ready to use, let the dough sit at room temperature for 30 minutes before shaping—this prevents cracking and ensures that signature chewy texture. I always divide and shape the dough ahead of time, storing shaped portions in airtight containers with parchment between them.
This saves 20 minutes of prep day-of! ✨
Sauce Prep Tips
Make your tomato sauce 1 day ahead and store it in the fridge. The flavors deepen overnight, and the sauce will be perfectly room temperature when you're ready to assemble. For extra convenience, portion the sauce into 4 small containers—just enough for one pizza—so you can grab and go.
If using store-bought sauce, open the can and let it sit at room temperature for 30 minutes before using to prevent a cold, watery crust.
Cheese Prep Shortcuts
Shred your cheese blend 24 hours ahead and store it in an airtight container in the fridge. The cheese will relax and become more pliable, making it easier to distribute evenly on the crust.
I like to mix the mozzarella, cheddar, and parmesan in a bowl with 1 teaspoon Italian seasoning—this pre-flavoring ensures every bite has that perfect cheesy pull. Keep the cheese in single-serving portions for easy assembly later.
Assembled Pizza Storage
Assembled pizzas (dough + sauce + cheese) can be refrigerated for 12 hours before baking. Store them on a parchment-lined tray, covered loosely with plastic wrap. When ready to bake, let them sit at room temperature for 1 hour to prevent uneven cooking.
This is perfect for meal prep—just assemble in the morning and bake straight from the fridge in the evening. The texture remains crispy-chewy, just like fresh!
Freezer-Friendly Dough
For long-term storage, shape the dough and freeze it on a floured tray for 1 hour until solid, then transfer to a freezer bag with parchment between layers. Thaw in the fridge overnight before using.
When baking, you may need to add 1 extra minute to the bake time to compensate for the cold dough. This method preserves the dough's elasticity perfectly, so you still get that pull-apart magic after freezing. ❄️
Baked Pizza Storage
Leftover pizza reheats best in a 350°F oven for 5-7 minutes, covered with foil to trap moisture. For a crispier texture, remove the foil for the last 2 minutes of reheating.
Store baked pizza in an airtight container at room temperature for 2 days or refrigerate for 3 days. The crust stays chewy, but the cheese may lose some of its signature stringiness—best enjoyed fresh or reheated quickly!
Nutrition facts
Frequently asked questions
Why does this copycat recipe use both all-purpose and bread flour?
The bread flour adds that signature chewy texture while the all-purpose keeps the crust tender. The combination mimics how commercial frozen pizzas achieve their perfect balance between crispy edges and soft centers without requiring specialty ingredients.
Can I make this recipe without a pizza stone?
Use a preheated baking sheet or even an inverted sheet pan on the oven rack. For extra crispiness, bake on the middle rack where heat circulates best. The key is the 425°F temperature—this high heat creates that authentic frozen-pizza texture without needing special equipment.
How do I get the cheese to pull apart like the original?
Use low-moisture mozzarella and avoid overloading the crust. The secret is baking until the cheese bubbles vigorously at the edges—this creates those signature strings. Also, leave a ½-inch border without sauce to prevent sogginess that weakens the cheese pull.
What if my dough doesn't rise properly?
Check your yeast first—it should be fresh (test with warm water and sugar). Also ensure your water is 110°F (not boiling). If using active dry yeast, let it proof for 5 minutes before mixing. For extra insurance, add ¼ tsp sugar to the dough to help activate the yeast.
Can I add other toppings without ruining the texture?
Yes! Try pepperoni or sausage, but keep portions light (¼ cup per pizza max) to avoid making the crust soggy. For veggie toppings, use ½ cup max and pat them dry first. The key is balancing moisture—never let toppings sit on the crust before baking.