Appetizers
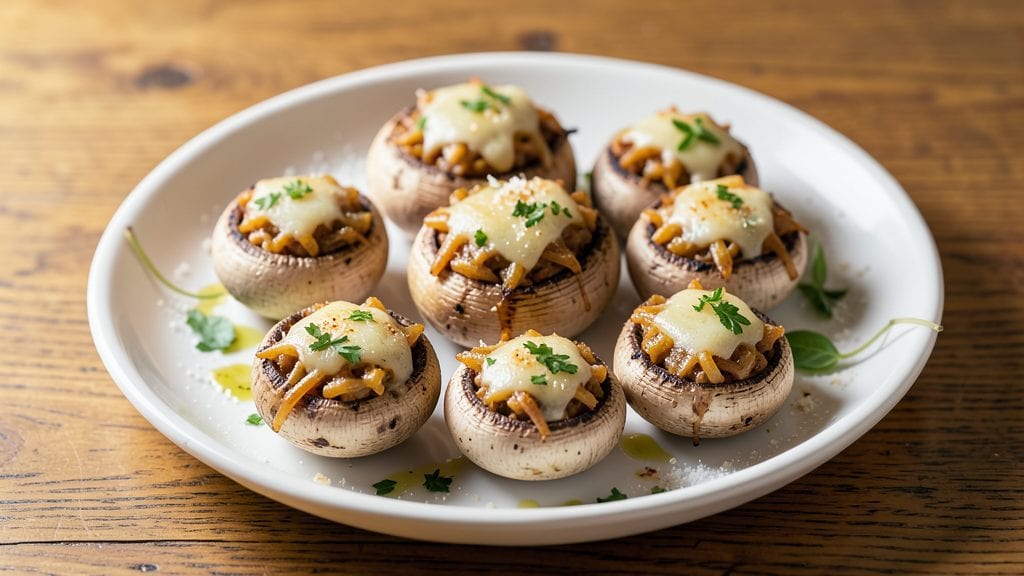
This classic stuffed mushrooms recipe brings together crispy breadcrumbs and melty cheese in a way that always steals the show at parties. Standing on a step stool in my grandmother’s kitchen in Sicily, I learned how to transform simple ingredients into something extraordinary—and these mushrooms are no exception.
The secret lies in the perfect balance of garlic, herbs, and Parmesan, baked until golden and bubbling.
What makes this recipe special is how foolproof it is—no fancy techniques, just a few simple ingredients that come together in under 30 minutes. The filling is a rich blend of breadcrumbs, cheese, and fresh herbs, while the mushrooms themselves stay tender and juicy.
It’s the kind of appetizer that disappears faster than you can say "second round."
By the time they come out of the oven, you’ll have perfectly stuffed mushrooms with crispy tops and melty, gooey centers that pull apart with every bite.
The aroma alone will have everyone gathering around the table, and the flavors are so satisfying they’ll become a regular at your gatherings. Let’s get started!
These stuffed mushrooms work as a standalone appetizer or pair beautifully with dips, salads, or even as a side dish. The versatility is what makes them a crowd-pleaser every time. Trust me, once you try this classic recipe, you’ll never go back to the store-bought versions.
Ingredients for classic stuffed mushrooms
Sixteen mushrooms, two cheeses, and a handful of herbs transform into golden, bubbly appetizers that vanish faster than you can say "second round."
| Ingredient | Amount | Notes |
|---|---|---|
| Large White Mushrooms 🍄 | 16 whole | Stems reserved for filling |
| Fresh Garlic Cloves 🧄 | 4 cloves | Minced finely for filling |
| Fresh Parsley Leaves 🌿 | ½ cup | Chopped finely for filling |
| Fresh Basil Leaves 🌿 | ¼ cup | Chopped finely for filling |
| Parmesan Cheese 🧀 | ½ cup | Freshly grated from block |
| Gruyère Cheese 🧀 | ½ cup | Shredded for melty texture |
| Panko Breadcrumbs 🍞 | 1 ½ cups | For crispy topping |
| Extra-Virgin Olive Oil 🫒 | ¼ cup | For brushing mushrooms |
| Unsalted Butter 🧈 | 2 tbsp | Melted for filling |
| Diamond Crystal Kosher Salt 🧂 | ½ tsp | For seasoning filling |
| Freshly Ground Black Pepper 🌶️ | ¼ tsp | For filling seasoning |
| Lemon Zest 🍋 | 1 tsp | For bright finishing touch |
| All-Purpose Flour 🌾 | 2 tbsp | For dredging mushroom tops |
The mushrooms are non-negotiable here—large white mushrooms with thick stems are ideal. Look for ones with firm caps and no bruising at Whole Foods or your local market. The stems should be thick and meaty (about 1/2 inch diameter) to hold the filling without falling apart. I always buy extra because you'll want seconds. For the cheeses, Parmesan needs to be freshly grated from a wedge—pre-grated tastes like sawdust in comparison. Gruyère melts beautifully but can be swapped for fontina if you're in a pinch. The herbs? Fresh parsley and basil make all the difference—dried works but lacks that bright pop (use half the amount).
No panko? Crushed cornbread or Italian breadcrumbs work just as well. Short on Gruyère? Mozzarella and Parmesan mixed gives a similar melty texture. The filling can be prepped ahead—just keep it chilled until ready to stuff. For extra crispiness, toast the breadcrumbs in a dry pan for 2-3 minutes before mixing with cheese. The lemon zest is optional but adds that bright, fresh finish that ties everything together. Pro tip: Zest a whole lemon and freeze the rest—you'll use it again before you know it.
These keep beautifully—reheat at 375°F for 8-10 minutes until bubbly. The filling stays creamy, and the tops get crispy again. Store leftovers in an airtight container for up to 4 days in the fridge. For parties, make them ahead and refrigerate until serving—crowds love warm appetizers, but pre-made ones are easier to manage. The aroma alone will have guests gathering, so cover them loosely with foil if prepping early to keep them from drying out.
Why You'll Love This Recipe
- One-Bowl Magic: I swear by this—just toss the guts out, mix the filling in the same bowl, and pop them in the oven. No extra dishes, no stress, just that rich, garlicky-parmesan goodness waiting for you.
- Umami Bomb: That crispy mushroom cap meets the creamy, herby filling—it’s like a tiny flavor explosion every bite. The basil and parsley brighten up the garlic and cheese so well, it’s dangerously addictive.
- Party in a Pan: Serve these as an appetizer, a side, or even a light main (yes, really). They’re fancy enough for guests but simple enough for a lazy Sunday. Honestly, I’ve taken them to potlucks, book clubs, and even my mom’s dinner table—always a hit.
- Budget-Friendly Leftovers: A single batch stretches for days—reheat them in the oven or microwave, and they taste just as good. Plus, you’re using whole mushrooms, not just the expensive caps, so every penny counts. My wallet thanks me every time.
Step-by-step instructions for classic stuffed mushrooms
Here's how to achieve that perfect balance of crispy, golden crust and creamy, melty filling every time.
Prepare the Mushroom Caps and Filling Ingredients
Begin by carefully twisting off the stems from all 16 whole large white mushrooms, reserving them for the filling. Use a small paring knife to make this easier—grip the mushroom firmly and twist counterclockwise. The stems should separate cleanly from the caps. Place the caps on a baking sheet, gill-side up, and set aside.
In a food processor, pulse the reserved mushroom stems along with the 4 cloves of minced fresh garlic, 0.5 cup of finely chopped fresh parsley leaves, and 0.25 cup of finely chopped fresh basil leaves until finely minced but not pasty. This ensures the filling has texture while still being smooth. Transfer the mixture to a bowl and stir in the 0.5 cup of freshly grated parmesan cheese, 0.5 cup of shredded gruyère cheese, 2 tablespoons of melted unsalted butter, 0.5 teaspoon of diamond crystal kosher salt, 0.25 teaspoon of freshly ground black pepper, and 1 teaspoon of lemon zest. Mix until fully combined and the cheese begins to soften slightly from the butter.
Create the Crispy Topping and Dredge the Mushrooms
In a separate bowl, combine the 1.5 cups of panko breadcrumbs with 2 tablespoons of all-purpose flour. This creates a lighter, crispier topping than using panko alone. Drizzle in the 0.25 cup of extra-virgin olive oil and toss with your hands until the mixture resembles wet sand—just moist enough to hold together when pressed but not clumping.
Lightly brush the inside of each mushroom cap with a thin layer of olive oil using a pastry brush. Then, generously stuff each cap with about 1 tablespoon of the mushroom filling mixture. Press the filling in firmly so it stays in place when you flip them later. Finally, sprinkle the panko mixture evenly over the tops, pressing gently to adhere. This ensures maximum crispiness when they bake.
Bake to Golden Perfection
Preheat your oven to 375°F for optimal browning without burning. Arrange the stuffed mushrooms on a parchment-lined baking sheet, leaving about 1 inch of space between each one. This allows hot air to circulate and ensures even browning. Bake for 20-25 minutes until the tops are deep golden brown and the filling is bubbling through the edges.
Here's the key: The mushrooms are done when they release easily from the baking sheet and the filling is just beginning to set. If you're unsure, cut one open—the cheese should be fully melted but still slightly creamy, not rubbery. The panko topping should be crispy with a few golden-brown spots. Let them rest for 3-5 minutes before serving to allow the filling to set slightly and the flavors to meld.
Pro Tips For Making Classic Stuffed Mushrooms
- STUFF CAPS TIGHTLY: Use toothpicks or small skewers to secure the filling—don’t just press the stems back in. I learned this the hard way when half my stuffing slid out mid-bake, leaving sad, half-empty mushrooms.
- SALT THE MUSHROOMS FIRST: Toss the cleaned caps with ½ teaspoon salt and let them sit for 10 minutes before stuffing. This draws out moisture so the filling doesn’t turn soggy—trust me, your future self will notice the difference.
- GARLIC MINCE SMALLER THAN YOU THINK: Chop the garlic into tiny confetti-sized pieces, not thin slices. Big chunks burn before the filling cooks through, and you’ll end up with bitter, uneven flavor. Tiny garlic = even cooking, every time.
- BAKE UNTIL STEMS ARE TENDER: Check doneness by piercing the stems with a fork—they should give way like overcooked pasta, not feel firm. I used to pull them out too soon, and the filling stayed raw in the center. Patience here makes the dish.
Pro cooking tips for great classic stuffed mushrooms
Garlic and Herb Prep
For the filling, I swear by mincing the garlic finely—almost like a paste—so it blends seamlessly with the mushrooms and herbs. Use a microplane for garlic if you have one; it saves time and ensures even distribution.
When chopping the parsley and basil, I pulse them in the food processor just until they're finely minced but still retain some texture. This prevents the filling from becoming mushy. 🧄
Cheese Selection Matters
Don’t skimp on the cheese—freshly grated Parmesan makes all the difference. I always buy a wedge from my local Italian deli and grate it myself; pre-shredded cheese has anti-caking agents that make the filling dry.
For Gruyère, look for blocks with holes—this indicates proper aging. If you can’t find Gruyère, fontina or sharp cheddar work well as substitutes. The key is a mix of melty and sharp flavors.
Crispy Topping Secrets
The panko-flour-oil mixture is where the magic happens for that perfect crispy crust. I like to toast the panko in a dry pan for 2-3 minutes before mixing it with flour and oil—this deepens the flavor.
When pressing the topping onto the mushrooms, use the back of a spoon to pack it firmly. This ensures the breadcrumbs stay put and get extra crispy. A light brush of olive oil on the mushroom caps before stuffing helps the filling adhere better too.
Baking Like a Pro
Preheat your oven to 375°F and let it come to temperature before baking—this prevents uneven cooking. Arrange the mushrooms on a parchment-lined sheet with 1 inch of space between them. This allows hot air to circulate, giving you even browning.
If your oven runs hot, start checking at 20 minutes—they’re done when the tops are golden and the filling is bubbling. 🔥
Resting is Key
Never skip the 3-5 minute rest after baking. This lets the filling set slightly and the flavors meld. If you cut into one too soon, the cheese will spill out.
I like to serve them straight from the baking sheet—just transfer to a platter and garnish with extra lemon zest or fresh herbs. The contrast of warm, melty mushrooms with a bright citrus note is what makes this dish unforgettable.
Troubleshooting Tips
If your mushrooms aren’t browning enough, try broiling for 1-2 minutes at the end of baking—watch them like a hawk to avoid burning. For extra moisture, add 1 teaspoon of heavy cream to the filling.
And if the filling leaks during baking, it’s a sign you stuffed them too full—stick to 1 tablespoon per mushroom. Trust me, these little adjustments make all the difference in the final result. ✨
Nutrition facts
Frequently asked questions
Can I use smaller mushrooms for this recipe?
Small mushrooms work perfectly, but you'll need about 24-30 instead of 16. Just halve the filling amount and reduce the baking time to 15-18 minutes since smaller mushrooms cook faster. The key is maintaining the same ratio of filling to mushroom size—about 1 teaspoon per mushroom.
How do I make this recipe vegetarian?
Swap the butter for vegan butter and use vegan Parmesan and Gruyère alternatives like Daiya or Violife. For extra protein, add 1/2 cup cooked quinoa or breadcrumbs mixed with flax eggs to the filling. The texture will still be rich and satisfying!
Why did my stuffed mushrooms get soggy?
Soggy mushrooms usually mean the filling was too wet or the baking time was insufficient. Try toasting your breadcrumbs for 3-4 minutes before mixing, and ensure your oven is fully preheated. Also, don't overstuff—1 tablespoon per mushroom is perfect. If they still seem damp, broil for 1-2 minutes at the end.
Can I make these ahead of time?
Assemble them up to 24 hours ahead and refrigerate uncovered. The filling will firm up slightly, making it easier to handle. Bake from cold for 25-30 minutes (add 5 extra minutes) or reheat pre-baked ones at 350°F for 10 minutes to restore crispiness. The flavors actually improve overnight!
What's the best way to serve these?
These stuffed mushrooms shine as an appetizer but work beautifully as a main course too! Serve with a side of arugula salad or garlic roasted potatoes for balance. For extra flair, drizzle with balsamic glaze or sprinkle with fresh thyme before serving. They're also perfect for game day or holiday gatherings!