Appetizers
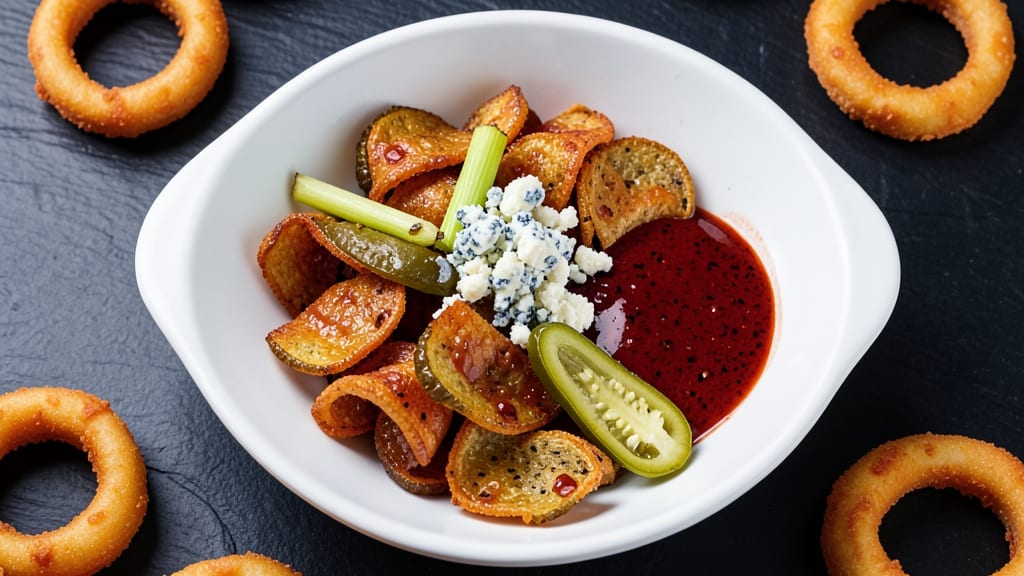
This Buffalo Wild Wings deep fried pickle recipe brings the iconic appetizer to your kitchen with a crispy, vinegar-cured exterior and that signature spicy kick. The secret lies in a light, airy batter that encases each pickle slice, creating a golden, crunchy shell while keeping the inside tangy and tender.
I perfected this method after years of experimenting with frying techniques—no more soggy or greasy results.
What makes this recipe stand out is the balance between crispiness and flavor. The batter, made with simple pantry staples, encases the pickles perfectly, while the frying process ensures a golden-brown exterior that shatters with every bite.
The Buffalo-inspired seasoning—spicy, tangy, and just a little sweet—transforms a humble pickle into a restaurant-worthy appetizer. This isn’t just a snack; it’s a crowd-pleaser that disappears faster than you can say "extra hot."
The result is a dish that’s impossible to resist: crispy on the outside, tangy on the inside, and packed with that familiar Buffalo Wild Wings heat. Serve with ranch or blue cheese for dipping, and watch your guests reach for seconds.
The key is in the frying—just 3 to 4 minutes per batch ensures maximum crunch without burning. This recipe delivers professional-quality results with minimal effort.
Perfect for game day, parties, or a bold appetizer to start any meal, these deep fried pickles are a game-changer. The technique is foolproof, and the flavor is undeniable—just like the original, but better. Let’s get started on creating your own batch of crispy, spicy perfection.
Ingredients for buffalo wild wings deep fried pickle
Simple pantry staples transform humble pickles into crispy, spicy perfection—just like Buffalo Wild Wings.
| Ingredient | Amount | Notes |
|---|---|---|
| Dill Pickle Slices 🥒 | 24 pieces | Vinegar-cured, 1/4-inch thick |
| All-Purpose Flour 🌾 | 1 ½ cups | White flour, sifted |
| Cornstarch 🌽 | ½ cup | For extra crispiness |
| Beer 🍺 | ½ cup | Light lager preferred |
| Hot Sauce 🌶️ | ½ cup | Buffalo-style, like Frank's |
| Butter 🧈 | ½ cup | Melted, unsalted |
| Vegetable Oil 🫒 | 3 cups | For frying, 350°F |
| Salt 🧂 | 1 tsp | Kosher or sea salt |
| Black Pepper 🌶️ | ¼ tsp | Freshly ground |
| Garlic Powder 🧄 | ½ tsp | For extra flavor |
| Ranch Dressing Mix 🥛 | 2 tbsp | For dipping, optional |
| Blue Cheese Crumbles 🧀 | ½ cup | For dipping, optional |
The pickles are the star, so grab dill slices cut 1/4-inch thick—thinner pieces fry faster and stay crispier. For the batter, light lager beer (like Bud Light or Coors) keeps things light, but any pale ale works. The cornstarch is non-negotiable—it’s what gives that signature crunch. I always double-check my pickles for any soft spots or bruises, as those won’t fry well. Costco or Trader Joe’s usually have the best vinegar-cured slices in bulk, but any jarred dill pickles will do if you’re in a pinch.
No beer? Sparkling water or ginger ale works in a bind—just skip the fizz before mixing. For the hot sauce, Frank’s RedHot is the gold standard, but Crystal or Texas Pete add a different but delicious kick. The ranch and blue cheese are optional but highly recommended—Hidden Valley or Bolthouse Farms are my go-tos for store-bought. If you’re feeling fancy, mix your own ranch with sour cream, buttermilk powder, and herbs. The melted butter in the batter adds richness, so don’t use margarine—it won’t crisp up the same way. And yes, you can freeze leftover batter for up to 2 weeks if you’re prepping ahead.
Freshly fried pickles stay crisp for about 1 hour at room temperature, so serve them immediately if you’re hosting. For leftovers, store in an airtight container in the fridge for up to 3 days, but they’ll lose some crunch. Reheat in a 350°F oven for 5-7 minutes to restore crispiness. The batter keeps for 2 days in the fridge if you’re not using it all at once—just whisk in a splash of beer or water to thin it out before frying. These are perfect for game day, parties, or as a bold appetizer—just don’t blame me if they disappear faster than you can say "extra hot."
Why You'll Love This Recipe
- Five-Ingredient Magic: I swear, this recipe is the kind of thing that makes you question why you ever bought frozen apps. Just pickles, flour, cornstarch, beer, and hot sauce—no fancy prep, no weird substitutions. The beer isn’t even there to make you feel fancy; it’s the secret weapon that keeps the batter light and crispy.
- Crispy-Tangy Obsession: That first bite? Crunchy enough to wake you up, then a punch of tangy heat that lingers like a good memory. The cornstarch gives it that satisfying shatter, while the hot sauce soaks in just enough to make every piece a little dangerous. (Yes, even on a Tuesday night.)
- Game-Day Ready: Between us, these are my go-to for Super Bowl parties, tailgates, or when my friends show up unannounced. They disappear faster than chips at a football game, and honestly? No one cares if they’re "dinner" or just snacks. Serve with ranch or blue cheese—either way, you’re golden.
- Leftovers? More Like Leftovers: I make a double batch and freeze half. Reheating them in the air fryer for 3-4 minutes turns them into crispy, cheesy little bites the next day. Budget-friendly? Absolutely. A weeknight lifesaver? Without a doubt. My kids even fight over them.
Step-by-step instructions for Buffalo Wild Wings deep fried pickle recipe
Here's how to create perfectly crispy, tangy-spicy fried pickles with a restaurant-quality crunch.
Prepare the Pickle Battering Mixture
In a large mixing bowl, combine the 1.5 cups all-purpose flour, 0.5 cup cornstarch, 1 teaspoon salt, 0.25 teaspoon black pepper, and 0.5 teaspoon garlic powder. Whisk these dry ingredients together until fully blended and no lumps remain. This creates the foundation for your crispy coating.
In a separate bowl, mix the 0.5 cup beer and 0.5 cup hot sauce. The beer helps create a lighter, crispier batter while the hot sauce infuses flavor throughout. Add the 0.5 cup melted butter to this wet mixture and stir until fully combined. Pour the wet ingredients into the dry ingredients and whisk vigorously for about 1 minute until you achieve a smooth, thick batter consistency.
Coat the Pickle Slices
Pat the 24 pieces dill pickle slices completely dry with paper towels. Any moisture remaining on the pickles will prevent proper crisping. Working in batches, dip each pickle slice into the batter, allowing any excess to drip off. You want a thin, even coating that clings to the surface without pooling.
Place the coated pickles on a wire rack set over a baking sheet. This allows air to circulate around each piece, ensuring even crisping. Let them rest for 5 minutes while you prepare the frying setup. This brief resting period helps the batter adhere more securely to the pickles.
Fry to Golden Perfection
Heat the 3 cups vegetable oil in a deep fryer or heavy pot to 350°F. Use a candy or deep-fry thermometer to monitor the temperature closely—this is critical for achieving crispy results. Once the oil reaches temperature, carefully add the pickles in a single layer, being careful not to splash the hot oil.
Fry the pickles for 2-3 minutes until they turn a deep golden brown color. You'll notice small bubbles forming around the edges as the batter cooks. Remove the pickles with a slotted spoon and transfer them to a paper towel-lined plate. The pickles should be crispy enough to hold their shape when lifted with tongs.
Prepare Dipping Sauces (Optional)
While the fried pickles cool slightly, prepare the optional dipping sauces. In a small bowl, mix the 2 tablespoons ranch dressing mix with 2 tablespoons water until it forms a smooth, spreadable consistency. For the blue cheese option, simply spread the 0.5 cup blue cheese crumbles on a plate for easy dipping.
Serve the fried pickles immediately while they're still crispy. The combination of the tangy pickle flavor, crispy batter, and spicy kick creates a perfect balance. Arrange them on a platter with the dipping sauces on the side for guests to enjoy as they please.
Pro Tips For Making Buffalo Wild Wings Deep Fried Pickle
- Drain and Pat Dry: Pickles straight from the jar are swimming in brine—skip the rinse, but pat them dry with paper towels before dipping. I learned this the hard way when my first batch came out soggy and half-cooked. Wet pickles = greasy, uneven frying. Do this step right after pulling them from the jar.
- Use a 50/50 Flour Mix: Swap all-purpose flour for a 50/50 blend with cornstarch—it’s the difference between a flimsy crust and one that stays crispy. The cornstarch absorbs moisture better, so your pickles won’t turn to mush in the beer batter. (Yes, even if you’re impatient like me.)
- Fry in Small Batches: Crowd the fryer, and you’ll end up with greasy, unevenly cooked pickles. Work in single-layer batches—no more than 4-5 slices at a time—and keep the oil at 350°F. Overloading drops the temp, and suddenly you’re dealing with a sad, greasy mess instead of crispy perfection.
- Marinate Pickles First: Toss your drained pickles in a mix of beer and hot sauce for 10-15 minutes before frying. Sounds weird, but it works: the beer tenderizes the edges slightly, and the hot sauce infuses the crust for a deeper, spicier bite. (Your future self will thank you.)
Pro cooking tips for buffalo wild wings deep fried pickle
Batter Consistency Matters
The key to perfect fried pickles is a batter that’s thick but pourable—like heavy cream. I aim for a consistency where the batter clings to a spoon without dripping. If your batter is too thin, add 1-2 tablespoons more flour and whisk until smooth.
Too thick? Thin it with 1 tablespoon beer or water at a time. A wire whisk works best for eliminating lumps. 🌶️
Double-Dip for Extra Crisp
For that restaurant-style crunch, dip each pickle slice twice in the batter. After the first dip, let excess drip off for 10 seconds, then dip again.
This creates a thicker, more even coating. I use a wire rack over a baking sheet to prevent sogginess while resting the pickles before frying.
Oil Temp Control
Use a candy or deep-fry thermometer to maintain oil at exactly 350°F. If the oil is too hot, the batter burns before cooking through. If too cool, the pickles absorb oil and turn greasy.
I recommend a heavy-bottomed pot (like All-Clad) for even heat distribution. Test with a wooden chopstick—if bubbles form immediately, the oil’s ready. ⚡
Fry in Batches
Overcrowding the fryer drops the oil temperature and causes soggy pickles. Fry 4-6 pieces at a time, giving them space to crisp evenly. Use a slotted spoon to remove them—this prevents oil splatter.
The pickles are done when they’re golden brown (about 2-3 minutes). Drain on a paper towel-lined plate to remove excess oil.
Rest Before Serving
Let fried pickles rest for 2-3 minutes after frying. This allows the batter to set and prevents them from becoming soggy when served. Arrange them on a platter lined with parchment paper for easy cleanup.
Serve immediately with ranch or blue cheese—Hidden Valley or Bolthouse Farms are my top picks. 💡
Equipment Shortcuts
No deep fryer? Use a heavy pot with at least 2 inches of oil. A thermometer is non-negotiable—without it, you risk burning or greasy results. For extra crispiness, try a second fry at 375°F for 30 seconds after resting.
Store leftover batter in an airtight container for up to 2 days in the fridge.
Nutrition facts
Frequently asked questions
Can I use regular pickles instead of dill pickles?
Dill pickles work best because their firm texture holds up better during frying. For bread-and-butter pickles, you can try them, but they may be too soft. If using regular pickles, look for vinegar-cured slices with a slightly crisp texture—avoid the mushy ones. The flavor will be milder, so you might want to add an extra 0.25 teaspoon of garlic powder to the batter for depth.
What if I don’t have beer for the batter?
No problem! Use sparkling water or ginger ale as a 1:1 substitute. The carbonation helps create air pockets for crispiness, just like beer. For a non-carbonated option, plain water works, but you may need to add 1 extra tablespoon of cornstarch to compensate for the lack of bubbles. Avoid milk or dairy—it’ll make the batter too heavy and greasy.
How do I keep the fried pickles crispy after frying?
Serve them immediately on a wire rack over a baking sheet to allow air circulation. If storing, keep them in an airtight container with a paper towel underneath to absorb moisture. Reheat in a 350°F oven for 5-7 minutes to restore crispiness. Avoid refrigerating them directly after frying—they’ll turn soggy faster. For best results, fry in small batches and serve right away.
Can I make this recipe ahead of time?
You can prep the batter up to 2 days ahead and store it in an airtight container in the fridge. Just whisk in a splash of beer or water before using. For the pickles, slice and pat them dry, then store in a sealed container with a paper towel for up to 1 day. Fry fresh for maximum crunch—pre-fried pickles won’t reheat crispy. The dipping sauces can be made 3 days ahead.
Why did my fried pickles turn out greasy instead of crispy?
Greasy pickles usually mean the oil was too cool or the batter wasn’t dry enough. Always use a thermometer to keep oil at 350°F. Pat the pickles very dry before dipping, and let the batter-coated pickles rest on a wire rack for 5 minutes before frying. Overcrowding the fryer also lowers oil temperature—fry in batches of 4-6 pieces at a time. For extra crispiness, try a second fry at 375°F for 30 seconds after resting.