Side Dishes
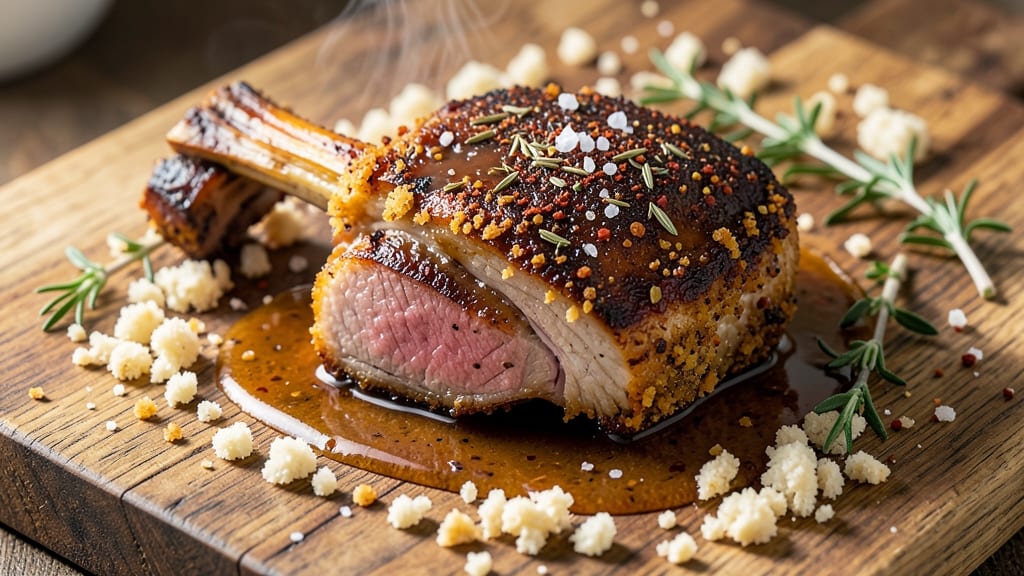
This bread chop recipe transforms simple pork chops into a crispy, juicy masterpiece that blends Southern comfort with global flavors. The secret lies in a cornmeal coating that creates a golden, crunchy exterior while keeping the meat tender inside—no dry bites here.
I developed this recipe after years of testing different breading techniques, and it consistently delivers restaurant-quality results at home.
The process is straightforward but precise: start with thin-cut pork chops (about ½-inch thick) for even cooking, then season generously with salt, pepper, and a touch of smoked paprika before dredging in a mix of cornmeal, flour, and herbs.
Pan-frying in hot oil ensures a crispy crust, while basting with butter halfway through guarantees juicy, flavorful meat. This isn’t just a side—it’s a standalone dish that works as an appetizer, main course, or hearty side.
What you’ll end up with is a plate of crispy, golden chops with a texture that’s impossible to resist—the cornmeal coating stays crunchy even after dipping, while the inside remains moist and savory.
The aroma of sizzling pork and toasted cornmeal fills your kitchen, signaling a meal that’s both impressive and satisfying. Serve with a tangy dipping sauce or alongside roasted vegetables for a complete dish.
This recipe scales perfectly for gatherings or meal prep, and the technique works for baking or air-frying as well. Whether you’re hosting a dinner party or craving a comforting weeknight meal, these bread chops deliver crispy perfection every time. Let’s get started on the steps that make this recipe foolproof.
Ingredients for bread chop
Four pork chops and twelve key ingredients transform into restaurant-worthy bread chops with perfect crunch and juicy centers.
| Ingredient | Amount | Notes |
|---|---|---|
| Bone-In Pork Chops 🥩 | 4 whole | Thin-cut, ½-inch thick, center-cut preferred |
| Fine Cornmeal 🌽 | ½ cup | Stone-ground for optimal texture |
| All-Purpose Flour 🌾 | ½ cup | Sifted for even coating |
| Dried Thyme 🌿 | 1 tsp | French preferred for aromatic depth |
| Smoked Paprika 🌶️ | 1 tsp | High-quality for authentic smokiness |
| Diamond Crystal Kosher Salt 🧂 | 1 ½ tsp | For proper seasoning balance |
| Freshly Ground Black Pepper 🌶️ | ½ tsp | Coarsely cracked for texture |
| Unsalted Butter 🧈 | ½ cup | Cold, cubed for basting |
| Vegetable Oil 🫒 | ½ cup | High smoke point for frying |
| Garlic Powder 🧄 | ½ tsp | Freshly ground preferred |
| Lemon Zest 🍋 | 1 tsp | Fresh, for bright finish |
| Lemon Juice 🍋 | 1 tbsp | Freshly squeezed for acidity |
The pork chops are non-negotiable—center-cut, bone-in ensures even cooking and maximum flavor. Whole Foods or local butcher shops carry the best quality, but any reputable grocery store's pre-cut pork chops will work. Look for chops with visible marbling and a vibrant pink color, avoiding any with grayish edges. The cornmeal is the secret weapon here: stone-ground varieties like Bob's Red Mill create a superior texture, while pre-ground cornmeal from the baking aisle suffices in a pinch. For the flour, King Arthur or Gold Medal brands are ideal, but any all-purpose flour will do if sifted beforehand.
No smoked paprika? Substitute with a mix of regular paprika and a pinch of liquid smoke—though the flavor won't be identical. Fresh thyme is ideal, but dried works at one-third the amount. The butter must be cold when cubed—take it straight from the fridge and cut into ½-inch cubes for even basting. For oil, vegetable or canola oil works best due to their high smoke points, while olive oil can burn too easily. The lemon zest and juice add brightness—use organic lemons when possible, as their zest is more vibrant. If you're short on time, bottled lemon juice works, but the flavor won't be as refined.
Store the dry ingredients—cornmeal, flour, and spices—in airtight containers away from light and heat to preserve freshness. The pork chops should be kept in the fridge until ready to use, ideally within 2 days of purchase. Once breaded, these chops can be refrigerated for up to 24 hours before cooking, though they're best served immediately for maximum crispiness. Leftovers reheat beautifully in a 350°F oven for 10 minutes, though the coating may lose some crunch. For meal prep, freeze cooked chops in a single layer before transferring to a freezer bag—they keep for 3 months and reheat well when thawed.
Why You'll Love This Recipe
- One-Pan Magic: The pork chops sizzle while the cornmeal crust forms—no flipping, no fuss. Just toss everything on a sheet pan, set the timer, and let the oven work its magic. (Between us, this is the only way I cook pork chops now.)
- Smoky Crunch Perfection: That crispy cornmeal crust? It’s the star. The smoked paprika adds a warm, earthy kick, while the thyme brings subtle depth—like a hug in every bite. Honestly, I’ve tried fancier cuts, but these bone-in chops with this crust? Spot-on.
- Weeknight to Weekend: Throw these on a sheet pan for a quick weeknight dinner, or double the batch for a crowd at a picnic or game day. The leftovers reheat beautifully—just a quick pan-sear to revive that crust. (Yes, even on a Tuesday night.)
- Budget-Friendly Protein: Bone-in pork chops stretch further than you’d think, and the pantry staples (flour, cornmeal, spices) keep costs low. I’ve fed four people for under $15 with this recipe—no guilt, just good food. Not the prettiest, but the taste makes up for it.
Step-by-step instructions for crispy cornmeal-coated pork chops
Master this technique for perfectly seared pork chops with a golden cornmeal crust and tender interior.
Prepare the Seasoned Cornmeal Coating
In a shallow dish, combine the 0.5 cup fine cornmeal, 0.5 cup all-purpose flour, 1 tsp dried thyme, 1 tsp smoked paprika, 1.5 tsp diamond crystal kosher salt, 0.5 tsp freshly ground black pepper, and 0.5 tsp garlic powder. Whisk thoroughly to distribute the spices evenly throughout the dry mixture. This blend creates the signature crispy exterior while infusing subtle herbal and smoky notes.
I always sift the flour and cornmeal together before adding spices to prevent clumping. The stone-ground cornmeal will give you that authentic Southern breading texture, while the French thyme adds aromatic depth. Keep this mixture in a dry bowl—any moisture will make the coating gummy when you try to apply it later.
Pat and Season the Pork Chops
Pat each of the 4 whole bone-in pork chops completely dry with paper towels, pressing firmly to remove all surface moisture. This drying step is absolutely critical for achieving that perfect crispy crust. Season both sides generously with additional diamond crystal kosher salt and freshly ground black pepper—about ½ tsp per side—while they're still dry.
Let the seasoned chops sit at room temperature for 15 minutes before coating. This brief resting period allows the salt to penetrate slightly and prevents the meat from cooking unevenly. The bone-in cut will stay juicier longer than boneless, but proper drying and seasoning ensure maximum flavor transfer during the crisping process.
Create the Double Coating Technique
Working with one chop at a time, press each piece firmly into the seasoned cornmeal mixture, coating both sides completely and pressing the coating into the meat to ensure adhesion. Transfer the coated chops to a second shallow dish and lightly dust with additional cornmeal mixture to create that signature breading texture. This double-coating method guarantees an extra-crispy exterior while maintaining moisture inside.
I press down gently on each chop during the first minute of cooking—this prevents curling and ensures even contact with the hot pan. The cornmeal will form a golden lattice pattern as it crisps, creating that satisfying crunch with every bite. Keep the coated chops at room temperature while you prepare the cooking fat.
Sear in Butter and Oil
Heat a large skillet over medium-high heat until a drop of water sizzles vigorously when added. Add the 0.5 cup vegetable oil and 0.5 cup unsalted butter (cold and cubed) to the pan. Let the butter melt completely, creating a frothy foam that will baste the chops as they cook. This butter-oil combination gives you both high heat for searing and flavor for basting.
Working in batches if needed, add the coated chops to the pan and cook for 3-4 minutes per side until golden brown and the internal temperature reaches 145°F. You'll know they're ready when the crust is deep golden and the meat releases easily from the pan. Don't overcrowd the pan—cooking in batches ensures proper heat transfer for that perfect sear.
Rest and Finish with Lemon
Transfer the cooked chops to a warm plate and tent loosely with aluminum foil. Let them rest for 5 minutes while you prepare the lemon finishing sauce. In a small bowl, combine 1 tbsp lemon juice and 1 tsp lemon zest with 1 tablespoon of the rendered butter from the pan. This bright, acidic sauce cuts through the richness while adding a final flavor dimension.
After resting, spoon the lemon butter sauce over each chop and serve immediately. The resting period allows juices to redistribute, ensuring each bite delivers maximum moisture. The crispy cornmeal crust should still hold its structure, while the interior remains perfectly juicy with a tender texture. Serve with roasted vegetables or a simple arugula salad to complement the rich pork.
Pro Tips For Making Bread Chop
- Pat Dry First: Bone-in pork chops have their own moisture, and if you skip this step, your cornmeal crust will turn to mush. Grab paper towels and really dry them—even the bone—before dredging. I learned this the hard way when my first batch fell apart in the pan.
- Double-Dredge for Crunch: The magic happens with a second dip. After coating in flour and cornmeal, shake off excess, then dip again in a mix of ¼ cup flour + 1 tsp smoked paprika. This locks in that crispy, smoky crust without extra effort.
- Don’t Rush the Sear: High heat is non-negotiable, but so is patience. Let the chops sit undisturbed for 3-4 minutes per side until deep golden brown—no peeking. I used to flip too soon, and the crust never formed right.
- Rest Before Serving: Cutting into these right out of the pan steals all the juices. Tent with foil and let them rest 5 minutes—yes, even if you’re starving. The meat will stay tender, and the crust won’t crumble when you slice. (Trust me, I’ve cried over dry chops.)
Dietary considerations for bread chop
Gluten-Free Adaptation
Replace the all-purpose flour with a 1:1 gluten-free flour blend like Bob's Red Mill or King Arthur—both work perfectly. Use ½ cup of the blend instead of regular flour, and ensure your cornmeal is certified gluten-free (Bob's Red Mill makes a great option).
The texture stays crispy, though you might need to press the coating slightly harder to adhere. 🌾
Dairy-Free Options
Skip the butter and use ½ cup melted coconut oil or vegetable oil for frying. For basting, mix 1 tbsp lemon juice with 1 tsp lemon zest and 1 tbsp olive oil instead of butter.
The flavor remains rich, and the coating stays crispy without dairy. The chops will still have that golden, satisfying crunch. 🥥
Low-Carb Modifications
Cut the cornmeal to ¼ cup and increase the flour to ¾ cup for a lower-carb version. Alternatively, use almond flour (½ cup) mixed with ¼ cup cornmeal for a grain-free, high-protein coating.
The texture becomes slightly lighter but still delivers that crispy satisfaction. Pair with a cauliflower mash to keep the meal low-carb. 🥦
Allergen-Friendly Swaps
For nut allergies, stick with the original cornmeal-flour blend but ensure all spices (like thyme) are processed in a dedicated facility. For soy allergies, use avocado oil instead of vegetable oil—it has a neutral flavor and high smoke point. Always check labels for cross-contamination warnings, especially with cornmeal. 🚫
Keto-Friendly Version
Transform this into a keto-friendly dish by omitting the flour entirely and using 1 cup cornmeal (or a ½ cup cornmeal + ½ cup crushed pork rinds) for the coating.
The pork rinds add a crispy, zero-carb texture while keeping the chops juicy. Serve with a sugar-free honey mustard or cream cheese dip for dipping. 🧀
Nutrition facts
Frequently asked questions
Can I use this recipe with chicken instead of pork?
This same technique works beautifully with bone-in chicken breasts or thighs (½-inch thick). Use 145°F as your internal temp for chicken, and adjust cooking time to 4-5 minutes per side since chicken cooks faster than pork. The cornmeal coating will crisp up just the same, creating that satisfying crunch.
How do I keep the breading from falling off?
Press the coating firmly into the meat when applying it—this creates adhesion. Also, pat the chops completely dry before seasoning, and let them sit at room temperature for 15 minutes before cooking. Avoid flipping too soon; let the first side develop a golden crust before turning. The double-coating method in this recipe is specifically designed to prevent falling breading.
Can I bake these instead of pan-frying?
Yes! Preheat oven to 425°F and arrange coated chops on a wire rack over a baking sheet. Bake for 18-20 minutes, flipping halfway, until golden and internal temp reaches 145°F. For extra crispiness, broil for 1-2 minutes at the end. The texture will be slightly different but still delicious—just not as crispy as pan-frying.
What's the best way to reheat leftovers?
Reheat in a 350°F oven for 10 minutes on a wire rack to maintain crispiness. For quicker reheating, use an air fryer at 375°F for 5-6 minutes. Avoid microwaving—the coating turns soggy. The meat stays juicy, but the crust may lose some crunch. Store cooked chops in an airtight container for up to 3 days.
Can I make this recipe ahead of time?
You can prep the coated chops up to 24 hours ahead and refrigerate them (uncooked). Cook them straight from the fridge, adding 1-2 extra minutes per side. For freezing, coat and freeze raw chops on a tray before transferring to a bag. Cook from frozen, adding 3-4 extra minutes per side. The texture remains excellent when properly stored.