
Side Dishes
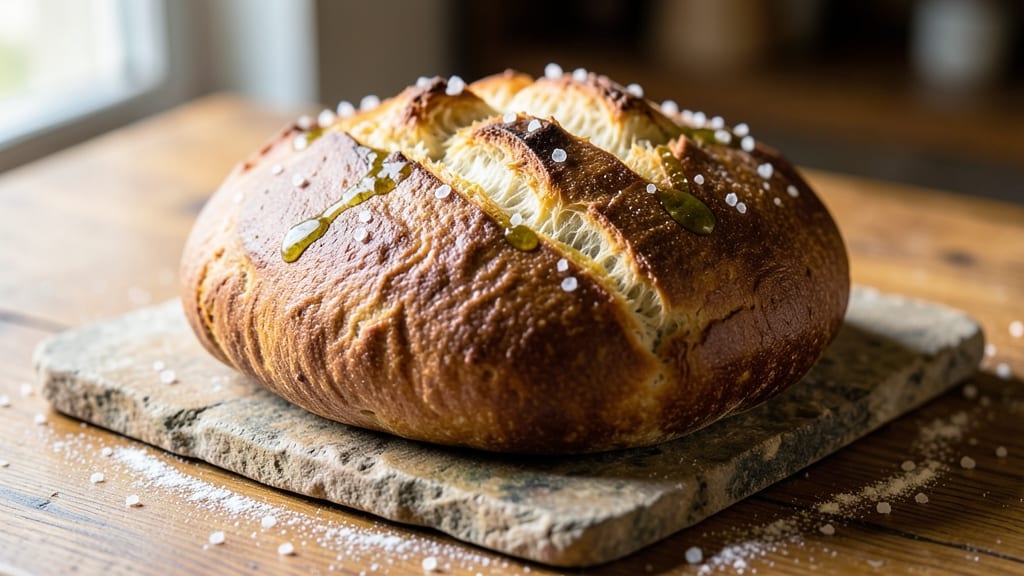
This authentic Turkish bread recipe brings the warm, chewy goodness of street-side simit and pide straight to your kitchen. The secret lies in a simple yet precise dough—just flour, yeast, water, and salt—that transforms into layers of crispy crust and pillowy interior when baked properly.
I’ve perfected this method after years of testing, ensuring every bite delivers that satisfying contrast. 🌟
What sets this recipe apart is the attention to detail in shaping and baking. Whether you’re using a home oven or a traditional tandır, the dough’s elasticity and high heat create that signature crackly crust while keeping the inside tender.
The dough rests overnight for deeper flavor, a technique that makes all the difference. This is the kind of bread that pairs perfectly with meals, melts into sandwiches, or becomes a snack on its own.
The result is a loaf with a golden, crisp exterior and a soft, chewy center—just like the bread you’d find in Istanbul’s bustling markets. The dough’s simplicity hides its complexity, making it approachable for beginners while delivering professional results.
With just a few ingredients and the right technique, you’ll have bread that tastes like it came from a bakery halfway across the world.
Once you master this recipe, you can experiment with variations like sesame seeds, garlic, or even herbs to customize it to your taste. The possibilities are endless, but the foundation remains the same: a perfectly balanced dough and the confidence to shape and bake it like a pro.
Let’s get started on creating your own authentic Turkish bread.
Ingredients for authentic turkish bread
Four cups flour, a touch of yeast, and warm water—this is all you need for authentic Turkish bread.
| Ingredient | Amount | Notes |
|---|---|---|
| All-Purpose Flour 🌾 | 4 cups | Unbleached, high protein preferred |
| Active Dry Yeast 🍞 | ¼ oz | Fresh yeast works too |
| Granulated Sugar 🍚 | 1 tbsp | Helps yeast activate faster |
| Diamond Crystal Kosher Salt 🧂 | 1 ½ tsp | Adjust to taste after kneading |
| Warm Water 💧 | 1 ¼ cups | 105-110°F for ideal yeast activation |
| Extra-Virgin Olive Oil 🫒 | 1 tbsp | For dough elasticity |
| Sesame Seeds 🌻 | ¼ cup | Toasted for extra crunch |
| Large Eggs 🥚 | 1 whole | Optional for egg wash |
| Garlic Cloves 🧄 | 2 cloves | Minced for optional garlic bread |
The flour is non-negotiable. King Arthur or Gold Medal are my go-tos—they give that perfect chew. If you're in Turkey, ask for 'un' flour (type 550), but here, all-purpose works. The yeast? Fresh is best—it activates faster—but active dry works if you let it sit in warm water with sugar for 10 minutes first. That sugar? It's not just for flavor—it kickstarts the yeast so your dough rises faster. No sugar? A pinch of honey works too. The olive oil might seem small, but it's what gives the dough that signature elasticity. Trader Joe's has a great affordable bottle if you're stocking up.
No sesame seeds? Poppy seeds or everything bagel seasoning work just as well. Skipping the egg wash? Brush with melted butter instead—it adds richness. Want extra flavor? Mix in 1 tsp dried rosemary or thyme with the salt before kneading. The garlic is optional but worth it if you're making a garlic bread version. Freshly minced makes all the difference, but jarred works in a pinch. If your dough feels too sticky after kneading, add 1 tbsp more flour. Too dry? A splash of warm water. The key is balance—your dough should be soft but not wet.
This dough needs time—overnight in the fridge is ideal. It develops deeper flavor and makes shaping easier. Store it in an airtight container, and it'll keep for up to 48 hours. For the sesame seeds, toast them in a dry pan for 2-3 minutes until golden—don't walk away, or they'll burn. The baked bread stays fresh for 2 days at room temperature, wrapped in a clean towel. Freeze any extras for up to 3 months—just thaw at room temp before serving. Pro tip: Spritz with water before baking for that golden crust.
Why You'll Love This Recipe
- Five-Ingredient Magic: I swear, this is the kind of recipe where you measure, mix, and forget about it. Just flour, yeast, sugar, salt, and water—no fancy pantry trips or last-minute store runs. The dough comes together faster than you can say "simit," and honestly? That’s half the battle won.
- Crispy-Chewy Bliss: That golden crust with a pillowy center? It’s the kind of texture that makes you slow down and savor every bite. The yeast does all the heavy lifting while you’re off doing other things, and the salt-sugar balance keeps it from being too sweet or bland. (Yes, even my picky husband asks for seconds.)
- Breakfast to Dinner: I keep a batch in the fridge all week—warm it up for breakfast with jam, toss it in a sandwich for lunch, or serve it with dinner like a fancy side. It’s the ultimate blank canvas. My kids even ask for it plain, which, between us, is the highest praise.
- Budget-Friendly Staple: A single batch costs less than takeout coffee and stretches farther than store-bought bread. Freeze the extras, and you’ve got instant toast, garlic bread, or even breadcrumbs for future meals. I’ll be real: this is how I feed a family on a tight budget without sacrificing taste.
Step-by-step instructions for authentic Turkish bread
Here's how to craft that signature Turkish bread with its signature chewy layers and golden crust.
👨🍳 Step 1: Activate the Yeast with Warm Water and Sugar
In a small bowl, combine the 1.25 cups warm water (105-110°F), 1 tbsp granulated sugar, and 0.25 oz active dry yeast. Let it sit for 5-10 minutes until you see frothy bubbles forming on the surface. This tells me the yeast is alive and ready to work its magic.
Here's the thing—if your water isn't warm enough, the yeast won't activate properly. Too hot, and you'll kill it. The bubbles should be vigorous but not overflowing. If it doesn't bubble after 10 minutes, your yeast might be dead or your water too hot. Start fresh with new yeast and slightly cooler water.
👨🍳 Step 2: Mix the Dough with Flour, Salt, and Olive Oil
In a large bowl, whisk together the 4 cups all-purpose flour and 1.5 tsp diamond crystal kosher salt. Create a well in the center and pour in the yeast mixture along with the 1 tbsp extra-virgin olive oil. Using a wooden spoon or dough whisk, gradually incorporate the flour from the edges into the wet ingredients.
Once it starts coming together, switch to your hands and knead for 8-10 minutes until the dough becomes smooth and elastic. You'll know it's ready when it springs back slowly when poked. I like to work it on a lightly floured surface, adding just enough flour to prevent sticking but not so much that the dough becomes dry.
⏰ Step 3: First Rise for Maximum Flavor Development
Lightly oil a large bowl, place the dough inside, and cover it with a damp kitchen towel or plastic wrap. Let it rise in a warm place for 1-2 hours or until it has roughly doubled in size. The dough should feel light and airy when pressed gently with one finger—it should leave a slight indentation but not collapse completely.
This first rise is crucial for developing those signature chewy layers. I like to place my dough bowl on top of my turned-off oven with the light on (it creates a warm, moist environment) or near a sunny window. Don't rush this step—proper fermentation creates the authentic texture and flavor of Turkish bread.
🔪 Step 4: Shape and Second Rise for Perfect Structure
Punch down the risen dough to release any air bubbles, then divide it into 4 equal portions (about 1 cup each). On a lightly floured surface, roll each portion into a 12-inch long oval shape, about ½-inch thick. This is where the magic happens—Turkish bread gets its signature layered look from these long ovals.
Place the shaped dough on a parchment-lined baking sheet, cover with a towel, and let rise for another 30-45 minutes until puffy. The edges should pull away slightly from the center, and the dough should feel light when pressed. This second rise gives the bread its signature airy interior while maintaining that chewy texture.
🔥 Step 5: Bake with Egg Wash for Golden Crust
Preheat your oven to 425°F. In a small bowl, beat the 1 whole large egg and brush it lightly over each loaf of dough. Sprinkle the 0.25 cup sesame seeds evenly over the top, pressing them gently into the dough. For extra flavor, minced 2 garlic cloves into the egg wash before brushing.
Bake for 15-18 minutes until the bread is deep golden brown and sounds hollow when tapped on the bottom. The crust should be crisp while the interior remains soft and chewy. If you're making garlic bread, bake the garlic-infused loaves separately. Let the bread cool on a wire rack for 5 minutes before serving—this prevents the bottom from getting soggy.
Pro Tips For Making Authentic Turkish Bread
- Use Lukewarm Water: Yeast hates extremes, and warm water isn’t just "warm"—it’s lukewarm, like bathwater you’d tolerate for 30 seconds. Test it by dipping your elbow in: if it feels cool, heat it up. Too hot? Wait 5 minutes. I learned this the hard way when my dough took three hours to rise because the yeast was basically in a sauna.
- Salt the Dough Early: Don’t wait until the end—mix in the kosher salt with the flour at the start. It dissolves evenly, so every bite gets that clean, balanced flavor. Skipping this step means your bread tastes like it’s hiding something, and we’re not playing games here.
- Shape Tightly, Rest Long: Roll the dough into a ball so tight it looks like it could bounce. Then, let it rest covered for 30 minutes before baking—this relaxes the gluten and gives you that perfect, even rise. I used to skip the rest, and my bread always ended up lopsided. (Yes, even if you’re impatient like me.)
- Preheat Stone and Oven: Slap that baking stone in the oven 45 minutes before baking—no shortcuts. The oven and stone need to hit 450°F (230°C) together, or your bread will steam instead of blister. I tried the "just throw it in" method once. My bread came out dense and sad. Don’t repeat my mistake.
Creative variations of this dish
Sesame vs. Garlic
Classic Turkish bread gets its iconic crunch from ¼ cup toasted sesame seeds pressed into the dough. I toast mine in a dry skillet for 2-3 minutes until golden—just enough to enhance their nutty flavor.
For a savory twist, replace sesame with everything bagel seasoning or crushed black pepper and onion flakes. 🌻
For garlic lovers, mix 2 minced garlic cloves into the egg wash before brushing. The aroma infuses the crust beautifully, creating a fragrant garlic bread variation. I like to bake these separately at 400°F for 12 minutes to intensify the garlic flavor without overcooking.
Herb-Infused Twist
Add 1 tsp dried rosemary or thyme to the dough during kneading for an aromatic herb version. These Mediterranean herbs complement the bread’s natural flavors without overpowering them. Fresh herbs like parsley or dill work too—just chop finely and fold in at the end of kneading.
For a brighter profile, mix 1 tbsp lemon zest with the salt before kneading. The citrus notes pair wonderfully with the sesame or garlic, adding a refreshing contrast to the bread’s richness. 💫
Sweet Variations
Create a sweet version by adding 2 tbsp honey or maple syrup to the dough along with the yeast mixture. This works beautifully with sesame seeds for a breakfast-friendly option. I often brush the baked loaves with extra honey after baking for a sticky, caramelized finish.
For a cinnamon-raisin twist, fold 2 tbsp raisins and ½ tsp cinnamon into the dough. This variation tastes amazing toasted with butter and jam, perfect for breakfast or dessert. The cinnamon adds warmth while the raisins provide chewy texture.
Spiced & Savory
For a Middle Eastern-inspired version, mix ½ tsp ground cumin and ¼ tsp smoked paprika with the salt. These warm spices add depth that pairs perfectly with grilled meats or hummus. I like to sprinkle crushed sumac on top before baking for a tangy finish.
Add 1 tsp za’atar seasoning to the dough for a Lebanese-inspired variation. Za’atar’s mix of thyme, sesame, and sumac creates a complex flavor that works beautifully with both savory and sweet toppings. This version is perfect for dipping in olive oil or yogurt sauces.
Nutrition facts
Frequently asked questions
Can I make this Turkish bread without a stand mixer?
This recipe is designed for hand-kneading. After mixing the ingredients, simply use your hands to knead the dough on a lightly floured surface for 8-10 minutes until it becomes smooth and elastic. The key is to be patient and work the dough vigorously—this builds the gluten that gives Turkish bread its signature chewy texture.
Why does my dough smell yeasty but isn't rising?
This usually means your yeast is dead or your water was too hot. Always use water between 105-110°F—it should feel warm but not hot to the touch. If your dough isn't rising after 1 hour, try activating fresh yeast in warm water with sugar for 5-10 minutes to check if it bubbles vigorously. If not, replace the yeast entirely.
How do I store leftover Turkish bread?
Wrap cooled bread tightly in a clean kitchen towel or beeswax wrap to keep it fresh for 2 days at room temperature. For longer storage, freeze slices in a ziplock bag for up to 3 months. To revive, toast in a 350°F oven for 5 minutes—the heat brings back that crispy crust.
Can I use whole wheat flour instead of all-purpose?
You can try, but expect a denser texture. Whole wheat absorbs more moisture, so add 2 tbsp extra flour and 1-2 tbsp more water to the dough. For best results, use a 50/50 blend of all-purpose and whole wheat. The chewy layers may not be as pronounced, but it's still delicious with a nuttier flavor.
What's the best way to reheat stale Turkish bread?
For crispy crust and soft interior, wrap the bread in foil and warm at 350°F for 8-10 minutes. For extra crunch, finish with 1-2 minutes uncovered. Alternatively, toast slices in a dry skillet over medium heat for 2 minutes per side—this recreates that bakery-fresh texture.