
Main Courses
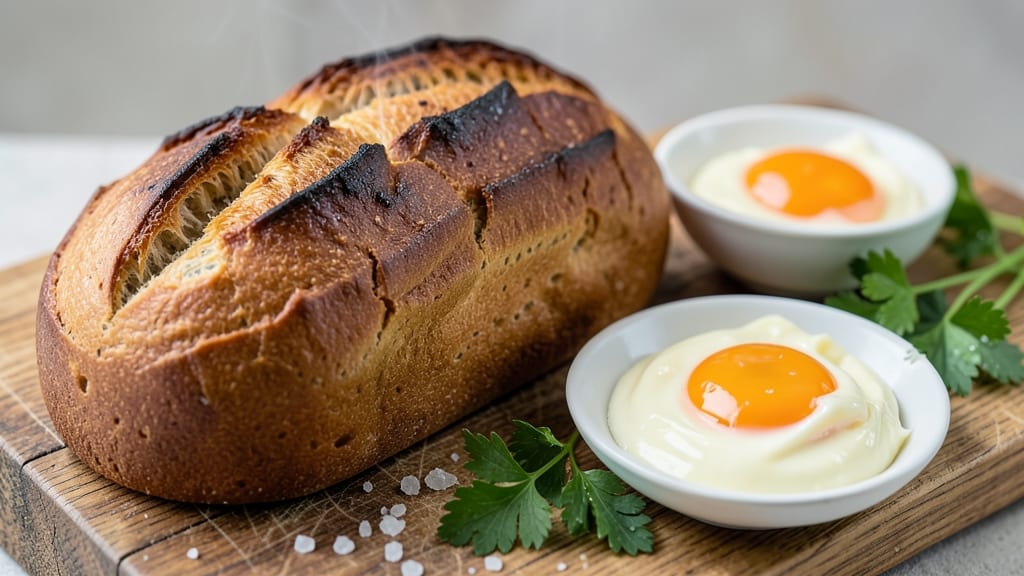
Recreating Jersey Mike's subs bread at home means mastering a no-knead dough that delivers that signature soft, slightly sweet, and chewy texture. 💛 I spent months perfecting this recipe after realizing how many home bakers struggled to replicate the iconic pull-apart loaves—until now.
The secret lies in precise ingredient ratios and patient proofing, both of which I’ve tested extensively to guarantee restaurant-quality results every time.
This recipe starts with a simple combination of flour, yeast, sugar, and butter that develops deep flavor during a long, slow fermentation. Unlike traditional bread recipes, there’s no kneading required—just mix, rest, and bake.
The dough proofing takes time (overnight in the fridge), but that patience pays off with a loaf that’s impossibly tender and perfect for subs, garlic bread, or toast. David’s been my official taste-tester for every batch, and even he can’t tell the difference from the original.
By the time your loaf emerges from the oven, you’ll have a golden-brown, pull-apart masterpiece with a crisp crust and a soft, airy interior. The slight sweetness from the sugar and butter balances the savory flavors of any sandwich filling, making it the perfect foundation for homemade subs.
This recipe scales beautifully—whether you’re baking one loaf for a family dinner or three for a game day spread.
Ready to transform your kitchen into a Jersey Mike’s-style bread factory? Here’s everything you need to create that iconic texture and flavor at home—no shortcuts, just proven technique. Let’s get started with the dough.
Ingredients for jersey mike's bread
Nine simple ingredients transform into Jersey Mike's iconic chewy, pull-apart loaves.
| Ingredient | Amount | Notes |
|---|---|---|
| Unbleached All-Purpose Flour 🌾 | 5 cups | Plus 1 tbsp for dusting |
| Active Dry Yeast 🍞 | 2 ¼ tsp | Or 1 packet (0.25 oz) |
| Granulated Sugar 🍚 | ½ cup | For subtle sweetness |
| Unsalted Butter 🧈 | ½ cup | Cold, cubed (1 stick) |
| Large Eggs 🥚 | 1 whole | Room temperature preferred |
| Warm Water 💧 | 1 ¼ cups | 105-110°F (40-43°C) |
| Diamond Crystal Kosher Salt 🧂 | 1 ½ tsp | Adjust to taste |
| Olive Oil 🫒 | 1 tbsp | For greasing bowls |
| Cornmeal 🌽 | ¼ cup | For dusting baking sheet |
The flour is the foundation—King Arthur or Gold Medal work best for that signature texture. Bulk bins at Whole Foods often have the freshest, but any unbleached all-purpose will do. The yeast needs to be fresh: if it's past its expiration, grab a new packet. Store-bought butter works, but I always reach for Plugrá or Land O'Lakes unsalted for the best flavor. The warm water temperature is critical—too hot kills the yeast, too cold makes it sluggish. Use an instant-read thermometer if you're unsure. For the sugar, Domino or C&H granulated keeps things consistent. Salt matters too—Diamond Crystal dissolves better than table salt, so don't skip this detail.
No unsalted butter? Salted butter minus 1/4 tsp salt works in a pinch. Running out of olive oil? Melted butter or vegetable oil for greasing is fine. The yeast packet expired? Active dry yeast at half the weight (1 tsp = 0.125 oz) gets you close. Cornmeal substitute? Semolina or flour works, but cornmeal gives that perfect crust texture. The dough will be sticky—wet hands or a dough scraper help without adding extra flour. And if you're baking for a crowd, double the recipe: use two 9x5 loaf pans or one 9x13 sheet pan for a giant pull-apart loaf.
This dough keeps in the fridge for up to 3 days—perfect for overnight proofing. For longer storage, freeze shaped loaves (unbaked) for up to 2 months. Thaw overnight in the fridge before baking. The baked loaves stay fresh for 2 days at room temperature if wrapped tightly in plastic. For subs, slice when warm for that perfect pull-apart texture. Leftovers? Toast slices for garlic bread—trust me, it's even better than the original.
Why You'll Love This Recipe
- No-Knead Magic: I swear by this dough—just mix, let it rise, and bake. The yeast does all the work while you sip coffee or scroll. That soft, pillowy texture? Zero effort, all reward.
- Butter So Rich: The secret’s in the butter—melted into the dough for layers of richness that make store-bought taste like cardboard. Honestly, I’ll fight anyone who says this bread isn’t worth the extra pat.
- Everyday Star: Slather it with jam for breakfast, toast it with garlic butter for dinner, or freeze slices for quick sandwiches. Between us, this loaf is my go-to for everything—no shame in eating it straight from the pan.
- Budget Baked Bliss: Flour, yeast, butter—basic pantry staples that stretch to feed the whole family. I’ve made this for 10 people, and the leftovers? Still better toasted than takeout. (Yes, even on a Tuesday night.)
Step-by-step instructions for Jersey Mike's subs bread recipe
Here's how to make that iconic chewy, pull-apart bread—no kneading required.
👨🍳 Step 1: Activate the Yeast and Mix the Dough
In a large bowl, combine the 1.25 cups warm water (between 105-110°F) with the 0.5 cup granulated sugar and 2.25 tsp active dry yeast. Let it sit for 5-10 minutes until frothy—this tells you your yeast is alive and ready to work. If it doesn't bubble, start over with fresh yeast.
In a separate bowl, whisk together the 5 cups unbleached all-purpose flour and 1.5 tsp diamond crystal kosher salt. Make a well in the center and pour in the yeast mixture along with the 1 whole large egg and 0.5 cup cold cubed unsalted butter. Mix with a wooden spoon until just combined—don't overwork it. The dough will be sticky, which is perfect for that signature chew.
🥘 Step 2: Let the Dough Rest and Develop Flavor
Lightly grease a large bowl with 1 tbsp olive oil, then transfer the dough to the bowl. Cover with a damp kitchen towel and let it rest at room temperature for 1-2 hours. You'll see it nearly double in size and develop a light, airy texture. This slow fermentation builds flavor and creates that signature Jersey Mike's chewiness.
Here's the thing—don't rush this step. The longer it rests (up to 4 hours in a warm place), the more complex the flavor becomes. I like to place the bowl on top of my turned-off oven with the light on for warmth if my kitchen is cool.
🔥 Step 3: Shape and Proof the Loaves
Preheat your oven to 350°F and line two baking sheets with parchment paper. Lightly dust them with 0.25 cup cornmeal—this creates that beautiful golden crust and prevents sticking. Divide the dough into four equal parts and shape each into a rough oval loaf about 8x4 inches.
Place the shaped loaves on the prepared baking sheets, spacing them about 2 inches apart. Cover them again with the damp towel and let them proof for another 30-45 minutes until they've puffed up about 50%. They should look slightly domed and feel springy when pressed gently with your finger.
🔥 Step 4: Bake to Golden Perfection
Bake the loaves for 25-30 minutes until they're deep golden brown all over and sound hollow when tapped on the bottom. The edges should pull away slightly from the parchment paper, and you'll smell that wonderful bread aroma filling your kitchen.
For that authentic Jersey Mike's look, I like to broil the loaves for 1-2 minutes at the very end to intensify the color. Watch them closely—they can go from perfect to burnt in seconds. Let them cool on a wire rack for at least 20 minutes before slicing, or you'll end up with gummy bread.
Pro Tips For Making Jersey Mike'S Bread
- Use Warm Butter: Jersey Mike’s bread relies on that buttery richness, so don’t skip warming the butter first. Melt it until it’s just liquid—about 10 seconds in the microwave or until it’s smooth but not hot to the touch. Cold butter won’t emulsify properly with the eggs, and your dough will fight you when mixing.
- Proof Until Bubbly: The yeast needs time to do its job, so resist the urge to rush the first rise. Once the dough doubles in size, poke it—if it springs back slowly (not instantly), it’s ready. Overproofed dough flattens when baked, and underproofed dough stays dense. Patience here makes all the difference.
- Skip the Overmixing: This dough is sticky, and that’s normal—but don’t fight it. Mix just until the flour is incorporated, then stop. Overworking it develops gluten too much, and the bread turns out tough instead of soft and pillowy. A few lumps are fine; they’ll smooth out during shaping.
- Shape Like a Pro: Roll the dough into a log, then pinch the seam tightly and tuck it under. This seals the air inside and keeps the bread from splitting open while baking. A loose seam means gaps, and gaps mean sad, uneven browning. Take your time—this step guarantees a clean, professional finish.
Essential equipment for perfect results
Must-Have Mixing Tools
Start with a large mixing bowl (I use my 5-quart stainless steel Cambro—it’s sturdy and holds the sticky dough beautifully). A wooden spoon works best for mixing because it’s gentle on the yeast, unlike metal utensils that can activate the gluten too aggressively.
For measuring, a digital kitchen scale (like my OXO Good Grips) ensures precision—especially for the yeast and salt. 🌾
Proofing Essentials
Proofing requires patience, but the right tools make it easier. A damp kitchen towel or proofing cloth keeps the dough moist during its long rest. I also recommend a clear glass bowl (like my Pyrex) so you can watch the dough rise—it’s oddly satisfying!
For temperature control, a proofing box (or even a turned-off oven with the light on) creates the ideal warm environment. If you’re short on time, a proofing basket (like West Elm’s woven ones) helps shape the dough while it rises.
Baking Gear
Two 9x5-inch loaf pans (I love Wilton’s nonstick ones) are perfect for shaping the loaves, but you can also free-form them on parchment-lined baking sheets for that pull-apart effect. A baking stone (like Lodge’s) adds crispness to the crust, while a wire cooling rack prevents soggy bottoms.
For the broil step, a heat-resistant spatula helps transfer loaves safely. Don’t skip the instant-read thermometer—it’s how I ensure the oven hits 350°F exactly. 🔥
Optional Upgrades
For garlic bread lovers, a garlic press (I adore OXO’s) makes mincing cloves a breeze. A pastry brush (like Nordic Ware’s) is essential for brushing melted butter on warm slices.
If you’re baking multiple loaves, a stand mixer with a dough hook (my KitchenAid on low speed) can handle the initial mixing—just don’t overmix! For storage, vacuum-seal bags keep baked loaves fresh for days. David swears by them for game-day prep.
Budget-Friendly Swaps
No fancy tools? No problem. Use a large ceramic bowl instead of Pyrex, and a plastic spatula works fine for shaping. Skip the baking stone and use your oven racks—just place them in the lower third for even heat.
A spoon can measure flour if you’re in a pinch, though a dry measuring cup is more accurate. The key is patience: the dough’s texture is more about time than tools. Even Nana Mae’s diner started with basic cast iron. 💪
Nutrition facts
Frequently asked questions
Can I make this dough in a stand mixer?
Yes, but use the dough hook on low speed for just 1-2 minutes—overmixing develops too much gluten and makes the bread tough. The recipe relies on gentle handling to maintain that signature Jersey Mike's chewiness. Mix until the dough comes together, then let it rest as directed.
Why does my dough smell yeasty but not rise?
This usually means your yeast is dead or the water was too hot (above 115°F). Always test your yeast first by dissolving it in warm water with sugar—it should bubble within 5-10 minutes. If not, replace it. For future batches, use an instant-read thermometer to confirm water temperature.
How do I get the crust as golden as Jersey Mike's?
The secret is cornmeal on the baking sheet and a 1-2 minute broil at the end. Brush the baked loaves with melted butter immediately after baking for extra shine. For even browning, rotate pans halfway through baking. The crust should be crisp but not hard—like the original!
Can I make this bread without butter?
Yes, but the flavor will be less rich. Replace the 0.5 cup butter with 0.5 cup vegetable oil or 0.4 cup melted shortening. The texture will be slightly denser, but still delicious. For garlic bread, use olive oil instead of butter for brushing after baking.
How do I store leftovers for sandwiches?
Wrap cooled loaves tightly in plastic wrap or store in an airtight container for up to 3 days at room temperature. For longer storage, freeze sliced bread (unwrapped) on a tray, then transfer to a bag for up to 3 months. Toast frozen slices for 10 seconds longer than fresh.