
Snacks
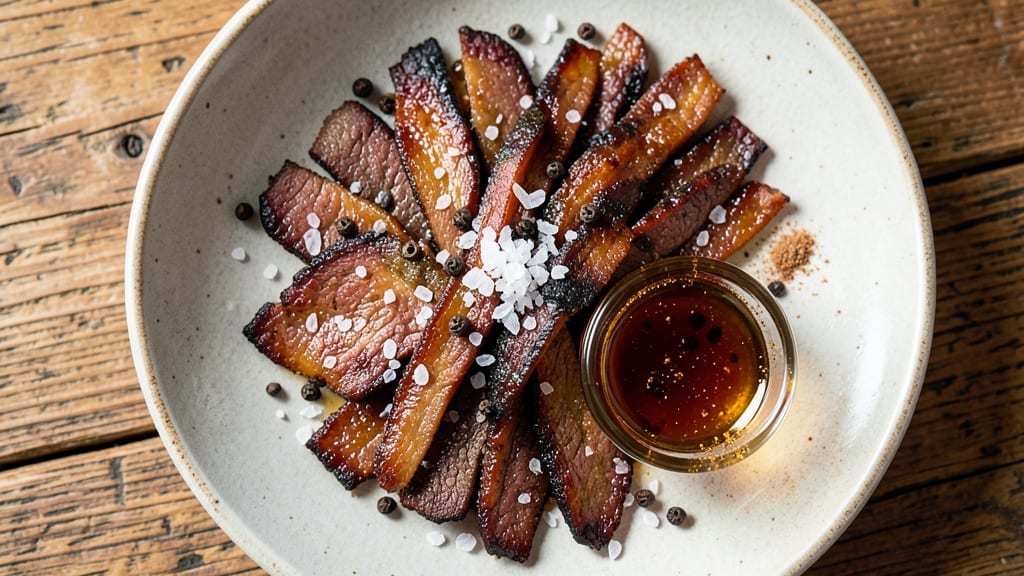
This salt and pepper beef jerky recipe delivers bold, smoky flavor without relying on sugar to mask the meat’s natural taste. After perfecting the balance between coarse kosher salt and freshly cracked black pepper, I’ve created a jerky that’s crispy, protein-packed, and free from the energy crash of sweetened versions.
The key lies in precise curing and dehydration—no shortcuts here.
Professional results start with lean cuts of beef, thinly sliced and cured for 24 hours in a flavorful brine. This ensures even seasoning and maximum tenderness before dehydration. Whether you use a dehydrator, oven, or smokehouse, maintaining 160°F throughout the process guarantees safety while preserving that satisfying crunch.
No special equipment? A well-ventilated oven with a rack works just as well.
What you’ll end up with is jerky that’s intensely savory, with a perfect texture—crispy enough to satisfy snack cravings but still flexible enough to hold its shape. The salt enhances the beef’s natural umami, while the pepper adds a subtle heat that lingers.
This isn’t just jerky; it’s a protein-rich, low-carb snack that keeps you full without the sugar spike.
Customize the marinade time for deeper flavor or adjust the pepper-to-salt ratio to suit your taste. Store in an airtight container for up to two weeks at room temperature, or freeze for longer shelf life. Ready to master this technique? Let’s get started with the full instructions.
Ingredients for salt and pepper beef jerky
Lean beef, bold seasonings, and precise curing create this protein-packed snack without sugar's energy crash.
| Ingredient | Amount | Notes |
|---|---|---|
| Top-Round Roast Beef 🥩 | 2 lb | Lean cut, thinly sliced against grain |
| Diamond Crystal Kosher Salt 🧂 | ½ cup | Coarse grind for even curing |
| Freshly Cracked Black Peppercorns 🌶️ | ¼ cup | Coarsely ground in mortar/pestle |
| Worcestershire Sauce 🍶 | 2 tbsp | For umami depth (optional) |
| Apple Cider Vinegar 🍎 | ¼ cup | Tenderizes and balances flavors |
| Garlic Powder 🧄 | 1 tbsp | Enhances savory profile |
| Smoked Paprika 🌶️ | 1 tsp | Adds subtle smokiness |
| Liquid Smoke 💨 | ½ tsp | For authentic smoky flavor |
| Brown Sugar 🍯 | 1 tbsp | Balances saltiness (optional) |
| Water 💧 | 1 cup | For curing solution |
| Lemon Juice 🍋 | 1 tbsp | Brightens final flavor |
The beef is everything. Top-round roast delivers the perfect lean-to-fat ratio for jerky—too much marbling means greasy results. Grab it pre-sliced at Costco or your butcher's counter for thin, even slices. If buying whole, slice against the grain for maximum tenderness. Diamond Crystal kosher salt is non-negotiable here—it dissolves evenly and doesn't clump like table salt. For the pepper, freshly cracked makes all the difference; pre-ground loses potency fast. I always double-check the cut's thickness—aim for 1/8-inch slices max for even drying.
No Worcestershire? Soy sauce or fish sauce adds umami depth, but reduce to 1 tbsp. Vinegar substitute? Lemon juice works at double the amount, though it'll be slightly less tenderizing. Short on smoked paprika? Regular paprika plus 1/4 tsp liquid smoke mimics that campfire flavor. The brown sugar is purely optional—skip it entirely for a zero-carb version, or use erythritol for sugar-free sweetness. For the curing solution, mix everything in a non-reactive container (glass or food-grade plastic) and let it bloom for 10 minutes before adding the beef. This ensures even flavor distribution.
This jerky keeps 2 weeks at room temperature in an airtight container with parchment between layers to prevent sticking. For longer storage, freeze for up to 6 months—just thaw in the fridge overnight. I portion mine into quart-sized bags with a silica packet to absorb any moisture. Rehydrate by soaking in warm water for 10 minutes if you prefer softer jerky. The flavor actually improves after 48 hours of curing—resist the urge to eat it too soon!
Why You'll Love This Recipe
- No-Fuss Prep: I swear by this—just slice the beef thin, toss it in a bowl, and let the salt and pepper do the magic. No marinating overnight, no fancy equipment, just a bowl and a little patience.
- Umami Bomb: That Worcestershire and apple cider vinegar combo? It’s the secret weapon. The salt cuts through the richness while the vinegar brightens everything up, leaving you with jerky that’s savory, tangy, and ridiculously addictive.
- Snack Attack Ready: Between us, this is my go-to for road trips, lunchboxes, or when I’m craving something salty but don’t want to turn on the oven. It keeps for weeks in the fridge, so I’m always covered—no last-minute grocery runs needed.
- Budget Stretch: Top-round roast is affordable, and a single cut lasts me ages. I make a big batch, portion it out, and suddenly I’ve got a pantry staple that’s cheaper than store-bought jerky and way better. (Yes, even on a Tuesday night.)
Step-by-step instructions for salt and pepper beef jerky recipe
Here's how to transform tough top-round beef into restaurant-quality jerky with bold flavors and perfect texture.
Prepare the Curing Solution
In a medium bowl, combine the 1 cup water, 0.5 cup diamond crystal kosher salt, and 0.25 cup freshly cracked black peppercorns. Stir vigorously for 2 minutes until the salt fully dissolves and the peppercorns release their oils. This creates the base curing brine that will penetrate the beef.
Next, add the 2 tbsp Worcestershire sauce, 0.25 cup apple cider vinegar, 1 tbsp garlic powder, 1 tsp smoked paprika, 0.5 tsp liquid smoke, 1 tbsp brown sugar, and 1 tbsp lemon juice. Mix thoroughly until completely homogeneous. The solution should have a deep amber color and a complex aroma blending smoky, tangy, and savory notes. This mixture will tenderize the meat while infusing it with layers of flavor.
Cure the Beef for Optimal Tenderization
Place the 2 lb top-round roast beef in a large resealable plastic bag and pour the curing solution over it. Using your hands, massage the solution into the beef, working it into all surfaces and crevices. Seal the bag and place it in the refrigerator for 12-24 hours. This curing time is crucial - it breaks down muscle fibers for perfect texture while allowing the seasoning to penetrate deeply.
After curing, remove the beef from the bag and rinse it thoroughly under cold water to remove excess salt. Pat dry completely with paper towels, pressing firmly to eliminate all moisture. Any remaining liquid will prevent proper dehydration during the drying process, which could lead to spoilage. The beef should now have a uniform coating of seasoning and appear slightly glossy from the curing process.
Slice Thinly Against the Grain
Using a sharp boning knife, slice the beef as thinly as possible - ideally between 1/8-inch to 1/16-inch thickness. Always cut against the grain to ensure the jerky remains tender rather than chewy. For best results, work in stages, keeping the sliced beef refrigerated between cuts to maintain freshness. The thinner the slices, the faster and more evenly they'll dry, but they must remain intact during the process.
Arrange the sliced beef on a clean kitchen towel and pat any remaining moisture from the surface. This final drying step is essential for preventing mold growth during storage. The slices should now have a uniform thickness and visible seasoning crystals on the surface. At this stage, the beef should be pale pink with no visible redness, indicating proper curing.
Dry the Jerky Properly
Preheat your dehydrator to 160°F and arrange the beef slices on the trays, ensuring they don't overlap. Leave at least 1/4-inch between slices for proper air circulation. Place a small fan nearby to create gentle airflow around the dehydrator, which helps prevent uneven drying. The jerky should dry for 4-6 hours, but this time may vary based on your climate and humidity levels.
Check the jerky periodically after 3 hours - it's ready when it's firm to the touch but still slightly pliable. The edges should be completely dry with no moisture visible, and the slices should be opaque rather than translucent. For oven drying, use the lowest temperature setting with the door slightly ajar for ventilation, rotating trays every 2 hours to ensure even drying throughout.
Test for Doneness and Store Properly
Allow the jerky to cool completely before testing. The perfect jerky should be firm enough to hold its shape but still flexible enough to bend slightly without breaking. Cut into a small piece and examine the center - it should be completely dry with no moisture visible. If any piece feels damp or smells slightly off, continue drying for another 30-60 minutes. Properly dried jerky will have a deep, concentrated flavor with no hint of raw beef aroma.
Store the finished jerky in an airtight container or vacuum-sealed bag in the refrigerator for up to 3 months, or freeze for up to 6 months. The flavors will continue to develop and intensify over time. When ready to eat, simply tear into strips and enjoy the perfect balance of smoky, spicy, and savory flavors without any sugar crash. This method preserves all the natural beef protein while creating a satisfying, portable snack.
Pro Tips For Making Salt And Pepper Beef Jerky
- Freeze Meat First: I learned this the hard way—skipping the freeze step means your jerky will dry out unevenly and end up rubbery in spots. Pop the top-round roast in the freezer for 24 hours before slicing; it tightens the fibers so they hold moisture during drying. Trust me, your jerky will thank you later.
- Crack Pepper Fresh: Pre-ground pepper loses its bite and aroma, and your jerky deserves better. Use a mortar and pestle or a clean spice grinder to crack black peppercorns right before coating the meat—it makes a real difference in flavor and texture. Yes, even if you’re impatient like me.
- Marinate Overnight: The Worcestershire and vinegar need time to work their magic. Toss your sliced beef with the marinade at least 12 hours before drying—ideally overnight. I used to rush this, and the jerky always tasted flat. Patience here guarantees depth.
- Dry Slices Evenly: Skip the crowding—lay slices in a single layer with space between them. If they stick together, they’ll steam instead of dry properly. Use a wire rack or parchment with holes, and rotate trays halfway through drying. Your future self will thank you.
Creative variations of this recipe
Smoked Garlic Twist
Swap out the basic seasoning for a smoked garlic variation by adding 1 tbsp smoked garlic powder and ½ tsp cayenne pepper to the curing solution.
For extra depth, infuse 2 tbsp olive oil with 4 crushed garlic cloves and 1 tsp smoked paprika, then brush it on the beef before curing. This adds a rich, smoky-sweet profile that pairs perfectly with the salt and pepper base. 🌟
Spicy Chipotle Kick
Transform your jerky into a fiery snack by incorporating 1 tbsp adobo sauce (from canned chipotle peppers) and ½ tsp ground chipotle powder into the curing solution. For an extra punch, add 1 tsp liquid smoke and ½ tsp onion powder to enhance the smoky, spicy depth.
The result is a bold, heat-packed jerky that’s perfect for those who crave a serious kick. 🔥
Herb-Infused Variation
Brighten up the flavor profile with a herb-infused twist by adding 1 tbsp dried rosemary, 1 tbsp dried thyme, and 1 tsp lemon zest to the curing solution. Fresh herbs like cilantro or parsley can also be finely chopped and sprinkled on the beef before drying.
This variation adds a fresh, aromatic touch that balances the salt and pepper perfectly. ✨
Sweet and Smoky Balance
For those who prefer a slightly sweet touch without overpowering the salt and pepper, reduce the brown sugar to ½ tbsp and add 1 tsp honey or maple syrup to the curing solution. This subtle sweetness complements the smoky and spicy notes beautifully, creating a complex, well-rounded flavor profile. 🍯
Coffee-Enhanced Depth
Add a bold, earthy dimension by incorporating 1 tbsp instant coffee granules into the curing solution. Coffee enhances the umami and adds a deep, rich undertone that pairs exceptionally well with the salt and pepper.
For an extra layer of complexity, add ½ tsp cinnamon to the mix. This variation is a game-changer for coffee lovers. ☕
Nutrition facts
Frequently asked questions
Can I use pre-sliced beef for this recipe?
Pre-sliced top-round beef from grocery stores works perfectly—just verify the thickness is 1/8-inch or thinner. If the slices are too thick, use a sharp knife to trim them down before curing. The key is uniform thickness for even drying.
How do I know when the jerky is fully dried?
Test for doneness by checking three things:
- firm texture (shouldn't bend easily),
- no moisture (edges should be completely dry), and
- opaque color (no translucent areas). If it feels damp or smells like raw meat, dry for another 30-60 minutes. Properly dried jerky will last weeks at room temperature.
What's the best way to store homemade jerky?
For short-term storage (2 weeks), keep in an airtight container with parchment paper between layers. For longer shelf life (3-6 months), vacuum-seal or freeze. Add a silica packet to absorb moisture if storing at room temperature. The flavors actually improve over time!
Can I make this jerky without a dehydrator?
Yes! Use an oven set to 160°F with the door slightly open for ventilation. Place slices on a wire rack over a baking sheet and dry for 4-6 hours, rotating trays every 2 hours. For extra airflow, prop the oven door open with a wooden spoon. Monitor closely to prevent over-drying.
Why did my jerky turn out too salty?
This usually happens from uneven curing or insufficient rinsing after the cure. For next time, massage the curing solution thoroughly into the beef and rinse 3 times with cold water before drying. You can also soak the finished jerky in cold water for 10 minutes to reduce saltiness (though this may soften the texture slightly).