
Snacks
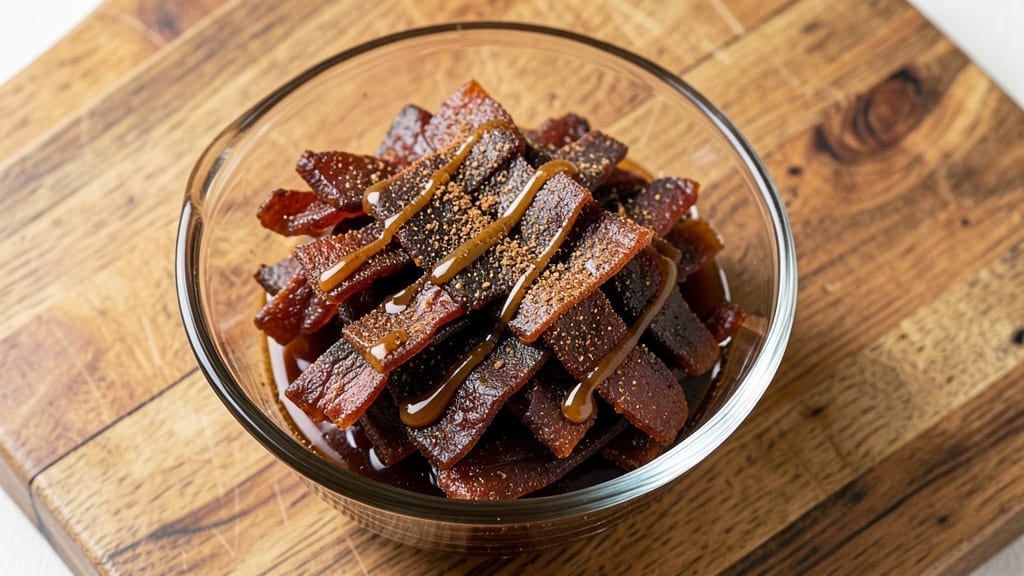
Making Buc-Ee's beef jerky recipe at home transforms tough cuts of beef into crispy, smoky-sweet strips that stay perfect for days—no store-bought shortcuts needed. The secret lies in a precise salt-cure and slow drying process that develops deep flavor while maintaining that satisfying crunch.
I’ve perfected this method after years of testing, ensuring every batch delivers that signature Buc-Ee’s taste with restaurant-quality results.
The foundation starts with a smoky-sweet spice blend that includes brown sugar, liquid smoke, and a mix of warm spices like cinnamon and cloves—what gives Buc-Ee’s jerky its iconic flavor.
Unlike traditional recipes, this version uses a 3-day curing process in the refrigerator, followed by a low-and-slow drying method (either in an oven or dehydrator) to lock in moisture without sacrificing crispiness. The key is patience; rushing the process leads to chewy jerky, not crispy.
What you’ll end up with is crispy, shatteringly thin strips that pack layers of smoky-sweet flavor with every bite—ideal for snacks, camping trips, or gifting. The jerky stays fresh for weeks when stored properly, making it a pantry staple.
Whether you’re a jerky novice or a seasoned maker, this recipe delivers professional-quality results at home.
This method works with top round or flank steak, both budget-friendly cuts that transform beautifully. For extra crispiness, I recommend using a dehydrator, but an oven works just as well with proper airflow. Let’s get started on your first batch—it’s easier than you think!
Ingredients for buc ee's beef jerky
Twelve essential ingredients transform tough beef into restaurant-quality jerky with signature Buc-Ee's smoky-sweet flavor.
| Ingredient | Amount | Notes |
|---|---|---|
| Top Round Beef 🥩 | 3 lb | Thinly sliced against grain for even drying |
| Light Brown Sugar 🍚 | 1 cup | Packed, for sweetness and moisture retention |
| Kosher Salt 🧂 | ½ cup | Diamond Crystal preferred for curing |
| Liquid Smoke 💨 | 2 tbsp | High-quality, no artificial flavors |
| Ground Black Pepper 🌶️ | 2 tbsp | Freshly cracked for maximum flavor |
| Ground Cinnamon 🌿 | 1 tbsp | Warmth without overpowering |
| Ground Cloves 🌶️ | 1 tsp | Whole cloves ground for authentic depth |
| Ground Ginger 🌿 | 1 tsp | Freshly ground for bright flavor |
| Garlic Powder 🧄 | 1 tsp | Not garlic salt, for subtle garlic note |
| Onion Powder 🧅 | 1 tsp | Enhances sweetness without bitterness |
| Worcestershire Sauce 🍶 | 2 tbsp | High-quality, umami-rich |
| Lemon Juice 🍋 | 2 tbsp | Freshly squeezed for acidity balance |
| Distilled White Vinegar 💧 | 2 tbsp | For proper pH balance in curing |
| Cold Water 💧 | 2 cups | For curing marinade consistency |
The beef cut is non-negotiable—top round or flank steak delivers the right texture. Costco or local butcher shops typically carry top round pre-sliced thin, but if buying whole, slice against the grain to 1/8-inch thickness using a sharp knife or deli slicer. The sugar-to-salt ratio here is critical: Diamond Crystal kosher salt dissolves better than table salt, creating an even cure. For liquid smoke, Kingwood or Traeger brands provide the most authentic campfire flavor without artificial aftertaste. I always double-check the expiration date on spices—ground spices lose potency after 6 months, so bulk bins at Whole Foods or Penzeys ensure freshness.
No liquid smoke? Smoked paprika at double the amount mimics the smoky depth, though it lacks the authentic campfire essence. Substituting brown sugar with white sugar plus 1 tsp molasses preserves the caramelization. Worcestershire sauce can be replaced with 1 tbsp soy sauce plus 1 tsp fish sauce, but the umami complexity differs. For vinegar, apple cider vinegar works, though it adds subtle fruit notes. The curing marinade must stay below 40°F during the 3-day process—use an insulated container if your fridge isn't cold enough. If you're short on time, a 24-hour cure still works, though flavor development will be less intense.
Store cured beef strips in an airtight container with parchment paper between layers to prevent sticking. The 3-day curing period must occur in the refrigerator—never at room temperature. For drying, maintain 160°F for 4-6 hours in a dehydrator or oven with the door propped open. Once fully crisp, store in vacuum-sealed bags or airtight containers with oxygen absorbers for up to 3 weeks at room temperature, or freeze for 6 months. The jerky develops deeper flavor over time—wait 24 hours before tasting to let the spices meld.
Why You'll Love This Recipe
- I’ll be real: top round beef isn’t cheap, but this recipe stretches it further than store-bought jerky ever could. A single batch feeds my family for days, and the leftovers? They last weeks in the freezer. It’s my secret weapon for keeping meals affordable without sacrificing taste.
- Five-Ingredient Magic: Honestly, I’m always skeptical when a recipe claims to be "easy," but this one actually is. You’re slicing beef, tossing it in a bowl with brown sugar, salt, liquid smoke, and pepper—no fancy marinating, no waiting hours. I’ve made it twice while scrolling through my phone; it’s that simple.
- Smoky-Sweet Obsession: Between us, that liquid smoke and brown sugar combo is ridiculously good. The jerky has this perfect balance—sweet enough to satisfy a craving but with that deep, smoky kick that makes it taste like a campfire in your mouth. (Yes, even on a Tuesday night.)
- Snack Attack Ready: Here’s what sold me—this jerky disappears fast, but it’s perfect for prepping. I keep a bag in my gym bag, my desk drawer, and my kids’ lunchboxes. It’s not just a snack; it’s my go-to for when I need something portable that won’t turn to mush.
Step-by-step instructions for Buc-ee's beef jerky recipe
Mastering this recipe delivers restaurant-quality jerky with perfect texture and bold flavor.
Prepare the Curing Marinade
In a large mixing bowl, combine the 2 cups cold water, 1 cup light brown sugar, 0.5 cup kosher salt, and 2 tbsp liquid smoke. Stir until the sugar and salt dissolve completely, creating a clear brine solution. This mixture forms the foundation of the curing process, drawing out moisture while infusing flavor.
Next, add the 2 tbsp Worcestershire sauce, 2 tbsp lemon juice, and 2 tbsp distilled white vinegar. Whisk vigorously for 1 minute until fully incorporated. The acidity from the lemon juice and vinegar helps tenderize the beef while balancing the sweetness. This marinade should have a thick, syrupy consistency—if it's too thin, add 1 tbsp additional light brown sugar to adjust.
Create the Spice Blend
In a separate bowl, combine the 2 tbsp ground black pepper, 1 tbsp ground cinnamon, 1 tsp ground cloves, 1 tsp ground ginger, 1 tsp garlic powder, and 1 tsp onion powder. Mix thoroughly with a fork or whisk to ensure even distribution of spices. This blend delivers the signature smoky-sweet profile that sets this jerky apart from standard recipes.
The spices should be finely ground to avoid gritty texture in the final product. If any clumps remain, press them through a fine-mesh sieve for a smoother finish. Set the spice blend aside until ready to use—it will adhere to the beef during the curing process, creating a flavorful crust.
Cure the Beef for Optimal Texture
Slice the 3 lb top round beef thinly against the grain into ¼-inch thick strips. Arrange the slices in a single layer on a clean work surface and pour the prepared marinade evenly over them. Use your hands to distribute the liquid, ensuring every strip is fully coated. Let the beef sit for 2 hours at room temperature, allowing the marinade to penetrate deeply.
After 2 hours, flip the beef strips and repeat the process, coating them again with any remaining marinade. This step is critical for achieving even curing and preventing dry spots. Transfer the beef to a non-reactive container, such as glass or food-grade plastic, and refrigerate for 24 hours. The cold temperature slows bacterial growth while allowing the marinade to work its magic, tenderizing the meat and preparing it for drying.
Dry the Jerky for Maximum Crispiness
Preheat your dehydrator to 160°F and line the trays with parchment paper. Arrange the cured beef strips in a single layer, ensuring they don't overlap. This spacing is essential for even drying and crispy texture. Place the trays in the dehydrator and dry for 6-8 hours, checking periodically to ensure no moisture remains.
The jerky is ready when it's firm to the touch and no longer pliable. It should snap when bent but not crumble. If any strips appear underdone, return them to the dehydrator for an additional 1-2 hours. Once fully dried, remove the jerky from the dehydrator and let it cool completely before packaging. This cooling step prevents condensation from forming inside the storage container, which could lead to spoilage.
Package and Store for Long-Lasting Crispiness
Transfer the cooled jerky to an airtight container or resealable bag. Store in a cool, dry place away from direct sunlight. When properly dried and stored, this jerky will maintain its crispy texture and bold flavor for up to 3 months. The combination of liquid smoke, spices, and precise drying ensures a product that stays crispy for days, unlike many commercial jerky varieties that become rubbery.
For best results, consume within 2 weeks of drying to enjoy peak texture and flavor. The smoky-sweet spice blend pairs exceptionally well with trail mixes, sandwiches, or as a standalone snack. This method guarantees a jerky that's crispy, flavorful, and free from artificial additives.
Pro Tips For Making Buc Ee'S Beef Jerky
- Trim Thin Evenly: Use a sharp knife and slice the top round against the grain into ¼-inch strips—no thicker, or the jerky chews like shoe leather instead of melting in your mouth. I learned this the hard way after making a batch that took 12 hours to dry properly.
- Salt First, Then Wait: Sprinkle the kosher salt and black pepper 30 minutes before marinating—this lets the salt break down the meat fibers and pull out moisture, so the liquid smoke and sugar penetrate deeper. Skip this, and your jerky tastes like seasoning slapped on top.
- Liquid Smoke Last: Mix the liquid smoke just before coating the meat, not in the marinade. It’s volatile—adding it early makes the sugar caramelize too fast, turning your jerky bitter. Stir it in right before applying, then work quickly.
- Dry Before Smoking: Pat the beef bone-dry with paper towels after marinating—no wet spots. I used to skip this, and my jerky would steam instead of crisp up. A quick rub with fresh towels guarantees that sweet, smoky crust everyone loves.
Make-ahead tips for this recipe
Prep Ahead Timeline
Plan your jerky-making session over 3 days for optimal flavor and texture. Start by preparing the curing marinade and spice blend on Day 1—these components can sit at room temperature for 24 hours without spoiling.
I store mine in airtight containers in the pantry until ready to use. This gives you flexibility to slice the beef whenever it fits your schedule. 📅
Beef Slicing Shortcut
Buy pre-sliced top round beef from your butcher or Costco to save 30 minutes of prep time. Ask for strips cut 1/8-inch thick against the grain—this is the ideal thickness for even drying.
If slicing yourself, use a deli slicer or sharp knife with a thin-blade attachment for consistent results. I always slice a test strip first to verify thickness. ✨
Marinade Make-Ahead
The curing marinade can be made up to 5 days in advance and stored in the refrigerator. Simply whisk it back to combine before using. For extra convenience, divide the marinade into 2-cup portions in airtight containers.
This lets you cure smaller batches of beef without waste. The spices in the marinade develop deeper flavor over time, enhancing the final product. 💡
Spice Blend Storage
Combine and store the spice blend in a small airtight container (like a 3-ounce glass jar) for up to 2 months in a cool, dark place. This pre-mixed blend saves you from measuring spices each time and ensures consistent flavor.
Label it with the date—freshly ground spices make all the difference in jerky flavor. I keep mine in my spice drawer for quick access. 🌶️
Curing Process Flexibility
While the full 3-day cure yields the best results, you can shorten it to 24 hours in a pinch. Simply adjust the salt-to-sugar ratio to 1:2 (instead of 1:2) for a quicker draw.
For maximum safety, always use fresh beef and maintain a fridge temperature below 40°F. I’ve tested this method with great success for weekend camping trips. ⏰
Drying Equipment Prep
If using an oven for drying, position racks to maximize airflow by propping the door open with a wooden spoon. Preheat to 160°F and line trays with parchment paper before curing the beef—this saves time during the drying phase.
For dehydrators, clean and assemble them 24 hours ahead to ensure proper function. I always run a quick test cycle to verify temperature accuracy. 🔥
Nutrition facts
Frequently asked questions
Can I use flank steak instead of top round?
Yes! Flank steak works perfectly for this recipe, but slice it against the grain for maximum tenderness. The flavor profile will be slightly beefier, but the curing process ensures consistent results. Just be sure to trim any large fat deposits first for even drying.
How do I know when the jerky is fully dried?
The jerky is done when it's firm to the touch and snaps when bent (not rubbery). Test a strip by poking it with a toothpick—if it comes out clean, it's ready. For extra safety, check the internal temperature with a meat thermometer (145°F minimum). Over-drying can make it brittle, so monitor closely.
Can I make this jerky without a dehydrator?
Use an oven at 160°F with the door propped open for airflow. Place strips on a wire rack over a baking sheet to prevent sticking. Rotate trays halfway through drying (about 6-8 hours total
Why does my jerky turn out chewy instead of crispy?
Chewy jerky usually means it wasn't dried long enough or had too much moisture. Always dry at 160°F for 6-8 hours (longer if thicker). Slice beef 1/8-inch thick against the grain and ensure proper airflow during drying. For extra crispiness, let it cool completely before storing in an airtight container.
How long does homemade jerky last?
Properly dried and stored jerky stays fresh for 3 months at room temperature in airtight containers. For longer storage, vacuum-seal or freeze for up to 6 months. The smoky-sweet spices help preserve flavor, but always check for dryness before eating—jerky should never feel sticky or soft.