Main Courses
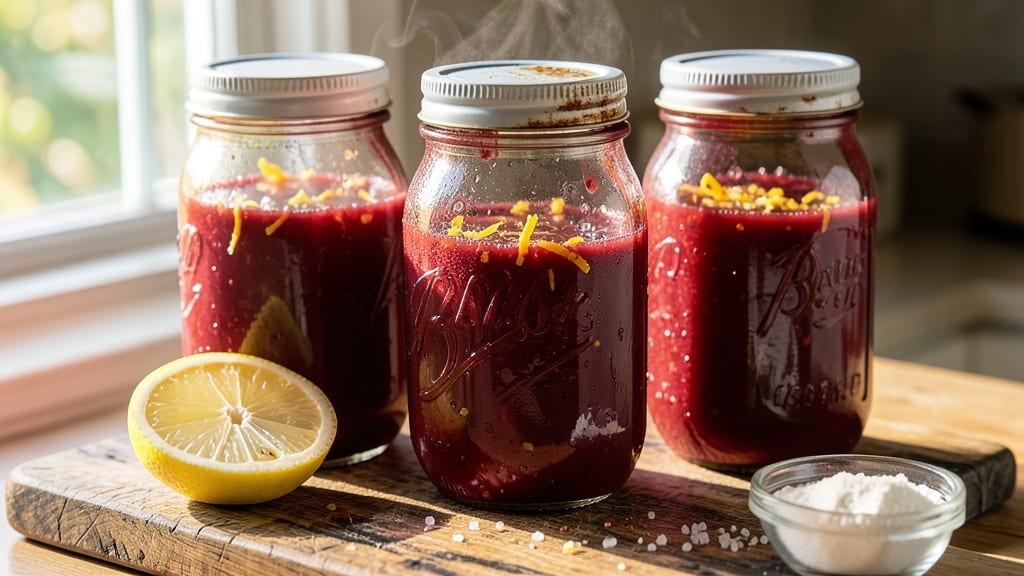
Pressure canning tomatoes transforms your summer harvest into year-long flavor while ensuring food safety through proven, science-backed methods. 🌟 As someone who grew up canning apple butter with Mrs. Henderson, I know firsthand how rewarding it is to preserve the bounty of fresh tomatoes—whether from your garden or farmers market—when they're at their peak.
The key lies in proper acidification, precise processing times, and altitude adjustments that guarantee shelf-stable results every time.
This method preserves tomatoes in their most versatile form—whole, crushed, or juiced—ready for sauces, soups, or stews all winter long. We'll use a tested acidification approach (lemon juice or citric acid) to meet USDA safety standards while maintaining vibrant flavor.
The process requires just 20 minutes of prep followed by pressure canning, with processing times varying by altitude (pints take 35 minutes at sea level, quarts 40 minutes).
What you'll achieve is a pantry stocked with perfectly preserved tomatoes that taste fresh, with no risk of spoilage when stored properly. The jars will seal tightly, creating an airtight barrier that locks in color and flavor.
This isn't just canning—it's building a safety net for your family's meals when fresh produce isn't available. Let's walk through each critical step to ensure your tomatoes last for years.
We'll cover everything from jar sterilization to proper sealing techniques, including how to test for successful canning and what to do if a jar fails. The same principles apply whether you're using garden tomatoes or store-bought varieties—just focus on consistent acid levels and precise timing.
Your future self will thank you when you pull these jars from the pantry in December.
Ingredients for pressure canning tomatoes
Garden-fresh tomatoes meet science-backed safety for year-long pantry flavor.
| Ingredient | Amount | Notes |
|---|---|---|
| Fresh Tomatoes 🍅 | 12 lb | Ripe, firm, disease-free varieties |
| Lemon Juice 🍋 | 3 ½ oz | Freshly squeezed, for acidification |
| Salt 🧂 | 1 ½ tsp | Non-iodized, for flavor balance |
| Canning Jars 🥫 | 7 pieces | Pint or quart size, new or sterilized |
| Lids and Bands 🔒 | 7 pieces | New lids for proper sealing |
| Citric Acid 💧 | 1 tsp | Alternative acidification method |
| Garlic Cloves 🧄 | 4 cloves | Optional, for extra flavor |
| Fresh Basil Leaves 🌿 | ¼ cup | Optional, for herb infusion |
| White Vinegar 🍶 | 1 tbsp | For jar sterilization |
| Pressure Canner 🍲 | 1 whole | 8-11 quart capacity preferred |
The tomatoes are the star—pick ones at their peak ripeness (deep color, firm but yielding slightly). Heirloom varieties hold up best, but any meaty tomato works. For sourcing, farmers markets often have the freshest, ripest tomatoes since they're picked when ready. If using store-bought, look for organic or vine-ripened labels—they tend to be more flavorful. The acidification is non-negotiable: USDA guidelines require a pH below 4.6, which is why we use lemon juice or citric acid. Ball or Kerr brands are trusted for their canning safety standards, but any reputable brand works as long as jars are in good condition.
No fresh lemons? Citric acid works perfectly—just dissolve it in hot water first. Short on vinegar for sterilizing? Boiling water works too, but vinegar kills bacteria more effectively. Want extra flavor? Toss in garlic cloves or basil leaves during processing—they'll infuse beautifully. For those at higher altitudes, adjust processing times (check your canner's manual). The key is consistency: weigh tomatoes before canning to ensure even distribution across jars. Pre-sterilized jars are a game-changer—Ball or Mason jars from grocery stores are pre-washed and ready to go.
Store sealed jars in a cool, dark place for 12-18 months. The first 6 months are peak flavor—after that, they'll still be safe but may soften slightly. Test seals by pressing the center of the lid: if it doesn't pop, it's sealed. Failed jars? Freeze or cook within 24 hours. I always label mine with the date—masking tape and marker work perfectly. Pro tip: Use the pint jars for sauces and the quarts for whole tomatoes—they store differently. This method gives you restaurant-quality tomatoes in December, straight from your summer harvest.
Why You'll Love This Recipe
- No Chopping Needed: I just toss whole tomatoes into jars—peels, seeds, and all—then add lemon juice and salt. The pressure canner does all the work while I sip tea and pretend I’m not actually canning.
- Bright, Tangy Magic: That lemon juice? It’s the secret—cutting through the tomato’s natural acidity for a flavor that’s fresh, vibrant, and way more interesting than store-bought sauce. Honestly, it’s the kind of taste that makes you pause mid-bite.
- Pantry Staple in Minutes: One batch feeds me for months—soups, pasta, tacos, you name it. I’ll be real: I’ve pulled jars out at midnight for late-night toast, and they’re still perfect.
- Zero Waste, Maximum Savings: Use up garden tomatoes (or cheap bulk buys) before they spoil, and store them for under $2 a jar. My wallet and the compost bin thank me every time.
Step-by-step instructions for pressure canning tomatoes
Here's how to safely preserve your harvest with perfect acidity and texture every time.
🔪 Step 1: Prepare the Tomatoes for Canning
Wash the 12 lb fresh tomatoes thoroughly under cool water to remove dirt. I like to blanch them first by dipping in boiling water for 30-60 seconds, then immediately plunging into ice water. This softens the skins so they peel easily.
Cut the tomatoes in half crosswise and scoop out the seeds and gelatinous cores using a spoon. Discard the seeds and cores—this prevents the jars from becoming too thick with pulp. For extra flavor, crush 4 cloves garlic and add them to the jars later. You'll want to work quickly once you start processing to maintain freshness.
🍳 Step 2: Acidify the Tomatoes Properly
In a large stockpot, combine the prepared tomatoes with 3.5 oz lemon juice and 1 tsp citric acid. Stir well to distribute the acid evenly—this is critical for safe canning. The acidity prevents botulism by creating an environment where harmful bacteria can't grow. Bring the mixture to a boil over medium-high heat.
While the tomatoes heat, prepare your 7 pieces canning jars by sterilizing them in boiling water for 10 minutes. Keep them hot until you're ready to fill. For the jars you'll use for the tomatoes, add 1.5 tsp salt to each jar first—this ensures proper seasoning. If using optional 0.25 cup fresh basil leaves, divide them evenly among the jars now.
🥘 Step 3: Fill and Process the Jars
Ladle the hot tomato mixture into the sterilized jars, leaving ½-inch headspace at the top. Use a non-metallic utensil to remove any air bubbles by sliding it around the inside of the jar. Wipe the jar rims with a clean, damp cloth to ensure a perfect seal.
Place the lids on the jars and screw on the bands until they're fingertip-tight—don't overtighten. Lower the jars into the pressure canner using the jar lifter. Add 3 quarts of hot water to the canner, making sure the water level covers the jars by at least 1-2 inches. Close the canner lid securely.
⏰ Step 4: Pressure Can for Safe Preservation
Bring the canner to a boil over medium-high heat, then reduce heat to maintain a steady boil. For pint jars, process for 35 minutes at 10 pounds of pressure. For quart jars, process for 40 minutes at the same pressure. This ensures the tomatoes are safely preserved while maintaining their texture.
Watch for the pressure gauge to stabilize at the correct pressure before starting your timer. Don't open the canner during processing—this can affect the pressure and safety. Once processing is complete, turn off the heat and let the pressure drop naturally to zero before carefully removing the lid.
👨🍳 Step 5: Cool, Seal, and Store Properly
Remove the jars from the canner and place them on a clean towel. Let them cool undisturbed for 12-24 hours. You'll hear the satisfying "ping" as the lids seal. Check each lid—it should be concave in the center with no flex when pressed. If a jar doesn't seal, refrigerate and use it within a week.
Once fully cooled, wipe the outside of the jars with 1 tbsp white vinegar to sterilize the surface and remove any residue. Label each jar with the date and contents. Store in a cool, dark place for up to 18 months. The sealed jars can be used in sauces, soups, or enjoyed straight from the jar—just heat gently and enjoy that summer flavor all year long!
Pro Tips For Making Pressure Canning Tomatoes
- Preheat Jars First: Hot jars seal better—pop them in a 200°F (93°C) oven for 10 minutes before filling. I learned this the hard way when my first batch of pints turned into a science experiment with half-sealed lids. Works for quarts too, just give them 15 minutes.
- Core Those Tomatoes: Skip the whole tomatoes if they’re rock-hard or underripe—core them and crush them instead. You’ll end up with smoother sauce and fewer floating chunks that make your jars look messy. (Yes, even if you’re impatient and want to skip this step.)
- Lemon Juice to pH 4.6: Don’t eyeball it—use a pH strip or the tested recipe ratio (about 2 tablespoons per quart). Too little acid, and your tomatoes won’t last; too much, and they’ll taste like a science experiment. My first batch of "sour tomatoes" taught me this lesson permanently.
- Headspace Matters: Fill jars to ½-inch headspace—no more, no less. Too much air, and the lids won’t seal; too little, and you’ll have a tomato volcano when you open them later. Use a headspace tool or a ruler—your future self will thank you.
Regional styles of these flavors
Southern Tomato Sauce Style
In the South, pressure-canned tomatoes often become the base for rich, slow-simmered sauces. I add 2 tbsp tomato paste and 1 tsp dried oregano to each quart jar before processing—this builds depth of flavor that intensifies over time.
The heat of 1 tsp red pepper flakes per quart adds a subtle kick that pairs perfectly with meatballs or pasta. Use San Marzano tomatoes if available; their natural sweetness shines in Southern-style dishes. 🌶️
Italian Whole-Peel Tomatoes
Northern Italian regions like Tuscany preserve tomatoes whole with their skins intact, perfect for rustic dishes. Pack jars with whole Roma tomatoes and 1 sprig fresh basil per quart, then process for 45 minutes (quarts) at 10 lbs pressure.
The skins stay tender but hold their shape—ideal for slicing onto bruschetta or tossing into winter salads. I always add ½ tsp black peppercorns to each jar for a classic Italian touch.
Mexican Salsa Base
For Tex-Mex styles, I blend 1 tsp minced garlic, 1 tsp ground cumin, and ½ tsp smoked paprika into the tomato mixture before canning. Process pints for 30 minutes (adjust for altitude) to create a vibrant salsa base.
The acidity from the lemon juice preserves the fresh flavors perfectly—great for making quick salsas or enchilada sauces later. Add 1-2 jalapeño slices per jar if you love heat.
Smoky BBQ Tomato Paste
In the Pacific Northwest, I adapt the recipe by adding 1 tbsp liquid smoke and 1 tsp brown sugar to each quart jar before processing. The result? A deep, smoky tomato paste perfect for BBQ sauces or glazes.
Process quarts for 40 minutes at 10 lbs pressure, then blend after opening for ultra-smooth texture. This variation became my go-to for winter braising liquids and pulled pork rubs.
Herb-Infused Garden Style
My Portland garden-inspired version includes ½ cup mixed fresh herbs (thyme, rosemary, and parsley) per batch. I tie them in cheesecloth bundles and add them to jars during processing—they infuse beautifully without floating loose.
Process pints for 35 minutes and quarts for 40 minutes**. The herbs add bright, fresh notes that elevate winter soups and stews. I always grow my own herbs for this method—they're fresher than store-bought!
Nutrition facts
Frequently asked questions
Why is acidification so important when canning tomatoes?
Acidification is critical because tomatoes are naturally low-acid fruits, creating an environment where harmful bacteria like Clostridium botulinum can grow. Adding 3.5 oz lemon juice or 1 tsp citric acid per quart lowers the pH below 4.6, making it safe for long-term storage. This simple step prevents foodborne illness while preserving the fresh flavor you love.
Can I use store-bought canned tomatoes as a shortcut?
No, store-bought canned tomatoes aren't safe for pressure canning because they already contain preservatives and may have inconsistent acidity levels. The USDA requires fresh, properly acidified tomatoes for home canning. If you're short on time, consider making a fresh tomato sauce to can instead—it's still safe and delicious!
What should I do if a jar doesn't seal properly?
If a jar fails to seal (lid pops when pressed), don't panic! Store it in the refrigerator and use the contents within 1 week or freeze it for up to 3 months. Unsealed jars are safe to eat immediately but won't keep long-term. Check your processing time and pressure—sometimes jars fail due to underprocessing or improper sealing technique.
How do I adjust processing times for high altitudes?
Altitude affects pressure canning because atmospheric pressure decreases as you go higher. Check your canner's manual for adjustments—typically, add 1 minute per 1,000 feet above sea level. For example, at 5,000 feet, process pints for 40 minutes instead of 35 minutes. Always follow the USDA's recommended times for your specific altitude.
Can I add onions, garlic, or herbs after canning?
No, adding fresh ingredients after canning can introduce bacteria that thrive in the low-acid environment. Instead, add garlic cloves, herbs, or onions to the jars before processing—they'll sterilize during canning. For extra flavor, try infusing herbs in cheesecloth bundles or adding them to the hot tomato mixture before filling the jars.