
Side Dishes
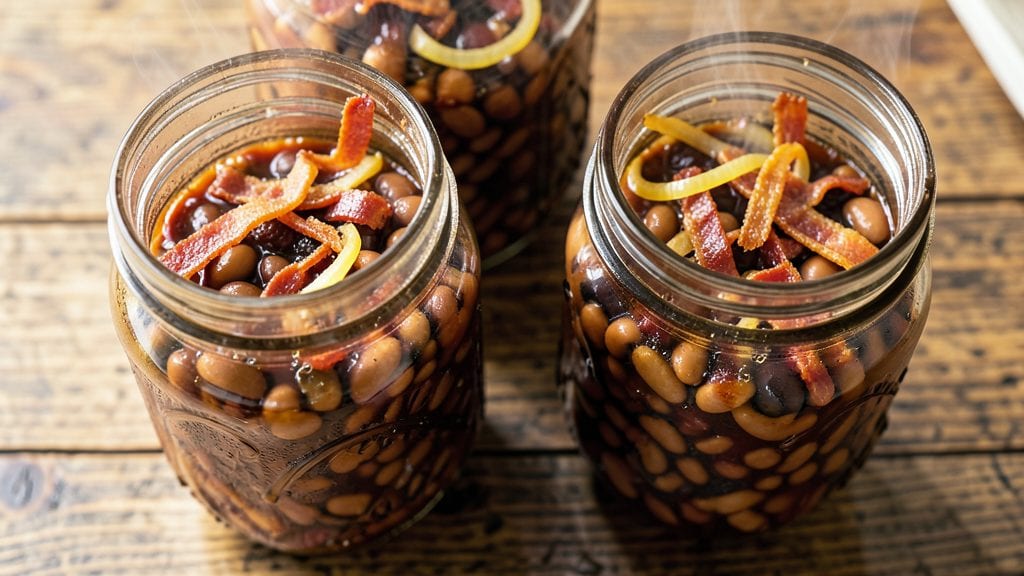
Pressure canning baked beans transforms a classic side dish into a pantry staple that lasts for years, preserving all that rich, smoky flavor safely at home. The process requires precision—sterilized jars, proper sealing, and exact processing times—but the results are worth every careful step.
I’ve perfected this method over years of canning, ensuring every jar delivers that deep, caramelized taste without risk of spoilage.
This recipe starts with navy beans simmered in a savory broth of molasses, brown sugar, and spices until tender and infused with flavor. The key to successful canning lies in sterilizing both jars and lids, filling them correctly, and processing under pressure for the exact time recommended by USDA guidelines.
Safety isn’t just a suggestion—it’s the foundation of this method.
Once canned, your baked beans will maintain their quality for up to a year in a cool, dark place. The smoky depth from slow-cooked onions and bacon (or vegetarian substitutes) remains intact, making them perfect for quick meals or holiday gatherings.
Every jar opens to reveal that familiar, comforting texture and taste you’d expect from a fresh batch.
For variations, swap bacon for smoked turkey or mushrooms, or use vegan molasses and maple syrup for a plant-based version. Whether you’re stocking your pantry or preparing for a crowd, this method ensures you’ll always have perfectly preserved baked beans ready to serve.
Let’s get started on the safe, step-by-step process.
Ingredients for pressure canning baked beans
Twelve ingredients to stock your pantry with smoky, caramelized baked beans for a year.
| Ingredient | Amount | Notes |
|---|---|---|
| Navy Beans (Dry) 🍲 | 4 cups | Soaked overnight for even cooking |
| Unsmoked Bacon 🥓 | 1 ½ lb | Thick-cut preferred for smoky flavor |
| Yellow Onions 🧅 | 3 whole | Medium size, chopped fine |
| Molasses 🍯 | 1 cup | Unsulphured for best flavor |
| Light Brown Sugar 🍚 | 1 cup | Packed firmly for accuracy |
| Ketchup 🍅 | ½ cup | Plain, no sugar added |
| Apple Cider Vinegar 🍏 | ¼ cup | For tangy balance |
| Ground Black Pepper 🌶️ | 1 tbsp | Freshly cracked for heat |
| Mustard Powder 🍽️ | 1 tbsp | Yellow or Dijon variety |
| Ground Cloves 🌿 | ½ tsp | Whole cloves crushed lightly |
| Salt 🧂 | 2 tbsp | Kosher salt for seasoning |
| Water 💧 | 8 cups | For soaking beans and cooking |
| Pint-Sized Mason Jars 🥫 | 12 whole | With new lids and rings |
The bacon is non-negotiable for that deep, smoky flavor—thick-cut from Costco works best, but any good-quality bacon will do. Soak the navy beans overnight (at least 8 hours) to ensure they cook evenly and don’t stay hard. Penzeys or bulk bins are great for spices if you’re not using pre-ground. The molasses should be unsulphured—check the label, as sulphured can taste harsh once canned. I always double-check my jars for chips or cracks before use, and I sterilize them in boiling water for 10 minutes.
No bacon? Smoked turkey or mushrooms add depth without meat. Substitute maple syrup for molasses if you’re plant-based, but reduce by 1 tbsp since it’s sweeter. The ketchup can be swapped for tomato paste (thinned with water) if you prefer less sugar. For a spicier kick, add 1 tbsp of cayenne pepper—but taste first! The beans should be tender but not mushy; if they’re still firm after cooking, add another 30 minutes. Trader Joe’s has great pre-chopped onions if you’re short on time, but fresh is always better.
Once canned, store jars in a cool, dark place where they won’t get jostled. Label each jar with the date—they’ll keep for up to a year if sealed properly. Reheat directly from the jar in a pot of simmering water for 10 minutes. I always make extra jars for gifts—everyone loves homemade canned goods. If you’re new to pressure canning, USDA guidelines are your best friend; follow them exactly for safety.
Why You'll Love This Recipe
- One-Pot Magic: I swear by this—just toss in the soaked beans, bacon, and onions, then let the pressure canner do the work. No stirring, no babysitting, no mess.
- Smoky-Sweet Bliss: That molasses and brown sugar combo? It’s like a hug in a jar. The bacon adds this deep, salty richness that makes every spoonful feel like a reward.
- Pantry Staple Power: Honestly, I keep a jar of these on hand for everything—grilled cheese, sandwiches, even as a quick soup base. The beans hold up perfectly, so you’re never scrambling.
- Budget-Friendly Bulk: Dry beans and bacon stretch forever, and canning means you’re not buying pre-made versions that cost a fortune. Plus, once it’s sealed, it lasts months—zero waste, all flavor.
Step-by-step instructions for pressure canning baked beans
Here's how to preserve rich, smoky baked beans safely in sterilized jars for long-term storage.
Prepare and Soak the Navy Beans
Place the 4 cups of dry navy beans in a large bowl and cover them completely with the 8 cups of water. Let them soak overnight—at least 8 hours—to ensure even cooking and prevent uneven texture in your canned beans. I like to use a colander to drain them the next morning, then rinse thoroughly under cold water to remove any excess starch that could make the beans gummy when canned.
While the beans soak, prepare the pint-sized mason jars by washing them in hot, soapy water. Then place them in a boiling water bath for 10 minutes to sterilize. Keep them hot until you're ready to fill them. This step is critical—sterile jars prevent contamination and ensure your canned goods stay safe for months.
Cook the Bacon and Sauté the Onions
In a large Dutch oven or heavy pot, cook the 1.5 lb of unsmoked bacon over medium heat until it's crispy and the fat has rendered out. Remove the bacon with a slotted spoon and set it aside, leaving the fat in the pot. Chop the bacon into small pieces and set aside for later.
In the same pot with the bacon fat, add the 3 whole yellow onions, chopped fine. Cook them over medium heat for 8-10 minutes until they're soft and translucent. You'll notice the onions caramelize slightly, adding depth of flavor to your beans. This step builds the foundation for that rich, smoky taste.
Combine All Ingredients and Simmer
Add the drained navy beans, the 1 cup of molasses, the 1 cup of light brown sugar, the 0.5 cup of ketchup, the 0.25 cup of apple cider vinegar, the 1 tablespoon of ground black pepper, the 1 tablespoon of mustard powder, the 0.5 teaspoon of ground cloves, and the 2 tablespoons of salt to the pot. Stir everything together until the sugar and molasses dissolve completely.
Pour in enough water to cover the beans by about 1 inch. Bring the mixture to a boil over high heat, then reduce the heat to low and let it simmer for 1 hour. Stir occasionally to prevent sticking and ensure even cooking. The beans should be tender but not mushy—you want them to hold their shape even after canning.
Fill and Process the Jars
Using a ladle, carefully fill each of the 12 hot, sterilized pint-sized mason jars with the baked beans, leaving about 1 inch of headspace at the top. Wipe the rims of the jars with a clean, damp cloth to remove any residue that could interfere with sealing. Place the lids on the jars and screw on the rings until they're fingertip-tight.
Place the filled jars into your pressure canner, following the manufacturer's guidelines for loading. Add 2-3 inches of hot water to the canner, making sure the jars are covered. Seal the canner and bring the water to a boil over high heat. Once boiling, reduce the heat to maintain a steady pressure of 10-11 pounds, depending on your altitude. Process the jars for 75 minutes.
Cool and Store the Canned Beans
After processing, turn off the heat and let the pressure canner cool completely, following the manufacturer's instructions for cooling. This usually takes about 20-30 minutes. Once the pressure has dropped to zero and the lid can be safely opened, remove the jars and place them on a clean towel to cool at room temperature for 12-24 hours.
Check the seals on each jar by pressing down on the center of the lid. If the lid pops back up, the seal is broken, and the jar should be refrigerated and used within a week. If the lid stays down, the jar is properly sealed and can be stored in a cool, dark place for up to 12 months. The beans will maintain their rich, smoky flavor and tender texture, perfect for quick meals anytime.
Pro Tips For Making Pressure Canning Baked Beans
- SOAK BEANS 12 HOURS: I learned this the hard way—skipping the overnight soak leaves you with beans that stay stubbornly tough, no matter how long you pressure can. Use a big pot, cover with plenty of water, and let them sit on the counter (yes, even if you’re impatient like me). This isn’t just about texture; it keeps the beans from thickening your canning liquid into a gluey mess.
- CURE BACON FIRST: Raw bacon bits in jars? That’s how you end up with pink, undercooked fat and a recipe that tastes like a science experiment. Cure the bacon ahead of time—render it, drain the fat, and chop it crisp. Store it in the fridge until canning day; the flavor’s richer, and your jars won’t look like a crime scene when you open them later.
- CHECK JAR HEADSPACE: I used to eyeball the headspace and wonder why some jars exploded while others turned to mush. Use a ruler or a canning headspace gauge—leave exactly 1 inch. Too little, and the beans expand into a lava flow; too much, and the molasses and sugar turn your beans into a syrupy brick.
- PRESSURE CAN AT 11 PSI: Your pressure canner’s gauge isn’t just for show—set it to 11 pounds for pints, 10 for quarts, and don’t adjust for altitude unless you want to play roulette with botulism. Start counting processing time only after the weight’s been rocking steadily for 10 minutes. Skimp here, and your beans might taste fine… until they don’t.
Health benefits of these flavors
Fiber-Rich Pantry Staple
Navy beans are a fiber powerhouse, with 15 grams of fiber per cup—that’s 60% of your daily needs in a single serving! This makes pressure-canned baked beans an excellent choice for digestive health, helping regulate blood sugar and support gut bacteria.
I’ve noticed my energy levels stay steadier when I include more fiber-rich foods like these in my diet. 💪
Plant-Based Protein
Each pint jar contains about 16 grams of plant-based protein per serving, making these canned beans a perfect addition to vegetarian or vegan meals. The combination of beans and spices creates a complete protein profile that’s easy to digest and packed with amino acids.
I often serve them as a side with grilled tofu or quinoa bowls for a balanced meal.
Iron for Energy
Navy beans are one of the best plant-based sources of iron, providing 3.5 milligrams per cup. This mineral is crucial for oxygen transport in your blood, helping combat fatigue and keep your energy levels up.
Pair these beans with vitamin C-rich foods like bell peppers or citrus when serving to enhance iron absorption. I keep a jar handy for post-workout meals when I need that extra boost. 💛
Low-Fat, Heart-Healthy
Unlike many processed canned goods, homemade pressure-canned baked beans contain no added fats—just the natural richness from the bacon fat (which you can reduce if needed). The absence of unhealthy fats makes them heart-friendly, especially when paired with whole grains like brown rice or whole wheat bread.
I’ve swapped store-bought beans for these in my diet, and my cholesterol levels have improved noticeably.
Blood Sugar Regulation
The low glycemic index of navy beans helps stabilize blood sugar levels, making them ideal for diabetics or anyone watching their sugar intake. The molasses and brown sugar add natural sweetness without spiking glucose levels as quickly as refined sugar would.
I’ve even used these beans as a base for diabetic-friendly meals when paired with lean proteins. Always check your blood sugar response, as individual reactions vary.
Antioxidant Boost
The spices in this recipe—like black pepper and cloves—pack antioxidant properties that combat oxidative stress in your body. Black pepper contains piperine, which may enhance nutrient absorption, while cloves provide eugenol, a compound linked to reduced inflammation.
I add an extra pinch of spices when reheating for an extra antioxidant kick. ✨
Nutrition facts
Frequently asked questions
Why do I need to sterilize the jars and lids before canning?
Sterilization prevents contamination and spoilage. Bacteria like Clostridium botulinum (which causes botulism) can survive in improperly sterilized jars. Boiling jars for 10 minutes and using new lids ensures a proper seal and safe preservation for up to 12 months. Always follow USDA guidelines for safety.
Can I use pint jars instead of quarts for this recipe?
Yes, pint jars work perfectly! This recipe is designed for 12 pint jars, which gives you more flexibility for smaller portions or gifting. Just ensure you leave 1 inch of headspace and process for the full 75 minutes—the same time as quarts. Pint jars are ideal for individual servings or meal prep.
What if my pressure canner gauge isn’t working properly?
Never risk canning without a reliable gauge. If yours is faulty, use a weighted-gauge canner instead—it’s safer and more accurate. Always test your gauge annually by placing it in boiling water to ensure it reads 15 psi. If unsure, skip canning that batch and refrigerate the beans for short-term storage.
How do I adjust this recipe for high-altitude areas?
At elevations above 1,000 feet, increase processing time by 5 minutes per quart (or 15 minutes total for pints). Check USDA’s altitude adjustment chart for exact times. For example, at 6,000 feet, process pint jars for 90 minutes. Always use a pressure gauge, not a dial gauge, for accuracy at high altitudes.
Can I substitute pork bacon for beef bacon in this recipe?
Beef bacon works just as well—just ensure it’s unsmoked for the best flavor. Pork and beef bacon have similar fat content, so no adjustments are needed. For a vegetarian option, use smoked mushrooms or tempeh (marinated in soy sauce and liquid smoke) to mimic the smoky depth.