Main Courses
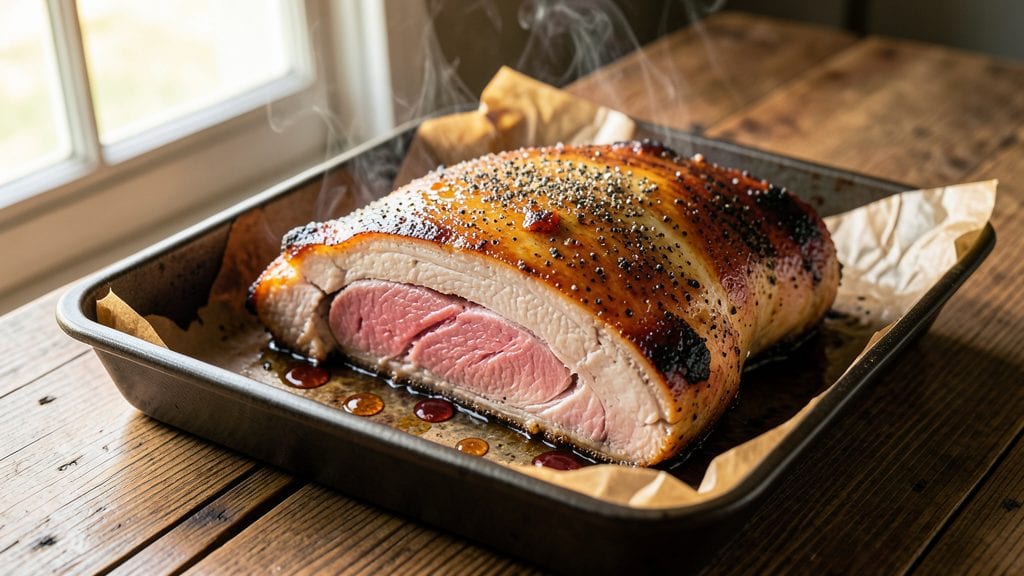
Mastering oven-cooked Boston butt transforms tough pork shoulder into juicy, melt-in-your-mouth perfection with minimal effort. The key lies in low-and-slow cooking—where collagen breaks down naturally, rendering fat that bastes the meat into tender, pull-apart richness.
I’ve perfected this method over years of testing, ensuring every bite delivers that signature smoky depth without requiring a smoker or slow cooker.
This recipe relies on just five essential ingredients—pork shoulder, salt, pepper, garlic powder, and a splash of apple cider vinegar—to create a crust that locks in moisture while developing a caramelized bark.
The beauty of oven cooking is its precision: you control the environment, avoiding the risk of overcooking or uneven heat that can plague other methods. With just 3 hours of active time (plus resting), you’ll end up with a dish that’s restaurant-worthy yet simple enough for weeknight dinners.
The result is a Boston butt so tender it nearly falls apart at the touch, with a glossy, golden-brown exterior that hints at the savory aromatics inside. Each slice is packed with flavor, whether you’re serving it on sandwiches, tacos, or straight from the pan.
The method also adapts effortlessly to other cuts of pork, making it a versatile addition to your cooking repertoire.
For those who love crispy skin, a quick broil at the end adds texture without drying out the meat. Pair with classic sides like mashed potatoes or coleslaw for a meal that’s both hearty and foolproof. Let’s get cooking—this is the kind of dish that turns ordinary dinners into showstoppers.
Ingredients for oven cooked boston butt
Five core ingredients transform tough pork shoulder into melt-in-your-mouth perfection.
| Ingredient | Amount | Notes |
|---|---|---|
| Bone-In Pork Shoulder (Boston Butt) 🥓 | 4 lb | With fat cap intact for flavor |
| Kosher Salt 🧂 | 1 ½ tbsp | Diamond Crystal preferred |
| Freshly Ground Black Pepper 🌶️ | 1 tsp | Coarse grind for texture |
| Garlic Powder 🧄 | 1 tbsp | Freshly ground preferred |
| Apple Cider Vinegar 🍎 | 2 tbsp | Unfiltered for depth |
| Extra-Virgin Olive Oil 🫒 | 2 tbsp | For crust development |
| Fresh Rosemary 🌿 | ¼ cup | Chopped, stems removed |
| Yellow Onion 🧅 | 1 whole | Sliced into 1/4-inch pieces |
| Garlic Cloves 🧄 | 4 cloves | Smashed, not minced |
| Beef Broth 💧 | 1 cup | Low-sodium preferred |
| Brown Sugar 🍚 | 1 tbsp | Light or dark variety |
| Smoked Paprika 🌶️ | 1 tsp | For subtle smokiness |
The Boston butt makes or breaks this dish—look for cuts with a thick fat cap (at least 1/4-inch) at Costco or your local butcher. A well-marbled shoulder yields the most flavorful, juicy result. If your cut is bone-in, leave it that way—the bone adds moisture during cooking. For best texture, don’t trim excess fat unless it’s yellowed or discolored. Trader Joe's often carries pre-portioned 4-lb cuts, perfect for this recipe. The fat cap should feel firm but pliable, not rock-hard or overly soft.
No apple cider vinegar? Red wine vinegar or balsamic works in a pinch, but the apple variety adds subtle sweetness that balances the savory notes. Fresh rosemary is ideal, but dried at one-third the amount gets you close. The beef broth can be substituted with water plus 1 tsp soy sauce for umami depth. For extra richness, add 1 tbsp of Worcestershire sauce to the broth. The brown sugar caramelizes beautifully during cooking—don’t skip it, even if you’re watching sugar intake. Smoked paprika adds depth without overpowering.
This dish tastes even better the next day, so plan ahead. Store leftovers in an airtight container in the fridge for up to 5 days, or freeze portions for 3 months. The meat continues to tenderize as it rests, so let it sit at room temperature for 15 minutes before slicing. For crispy skin, broil for 2-3 minutes at the end—watch closely to avoid burning. The rendered fat can be repurposed for roasting vegetables or making gravy.
Why You'll Love This Recipe
- Foolproof Timing: I swear by this method—just season the pork with salt, pepper, and garlic powder, then let the oven do the work while I handle the kids or watch a show. No babysitting the stove, no risk of burning.
- Tangy Crisp Magic: That apple cider vinegar in the rub? It’s the secret weapon. The edges get this addictive caramelized crust, while the inside stays juicy—like a cross between BBQ and comfort food, but better.
- Leftover Goldmine: Seriously, this recipe makes so much meat. I’ll pull it apart for tacos one night, sandwiches the next, and still have enough for a lazy Sunday breakfast. It’s my meal prep MVP.
- Budget Stretch: A whole pork shoulder costs less than takeout for two, and it feeds a crowd. Honestly, I’ve made this for game nights, family dinners, and even a potluck—everyone raves, and I save money doing it.
Step-by-step instructions for slow-braised Boston butt
Here's how to transform a tough cut into melt-in-your-mouth perfection with minimal effort.
Prepare and Season the Pork Shoulder
Remove the pork shoulder from the refrigerator and pat it dry completely with paper towels. This drying step is crucial—it helps create that beautiful crispy bark later. Place the shoulder fat-side up in a roasting pan.
In a small bowl, combine the 1.5 tablespoons kosher salt, 1 teaspoon freshly ground black pepper, 1 tablespoon garlic powder, 1 teaspoon smoked paprika, and the 0.25 cup chopped fresh rosemary. Rub this mixture all over the pork shoulder, pressing it into the meat and fat cap. The fat cap should be generously coated—this helps render flavor during cooking. Let the seasoned shoulder sit at room temperature for 30 minutes before cooking. This ensures even cooking throughout.
Sear for Flavor and Crispiness
Preheat your oven to 300°F. Heat a large oven-safe skillet over medium-high heat and add the 2 tablespoons extra-virgin olive oil. Once the oil is shimmering, carefully place the pork shoulder fat-side down in the skillet. Sear for 8-10 minutes until the fat cap is deeply golden brown and crispy in spots. Flip the shoulder and sear the meat side for another 4-5 minutes until golden.
Here's the thing—don't rush this step. You want that fat to render and the meat to develop a deep brown crust. If you notice the fat smoking excessively, reduce the heat slightly. Transfer the seared shoulder to the roasting pan, fat-side up, and place it in the preheated oven.
Slow-Braise with Aromatics and Vinegar
In the same skillet (no need to clean it), add the 1 whole yellow onion sliced into ¼-inch pieces and the 4 smashed garlic cloves. Sauté for 3-4 minutes until the onions soften and begin to caramelize. Pour in the 2 tablespoons apple cider vinegar and scrape up any browned bits from the bottom of the pan. This deglazing step captures all the flavor.
Transfer the onion and garlic mixture to the roasting pan with the pork shoulder. Pour the 1 cup beef broth over the shoulder, making sure it's evenly distributed. Sprinkle the 1 tablespoon brown sugar over the top. The sugar will help caramelize during cooking, adding depth of flavor. Cover the roasting pan tightly with aluminum foil.
Cook Low and Slow Until Fork-Tender
Return the pork shoulder to the oven and cook for 4-5 hours at 300°F. This long, slow cook time is what transforms tough muscle into tender, pull-apart meat. About 1 hour before the pork is done, remove the foil to let the surface crisp up slightly. You'll know it's ready when the internal temperature reaches 195-203°F at the thickest part of the meat (use a meat thermometer for accuracy).
Real talk: The pork will look like it's not cooking much during the first few hours, but that's normal. Patience is key here. The meat should have a deep mahogany color and the fat should be rendered but still slightly crispy. If the pork isn't quite tender enough, continue cooking for another 30 minutes at the same temperature.
Rest and Shred for Maximum Juiciness
Once the pork reaches the target temperature, remove it from the oven and let it rest for 30-45 minutes before shredding. This resting period allows the juices to redistribute throughout the meat, ensuring each bite is moist and flavorful. Don't skip this step—it's what separates good pulled pork from exceptional pulled pork.
To shred, use two forks or a pair of tongs to pull the meat apart against the grain. Discard any large fat chunks or connective tissue. Taste the pork and adjust seasoning if needed—you might want to add a pinch more salt or a splash of the cooking liquid to loosen the shreds. Serve immediately with the cooking juices spooned over the top for that authentic, restaurant-quality experience.
Pro Tips For Making Oven Cooked Boston Butt
- Trim the Fat Cap: The thick fat layer on the Boston butt isn’t just for looks—it renders down into flavor gold. Use a sharp knife to trim it down to about ¼-inch thick before seasoning. I learned this the hard way after my first batch turned into a grease fire in the oven.
- Salt Like It’s 1920: Don’t skimp on kosher salt—this isn’t a delicate fish fillet. Generously coat the meat with 1-2 tablespoons of salt (and a pinch of pepper) at least 4 hours ahead, or overnight if possible. The salt penetrates deeper, and the crust forms better. Yes, even if you’re impatient like me.
- Start Hot, Finish Slow: Roast the Boston butt at 425°F for the first 30 minutes to kickstart the crust, then drop to 275°F. After burning three batches trying to low-and-slow from the start, I finally realized the high heat jumpstarts the Maillard reaction without drying it out. —I know, I know, but trust the process.
- Vinegar Bath Before Roasting: Brush the meat with apple cider vinegar right before it hits the oven. It cuts through the fat, tightens the skin, and adds a subtle tang that balances the richness. Skip this, and you’ll end up with a dish that tastes like it’s missing something—even if you can’t put your finger on it.
Dietary considerations for oven cooked boston butt
Gluten-Free Adaptations
This recipe is naturally gluten-free, but the key is ensuring all ingredients meet the standard. Use certified gluten-free beef broth like Annie's Homegrown or Pacific Foods to avoid hidden gluten.
The apple cider vinegar and smoked paprika from Penzeys are typically gluten-free, but always check labels since cross-contamination can occur in shared facilities. For extra safety, I recommend Bob's Red Mill gluten-free spices. 🌱
Low-Carb/Keto Options
To make this keto-friendly, skip the brown sugar and replace it with 1 tablespoon erythritol or monk fruit sweetener. The beef broth should be sugar-free, so opt for Kettle & Fire Bone Broth or Whole30-approved brands.
The apple cider vinegar adds acidity without carbs, and the rosemary and garlic provide flavor without impacting net carbs. With these adjustments, you’ll get a rich, savory dish under 5g net carbs per serving.
Dairy-Free Considerations
This recipe doesn’t contain dairy, but if you’re avoiding it entirely, ensure your smoked paprika and spices are processed in a dairy-free facility. The only potential dairy in the original recipe comes from the fat cap of the pork, which is naturally dairy-free.
For extra flavor without dairy, add 1 teaspoon onion powder or 1 tsp ground mustard to the seasoning rub for depth. 🧂
Allergen-Friendly Swaps
For nut allergies, this recipe is already safe, but always double-check labels on smoked paprika and spices for nut processing warnings. If you’re avoiding garlic, substitute 1 tbsp garlic powder with 1 tsp asafoetida (hing), a common garlic substitute in Indian cuisine.
For onion-free versions, use 1 tbsp onion powder or 1 tsp celery salt for umami. The beef broth can be swapped for chicken broth if preferred.
Protein-Packed Boost
Want to maximize protein? Trim any excess fat from the pork shoulder before cooking—this reduces total fat content while keeping the protein high. A 4-lb pork shoulder yields about 100g protein when fully cooked, making it a powerhouse for muscle recovery.
For an extra protein kick, add 1 cup cooked lentils to the pan during the last 30 minutes of cooking. They’ll absorb the flavors beautifully. 💪
Sodium Control Tips
If you’re watching sodium, reduce the kosher salt to 1 teaspoon and boost flavor with 1 tbsp lemon juice or 1 tsp mustard powder. Use a low-sodium beef broth like Low Sodium Beef Bouillon from Pacific Foods.
The apple cider vinegar adds tang without sodium, and the rosemary and garlic provide aromatic depth. This keeps your dish flavorful while cutting sodium by 50%.
Nutrition facts
Frequently asked questions
Why does the recipe call for a fat cap on the pork shoulder?
The fat cap is essential for two reasons: it renders during cooking, creating a flavorful sauce that bastes the meat, and it helps develop a crispy, golden-brown crust. A well-marbled shoulder with a thick fat cap (at least 1/4-inch) ensures the meat stays juicy and packed with flavor. The fat also protects the meat from drying out during the long cooking process.
Can I use a different oven temperature than 300°F?
Yes, but adjust the cooking time accordingly. A lower temperature like 275°F will take 5-6 hours for the same results, while 325°F can cut cooking time to 3.5-4 hours. The key is maintaining a temperature that keeps the meat tender without drying it out. Use a meat thermometer to check for doneness at 195-203°F.
What if my pork shoulder isn't tender after 4-5 hours?
Don’t panic! If the internal temperature hasn’t reached 195-203°F, continue cooking for another 30-60 minutes at the same temperature. The meat should become fork-tender as it breaks down further. If it’s still tough, add 1/2 cup more broth to the pan, cover tightly, and cook for an additional 1 hour. Patience is key—this is a slow process.
How do I store leftovers to keep them juicy?
Store leftovers in an airtight container in the refrigerator for up to 5 days or freeze for 3 months. The meat continues to tenderize as it rests, so let it sit at room temperature for 15 minutes before reheating. For best texture, reheat in a skillet over low heat with a splash of broth or water to keep it moist. Avoid microwaving, as it can dry out the meat.
Can I make this recipe in a Dutch oven instead of a roasting pan?
A Dutch oven works beautifully for this recipe. The deep sides help contain the cooking liquid, and the heavy material retains heat evenly. Follow the same steps, but reduce the broth to 3/4 cup to prevent overflow. The tight lid will trap steam, speeding up the cooking process slightly. Just be sure to remove the lid for the last 30 minutes to crisp the skin.