Side Dishes
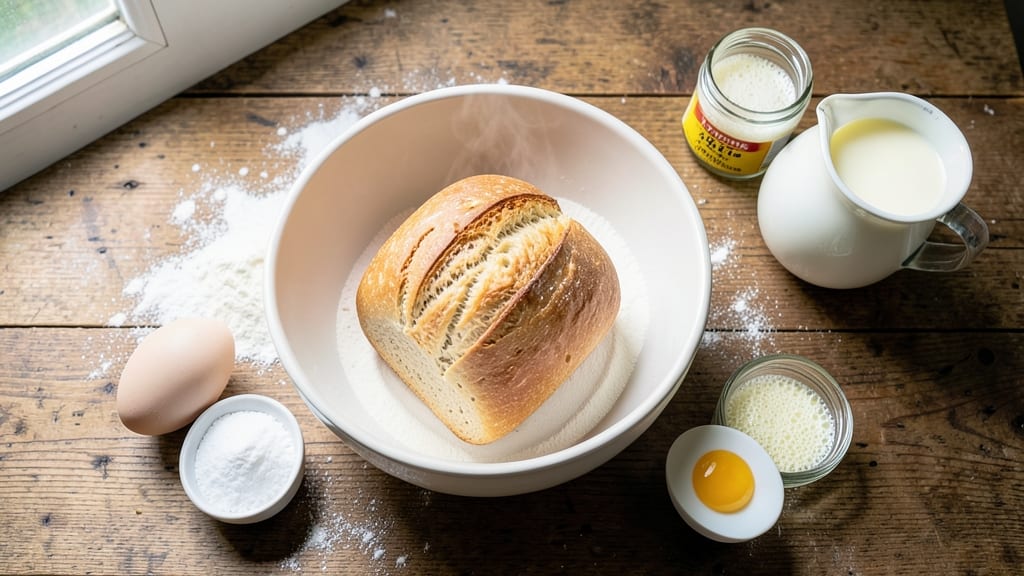
This old-fashioned white bread recipe brings back the nostalgia of homemade loaves with a tender crumb and crisp golden crust—just like your grandmother used to make. The secret lies in precise kneading and slow fermentation, transforming simple ingredients into bread with a texture that’s both soft and sturdy.
I’ve perfected this recipe over years of baking, ensuring every slice delivers that classic, comforting bite.
The dough requires only five basic ingredients—flour, yeast, sugar, salt, and milk—but the technique is what makes all the difference. A proper knead develops gluten for that signature pillowy texture, while a warm rise allows the yeast to work its magic.
This isn’t your quick-rise store-bought bread; it’s the real deal, baked in a home oven with professional results.
By the time you pull that loaf from the oven, you’ll have a fragrant, golden-brown crust that crackles slightly when sliced, revealing a soft, even crumb inside. The aroma alone will transport you to childhood memories of fresh-baked bread cooling on the counter.
This recipe is designed to be your go-to for sandwiches, toast, or simply enjoying with butter.
Whether you’re baking for a family gathering or just craving homemade bread, this method delivers consistent, restaurant-quality loaves every time. The key is patience—letting the dough rise properly ensures that perfect balance of softness and structure. Let’s get started on making bread that tastes like home.
Ingredients for old fashioned white bread
Five simple ingredients transform into nostalgic, pillowy white bread with a perfect golden crust.
| Ingredient | Amount | Notes |
|---|---|---|
| All-Purpose Flour 🌾 | 5 cups | Sifted for even texture |
| Active Dry Yeast 🍞 | 2 ¼ tsp | Freshly opened for potency |
| Granulated Sugar 🍚 | 1 tbsp | White sugar preferred |
| Salt 🧂 | 1 ½ tsp | Kosher or sea salt |
| Whole Milk 🥛 | 1 cup | Room temperature preferred |
| Large Eggs 🥚 | 1 whole | Room temperature for best mixing |
| Unsalted Butter 🧈 | ½ cup | Softened but not melted |
| Vegetable Oil 🫒 | 1 tbsp | Light neutral oil preferred |
| Water 💧 | ¼ cup | Warm, not hot |
The flour is the foundation—King Arthur or Gold Medal brands yield the best results due to their consistent protein content. Look for all-purpose flour labeled with a protein content of 10-12% for that classic tender crumb. If you're using a different brand, check the protein level; higher protein (13%+) can make the bread too chewy. The yeast must be active dry—never instant yeast for this recipe, as it requires a different hydration approach. Store your flour in an airtight container in a cool, dark place to preserve freshness, and buy in bulk if you bake often—Aldi or WinCo often have the best prices. The milk should be whole milk for richness, but 2% works in a pinch—just expect slightly less tenderness.
No whole milk? Evaporated milk or buttermilk (with a splash of water) mimics the fat content well. The egg is non-negotiable—it adds structure and shine, but if you're avoiding eggs, 1 tbsp melted butter plus 1 tbsp water can substitute (though texture may vary). For the butter, Land O'Lakes or Plugrá are reliable choices—avoid salted butter unless you adjust the salt later. The vegetable oil is optional but helps create a smoother dough; canola or light olive oil work best. If you're short on time, skip the water and use the milk's liquid content, but the dough may be slightly drier. For yeast issues, always test it first: dissolve 1 tsp sugar and 1 tsp yeast in ¼ cup warm water, wait 5 minutes—if it doesn’t foam, your yeast is dead.
This dough keeps in the fridge for up to 24 hours before shaping, making it perfect for overnight prep. Once shaped, it can rise at room temperature for 1-2 hours or in the fridge overnight for deeper flavor. Freeze shaped dough balls for up to 3 months—thaw and let rise before baking. For storage, wrap cooled loaves in beeswax wrap or a cotton towel to keep them soft for 3-4 days. Reheat slices in a toaster or oven at 300°F for 5 minutes to revive freshness. Portion dough into 4 equal loaves or one large pan for maximum yield—every slice will have that nostalgic, buttery aroma you remember from childhood.
Why You'll Love This Recipe
- No-Knead Magic: I swear by this trick—just mix the warm milk with yeast and flour, let it rise overnight, and boom. No standing at the counter, no arm workout. The dough practically proofs itself while I sleep.
- Buttery Soft Core: That whole milk? It’s the secret weapon. The bread turns out tender, with just enough chew, and a crust that’s crisp enough to satisfy but not so tough you need a hammer. Honestly, my toast game changed forever.
- Lunchbox Legend: Between us, this bread is my go-to for sandwiches, grilled cheese, or even French toast. Freeze the leftovers in slices, and you’ve got a week’s worth of quick breakfasts. My kids still beg for it years later.
- Pantry Staple: Five ingredients, zero fuss. The yeast and sugar combo kicks in reliably, and the salt balances everything just right. I make a double batch every Sunday—it’s cheaper than buying loaves, and it lasts longer than store-bought. Win-win.
Step-by-step instructions for soft pillowy white bread
Follow this method carefully and you'll achieve light, airy loaves with a perfect golden crust every time.
Activate the Yeast for Maximum Rise
In a small bowl, combine the 0.25 cup warm water (about 110°F) with the 1 tbsp granulated sugar and 2.25 tsp active dry yeast. Let it sit for 5-10 minutes until foamy. You should see small bubbles forming on the surface—this indicates the yeast is alive and ready to work. If it doesn't foam, your yeast may be old or your water too hot.
While waiting, place the 1 cup whole milk and 0.5 cup unsalted butter in a microwave-safe bowl and heat for 30-45 seconds until the butter melts and the milk is warm to the touch. This creates the perfect environment for yeast activation and dough development. Let it cool slightly before using.
Mix the Dough Until Smooth and Elastic
In a large mixing bowl, combine the 5 cups all-purpose flour and 1.5 tsp salt. Make a well in the center and add the yeast mixture, warmed milk-butter mixture, and 1 whole large egg. Using a wooden spoon, stir until everything comes together into a shaggy mass.
Add the 1 tbsp vegetable oil and mix again. Then switch to a stand mixer fitted with the dough hook attachment. Knead on low speed for 3-5 minutes until the dough begins to pull away from the sides of the bowl. The dough should be smooth, elastic, and slightly tacky—not sticky enough to leave residue on your fingers.
Knead Until Windowpane Test Passes
Continue kneading on medium speed for another 5-7 minutes until the dough passes the windowpane test. To test, take a small piece of dough and stretch it between your fingers—it should be thin enough to see light through it without tearing. This indicates proper gluten development, which gives your bread its structure and chew.
If the dough feels too sticky, add 1 tablespoon flour at a time until it reaches the right consistency. The dough should be soft but not wet. Once properly kneaded, shape it into a ball, lightly oil the bowl, place the dough inside, and cover with a damp towel. Let it rise in a warm place for 1-1.5 hours or until doubled in size.
Shape and Proof for Optimal Texture
Punch down the risen dough to release air, then divide it into 4 equal portions (about 1 pound each). Shape each portion into a smooth, round loaf by rolling it into a ball and tucking the edges under. Place the shaped loaves in a greased 9x5-inch loaf pan, seam-side up, spacing them evenly.
Cover the pan with a damp towel and let the dough proof again for 30-45 minutes until the loaves have risen about halfway up the sides of the pan. This second rise ensures maximum air pockets for that signature pillowy texture. Preheat your oven to 375°F while the bread proofs.
Bake to Golden Perfection
Bake the loaves for 25-30 minutes until they're golden brown and sound hollow when tapped on the bottom. The internal temperature should reach 190-200°F. Rotate the pan halfway through baking for even browning.
Remove from the oven and let cool in the pan for 10 minutes before transferring to a wire rack. This resting period prevents the bread from becoming gummy. Once fully cooled, slice with a serrated knife for clean cuts. The interior should be soft and moist with a fine crumb structure, while the exterior maintains that classic golden crust.
Pro Tips For Making Old Fashioned White Bread
- Mix Milk First: DESCRIPTION: Warm the whole milk to 110°F (43°C)—just until it’s cozy to the touch—before mixing it with the yeast and sugar. Cold milk kills yeast; hot milk (above 120°F) does too, but lukewarm gets it bubbling in 5-7 minutes, not 20. I learned this the hard way after staring at a sluggish yeast bowl for half an hour.
- Knead Like You Mean It: DESCRIPTION: Use the windowpane test—stretch a golf-ball-sized dough between your fingers until it’s translucent and thin enough to see light through. Old-fashioned dough needs 8-10 minutes of vigorous kneading (by hand) or 5-6 minutes in a stand mixer with a dough hook. Skimp here, and your loaf will be dense. (Yes, even if your arms protest.)
- Skip the Overproofing: DESCRIPTION: Let the dough rise until it doubles in size—no more, no less. Overproofing (waiting for it to triple or collapse) makes the crumb gummy. Poke it: if the dent springs back slowly, it’s ready. If it bounces back fast, give it 10 more minutes. (Your future toast will thank you.)
- Use Bread Flour for Structure: DESCRIPTION: Swap 10% of the all-purpose flour for bread flour (or add 1 extra tablespoon of vital wheat gluten per cup). The extra gluten gives old-fashioned bread that chewy, classic texture—not the fluffy, short-lived loaf you’d expect from all-purpose alone. (I was skeptical until I tried it.)
Flavor customization for this dish
Sweet Variations
For a sweeter loaf, add 1 tbsp honey or 1 tbsp maple syrup to the dough along with the sugar. This works beautifully for cinnamon raisin bread—fold in ½ cup raisins and 1 tsp cinnamon after the first rise.
For extra richness, replace 2 tbsp milk with 2 tbsp sweetened condensed milk before mixing. 🍯
Herb-Infused Twists
Brighten the dough with fresh herbs like 1 tbsp chopped rosemary or 1 tsp dried thyme for a savory twist. I love adding ½ cup grated Parmesan cheese and 2 tbsp chopped parsley for a garlic-herb loaf that’s perfect for sandwiches.
For a Mediterranean touch, mix in 1 tbsp dried oregano and ¼ cup chopped sun-dried tomatoes.
Seeded & Whole Grain
Swap 1 cup all-purpose flour for 1 cup whole wheat flour and add 2 tbsp poppy seeds or sesame seeds for texture. For a pumpkin spice variation, mix in ½ cup pumpkin puree and 1 tsp pumpkin pie spice before kneading.
The seeds add crunch while keeping the bread soft inside. Store-bought seed mixes work, but I prefer Penzeys Everything Bagel Seasoning for a bold flavor. 🌾
Cheesy & Savory
Transform this into cheddar bread by folding in 1 cup shredded sharp cheddar after the first rise. For a sourdough-style loaf, replace ½ cup milk with ½ cup sourdough starter and add 1 tsp mustard powder for depth.
A jalapeño cheddar version uses ½ cup cheddar and 2 diced jalapeños for a spicy kick. Always reduce salt slightly when adding cheese.
Gluten-Free Adaptation
For a gluten-free version, replace the all-purpose flour with a 1:1 gluten-free baking flour blend (like King Arthur Measure for Measure). Add 1 tbsp xanthan gum if your blend doesn’t include it, and increase the water by 2 tbsp to compensate for dryness.
Let the dough rest for 10 minutes** after mixing to hydrate fully. Expect a denser crumb, but the flavor remains rich and buttery. 💪
Nutrition facts
Frequently asked questions
Why does this recipe use milk instead of water?
The milk creates a richer, more tender crumb compared to water. Whole milk adds fat that improves texture and browning, while its proteins help develop gluten for that classic soft yet sturdy structure. For a lighter loaf, you could substitute with 2% milk, but the flavor won't be as rich.
Can I make this bread without a stand mixer?
By hand, knead the dough on a lightly floured surface for 8-10 minutes until it passes the windowpane test. Work in 30-second intervals, letting the dough rest between each to prevent overheating. The extra effort develops gluten just as effectively as a mixer.
What's the best way to store homemade white bread?
Wrap cooled loaves in a clean kitchen towel or beeswax wrap to maintain moisture. Store at room temperature for 3-4 days or freeze for up to 3 months. For extra freshness, place an apple slice in the bag—it releases ethylene gas that keeps bread soft longer.
Why did my bread turn out dense instead of pillowy?
Dense bread usually means underproofed dough or insufficient kneading. Ensure your yeast is active (test it first) and let the dough rise until it doubles in size. Also verify you kneaded for 10-12 minutes total—this develops gluten for that signature light texture. A 375°F oven is key too—too high and the bread bakes too fast.
Can I use this recipe for dinner rolls?
Yes! Shape the dough into 1-inch balls and place them on a baking sheet. Let them rise for 45-60 minutes** until puffy, then bake at 375°F for 12-15 minutes. Brush with melted butter after baking for extra richness. For extra flavor, add 1 tbsp garlic powder to the dough before shaping.