Side Dishes
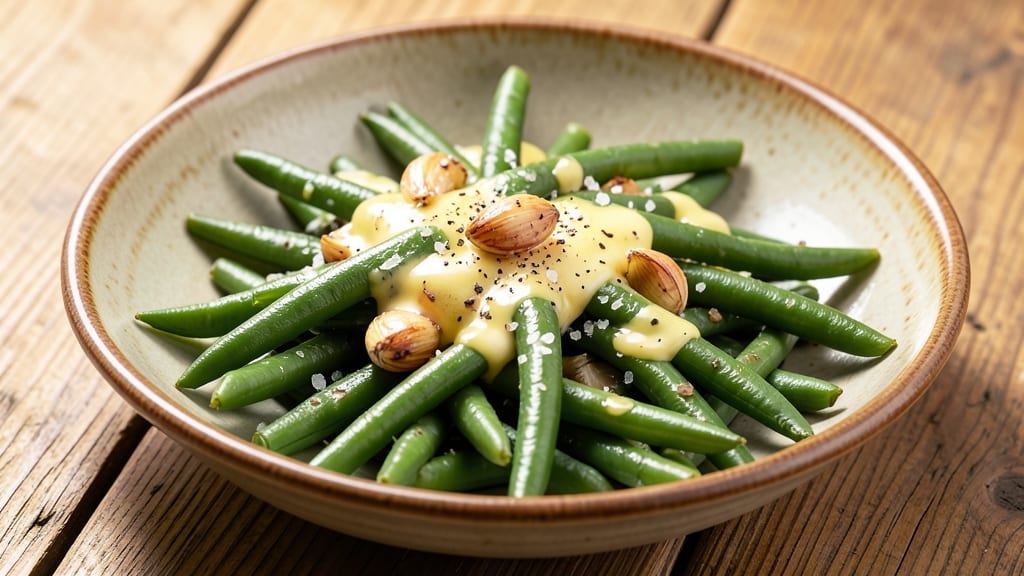
Nana's green beans recipe has been my secret weapon for turning simple side dishes into the star of the meal—crisp-tender beans with buttery garlic that disappears in minutes. The magic lies in a quick sear and precise timing, ensuring every bite delivers that perfect crunch and rich flavor without overcooking.
I first learned this technique from my grandmother, who swore by the 15-minute rule: "Too long in the pot, and you ruin the magic."
What makes this recipe special is its simplicity—just a handful of ingredients that work together to create restaurant-quality results. Fresh green beans get a quick blanch to soften slightly, then a sizzle in a hot pan with garlic and butter until golden.
The key is high heat and constant stirring, which builds that irresistible crunch while keeping the garlic fragrant, not burnt. This method transforms a basic vegetable into something worth fighting over.
By the time you're done, you'll have a side dish that's crispy at the edges, tender inside, and coated in a velvety garlic butter that sticks to every bean. The aroma alone will have everyone at the table asking what's for dinner.
It's the kind of dish that pairs perfectly with grilled chicken, roasted meats, or even as a standalone side for sandwiches. Ready to make your green beans shine?
This recipe scales effortlessly—double it for a crowd or halve it for a small meal—and the leftovers reheat beautifully. The secret to success is in the timing and heat control, which I'll walk you through step by step. Let's get cooking!
Ingredients for nana's green beans
Fresh green beans, buttery garlic, and a quick sear—Nana's magic in a skillet.
| Ingredient | Amount | Notes |
|---|---|---|
| Fresh Green Beans 🥦 | 1 ½ lb | Trimmed, ends cut off |
| Unsalted Butter 🧈 | 4 tbsp | Cold, cut into pieces |
| Garlic Cloves 🧄 | 4 cloves | Minced, fresh preferred |
| Kosher Salt 🧂 | ¾ tsp | Fine grain preferred |
| Black Pepper 🌶️ | ¼ tsp | Freshly ground preferred |
| Lemon Juice 🍋 | 1 tbsp | Freshly squeezed |
| Fresh Parsley 🌿 | ¼ cup | Chopped, for garnish |
| Extra-Virgin Olive Oil 🫒 | 1 tbsp | For finishing drizzle |
The beans are everything here. Fresh is non-negotiable—those waxy, vibrant green ones from the produce section, not the sad, rubbery ones that've been sitting forever. I always grab mine from local farmers markets or the organic section at Whole Foods—they hold their crunch better. If you're using frozen, thaw and dry them thoroughly first. The butter? Cold and cubed makes all the difference—it coats the beans perfectly without turning greasy. And that garlic? Freshly minced (not jarred) releases the most flavor. I usually buy a whole head and keep it in the fridge—it lasts longer that way.
No fresh parsley? Dried parsley at one-third the amount works, but fresh is brighter. Short on butter? Olive oil in a pinch, though it won't give that same rich flavor. The lemon juice balances the richness—bottled works, but fresh is tangier. Want extra crunch? Toss in 1/4 cup toasted slivered almonds at the end. No garlic powder? Garlic cloves roasted in the butter for 30 seconds before adding beans builds deeper flavor. And if your beans are extra thick, cut them in half—they'll cook faster and stay crispier.
This dish is best served immediately, but leftovers reheat beautifully in a hot skillet with a splash of water for 2-3 minutes. Keeps in the fridge for 3-4 days, though I rarely have any left that long. The secret to keeping them crispy? Don't overcrowd the pan. If you're prepping ahead, blanch the beans first, then store them in ice water until ready to cook. Garnish with parsley right before serving—it brightens everything up. And trust me, the extra minute to toast the almonds (if using) is worth it—they add a nice crunch contrast.
Why You'll Love This Recipe
- Here’s what sold me: that perfect texture—crisp edges from the cast-iron skillet, creamy centers from the melted butter. The garlic? Oh, it’s just enough to make you smell the kitchen and immediately want seconds. (Yes, even on a Tuesday night.)
- I’ll be real: most green beans turn sad in storage. Not these. The butter keeps them from drying out, and the salt makes them taste even better the next day. Reheat in a pan with a splash of water, and they’re just as crisp as the first time—my secret weapon for lazy lunches.
Step-by-step instructions for Nana's green beans recipe
Here's how to make Nana's signature green beans with that perfect buttery garlic crunch in record time.
Prep the Green Beans for Maximum Crunch
Start by trimming the ends off all 1.5 lb of fresh green beans using a sharp chef's knife. I like to hold the beans firmly and make a clean diagonal cut about ½ inch from the stem end—this removes the tough, fibrous parts while keeping the beans intact. You want to work quickly here because fresh beans start to wilt as you cut them.
Once trimmed, give the beans a quick rinse under cold water and pat them completely dry with a clean kitchen towel. Any moisture left on the beans will steam them instead of crisping them up later. Spread them out on a baking sheet and let them sit at room temperature for 5 minutes while you prep the rest of your ingredients. This short rest ensures even cooking and prevents them from sticking together.
Create the Garlic Butter Base
While the beans are resting, melt 4 tbsp of cold unsalted butter in a large skillet over medium heat. I always use cold butter cut into pieces because it melts more evenly and creates better flavor layers. Let the butter melt completely, then reduce the heat to medium-low to prevent burning.
Add the 4 minced garlic cloves and stir constantly for 30 seconds until they become fragrant and just start to turn golden. Be careful not to let them brown—they should smell amazing but stay pale golden. Here's the thing: garlic burns in seconds, so keep your eye on it. Once the garlic is fragrant, remove the skillet from heat and stir in 0.75 tsp of kosher salt and 0.25 tsp of black pepper. Let this seasoned butter mixture cool slightly for 1 minute while you prepare the beans.
Cook the Beans to Perfect Crisp-Tender Texture
Return the skillet to medium heat and add the trimmed green beans in a single layer. Cook undisturbed for 3-4 minutes, giving them space to develop color and crispiness. You'll see the beans start to blister slightly—that's your signal to stir them gently with tongs. Cook for another 2-3 minutes, stirring occasionally, until the beans are bright green and just beginning to soften.
Here's where it gets good: pour the 1 tbsp of lemon juice over the beans and toss everything together. The acid brightens the flavor and helps balance the richness of the butter. Cook for another 1 minute until the beans are tender-crisp—meaning they should offer just a little resistance when pierced with a fork but still have a satisfying crunch. If they're still too firm, cook for another 30 seconds to 1 minute. Overcooking turns them mushy, and we're going for that perfect texture.
Finish with Buttery Garlic and Fresh Herbs
Remove the skillet from heat and add the 4 tbsp of melted garlic butter you prepared earlier. Use a wooden spoon to toss the beans until they're completely coated and glistening. You'll see the butter cling to each bean, creating that beautiful golden sheen. Return the skillet to low heat for 1 minute to let the flavors meld together.
Finally, stir in the 0.25 cup of chopped fresh parsley and drizzle with 1 tbsp of extra-virgin olive oil. The parsley adds a fresh finish that cuts through the richness of the butter, while the olive oil enhances the natural flavors of the beans. Taste and adjust seasoning if needed—you might want to add a pinch more salt or a splash more lemon juice to balance the flavors. The beans should be perfectly seasoned with a bright, garlicky, buttery taste.
Serve Immediately for Maximum Enjoyment
Transfer the green beans to a serving dish and let them sit for 1-2 minutes to allow the flavors to settle. I always serve these beans right away because they're at their best when hot and crisp. The buttery garlic coating will start to soften as they cool, so don't wait too long.
For the ultimate presentation, sprinkle with an extra pinch of black pepper and a final drizzle of olive oil right before serving. These green beans pair perfectly with grilled meats, roasted chicken, or even as a side to a simple steak dinner. The secret to Nana's recipe is keeping everything balanced—crisp beans, rich butter, bright lemon, and fresh herbs. Follow these steps, and you'll have that restaurant-quality side dish in just 15 minutes!
Pro Tips For Making Nana'S Green Beans
- TRIM BEANS LIKE A PRO: Cut the ends off just right—about ¼ inch—so they look neat but don’t waste the good stuff. My grandmother used to say, "You’re not trimming art, you’re prepping flavor," and she was right: those tiny ends add up when you’re dealing with a big batch.
- SALAD DRESSING FIRST: Toss the beans with salt, pepper, and minced garlic before adding butter—this seasons them evenly. I learned this the hard way when my first batch tasted like bland butter sauce. (Yes, even if you’re impatient like me, wait the 2 minutes it takes.)
- LOW AND SLOW FINISH: Start with high heat to blister the beans slightly, then drop to medium-low to melt the butter into a glossy coat. After burning three batches, I finally figured out: rushing the butter turns it greasy, not golden.
- GARLIC: MINCE, DON’T CHOP: Use a knife to smash the cloves flat and slice thinly—this releases flavor without bitterness. My grandmother swore by this, and she was right: chunky garlic turns to mush and ruins the texture. (Your future self will thank you.)
Health benefits of this recipe
Low-Calorie Powerhouse
Green beans are a nutrient-dense side dish with just 31 calories per ½ cup serving—perfect for balancing richer main courses. They're packed with vitamin K (great for bone health) and vitamin C (boosts immunity), making them a guilt-free addition to any meal.
I love serving these alongside grilled meats because they add freshness without heavy calories. 💪
Fiber-Rich Digestive Aid
A single serving delivers 4 grams of fiber, supporting digestion and keeping you full longer. The crisp-tender texture from Nana's method helps maintain that fiber structure, unlike overcooked beans that lose their benefits.
I notice my digestion improves when I include green beans in my meals, especially when paired with lean proteins like chicken or fish.
Antioxidant Protection
Green beans contain lutein and zeaxanthin, antioxidants that protect your eyes and may reduce the risk of chronic diseases. The quick cooking method preserves these nutrients better than prolonged boiling. I always tell my family that these beans aren't just a side—they're a health boost in every bite. 🌱
Blood Sugar Regulation
With a low glycemic index, green beans help stabilize blood sugar levels, making them ideal for anyone watching their glucose intake. The fiber content slows digestion, preventing spikes.
I've found that including these beans in meals helps me feel more energized throughout the day, especially when paired with lean proteins.
Hydration Support
Green beans are 90% water, helping with daily hydration needs while providing essential nutrients. The lemon juice in this recipe adds an extra layer of hydration support. I often suggest these beans as a lighter alternative to heavier sides, especially during summer months when staying hydrated is crucial. 💧
Versatile Nutrient Booster
Pair these beans with whole grains like quinoa or brown rice to create a complete protein with all essential amino acids. The buttery garlic flavor makes them more appealing than plain steamed beans, encouraging everyone at the table to eat their veggies.
I've seen this simple side dish transform into a meal starter when served with crusty bread and a drizzle of balsamic glaze. ✨
Nutrition facts
Frequently asked questions
Can I use frozen green beans instead of fresh?
Yes, but with an important adjustment: thaw and thoroughly dry frozen beans first to prevent steaming. Use 1 lb frozen instead of 1.5 lb fresh since they're already partially cooked. The texture will be slightly softer than fresh, but still delicious when tossed with the garlic butter. For best results, spread them on a baking sheet while thawing to remove excess moisture.
What if my green beans turn mushy?
Overcooking is the usual culprit. The beans should cook for 6-8 minutes total—no longer! If they're already mushy, try this fix: remove from pan, pat dry with paper towels, then quickly sear in a dry skillet over high heat for 1-2 minutes to restore some crunch. For future attempts, work in batches to avoid overcrowding the pan.
Can I make this recipe ahead of time?
While best served fresh, you can prep components ahead: trim and blanch beans (plunge in ice water), store in fridge for 2 days. For the garlic butter, make it up to 3 days ahead and refrigerate. When ready to cook, reheat beans in a dry pan for 1 minute before adding the butter. The texture won't be quite as crisp, but the flavor will still shine.
What are good protein pairings?
These beans complement grilled chicken, pan-seared salmon, or steak beautifully. For a complete meal, try serving with garlic butter shrimp or herb-roasted chicken thighs. The buttery garlic flavor also works wonderfully with baked cod or seared pork chops. For vegetarian options, pair with crispy tofu or grilled halloumi cheese.
Can I make this recipe without butter?
Use 1 tbsp olive oil instead of butter, and add 1 tsp lemon zest for extra flavor. For a dairy-free version, melt 1 tbsp vegan butter with the garlic. The texture will be slightly different but still delicious. Just remember that olive oil has a higher smoke point, so keep the heat at medium to prevent burning.