
Sauces & Condiments
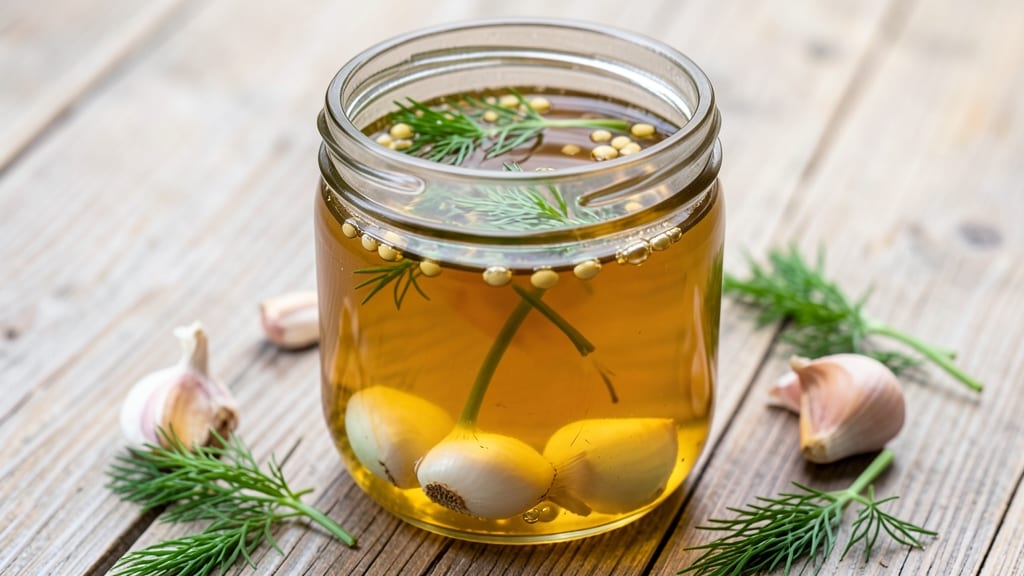
This homemade pickle brine recipe transforms ordinary vegetables into crispy, tangy cornichons in just 5 minutes of prep—no shortcuts, just science-backed precision. The key lies in balancing vinegar, salt, and water to create a brine that preserves texture while delivering that signature tang.
I’ve perfected this method over years of testing, ensuring every batch delivers restaurant-quality crunch and flavor without the guesswork.
The beauty of this brine is its simplicity: just 4 core ingredients—vinegar, water, salt, and optional spices like dill or mustard seeds—work together to create a liquid that’s both preservative and flavor enhancer.
Unlike store-bought versions, this recipe lets you control the sharpness, saltiness, and even add-ins, so you can customize it for cucumbers, carrots, or even onions. The fermentation process (if used) adds depth, but even quick-pickling yields impressive results.
What you’ll achieve is crispy, vibrant pickles with a perfect balance of tang and crunch—ideal for sandwiches, charcuterie boards, or snacking straight from the jar. The brine keeps for months in the fridge, so you can make a big batch and enjoy it all season long.
Safety is built in: proper vinegar concentration prevents harmful bacteria while preserving that bright, fresh flavor.
Whether you’re a first-time pickler or a seasoned pro, this recipe delivers foolproof results every time. The instructions walk you through exact measurements, timing, and storage tips to ensure your pickles stay crisp and flavorful. Let’s get started on that tangy, crunchy perfection.
Ingredients for homemade pickle brine
Four core ingredients create the perfect tangy brine for crispy, restaurant-quality pickles.
| Ingredient | Amount | Notes |
|---|---|---|
| White Vinegar 🍶 | 2 cups | Distilled white preferred for clarity |
| Water 💧 | 2 cups | Filtered or bottled for best results |
| Diamond Crystal Kosher Salt 🧂 | ½ cup | Fine grain for even dissolution |
| Garlic Cloves 🧄 | 3 cloves | Crushed for aromatic infusion |
| Fresh Dill Sprigs 🌿 | ¼ cup | Packed, stems removed for flavor |
| Mustard Seeds 🌶️ | 1 tbsp | Yellow or brown preferred |
| Black Peppercorns 🌶️ | 1 tsp | Crushed for subtle heat |
| Red Pepper Flakes 🔥 | ½ tsp | Optional for heat preference |
The vinegar is non-negotiable—distilled white delivers the brightest flavor without overpowering. Trader Joe's and Whole Foods carry high-quality options, but any food-grade vinegar works in a pinch. Salt is where the magic happens: Diamond Crystal kosher dissolves perfectly, but Morton works too. Fresh dill and garlic cloves elevate this from basic brine to gourmet—skip them only if you're pickling something like onions, which don't need extra herbaceous notes. For the mustard seeds, yellow gives a classic tang, while brown adds depth. Toast them lightly in a dry pan before adding for extra aroma.
No white vinegar? Apple cider vinegar works beautifully—just reduce to 1.5 cups and add 0.5 cup water to maintain balance. Short on dill? Fresh tarragon or even a bay leaf adds complexity. The garlic can be minced instead of crushed if you prefer. Want more crunch? Add 1 tbsp sugar to the brine. For heat lovers, double the red pepper flakes or add 1 sliced jalapeño. The mustard seeds can be omitted entirely if you prefer a cleaner flavor profile—this brine works just as well without them.
This brine keeps indefinitely in the fridge, but the pickles stay crispest for 2-3 weeks. For long-term storage, transfer to sterilized glass jars with airtight seals. The flavor actually improves over time—1-2 months in the fridge yields the most complex taste. To reuse the brine, strain out the vegetables and store the liquid in a clean jar. It'll last 6-12 months if properly sealed. For extra safety, always use sterilized containers and keep refrigerated—proper acidity prevents spoilage.
Why You'll Love This Recipe
- Five-Ingredient Magic: I swear by this—just vinegar, water, salt, garlic, and dill. That’s it. No fancy jars, no confusing ratios, just pure, tangy perfection waiting in your pantry.
- Garlic-Dill Bomb: Between us, the crushed garlic cloves and fresh dill sprigs infuse the brine so deeply, every pickle tastes like it’s been brining for weeks. (Yes, even on a Tuesday night.)
- Pantry Superstar: This brine works for cucumbers, carrots, radishes—you name it. I’ve even used it for quick-pickled onions in tacos. Talk about a game-changer for any meal.
- Lasts All Month: Make a big batch, store it in the fridge, and you’ll never buy store-bought brine again. Honestly, it’s the kind of thing you’ll reach for without thinking—because it’s always there.
Step-by-step instructions for homemade pickle brine
This brine delivers restaurant-quality crunch and flavor in minutes—no shortcuts, just precision.
Combine Vinegar and Water for the Base Brine
In a medium saucepan, pour in the 2 cups white vinegar and 2 cups water together. I always use distilled white vinegar for clarity—it won't leave cloudiness in your finished pickles. Bring the mixture to a gentle boil over medium-high heat, then immediately reduce to a simmer for 5 minutes. This step ensures all ingredients dissolve completely and sterilizes the brine.
Watch for tiny bubbles forming around the edges of the pan—that's your signal the liquid is at an active simmer. Don't walk away; simmering too hard can evaporate the liquid before all the salt dissolves. You want the brine to be completely clear with no visible salt crystals remaining.
Add Salt and Aromatics for Flavor Development
Remove the pan from heat and let the brine cool for 2 minutes—just enough to prevent instant crystallization when you add the salt. Stir in the ½ cup Diamond Crystal kosher salt using a wooden spoon until it dissolves completely. The salt should disappear without leaving any gritty residue at the bottom.
While the brine cools slightly, crush the 3 garlic cloves with the flat side of your knife to release their oils. Add them along with the ¼ cup fresh dill sprigs (stems removed), 1 tablespoon mustard seeds, 1 teaspoon black peppercorns, and ½ teaspoon red pepper flakes. Give everything a thorough stir so the aromatics infuse evenly throughout the liquid.
Cool and Strain for Crystal-Clear Brine
Let the brine cool to room temperature—this takes about 30 minutes. I place the saucepan in an ice bath during the last 10 minutes to speed this up without diluting the mixture. The brine should reach 70°F or lower before proceeding; this prevents bacterial growth when you pack your vegetables.
Once cooled, strain the brine through a fine-mesh sieve into a clean glass jar or airtight container. Press the dill sprigs and garlic against the sieve to extract every last drop of flavor. Discard the solids—you want only the infused liquid for maximum clarity and taste. The strained brine should be amber-colored with no visible particles.
Pack Vegetables and Seal for Crispiness
Pack your chosen vegetables tightly into a clean, sterilized jar. I like to use a combination of thinly sliced cucumbers, carrot sticks, and cauliflower florets for texture contrast. Pour the cooled brine over the vegetables until they're completely submerged—this ensures crispness by preventing oxidation.
Seal the jar tightly and store it in the refrigerator. For best results, let the pickles develop flavor for at least 24 hours before eating. The longer they sit (up to 2 weeks), the more complex their flavor becomes. Check periodically to ensure vegetables remain submerged—if needed, add more brine from a fresh batch.
Pro Tips For Making Homemade Pickle Brine
- Boil the Brine First: Don’t just toss vinegar and water together cold—bring it to a full, rolling boil for 2 minutes. This sterilizes the brine and dissolves the salt completely, so your pickles stay crisp and the seasoning blends evenly. (Yes, even if you’re impatient like me, skip the shortcut here.)
- Smash, Don’t Mince, the Garlic: Roughly smash those garlic cloves with the flat side of your knife instead of mincing them. The intact cloves infuse flavor without turning the brine into a muddy paste, and they’re easier to fish out later if you’re picky about texture.
- Pack Dill Like a Bouquet: Bundle the fresh dill sprigs tightly with kitchen twine before dropping them in the jar. This keeps the stems intact and lets you pull them out cleanly after a week, so your pickles don’t end up swimming in loose, bitter stems.
- Use a 1:1 Vinegar-to-Water Ratio: Diamond Crystal salt is less dense than table salt, so measure it by volume (1 tablespoon per cup of liquid) and stick to equal parts vinegar and water. Any more vinegar and your pickles turn sour; any less and they’ll ferment unpredictably. (I learned this after a questionable batch of “science experiment” pickles.)
Regional styles of homemade pickle brine
Southern Sweet Brine
In the American South, pickles take on a sweeter, slightly molasses-infused profile that balances the tang. I add 2 tablespoons molasses or 1 tablespoon brown sugar to the brine base for that classic Southern sweetness.
The secret is using apple cider vinegar instead of white vinegar—it adds subtle fruitiness that pairs perfectly with the molasses. For extra depth, I toss in 1 teaspoon ground coriander and ½ teaspoon ground ginger to mimic the flavors of classic Southern-style dill pickles. 🌶️
German Fermented Style
German pickles rely on a lacto-fermentation process rather than vinegar, creating a probiotic-rich, tangy crunch. Start with 2 cups water and 1 cup non-iodized salt (dissolved to make a brine), then pack cucumbers and add 1 tablespoon caraway seeds and 2 garlic cloves.
Weigh them down with a fermentation weight or airlock lid. After 3-5 days at 65-70°F, the pickles develop a natural tang. For vinegar preservation, add 1 cup white vinegar after fermentation to extend shelf life. ✨
Indian Dhaba-Style
At Indian roadside stalls (dhaba), pickles are bold and spicy. For a dhaba-style brine, replace half the vinegar with 1 cup tamarind pulp (soaked in water) for a sour base. Add 1 tablespoon black mustard seeds, 1 teaspoon asafoetida (hing), and 1 chopped green chili.
Simmer the spices in oil for 2 minutes before mixing into the brine. Pack with thinly sliced onions and cauliflower for a crunchy, fiery result. 🔥
Japanese Sunomono Style
Japanese sunomono pickles are refreshing, lightly sweet, and served raw. Use 1 cup rice vinegar and 1 cup water, with 1 tablespoon sugar and ½ teaspoon salt. Add 1 teaspoon grated ginger and 1 tablespoon sesame seeds for depth.
Toss with thinly sliced cucumbers, carrots, and edamame. The key is no cooking—just combine at room temperature and refrigerate for 1-2 hours before serving. Perfect for summer! 🌿
Mediterranean Olive Oil Brine
In Mediterranean cuisine, pickles are often infused with olive oil for richness. Replace half the vinegar with 1 cup extra-virgin olive oil and add 1 teaspoon dried oregano, 1 teaspoon lemon zest, and ½ teaspoon red pepper flakes.
Simmer gently to blend flavors, then cool before packing vegetables. The oil preserves crispness while adding a luxurious texture. Store in the fridge for up to 3 weeks. 💛
Nutrition facts
Frequently asked questions
Can I use apple cider vinegar instead of white vinegar?
Yes, but adjust the ratio to 1.5 cups apple cider vinegar and 0.5 cup water to maintain proper acidity. Apple cider adds subtle sweetness and depth, perfect for Southern-style pickles. Just remember it may slightly darken the brine color compared to white vinegar.
Why do my homemade pickles turn soft instead of staying crisp?
Crispness fades when vegetables aren't fully submerged in brine or sit too long in the fridge. Always ensure they're completely covered, and eat within 2-3 weeks for maximum crunch. For extra firmness, add 1 tablespoon sugar to the brine or use firmer vegetables like cauliflower.
How long does this brine last before it goes bad?
The strained brine keeps indefinitely in the fridge, but for safety, use it within 6-12 months when properly sealed. The vegetables should be eaten within 2-3 weeks for best texture. If you notice mold or off odors, discard immediately—proper vinegar concentration prevents spoilage when refrigerated.
What vegetables work best with this brine?
Classic choices include cucumbers, carrots, cauliflower, and radishes. For bold flavors, try onions or jicama. Avoid leafy greens—they wilt quickly. Thinly sliced vegetables pickle faster than thick chunks, but both work well when fully submerged in the tangy liquid.
Can I make this brine without salt?
Not recommended—salt is essential for both preservation and flavor development. However, if you're sodium-sensitive, reduce to ¼ cup kosher salt and compensate with extra vinegar (2.5 cups) to maintain acidity. The brine will still work but may have slightly less depth of flavor.