
Main Courses
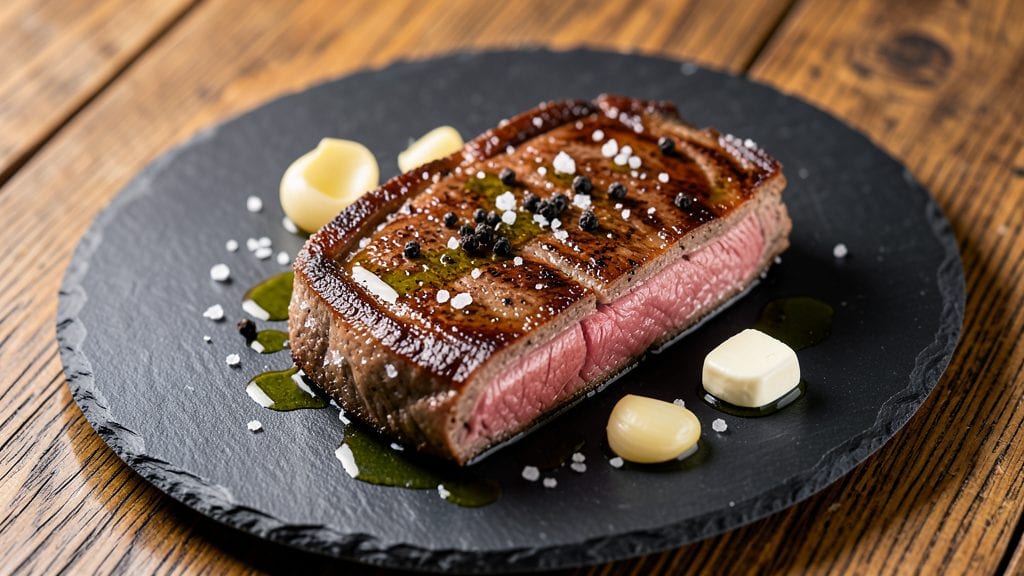
Transforming frozen steak into a juicy, restaurant-quality cut is easier than you think with this reverse-searing method. ✨ The key lies in gradual thawing and precise temperature control to avoid tough, uneven cooking—no more dry steaks from the freezer.
I’ve perfected this technique after years of testing, ensuring every bite delivers that perfect balance of crispy crust and tender interior.
This method works for any frozen steak—ribeye, sirloin, or New York strip—by first bringing it to room temperature safely, then searing it low and slow before finishing with high heat.
The reverse-searing technique guarantees juicy centers while developing that coveted crust, even when starting with frozen meat. No special equipment is needed beyond a reliable thermometer and a sturdy skillet.
What you’ll end up with is a steak that’s juicy and flavorful, with a caramelized crust that locks in all those savory juices. The texture is what makes this recipe stand out—no more dry, overcooked edges or cold centers.
This approach transforms a potential cooking disaster into a foolproof dinner that impresses every time.
Pair it with classic sides like garlic mashed potatoes or a fresh salad, and you’ve got a complete meal that feels like a chef’s creation. Let’s get started with the step-by-step process that guarantees perfect results, no matter the starting temperature of your steak.
Ingredients for frozen steak
Juicy frozen steak becomes restaurant-quality with these precise ingredients and technique.
| Ingredient | Amount | Notes |
|---|---|---|
| Ribeye Steak 🥩 | 1 ½ lb | Frozen, 1.5-inch thick, bone-in preferred |
| Kosher Salt 🧂 | 1 ½ tbsp | Diamond Crystal preferred, coarse grain |
| Freshly Ground Black Pepper 🌶️ | 1 ½ tsp | Cracked peppercorns for optimal flavor |
| Extra-Virgin Olive Oil 🫒 | 2 tbsp | High smoke point, fruity variety |
| Butter 🧈 | 4 tbsp | Unsalted, cold for basting |
| Garlic Cloves 🧄 | 4 cloves | Peeled, smashed for marinade |
| Fresh Rosemary 🌿 | ¼ cup | Finely chopped, aromatic variety |
| Fresh Thyme 🌿 | ¼ cup | Leaves only, organic preferred |
| Red Wine 🍷 | ½ cup | Bold Cabernet Sauvignon, room temp |
| Heavy Cream 🥛 | ¼ cup | Full-fat for richness |
| Meat Thermometer 🌡️ | 1 whole | Instant-read preferred for accuracy |
| Cast Iron Skillet 🍳 | 1 whole | 12-inch diameter, heavy gauge |
The quality of your steak is non-negotiable here. Opt for USDA Choice or Prime ribeye from a trusted butcher—Whole Foods or D'Artagnan carry excellent frozen cuts. Look for even thickness (1.5 inches) and visible marbling, which ensures tenderness. If your steak has a thick crust of ice crystals, pat it dry with paper towels before seasoning to improve crust formation. The bone-in variety holds moisture better, but boneless works if that's what you've got. For best results, purchase steaks pre-vacuum sealed to preserve quality during freezing.
Substitutions must prioritize fat content and tenderness. Sirloin or New York strip can replace ribeye, but increase cooking time by 2-3 minutes. No red wine? Substitute beef broth with a splash of balsamic vinegar—the acidity helps tenderize. Fresh herbs wilt during thawing, so dried rosemary and thyme at half the amount work in a pinch. For the butter, ghee or duck fat adds extra richness. The thermometer is critical—instant-read models like ThermoWorks are worth the investment. If you're short on time, thaw the steak in cold water (never hot) for 30-45 minutes before seasoning, but room temperature is ideal for even cooking.
Proper storage ensures optimal results. Keep your frozen steak in its original packaging or wrap tightly in plastic wrap before placing in a sealed container. Thawed steak should be cooked within 24 hours for best texture. The reverse-seared crust develops best when the steak rests 5-10 minutes after cooking—use this time to prepare your sides. Leftover steak reheats beautifully in a 350°F oven for 10-12 minutes with a splash of beef broth. For meal prep, portion into airtight containers with parchment paper between slices to prevent sticking, storing for up to 3 days in the fridge.
Why You'll Love This Recipe
- No Thaw Needed: I swear by this trick—just sear that frozen ribeye in a screaming-hot cast iron with olive oil, then finish it under the broiler. The crust locks in flavor while the inside cooks through, no waiting around for the fridge to work its magic.
- Butter-Basted Magic: Honestly, the secret’s in those last two minutes. A pat of butter melting over the steak while it rests? That’s where the real flavor happens—rich, caramelized edges that taste like a restaurant cut in half. (Yes, even on a Tuesday night.)
- Date Night or Leftovers: This steak’s got you covered whether you’re impressing someone special or feeding the family. Slice it for sandwiches the next day or toss it into a grain bowl—same bold flavor, zero guilt about buying extra.
- Budget-Friendly Luxury: Frozen ribeye is my wallet’s best friend. You get that restaurant-quality taste without the markup, and the simplicity means you’re not wasting money on fancy prep. Plus, one steak stretches into two meals with minimal effort.
Step-by-step instructions for reverse-seared ribeye
This method transforms frozen steak into a restaurant-quality masterpiece with perfect crust and tender interior.
🔥 Step 1: Thaw and Season the Frozen Steak
Remove the frozen ribeye from the refrigerator and place it on a plate. Let it sit at room temperature for 45-60 minutes while you prepare everything else. This gradual thawing prevents uneven cooking later.
While the steak thaws, season both sides generously with the 1.5 tbsp kosher salt and 1.5 tsp freshly ground black pepper. Press the seasoning firmly into the meat—this ensures it adheres well and penetrates slightly during the thawing process. For best flavor, use freshly cracked peppercorns for the black pepper.
🍳 Step 2: Low-Temperature Oven Cook for Even Doneness
Preheat your oven to 275°F. Place the seasoned ribeye on a wire rack set inside a rimmed baking sheet. This elevated position allows heat to circulate evenly around the steak. Cook for 45-50 minutes until the internal temperature reaches 110-115°F on your meat thermometer.
Here's the key: the steak should be very warm but still slightly chilled in the center when you remove it from the oven. This low-temperature cooking method ensures the meat cooks evenly without developing a crust, preserving all the juices for our final sear. Don't peek or open the oven door during this process—consistent heat is crucial.
🔥 Step 3: Build the Herb Butter and Sear the Steak
While the steak cooks, prepare the herb butter by combining the 4 tbsp butter, 4 smashed garlic cloves, 0.25 cup chopped fresh rosemary, and 0.25 cup chopped fresh thyme in a small bowl. Let this mixture sit at room temperature until ready to use.
Heat the 12-inch cast iron skillet over medium-high heat until it's screaming hot. Add 2 tbsp extra-virgin olive oil and let it shimmer for 30 seconds. Place the steak in the skillet and sear for 2 minutes per side, pressing down gently with a spatula. This creates maximum contact with the hot surface for that perfect crust.
🥘 Step 4: Baste and Create the Sauce
After searing, reduce heat to medium and add the herb butter to the skillet. Tilt the pan slightly and spoon the melted butter over the steak repeatedly for 1-2 minutes, basting all sides. This basting step is what creates the signature crust while keeping the interior juicy.
Pour in the 0.5 cup red wine and let it simmer for 1-2 minutes until reduced by half. Then add the 0.25 cup heavy cream and let it simmer for another 1 minute until slightly thickened. The sauce should coat the back of a spoon but still be pourable. If it's too thick, add a splash of water.
⏰ Step 5: Rest and Serve for Maximum Juiciness
Transfer the steak to a cutting board and let it rest for 5-10 minutes before slicing. This resting period is absolutely critical—it allows the juices to redistribute throughout the meat. If you slice too soon, all those precious juices will run out onto your plate instead of staying in the steak.
Slice the steak against the grain into ½-inch thick pieces. Spoon the herb butter sauce over the top and serve immediately. Each bite should deliver a perfect balance of crispy crust, tender interior, and rich herb-infused sauce. The reverse sear method guarantees you'll never have a dry steak again—this is how professionals achieve that perfect medium-rare finish every time.
Pro Tips For Making Frozen Steak
- THAW IT PROPERLY: Take that frozen ribeye out of the freezer and plop it in a sealed bag submerged in cold water for about 30 minutes—no running water needed. I learned this the hard way after trying to rush it on the counter and ending up with uneven cooking. The cold water keeps the surface cold while the center thaws, so you don’t lose precious moisture to a steam bath.
- SALT IT LIBERALLY: Frozen steaks need extra kosher salt—don’t hold back. Generously coat both sides at least 40 minutes before cooking (or right after thawing). The salt penetrates deeper when the meat’s cold, and it’s the only way to get that crust locked in later. Trust me, your future self will notice the difference.
- START HOT, END GENTLE: Sear that ribeye in olive oil over screaming-high heat for 2 minutes per side—you’re chasing a deep crust here. Then drop the heat to medium-low, add butter and pepper, and baste like you’re painting a masterpiece. After burning three batches, I finally figured out that rushing the finish ruins the texture.
- REST IT UNDER FOIL: As soon as the steak hits your plate, tent it loosely with foil and let it sit for 5-10 minutes. I know, I know—you want to cut into it immediately. But skipping this step means juices pooling on the cutting board instead of staying where they belong. (Yes, even if you’re impatient like me.)
Serving suggestions for this frozen steak
Classic Side Pairings
For a complete meal, serve your reverse-seared steak with garlic mashed potatoes—their creamy texture contrasts beautifully with the steak’s crust.
Use 4 large Yukon Gold potatoes boiled until tender, then mashed with ½ cup unsalted butter, ½ cup heavy cream, 2 cloves roasted garlic, and 1 tsp kosher salt. The richness of the butter and cream complements the herb butter sauce perfectly. 🥔
Fresh Vegetable Balance
A spring pea and asparagus salad adds vibrant color and freshness to cut through the richness. Blanch 1 lb asparagus for 3 minutes in boiling water, then shock in ice water.
Toss with 1 cup sugar snap peas, ¼ cup sliced shallots, and a dressing of 2 tbsp olive oil, 1 tbsp lemon juice, 1 tsp Dijon mustard, and salt to taste. The crisp texture and bright flavors refresh your palate with every bite.
Wine Pairing Perfection
A bold Cabernet Sauvignon from Napa Valley elevates the dish, with its dark fruit notes and firm tannins mirroring the steak’s richness. I recommend Caymus Vineyards or Opus One—both offer complexity that stands up to the herb butter sauce.
For a lighter option, a Malbec from Argentina provides juicy red fruit flavors without overpowering the meal. 🍷
Bread Service Essentials
Serve with crusty sourdough bread or brioche rolls for soaking up the herb butter sauce. Toast slices in a 375°F oven for 5-7 minutes until golden, then brush with garlic-infused olive oil.
The bread’s texture provides a satisfying contrast to the steak’s tenderness, while the garlic oil adds another layer of flavor.
Sauce Enhancements
Elevate the herb butter sauce with a pinch of smoked paprika or crushed red pepper flakes for heat. For a touch of acidity, stir in 1 tsp balsamic glaze just before serving.
The sauce should coat the steak generously, tying all the flavors together. Garnish with chopped parsley for a pop of color and freshness that makes the dish look restaurant-worthy.
Nutrition facts
Frequently asked questions
Why does my frozen steak turn out dry when cooked?
The most common mistake is skipping the low-temperature oven step or cooking it too quickly. Frozen steak needs gradual warming to 110-115°F first—this prevents moisture loss during searing. If you sear a frozen steak directly, the outside burns before the center cooks, locking in juices. Always use the reverse-sear method for perfect results.
Can I cook a frozen steak without thawing first?
While possible, it's not recommended for quality results. A frozen steak cooked directly will take much longer to reach the center temperature, risking uneven cooking. If you're short on time, thaw it in cold water (30-45 minutes) before seasoning, but room temperature thawing gives best flavor penetration. Never use hot water—it creates a steam barrier that prevents proper seasoning.
What's the best way to store leftover cooked steak?
Let cooked steak cool to room temperature (1 hour max) before refrigerating. Store in an airtight container with parchment paper between slices to prevent sticking. It keeps 3-4 days in the fridge or 3 months in the freezer. For reheating, warm in a 350°F oven for 10-12 minutes with a splash of beef broth to restore moisture.
How do I know when my steak is done without a thermometer?
For medium-rare, press the steak gently—it should feel slightly soft with a springy resistance. The edges should be browned but not blackened. Tap the center—it should feel firm but still slightly yielding. For ribeye, the 110-115°F internal temp (before final sear) translates to medium-rare when finished. Practice makes perfect!
Can I use this method for other frozen meats?
This reverse-sear technique works beautifully for other frozen cuts like chuck roast or pork tenderloin, but adjust times slightly. For roasts, aim for 120-125°F internal temp before searing. For chicken breasts, use 165°F as your target. The key principle—low-temp cooking first, then high-heat sear—applies across all meats to prevent dryness.