
Side Dishes
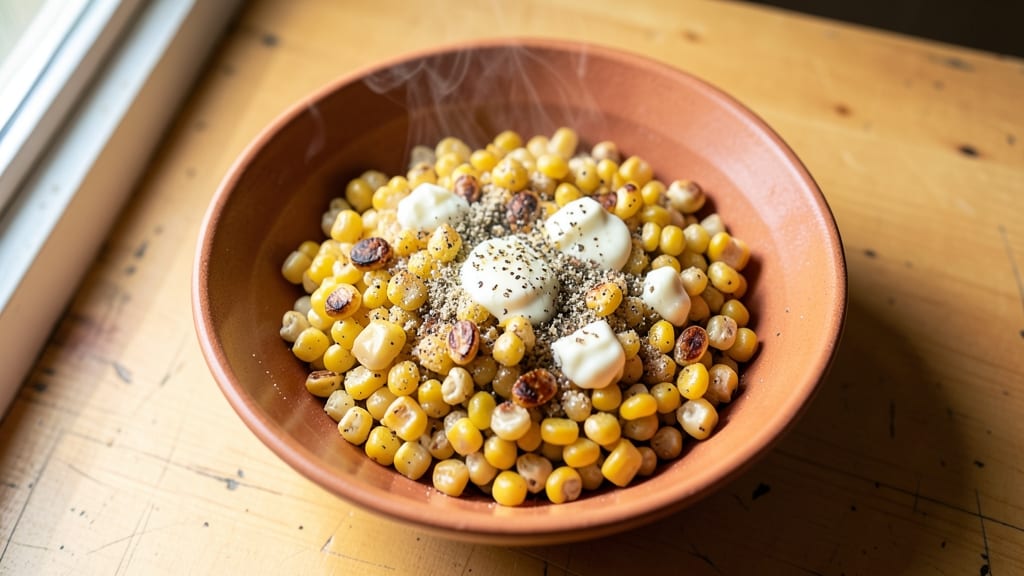
This old-fashioned baked corn recipe delivers the perfect balance of buttery crust and sweet, creamy centers—just like Grandma used to make. The secret lies in the foil-wrapped technique, which traps steam while allowing the corn to develop that signature golden-brown crust.
I've perfected this method over years of holiday gatherings, where it becomes the star side dish without stealing the show from the main course.
What makes this recipe truly old-fashioned is the hands-off approach: no complicated prep, no fancy equipment, just fresh corn, butter, and a few simple seasonings. The foil wrapping ensures even cooking while keeping the kernels tender, and the butter melts into a rich, flavorful crust that's impossible to resist.
It's the kind of dish that transforms a simple vegetable into something special with minimal effort.
By the time you pull it from the oven, you'll have perfectly baked corn with a crispy, buttery exterior and creamy, juicy kernels inside. The aroma alone will have everyone gathering around the table, and the texture contrast makes each bite satisfying.
This is comfort food at its finest—simple, nostalgic, and impossible to mess up.
Serve it as a side for roasted meats, alongside grilled vegetables, or even as a light main with a sprinkle of fresh herbs. The beauty of this recipe is its versatility—it works for holiday feasts or weeknight dinners alike.
Let's get started on creating this classic side dish that brings warmth to any table.
Ingredients for old fashioned baked corn
Fresh corn, rich butter, and simple seasonings create this nostalgic side dish.
| Ingredient | Amount | Notes |
|---|---|---|
| Fresh Corn on the Cob 🌽 | 4 whole | Husked, silks removed |
| Unsalted Butter 🧈 | ½ cup | Melted and cooled slightly |
| Salt 🧂 | 1 tsp | Kosher or sea salt |
| Black Pepper 🌶️ | ½ tsp | Freshly ground preferred |
| Garlic Powder 🧄 | ½ tsp | For subtle depth |
| Onion Powder 🧅 | ½ tsp | Enhances sweetness |
| Heavy Cream 🥛 | ¼ cup | Full-fat for richness |
| Shredded Parmesan Cheese 🧀 | ¼ cup | Freshly grated preferred |
| Aluminum Foil 📄 | 1 sheet | Heavy-duty for wrapping |
| Fresh Parsley 🌿 | 2 tbsps | Chopped, for garnish |
The corn is the star, so prioritize freshness. Local farmers markets often have the sweetest ears in season, but grocery store corn works too—just check for plump kernels and vibrant husks. If using frozen corn, thaw it completely first, as moisture affects the baking process. For the butter, Land O'Lakes or Plugrah are reliable choices, but any unsalted brand will do. The heavy cream adds luxurious creaminess, so don't substitute with lighter options—Hormel or Organic Valley are good store-bought picks. Shred your own Parmesan if possible; pre-shredded often contains anti-caking agents that prevent proper melting.
No fresh parsley? Fresh chives or dried parsley at half the amount work in a pinch. Short on heavy cream? Half-and-half or whole milk can replace it, though the texture will be slightly lighter. If you're avoiding dairy, coconut cream mimics the richness well. For the seasonings, garlic and onion powder can be swapped for fresh minced garlic and onion if you prefer, but the powders provide a more consistent flavor. The foil is non-negotiable—heavy-duty aluminum foil ensures even heat distribution and prevents sticking. If you're baking multiple ears, use separate foil sheets for each to maintain crispiness.
This dish reheats beautifully—just wrap cooled corn in fresh foil and bake at 350°F for 10 minutes. Store leftovers in the fridge for up to 3 days, though the texture softens slightly after the first day. For make-ahead convenience, bake the corn ahead of time, then reheat with a sprinkle of fresh butter. The Parmesan and parsley can be added right before serving to keep them fresh. If freezing, wrap each ear individually in foil and store for up to 2 months—thaw overnight in the fridge before reheating.
Why You'll Love This Recipe
- Foolproof Simplicity: I swear by this recipe because it’s the kind of dish where you just happen to have everything in your pantry. Fresh corn, butter, salt, pepper—no fancy prep, no peeling, no shucking drama. Just slather, season, and bake while you handle the rest of dinner.
- Buttery-Garlic Magic: That moment when the butter melts into the corn, caramelizing just enough to make every bite rich and savory? Chef’s kiss. The garlic powder adds this subtle, warm depth that turns simple corn into something you’ll fight over at the table.
- Picnic or Potluck Ready: Between us, this is my go-to for summer gatherings. Wrap it in foil, toss it in a cooler, and it stays perfect—no reheating needed. Even my picky uncle (who claims he hates corn) asks for seconds.
- Budget-Friendly Leftovers: Corn gets expensive fast, but this recipe stretches it further than I ever thought possible. Bake a big batch, and those leftovers? Still delicious the next day—toss them in salads, soups, or just eat them straight from the fridge with a sprinkle of extra garlic powder.
Step-by-step instructions for old fashioned baked corn
Here's how to achieve that perfect balance of crispy crust and creamy filling every time.
Prepare the Corn for Baking
Preheat your oven to 375°F to ensure even baking. Take each of the 4 whole fresh corn on the cob and cut them in half horizontally, removing the kernels from the cobs. Place the kernels in a large mixing bowl and set aside. This preparation allows for even cooking and maximum flavor absorption from the seasonings.
In a small saucepan, melt the 0.5 cup unsalted butter over low heat until fully liquid but not browned. Remove from heat and let it cool slightly for about 5 minutes. This cooled butter will help create a rich, flavorful crust without overwhelming the corn's natural sweetness.
Season and Mix the Corn
In the same bowl with the corn kernels, add the melted butter, 1 tsp salt, 0.5 tsp black pepper, 0.5 tsp garlic powder, and 0.5 tsp onion powder. Stir everything together until the kernels are evenly coated. The seasonings should cling to the corn, creating a flavorful base for the creamy filling.
Taste the mixture and adjust the seasoning if needed. The corn should be well-seasoned but not overly salty. This step ensures every bite will have that perfect balance of sweetness and savory flavor that defines this classic dish.
Assemble and Bake the Corn
Cut the 1 sheet aluminum foil into four equal squares. Divide the seasoned corn evenly among the foil squares, creating four equal portions. In the center of each portion, make a small well and add 1 tablespoon of the heavy cream to each. Sprinkle 1 tablespoon of the shredded parmesan cheese over each portion of corn.
Fold the foil squares into small packets, sealing them tightly to prevent any leaks. Place the packets on a baking sheet and bake for 25-30 minutes until the corn is tender and the filling is bubbly. The packets should feel warm to the touch and the aroma should be rich and inviting.
Finish and Serve
Remove the foil packets from the oven and let them rest for 2-3 minutes. Open each packet carefully, as steam will escape. The corn should be tender with a creamy sauce that has thickened slightly from the baking process. If the sauce appears too thick, stir in a bit more of the remaining 0.25 cup heavy cream to achieve the desired consistency.
Garnish each serving with 0.5 tablespoon of the chopped fresh parsley. The parsley not only adds a pop of color but also a fresh contrast to the rich, creamy corn. Serve immediately while the corn is hot and the filling is at its most luxurious. This dish is perfect for family gatherings or as a delightful side to any meal.
Pro Tips For Making Old Fashioned Baked Corn
- Trim the husks first: Shuck the corn before baking—peeling back the husks and silky silk layer lets the butter and seasonings penetrate the kernels directly. I used to bake it in the husk, thinking it’d steam better, but the flavor stays trapped and bland. Skip the husk entirely for crispier, more flavorful corn.
- Butter generously, then seal: Slather each ear with at least 1 tablespoon of softened unsalted butter, then sprinkle salt and garlic powder before wrapping in foil. The foil traps the steam and melts the butter into the corn—no drippy mess. I learned this after my first batch turned out dry because I skimped on the butter.
- Bake at 425°F, not lower: High heat (425°F) gets the corn tender and slightly caramelized in 20-25 minutes. I used to bake it at 375°F, thinking it’d be gentler, but it ended up gummy. The higher temp also crisps the edges—just watch it after 20 minutes.
- Pepper last, after baking: Freshly ground black pepper loses its bite when baked with butter. Sprinkle it on right after pulling the corn from the oven while it’s still hot—it’ll cling better and taste sharper. I used to mix it in beforehand, and the flavor always felt muted.
Best sauces and condiments for old fashioned baked corn
Classic Creamy Sauce
Start with the foundation: a rich, velvety sauce made from ¼ cup heavy cream and ¼ cup shredded Parmesan cheese. This combination creates the signature creamy texture that makes this baked corn so irresistible.
I like to mix these ingredients directly into the corn kernels before baking, ensuring every bite gets that luxurious coating. For extra depth, stir in 1 tablespoon of melted butter before adding the cream. 🥛
Buttery Crust Enhancer
For that golden, crispy crust, I recommend brushing the baked corn with 2 tablespoons of melted butter right after removing it from the oven. This step adds a beautiful caramelized finish while keeping the kernels tender inside.
If you prefer a smoky touch, swap 1 tablespoon of the butter for 1 tablespoon of bacon fat—it adds a delicious savory note that pairs perfectly with the sweet corn. 🧈
Spicy Kick Option
If you love heat, add ½ teaspoon of smoked paprika or ¼ teaspoon of cayenne pepper to the seasoning mix before baking. For a milder but still flavorful twist, stir in 1 teaspoon of chipotle powder after baking.
This adds a subtle smokiness that complements the creamy sauce beautifully. I often serve this spiced version with grilled meats for a balanced, bold flavor profile. 🌶️
Herb-Infused Garnish
Fresh herbs elevate this dish to restaurant-quality. After baking, sprinkle the corn with 2 tablespoons of chopped fresh parsley for a bright, clean finish. For something more robust, try 1 tablespoon of chopped chives or 1 teaspoon of fresh thyme leaves.
If you're feeling adventurous, a pinch of fresh dill adds a unique tang that pairs wonderfully with the creamy filling. 🌿
Cheesy Variations
Swap the Parmesan for sharp cheddar or Monterey Jack cheese for a milder, creamier sauce. For a Southern twist, mix in 1 tablespoon of crumbled blue cheese or goat cheese after baking—it adds a tangy contrast that’s surprisingly delicious.
If you're avoiding dairy, use nutritional yeast for a cheesy flavor without the dairy. 🧀
Sweet and Tangy Topping
Drizzle the baked corn with 2 tablespoons of honey or maple syrup before serving for a sweet-savory balance. For a tangy finish, add 1 tablespoon of sour cream or Greek yogurt mixed with a pinch of salt. This topping cuts through the richness and adds a refreshing contrast. 🍯
Nutrition facts
Frequently asked questions
Can I use frozen corn instead of fresh?
Yes, but with adjustments! Thaw frozen corn completely first, then pat it dry to remove excess moisture. This prevents a watery texture during baking. For best results, use 1 cup thawed frozen kernels per 4 ears of fresh corn in the recipe. The flavor won't be as vibrant, but the texture will be similar when properly dried.
Why does my baked corn turn out mushy?
Overcooking or skipping the foil wrapping are the most common causes. Always bake at 375°F for 25-30 minutes max—no longer! The foil traps steam, so if you remove it too early, the kernels won't develop that perfect buttery crust. Also, never skip patting dry any excess liquid from thawed or fresh corn.
Can I make this ahead of time?
Assemble the foil packets up to 24 hours ahead and refrigerate. Bake straight from cold—just add 5-10 extra minutes to the cooking time. For make-ahead serving, reheat in the oven at 350°F for 10 minutes wrapped in fresh foil. The flavors actually deepen overnight!
What's the best way to serve this?
This creamy corn pairs beautifully with grilled meats like pork chops or steak, or even as a light vegetarian main. For extra flair, serve with a dollop of sour cream or hot honey. The foil packets make it perfect for potlucks—just bring the sealed packets and bake at the host's home!
How do I store leftovers?
Let cooled corn rest 10 minutes before storing. Keep in an airtight container in the fridge for up to 3 days. For reheating, wrap in fresh foil and bake at 350°F for 10 minutes. The texture softens slightly but remains delicious. Freezing isn't recommended as it alters the perfect crust.