
Main Courses
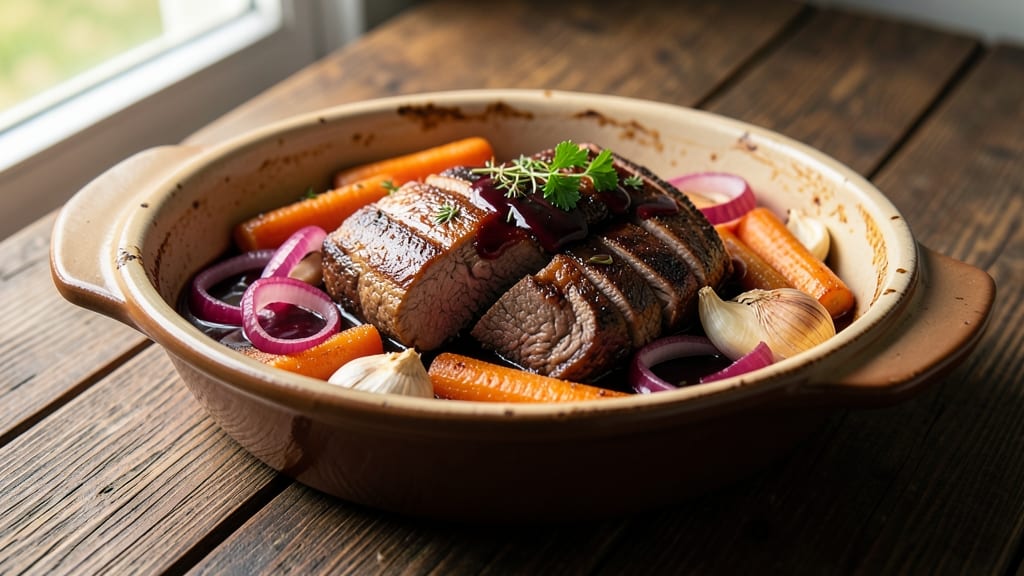
This braised mock tender steak recipe transforms tougher cuts into melt-in-your-mouth perfection through slow-cooked tenderness and rich, beefy depth. The secret lies in proper searing and a carefully balanced braising liquid that infuses every bite with flavor.
After years of perfecting this technique, I’ve developed a method that delivers restaurant-quality results without requiring specialized equipment.
What sets this recipe apart is the combination of high-heat searing to develop a deep, caramelized crust followed by a slow braise that tenderizes the meat while absorbing aromatic flavors.
The braising liquid—a blend of red wine, beef broth, and aromatic vegetables—creates a sauce that’s rich yet balanced, with just the right amount of acidity to cut through the richness. This method ensures the steak becomes fork-tender while retaining its natural beefy flavor.
By the time you’re done, you’ll have perfectly braised steak that falls apart with minimal effort, coated in a velvety sauce that’s ideal for serving over creamy mashed potatoes or alongside roasted vegetables.
The slow cooking process transforms even budget-friendly cuts into something luxurious, making this a dish worth planning ahead for. Ready to elevate your weeknight dinners? Let’s get started with the precise steps that guarantee success.
This recipe is designed to be both approachable and impressive, with techniques that build confidence in the kitchen. Whether you’re cooking for a family gathering or treating yourself to a special meal, the results are consistently tender, flavorful, and deeply satisfying.
The key to mastering this dish lies in patience and attention to detail—two things that pay off in every bite.
Ingredients for braised mock tender steak
Transform tough cuts into luxurious braised mock tender steak with these carefully selected ingredients.
| Ingredient | Amount | Notes |
|---|---|---|
| Chuck Roast 🥩 | 3 lb | Trimmed of excess fat, cut into 2-inch cubes |
| Yellow Onion 🧅 | 1 whole | Peeled, cut into 1-inch chunks |
| Carrots | 4 medium | Peeled, cut into 1-inch chunks |
| Garlic Cloves 🧄 | 6 cloves | Peeled, smashed with side of knife |
| Dry Red Wine 🍷 | 1 ½ cups | Bold variety like Cabernet Sauvignon |
| Beef Broth 💧 | 2 cups | Low-sodium preferred, homemade or quality brand |
| Tomato Paste 🍅 | 2 tbsp | Smooth, not chunky |
| Fresh Thyme 🌿 | 2 sprigs | Stems removed, leaves only |
| Fresh Rosemary 🌿 | 1 sprig | Needles only, finely chopped |
| Bay Leaves 🍃 | 2 whole | Dried, standard size |
| Olive Oil 🫒 | 2 tbsp | Extra-virgin for high-heat searing |
| Kosher Salt 🧂 | 2 tsp | Diamond Crystal preferred |
| Freshly Ground Black Pepper 🌶️ | 1 tsp | Coarsely ground |
| All-Purpose Flour 🌾 | 2 tbsp | For dredging meat |
The chuck roast is the foundation—look for well-marbled cuts at Whole Foods or your local butcher for optimal tenderness. Costco often carries excellent pre-cut chuck roast at competitive prices, but avoid pre-cubed meat with excess liquid. The wine should be bold and dry; Caymus or Apothic are reliable choices, but any robust red will work. Fresh thyme and rosemary elevate the dish significantly, so source them from a trusted market where the herbs smell vibrant and fresh. The beef broth should be rich but not overly salty—Kitchen Basics or Pacific Foods brands are excellent choices for homemade flavor.
No red wine? Substitute with additional beef broth and 1 tbsp balsamic vinegar for depth. Fresh herbs unavailable? Use dried thyme at one-third the amount and dried rosemary at half. The tomato paste can be omitted entirely if you prefer, though it adds subtle sweetness. For a quicker version, swap fresh carrots for pre-cut frozen (thaw and drain well). The flour is crucial for the initial searing step—it creates a golden crust that locks in moisture during braising. If you're short on time, cornstarch can replace flour at a 1:1 ratio for a lighter crust.
This dish improves with time—braise for at least 3 hours for optimal tenderness. Store leftovers in an airtight container in the refrigerator for up to 5 days, or freeze for 3 months. The sauce thickens as it cools, so add a splash of broth when reheating. For meal prep, portion the steak and sauce separately—reheat the sauce first, then add the steak to warm through gently. The flavor profile deepens overnight, making this an ideal make-ahead dish for busy weeknights.
Why You'll Love This Recipe
- Chuck’s Secret Weapon: I swear by this trick—tossing a chuck roast in the slow cooker with onions, carrots, and a splash of red wine turns tough meat into melt-in-your-mouth perfection. No fancy cuts, no stress, just ridiculously tender results.
- Wine-Infused Magic: That dry red wine isn’t just for show—it deepens the sauce into something rich and savory, while the garlic and caramelizing onions add layers of warmth. Honestly, the first bite makes you forget it’s a mock tender steak.
- Weeknight Workhorse: Between us, this is my go-to when I’m too tired to think. Toss everything in, walk away, and come back to a dish that’s basically a hug in food form. (Yes, even on a Tuesday night.)
Step-by-step instructions for braised mock tender steak
This method transforms tough chuck roast into fork-tender perfection through precise timing and layering of flavors.
Sear the Chuck Roast for Deep Flavor
Heat a heavy Dutch oven over medium-high heat until hot. Add the 2 tablespoons olive oil and swirl to coat the bottom. Working in batches if needed, add the 3 lb chuck roast cubes, arranging them in a single layer. Let them sear undisturbed for 3-4 minutes per side until developing a deep golden brown crust.
This initial searing creates the Maillard reaction, which builds complex flavors that will infuse the braising liquid. Don't crowd the pan—this prevents proper browning. Once all pieces are seared to color, transfer them to a plate and set aside. The residual heat will keep them warm while you prepare the aromatics.
Build the Braising Base with Aromatics
In the same Dutch oven, add the 1 whole yellow onion and 4 medium carrots, both cut into chunks. Cook for 5-6 minutes until the vegetables begin to soften and the onions turn translucent. Add the 6 cloves garlic cloves and cook for another 30 seconds until fragrant.
Here's where the depth of flavor begins. The caramelization of the onions and the release of garlic's essential oils form the foundation of your braise. Sprinkle in the 2 tablespoons all-purpose flour and stir vigorously for 1 minute to cook off the raw flour taste. This creates a light roux that will thicken your braising liquid later.
Deglaze and Develop the Braising Liquid
Pour in the 1.5 cups dry red wine and scrape up all the browned bits from the bottom of the pot with a wooden spoon. This deglazing step captures all the concentrated flavors that would otherwise be lost. Let the wine simmer for 3-4 minutes until reduced by about half and slightly thickened.
The alcohol content in the wine will cook off during this reduction, leaving behind its rich, concentrated flavor. Add the 2 tablespoons tomato paste, 2 cups beef broth, 2 sprigs fresh thyme, 1 sprig fresh rosemary, 2 whole bay leaves, 2 teaspoons kosher salt, and 1 teaspoon freshly ground black pepper. Stir well to combine all ingredients.
Braise Until Fork-Tender
Return the seared chuck roast to the Dutch oven, along with any accumulated juices. Bring the liquid to a gentle simmer, then reduce heat to low. Cover tightly with a lid and transfer to a 325°F oven. Braise for 2.5-3 hours until the meat is fork-tender and easily pulls apart with minimal resistance.
This slow cooking time is critical for breaking down the connective tissue in the chuck roast. The meat should be so tender that a fork slides through it with little effort. Check occasionally to ensure the liquid doesn't reduce too much—add a splash of water if needed to maintain a sauce consistency. The vegetables should also be tender but still hold their shape.
Finish and Rest for Maximum Tenderness
Once the meat reaches the desired tenderness, remove the Dutch oven from the oven and let it rest uncovered on the stovetop for 10-15 minutes. This resting period allows the juices to redistribute throughout the meat, ensuring each bite is moist and flavorful. Remove and discard the herb sprigs and bay leaves before serving.
The braising liquid should now have thickened into a rich, flavorful sauce that coats the meat beautifully. If you prefer an even thicker sauce, return the pot to the stovetop and simmer uncovered for an additional 5-10 minutes to reduce further. Serve the braised chuck roast with the sauce spooned over the top, accompanied by crusty bread to soak up every last bit of flavor.
Pro Tips For Making Braised Mock Tender Steak
- Sear the Roast First: High heat. Seriously, crank it up until the chuck roast develops a deep brown crust—this locks in flavor that won’t dissolve later. I used to skip this, and the dish always tasted bland until I learned the hard way: a good sear is non-negotiable for braised meat.
- Cut Onions Thin: Slice those yellow onions paper-thin—no thick rounds or half-moons. They’ll break down faster, sweeten the sauce, and blend seamlessly into the braise without turning mushy. (Yes, it’s tedious, but your future self will notice the difference.)
- Deglaze with Wine: After searing the meat and onions, pour in that dry red wine immediately—don’t let the browned bits sit. Scrape the bottom of the pot with a wooden spoon while it bubbles; this lifts all the flavor into the sauce. Skimp here, and you’re left with a dull, watery base.
- Braise Low and Slow: Cover the pot and simmer at 300°F (150°C) for at least 2.5 hours—no rushing. The chuck needs time to melt into tender perfection, and a higher heat just steams the meat instead of breaking it down. (I know, I know—you’re impatient, but trust the process.)
Essential equipment for this recipe
Dutch Oven Essentials
A heavy-duty Dutch oven is your secret weapon for perfect braised mock tender steak. I swear by the Le Creuset Signature Dutch Oven (5.5-quart)—it distributes heat evenly and retains it beautifully during the long braising process.
For budget-friendly options, the Lodge Pre-Seasoned Cast Iron Dutch Oven is a game-changer, offering the same heat retention without the premium price. Both handle the high-heat searing and low-and-slow oven braise flawlessly. 🔥
Precision Thermometer
Never guess your oven temperature again. A Meater Plus or Thermoworks Smoke thermometer ensures your oven stays at the perfect 325°F throughout the braise. I place the probe in the center of the oven, away from heating elements, to get an accurate reading.
These thermometers also alert you when the meat reaches the ideal tenderness—no more poking with a fork to test! ⏰
Wooden Spoon & Slotted Spoon
Invest in a sturdy OXO Good Grips Wooden Spoon for stirring the braising liquid without scratching your Dutch oven. A Vollrath Slotted Spoon is essential for removing meat and vegetables without losing precious braising liquid.
I keep both within arm's reach while cooking—trust me, you'll use them constantly during this process. The wooden spoon helps deglaze while the slotted spoon keeps your meat intact. ✨
Carving Tools
For serving, a Dexter-Russell 12-inch Carving Knife makes quick work of slicing through tender braised meat. Pair it with a Jaccard 8-inch Serving Fork to hold the meat steady. The sharp blade ensures clean cuts, while the fork's tines provide excellent grip.
I always preheat my carving knife in hot water for 10 seconds before slicing—it glides through the meat like butter. 💡
Measuring Tools
Precision matters when balancing flavors. Use a OXO Good Grips Measuring Cups set for liquids and a scale (like the Escali Primo Digital Scale) for accurate meat portions. I weigh my chuck roast to ensure the 3 lb target—this consistency makes all the difference in final texture.
A microplane comes in handy for zesting citrus or finely grating garlic if you prefer that texture. 🌶️
Optional but Helpful
For extra convenience, a slow cooker liner (like the Thermos Food Bag) makes cleanup effortless after braising. I also keep a fine-mesh strainer handy for skimming excess fat from the sauce if desired.
A baste brush helps spread sauce evenly over the meat during the last 10 minutes of cooking for extra richness. These extras aren't mandatory, but they elevate the experience significantly. 💫
Nutrition facts
Frequently asked questions
Can I use a slow cooker instead of an oven for this recipe?
Transfer the seared meat and braising liquid to a 6-quart slow cooker and cook on low for 6-8 hours or high for 4-5 hours. The meat will become just as tender, though the sauce may be slightly thinner. For a richer texture, finish by simmering the sauce on the stovetop for 10 minutes before serving.
What cut of beef works best for this recipe?
The chuck roast is ideal because its connective tissue breaks down beautifully during braising. Other tough cuts like short ribs or brisket also work well. Avoid leaner cuts like sirloin—they won’t become tender enough. Look for well-marbled meat at your butcher or grocery store.
How do I know when the meat is fully tender?
Test for doneness by inserting a fork or skewer into the thickest piece—it should slide in effortlessly. The meat should also pull apart easily with minimal resistance. If it’s still slightly firm after 3 hours, add 30 minutes more cooking time. Never rush this step!
Can I make this recipe ahead of time?
Yes! This dish tastes even better the next day. Store the braised meat and sauce in an airtight container in the fridge for up to 5 days. Reheat gently on the stovetop, adding a splash of broth if the sauce thickens too much. The flavors deepen as they meld overnight.
What’s the best way to serve braised mock tender steak?
Pair it with creamy mashed potatoes, crusty bread, or roasted root vegetables to soak up the rich sauce. For a heartier meal, serve with wild rice pilaf or polenta. The sauce also works beautifully over pasta if you prefer a lighter dish.