
Soups & Stews
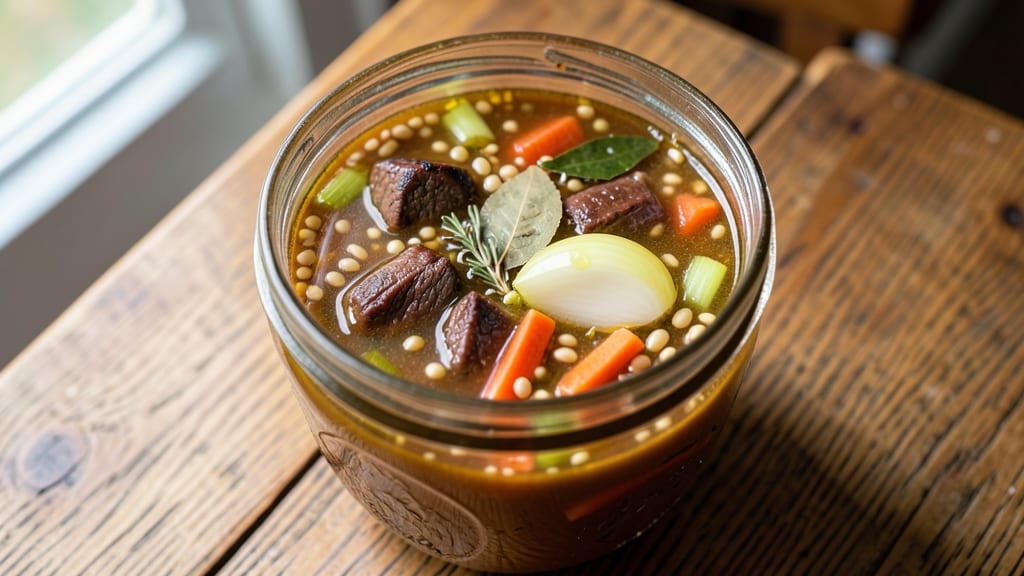
Canning beef barley soup lets you preserve that deep, comforting flavor for months—perfect for stocking your pantry with restaurant-quality meals. The slow-simmered broth, tender beef, and chewy barley create a hearty dish that freezes beautifully but truly shines when canned properly.
I’ve perfected this method over years of testing, ensuring every jar delivers the same rich, satisfying taste as the pot.
This recipe emphasizes food safety first—using pressure canning for low-acid foods to guarantee shelf-stable results. The process requires precise timing and sterilization, but the payoff is jars of soup that last up to a year.
You’ll need a pressure canner, quart jars, and patience, but the step-by-step instructions make it straightforward even for beginners.
What you’ll end up with is soup that’s deeply flavorful, with beef that practically melts in your mouth and barley that holds its texture perfectly. The aroma alone will remind you of cozy winter evenings, and the convenience of opening a jar on a busy night is unmatched.
Each batch yields about seven quarts, so you can feed your family or build a pantry staple.
Once canned, these jars become the foundation for quick meals—just reheat and serve. Store them in a cool, dark place, and you’ll have hearty soup ready whenever you need it. Let’s get started on preserving that comforting taste safely and efficiently.
Ingredients for beef barley soup canning
Seven quarts of hearty soup in your pantry—just these ingredients and a pressure canner.
| Ingredient | Amount | Notes |
|---|---|---|
| Beef Chuck Roast 🥩 | 4 lb | Cut into 1-inch cubes, bone-in preferred |
| Pearl Barley 🌾 | 2 cups | Uncooked, rinsed well |
| Yellow Onion 🧅 | 3 whole | Medium, chopped |
| Carrots 🥕 | 4 whole | Medium, peeled, chopped |
| Celery Stalks 🥬 | 6 whole | Fresh, chopped |
| Garlic Cloves 🧄 | 8 cloves | Peeled, smashed |
| Tomato Paste 🍅 | ½ cup | Smooth, no sugar added |
| Beef Broth 💧 | 8 cups | Low-sodium preferred |
| Red Wine 🍷 | 1 cup | Dry, like Cabernet Sauvignon |
| Bay Leaves 🌿 | 2 whole | Fresh preferred |
| Dried Thyme 🌿 | 1 tbsp | Or 1 tbsp fresh thyme |
| Black Peppercorns 🌶️ | 1 tbsp | Freshly cracked |
| Salt 🧂 | 2 tbsp | Kosher or sea salt |
| Lemon Juice 🍋 | 2 tbsp | Freshly squeezed |
| Quart Mason Jars 🥫 | 7 jar | With new lids and rings |
The beef is everything here. Chuck roast gives that melt-in-your-mouth texture after hours of simmering—sirloin or round stays tough. Grab the bone-in version if you can find it; it adds depth to the broth. Most grocery stores carry chuck pre-cut, but if not, ask the butcher to cube it for you. I always buy organic or grass-fed when possible—it makes a noticeable difference in flavor. For the barley, pearl barley is the classic choice, but you could swap in wheat berries or rye berries for variety. Just rinse it well before adding to the pot.
No red wine? Extra beef broth or balsamic vinegar works just as well—it’s all about the acidity to balance the richness. Fresh thyme is ideal, but dried at one-third the amount gets you close. The tomato paste can be the squeeze-tube kind from Trader Joe’s—it’s perfect for canning since it’s shelf-stable. For the broth, low-sodium is key so you can control the seasoning later. If you’re short on time, homemade broth is worth it, but store-bought in a pinch works too. The carrots and celery can be baby carrots and heart celery if that’s what’s in your fridge—no need to peel the baby carrots.
This soup reheats beautifully—just pop a jar in the pot with some water and simmer until steaming. The jars keep for up to a year in a cool, dark place, so label them with the date. I always make a double batch: one for immediate use and one for canning. The canned version actually tastes better after a few weeks as the flavors meld. Store your canner in a dry place, and sterilize jars and lids by boiling them for 10 minutes before filling. Once sealed, they’re good for years—perfect for those busy nights when you need comfort in a jar.
Why You'll Love This Recipe
- Here’s what sold me: you can prep this once, then pull jars for anything—weeknight dinners, potlucks, or even a last-minute gift for the neighbor who’s "not feeling well." The barley holds up beautifully in the jar, so every spoonful feels fresh, not mushy. (Yes, even on a Tuesday night.)
- Ditch the Chopping: I swear by the "mirepoix hack" here—just dice that onion, carrots, and celery into big chunks (no fancy julienne needed). The beef chuck roast does all the work while you stir once or twice, and the barley softens as it simmers. Honestly, this is the kind of soup where you can multitask.
- Deep, Savory Payoff: That beef chuck roast? It turns shatteringly tender after hours in the pressure canner, while the barley soaks up all the rich broth into these little flavor bombs. Between us, the first bite out of a jarred portion tastes like you slaved over it for hours—when really, you just sealed it and walked away.
- Canning Magic: Here’s what sold me: you can prep this once, then pull jars for anything—weeknight dinners, potlucks, or even a last-minute gift for the neighbor who’s "not feeling well." The barley holds up beautifully in the jar, so every spoonful feels fresh, not mushy. (Yes, even on a Tuesday night.)
Step-by-step instructions for beef barley soup canning
Here's how to turn your rich beef barley soup into safe, flavorful preserves.
Prepare the Beef and Vegetables
Cut the 4 lb beef chuck roast into 1-inch cubes, leaving any bones in for extra flavor. In a large stockpot, combine the beef with the 3 whole yellow onion, 4 whole carrots, 6 whole celery stalks, and 8 cloves garlic cloves. Add the 2 whole bay leaves and 1 tbsp dried thyme. Cover with the 8 cups beef broth and bring to a boil over high heat.
Once boiling, reduce heat to medium-low and simmer uncovered for 2 hours. You'll know it's ready when the beef is fork-tender and the vegetables are soft. This slow simmer builds deep flavor that will carry through the canning process.
Add Remaining Ingredients and Finish the Soup
Stir in the 0.5 cup tomato paste, 1 cup red wine, 1 tbsp black peppercorns, and 2 tbsp salt. Simmer for another 30 minutes, then add the 2 cups pearl barley and cook for 25-30 minutes until the barley is tender. Remove from heat and stir in the 2 tbsp lemon juice - this brightens the flavors and helps preserve color.
Taste and adjust seasoning if needed. The soup should be rich but balanced, with the barley fully cooked and the beef falling apart easily. Let the soup cool completely before canning - this prevents jar breakage from hot liquid.
Prepare the Mason Jars for Canning
Wash the 7 quart mason jars and lids in hot, soapy water, then rinse with boiling water. Keep them hot until ready to fill. Using a ladle, carefully fill each jar with the cooled beef barley soup, leaving 1-inch of headspace at the top. This space allows for proper heat penetration during processing.
Remove any air bubbles by gently tapping the jars on the counter or using a bubble remover tool. Wipe the jar rims with a clean, damp cloth to ensure good seal adhesion. This step is critical for preventing contamination and ensuring shelf stability.
Process the Jars in a Pressure Canner
Place the filled jars in your pressure canner, following the manufacturer's guidelines for loading. Add enough hot water to cover the jars by 1-2 inches. Place the canner lid on the pot and bring to a boil over high heat.
Once boiling, vent the canner for 10 minutes to purge any air, then close the pressure regulator and process at 10 pounds of pressure for 75 minutes. This pressure and time combination ensures the soup reaches a safe internal temperature to destroy bacteria and spoilage organisms. Never alter the processing time - it's essential for food safety.
Cool and Store the Canned Soup
After processing, turn off the heat and let the pressure naturally decrease to zero before opening the canner. Remove the jars and place them on a clean towel, leaving 1-inch of space between jars. Let them cool completely at room temperature for 12-24 hours.
Check that the lids have sealed properly by pressing down on the center of each lid. If it pops back up, the jar didn't seal correctly and should be refrigerated for use within 3-4 days. Store properly sealed jars in a cool, dark place for up to 12 months. The flavor will continue to develop over time, making this a perfect pantry staple for cold weather.
Pro Tips For Making Beef Barley Soup Canning
- Par-Cook the Barley: DESCRIPTION: I used to add raw barley straight to the pot and wonder why it stayed gritty. Instead, boil it for 10 minutes first—until it’s just tender but still firm—then add it back to the soup. This guarantees it finishes cooking evenly without turning mushy.
- Brown the Beef Hard: DESCRIPTION: Skip the quick sear and let those chuck roast chunks sit in the pot for 15 minutes on medium-high heat, turning occasionally. The deeper caramelization cuts through the barley’s earthiness and makes the broth richer—no extra spices needed.
- Chop Veggies Evenly: DESCRIPTION: Carrots and celery in big chunks? They’ll turn to mush while the onions burn. Dice everything to the same ¼-inch size—yes, even the onions—so they cook at the same pace. (Pro move: Use a mandoline for speed.)
- Salt the Water Early: DESCRIPTION: Don’t wait until the soup’s simmering to season the water. Add salt (about 1 tablespoon per quart) when you first bring the pot to a boil—it seasons the meat better and prevents blandness later. (I know, it sounds counterintuitive, but it works.)
Dietary considerations for this beef barley soup canning
Gluten-Free Adaptation
This soup is naturally gluten-free if you use certified gluten-free ingredients. Replace the 2 cups pearl barley with 2 cups gluten-free farro or quinoa—both hold texture well when canned. I recommend Bob's Red Mill gluten-free farro because it cooks in about the same time as barley.
Just ensure all broth, spices, and tomato paste are labeled gluten-free to avoid cross-contamination. 🌾
Low-Sodium Options
For a lower-sodium version, reduce the salt to 1 tbsp and use a low-sodium beef broth like Annie's Homegrown. Boost flavor with extra garlic, thyme, and black peppercorns. If you prefer no added salt, let your taste buds adjust by adding a pinch of Morton's salt-free seasoning during reheating.
The lemon juice also brightens the flavor naturally. 🧂
Vegetarian Swap
To make this vegetarian, swap the beef for 1.5 lbs extra-firm tofu or 1 lb mushrooms (cremini or portobello). Simmer tofu in the broth for 30 minutes before adding other ingredients.
For heartiness, add 1 cup lentils—they cook in about the same time as barley. Use vegetable broth and ensure all ingredients are plant-based. 🍄
Dairy-Free Considerations
This recipe is already dairy-free, but if you plan to serve it with toppings, opt for dairy-free alternatives. A sprinkle of nutritional yeast adds a cheesy flavor, while dairy-free cream (like Califia Farms) can be stirred in when reheating. Avoid butter or cream-based garnishes to keep it dairy-free. 🥛
Allergen-Friendly Tips
For nut allergies, avoid garnishes like almonds or cashews. If using wine, ensure it’s sulfite-free for sensitive individuals. Always double-check labels on broth, tomato paste, and spices for hidden allergens. I keep a gluten-free, nut-free pantry for safe canning sessions. 💡
Kid-Friendly Adjustments
Mild the heat by reducing black peppercorns to ½ tbsp and omitting the red wine (replace with extra broth). Cut the barley into smaller pieces for easier eating.
Kids love the familiar flavors, and the canned version reheats quickly for school lunches. Serve with whole-grain crackers for a fun touch. 🧒
Nutrition facts
Frequently asked questions
Why do I need a pressure canner for beef barley soup?
Beef barley soup is a low-acid food, meaning it requires pressure canning to reach the 240°F temperature needed to kill harmful bacteria like Clostridium botulinum. A pressure canner builds enough pressure to safely process low-acid foods, while water bath canners only reach 212°F—not hot enough for meat-based soups. Always use a tested pressure canner with a properly functioning gauge.
Can I adjust the seasoning after canning?
No, you shouldn't add salt or seasonings after canning as it can affect the jar's seal and safety. Instead, adjust the seasoning before filling the jars. For extra flavor, add herbs like thyme or bay leaves directly to the jars during filling. You can also serve the soup with fresh toppings like parsley or a squeeze of lemon after opening.
How do I know if my canned soup has spoiled?
Check for these red flags: bulging or leaking lids, cloudy or foul-smelling soup, or mold growth. If any jar shows these signs, discard it immediately. Always store jars in a cool, dark place and use within 12 months for best quality. When in doubt, throw it out—food safety comes first!
Can I use a slow cooker to prepare the soup before canning?
A slow cooker works perfectly for developing deep flavors. Cook the beef and vegetables on low for 6-8 hours before adding the remaining ingredients. Just ensure the soup is fully cooled before canning to prevent jar breakage. The slow cooker method is especially convenient for busy days.
What if I don't have red wine?
No problem! Substitute with 1 cup beef broth or ½ cup balsamic vinegar to maintain acidity and depth of flavor. The wine adds complexity, but these alternatives work well for canning. If using vinegar, add it after the soup has simmered to preserve its bright notes.