
Side Dishes
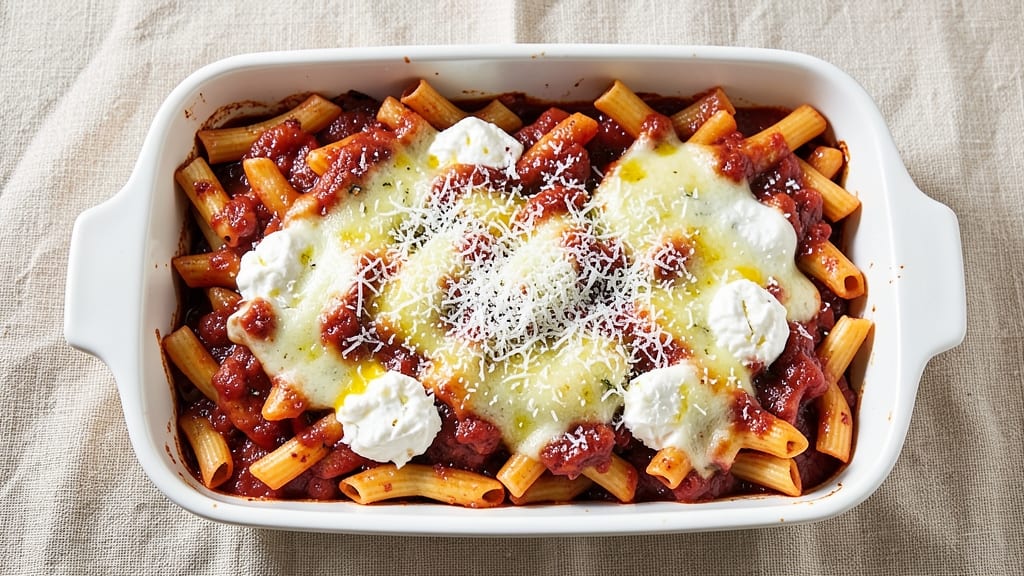
This basic baked ziti recipe delivers all the cheesy, saucy comfort of Italian classics without the fuss of restaurant-level prep. The secret lies in layering al dente pasta with marinara, ricotta, and mozzarella until it forms a golden, bubbling masterpiece in one pan.
I’ve perfected this version over years of holiday dinners, where it consistently earns standing ovations—no special skills required.
The beauty of baked ziti is its simplicity: just a handful of ingredients working together in harmony. You’ll start with pre-cooked pasta (or cook it fresh if you prefer) tossed in marinara sauce, then layer it with a creamy ricotta mixture and melted mozzarella.
The result? A dish so rich and satisfying that it feels indulgent yet stays true to its roots. Every bite delivers that perfect balance of tangy tomato, creamy cheese, and tender pasta.
What makes this recipe foolproof is the baking technique—a single layer of foil ensures the bottom doesn’t burn while the top browns to perfection. The aroma alone will have everyone gathering around the table, and the first forkful?
Pure comfort food magic. This is the kind of dish that transforms a simple weeknight into a celebration, with minimal effort and maximum flavor.
Whether you’re feeding a family or prepping for a potluck, this baked ziti scales effortlessly. Serve it with a side salad or garlic bread for the full Italian experience. Ready to master this classic? Let’s get started with the ingredients and steps that guarantee success every time.
Ingredients for basic baked ziti
Nine essential ingredients transform into a cheesy, saucy masterpiece that feeds six effortlessly.
| Ingredient | Amount | Notes |
|---|---|---|
| Ziti Pasta 🍝 | 12 oz | Uncooked, medium width |
| Marinara Sauce 🍅 | 2 ½ cups | High-quality jarred or homemade |
| Ricotta Cheese 🧀 | 15 oz | Full-fat for creaminess |
| Mozzarella Cheese 🧀 | 2 cups | Shredded, part-skim preferred |
| Parmesan Cheese 🧀 | ½ cup | Freshly grated from block |
| Large Eggs 🥚 | 2 whole | Room temperature |
| Garlic Cloves 🧄 | 3 cloves | Minced for flavor |
| Extra-Virgin Olive Oil 🫒 | 2 tbsp | For tossing pasta |
| Salt 🧂 | 1 ½ tsp | Kosher or sea salt |
| Black Pepper 🌶️ | ½ tsp | Freshly ground |
| Fresh Basil Leaves 🌿 | ¼ cup | Chopped, for garnish |
| Aluminum Foil 📄 | 1 sheet | Heavy-duty for baking |
The pasta is the foundation—medium-width ziti holds sauce best without turning mushy. Pre-cooked saves time, but fresh pasta delivers that al dente bite. For the cheese, block Parmesan and part-skim mozzarella (not pre-shredded) prevent excess moisture. Ricotta should be full-fat for that creamy texture—none of that low-fat nonsense. Garlic is non-negotiable here; three cloves add depth without overpowering. I always grab my marinara from Rao's or Victoria—the quality shows in every layer. Fresh basil at the end brightens the dish, but dried works in a pinch if you're short on time.
No ricotta? Cottage cheese blended smooth works in a bind, though it won’t be as creamy. Pre-shredded cheese gets clumpy—grate your own from a block for that perfect melt. Short on time? Pre-cook the pasta and toss it with olive oil and a pinch of salt to prevent sticking. The eggs bind the ricotta mixture; room temperature ensures a smooth blend. For extra richness, stir 1 tbsp of heavy cream into the ricotta. And if you’re feeling fancy, add a pinch of nutmeg to the cheese layer—trust me, it elevates everything.
This dish reheats beautifully—cover with foil and bake at 375°F for 15 minutes to revive that golden crust. Leftovers keep 4-5 days in the fridge, but honestly, it’s gone by day two. For make-ahead prep, assemble the dish, cover tightly, and refrigerate up to 24 hours before baking. Freezes for 3 months if portioned into airtight containers. The foil trick? Crumple it loosely over the top—just enough to protect the bottom without steaming the cheese.
Why You'll Love This Recipe
- One-Pan Magic: I swear by this recipe because it’s literally one bowl, one pan, and done. No fancy layers or tricky assembly—just toss the cooked ziti with sauce, ricotta, and cheeses, then bake. My hands stay clean, my counters stay clear, and somehow it still feels like a proper meal.
- Cheese Love Bomb: That creamy ricotta mixed with the tangy marinara and melty mozzarella? It’s the kind of combo that makes you close your eyes and sigh. The Parmesan on top adds this crispy, salty crunch that turns every bite into a little flavor party. (Yes, even on a Tuesday night.)
- Meal Prep MVP: I make this on Sundays and it lasts all week—reheats like a dream and still tastes fresh. Pack it for lunches, serve it at game nights, or freeze half for when you’re too tired to cook. The ricotta keeps it rich without getting soggy, so it’s always a win.
- Budget-Friendly Feast: Ziti and jarred marinara won’t break the bank, and ricotta stretches farther than you’d think. A single batch feeds four for under $10, and the leftovers? Even better the next day. Honestly, it’s the kind of dish that makes grocery shopping feel less stressful.
Step-by-step instructions for basic baked ziti
This method delivers perfectly layered baked ziti with crispy top and creamy texture every time.
Cook the Ziti Pasta Al Dente
Bring a large pot of water to a rolling boil and add 1.5 teaspoons salt. Add the 12 oz ziti pasta and cook according to package directions until 1 minute shy of al dente. You want the pasta to have a slight bite—it'll finish cooking in the oven.
Before draining, reserve 1 cup pasta water in a measuring cup. This starchy liquid is essential for creating a smooth, creamy sauce later. Drain the pasta and immediately toss it with 2 tablespoons extra-virgin olive oil to prevent sticking and add shine.
Prepare the Cheese Mixture
In a medium bowl, combine the 15 oz ricotta cheese, 2 whole large eggs, 0.5 cup parmesan cheese, 0.5 teaspoon black pepper, and 3 cloves minced garlic cloves. Mix thoroughly until smooth and well combined. This mixture forms the creamy base layer between the pasta and sauce.
I like to use a silicone spatula for this step—it helps scrape up any ricotta that sticks to the bowl. The eggs bind the ricotta, creating a rich, velvety texture that contrasts beautifully with the marinara and mozzarella.
Assemble the Layers in a Baking Dish
Preheat your oven to 375°F. Spread 1 cup marinara sauce on the bottom of a 9x13-inch baking dish to prevent sticking. Add half of the cooked ziti pasta, spreading it evenly across the dish.
Spread half of the ricotta mixture over the pasta, then sprinkle with half of the 2 cups mozzarella cheese and remaining 1.5 cups marinara sauce. Repeat with the remaining pasta, ricotta mixture, and mozzarella. The layers should be even—this ensures consistent cooking.
Bake Until Bubbly and Golden
Cover the baking dish tightly with the aluminum foil and bake for 25 minutes. Remove the foil and bake for an additional 10-15 minutes until the top is golden brown and bubbly. The edges should be slightly crispy, and the cheese should be fully melted.
Here's the thing—don't peek during baking. Every time you open the oven, you lose heat and steam, which can cause the top to dry out. If the top browns too quickly, tent it loosely with foil to prevent over-browning.
Rest and Garnish Before Serving
Let the baked ziti rest for 10 minutes before serving. This resting period allows the layers to set slightly, making it easier to slice and serve. The cheese will continue to melt and meld, creating a perfectly creamy texture.
Garnish with 0.25 cup chopped fresh basil leaves just before serving. The bright basil adds freshness that cuts through the richness of the cheese and sauce. Serve immediately with a side of garlic bread or a simple salad.
Pro Tips For Making Basic Baked Ziti
- Preheat Like It’s 1999: DESCRIPTION: Your oven needs to hit 425°F (220°C) before that ziti hits the pan—no exceptions. I learned this the hard way when my first batch came out soggy because I rushed. That extra 10 minutes of preheating guarantees a crispy top layer that isn’t just for show.
- Drain Ziti Cold: DESCRIPTION: Run that pasta under cold water for 30 seconds after draining—it stops the cooking and prevents mush. I used to skip this, and my ziti would turn to glue in the oven. Works like a charm, even if it feels weird.
- Mix Ricotta Roughly: DESCRIPTION: Don’t overwork the ricotta—just fold it in with a fork until it’s streaky, not smooth. Overmixing makes it rubbery, and nobody wants that. Think "marbled," not "pâté."
- Top With Parmesan Last: DESCRIPTION: Sprinkle that hard, dry Parmesan right before baking—it melts into a golden crust instead of turning into paste. Save the fancy grated stuff for the top layer, not the mix. Trust me, it’s worth the effort.
Pro cooking tips for basic baked ziti
Pasta Prep Secrets
Cook your ziti 1 minute shy of al dente—it’ll finish perfectly in the oven. I swear by Barilla ziti for its sturdy shape that holds sauce without turning mushy. Reserve 1 cup pasta water—this starchy liquid is liquid gold for creating a silky sauce later.
Toss the drained pasta immediately with 2 tbsp olive oil while hot to prevent sticking and add shine. 💡
Cheese Layering Tricks
Use part-skim mozzarella (not pre-shredded) to avoid excess moisture that makes your dish soggy. Grate your own Parmigiano-Reggiano for that nutty depth—pre-shredded cheese contains anti-caking agents that ruin texture. For extra richness, stir 1 tbsp heavy cream into your ricotta mixture. Spread layers evenly to ensure consistent cooking throughout. 🧀
Foil Baking Technique
Crumple the heavy-duty foil loosely over the dish—just enough to protect the bottom without trapping steam. This prevents the bottom from burning while allowing the top to brown beautifully. After 25 minutes, remove the foil and bake uncovered for 10-15 minutes until golden and bubbly.
Never peek during baking—each time you open the oven, you lose precious heat and steam. 🔥
Resting for Perfection
Let your baked ziti rest for 10 full minutes before serving. This crucial step allows the layers to set slightly, making it easier to slice and preventing a messy slide.
The cheese continues to melt and meld during this time, creating that perfect creamy texture we all crave. Trust the process—rushing this step ruins everything. ⏰
Garnish Like a Pro
Fresh basil leaves add a bright contrast to the rich cheese and sauce. I like to chop mine finely and sprinkle just before serving. For extra flair, add a pinch of red pepper flakes or a drizzle of hot honey for guests who want heat.
The right garnish elevates your dish from homemade to restaurant-worthy. 🌿
Make-Ahead Magic
Assemble your baked ziti up to 24 hours ahead and refrigerate uncovered. When ready to bake, add 5-10 minutes to your baking time to account for the cold start.
For freezing, portion into airtight containers and bake from frozen, adding 15-20 extra minutes covered with foil. The flavors actually improve after resting overnight! ❄️
Nutrition facts
Frequently asked questions
Can I make baked ziti without ricotta?
Yes! Swap the ricotta for a mix of 1 cup cottage cheese and 1/4 cup heavy cream blended smooth, or use an extra 1/2 cup mozzarella mixed with 1 egg and 1 tbsp cream. The texture will be slightly denser but still delicious. For a lighter option, try 1 cup mascarpone cheese instead.
Why is my baked ziti soggy after baking?
Sogginess usually comes from excess moisture. Use block mozzarella (not pre-shredded) and drain ricotta well. Also, avoid overmixing the ricotta-egg mixture—it releases too much liquid. Another trick: bake uncovered for the last 5 minutes to evaporate any trapped steam.
How do I keep the top from getting too brown before the inside cooks?
Crumple foil loosely over the top after 25 minutes (not tightly!) to protect the cheese while allowing heat to circulate. For extra insurance, place a silicon baking mat on top before the final 10 minutes of baking. This creates a barrier while letting the oven's heat work its magic.
Can I use penne or another pasta shape?
Penne, rigatoni, or even fettuccine work well—just adjust cooking times slightly. For best results, choose a shape that holds sauce well (like penne or rigatoni). The key is to cook it 1 minute shy of al dente so it finishes perfectly in the oven.
What's the best way to reheat leftovers?
Cover with foil and bake at 375°F for 15-20 minutes until bubbly. For microwave reheating, sprinkle a tablespoon of water over the top and cover with a damp paper towel to restore moisture. Leftovers taste best within 3 days—the flavors meld beautifully!