
Main Courses
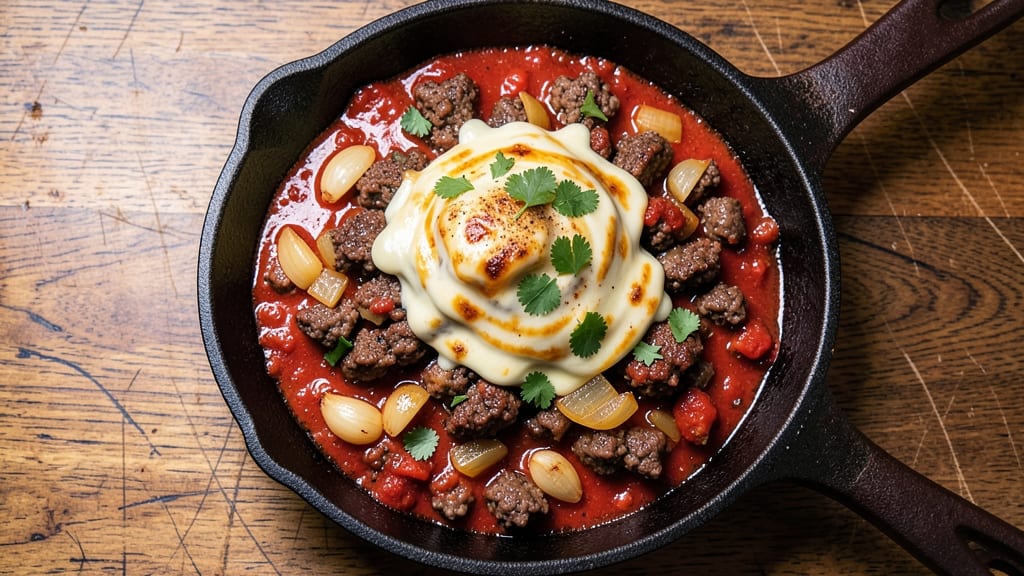
Recreating Chili's signature chile at home delivers that same smoky, cheesy comfort you crave after a long day. The restaurant's version relies on perfectly browned beef, deep spice layers, and a rich tomato base that simmers until every bite is hearty and satisfying.
I've refined this recipe over years of testing—balancing heat, texture, and that signature cheesy finish that makes it a standout dish.
The key to authentic flavor starts with browning the ground beef until deeply caramelized, which builds the foundation for that smoky depth. Adding chili powder, cumin, and garlic upfront lets those spices bloom before the broth joins the pot, ensuring they infuse evenly.
A slow simmer develops the chili's complexity, while a final layer of melted cheddar transforms it into the rich, cheesy masterpiece you know and love.
What you'll end up with is a one-pot chili that's thick, hearty, and packed with layers of flavor—just like the restaurant version. The beef stays tender, the spices are balanced, and the cheese melts into a velvety blanket over the top.
Serve it with crusty bread or tortilla chips to soak up every last bit of that smoky, cheesy goodness.
This recipe serves 6-8 and comes together in about 1 hour, with most of that time spent simmering. The best part? Leftovers taste even better the next day, making it perfect for meal prep or feeding a crowd. Let's get started on this restaurant-quality chili.
Ingredients for chili's chile
Eight essential ingredients. One pot. That signature Chili's chile flavor you love.
| Ingredient | Amount | Notes |
|---|---|---|
| Ground Beef 🥩 | 1 ½ lb | 80% lean for best flavor |
| Yellow Onion 🧅 | 1 whole | Diced, medium size |
| Garlic Cloves 🧄 | 4 cloves | Minced, fresh preferred |
| Canned Tomato Sauce 🍅 | 15 oz | High-quality, no sugar added |
| Chili Powder 🌶️ | 2 tbsp | Smoked variety for depth |
| Ground Cumin 🌿 | 1 tbsp | Toasted for extra aroma |
| Salt 🧂 | 1 ½ tsp | Kosher or sea salt |
| Black Pepper 🌶️ | ½ tsp | Freshly ground preferred |
| Beef Broth 💧 | 2 cups | Low-sodium preferred |
| Diced Tomatoes 🍅 | 14 ½ oz | Fire-roasted for smoky flavor |
| Black Beans 🫘 | 15 oz | Drained and rinsed |
| Shredded Sharp Cheddar Cheese 🧀 | 1 ½ cups | Freshly shredded preferred |
| Olive Oil 🫒 | 1 tbsp | For browning beef |
| Bay Leaves 🌿 | 2 whole | Removed before serving |
The beef is non-negotiable here—80% lean ground chuck from the meat counter gives you that perfect balance of flavor and texture. Costco or Trader Joe's usually have it pre-packaged, but the butcher section at Whole Foods often has better quality. Look for bright red color and good marbling. The chili powder? Penzeys or any smoked variety will give you that authentic depth. Skip the pre-mixed packets—they taste like dust. For the beans, Goya or Trader Joe's brands are my go-to—they're consistently flavorful and drain well.
No smoked paprika? Regular chili powder plus a pinch of liquid smoke works in a pinch. Fresh garlic is ideal, but garlic powder at half the amount gets you close. The tomato sauce can be homemade (just tomatoes, garlic, olive oil, and salt) or a quality jarred version like Rao's. For the beans, kidney beans or pinto beans swap one-for-one. And if you're watching sodium, low-sodium broth plus extra salt at the end keeps it balanced. The cheese? Freshly shredded sharp cheddar melts best—pre-shredded gets clumpy.
This chili tastes even better the next day, so double the batch if you're feeding a crowd. Store in the fridge for up to 5 days, or freeze portions for 3 months. I like to portion it into meal prep containers so lunches are ready to grab. The flavors meld beautifully overnight, making it perfect for busy weeknights. And trust me, the leftovers are just as good—if not better—than the first serving.
Why You'll Love This Recipe
- One-Pan Magic: I swear by this recipe because it’s that simple—just brown the beef, toss in the onion and garlic, then dump in the canned sauce and chili powder. No chopping, no straining, no fuss. My weeknights thank me every time.
- Deep, Smoky Richness: That canned tomato sauce might seem basic, but when it simmers with ground beef and a generous pinch of chili powder? It’s ridiculously flavorful—thick, hearty, and just spicy enough to linger. Honestly, the first bite always makes me go back for seconds.
- Game for Any Meal: This chili is my go-to for lazy Sundays, tailgates, or even a quick dinner when friends drop by. Serve it over rice, with cornbread, or straight from the pot—it’s adaptable without losing its soul.
- Budget Meal, Big Payoff: Ground beef and canned sauce keep costs low, but the taste? That’s restaurant-quality. I make triple batches, freeze half, and still have leftovers for days. Between us, this is my secret weapon for feeding a crowd without breaking the bank.
Step-by-step instructions for chili's chile recipe
Here's how to create that perfect blend of smoky, cheesy layers in one comforting pot.
Brown the Ground Beef and Sauté Aromatics
Heat the 1 tablespoon olive oil in a large Dutch oven or heavy pot over medium-high heat. Add the 1.5 pounds ground beef, breaking it apart with a wooden spoon, and cook until it loses its raw color and begins to brown—about 5-7 minutes. This step is crucial for developing deep, meaty flavor.
Once the beef is mostly browned, drain most of the fat (leave about 1 tablespoon for flavor), then add the 1 whole diced yellow onion and 4 minced garlic cloves. Cook for 3-4 minutes until the onions soften and become translucent, and the garlic releases its fragrant aroma. You'll know it's ready when the garlic just starts to turn golden—don't let it burn, or it'll turn bitter.
Build the Flavor Base with Spices and Tomatoes
Stir in the 2 tablespoons chili powder, 1 tablespoon ground cumin, 1.5 teaspoons salt, and 0.5 teaspoon black pepper, coating the beef and onions evenly. Cook for 1 minute to toast the spices and release their aromas. This step ensures every bite is packed with that signature smoky depth.
Pour in the 15 ounces canned tomato sauce, 14.5 ounces diced tomatoes, and 2 cups beef broth. Add the 2 whole bay leaves and bring the mixture to a gentle boil. Reduce heat to medium-low and let it simmer uncovered for 15 minutes, stirring occasionally. You'll see the mixture thicken slightly as the flavors meld together—this is where the magic happens.
Add Beans and Simmer for Hearty Texture
Gently stir in the 15 ounces drained and rinsed black beans, breaking them up with a wooden spoon to distribute evenly. Return the heat to medium-low and let the chile simmer uncovered for another 20-25 minutes. The beans will absorb the rich, spiced broth while keeping their structure, adding that satisfying heartiness.
Here's the thing—don't stir constantly. Occasional gentle stirs prevent the beans from breaking down too much, keeping the texture just right. You're looking for a chile that's thick but still spoonable, with the beans holding their shape. If it gets too thick, add a splash of water or broth to loosen it.
Finish with Cheese for Ultimate Comfort
Once the chile has simmered for 20-25 minutes, remove the 2 bay leaves and stir in the 1.5 cups shredded sharp cheddar cheese. Let the mixture cook for an additional 5 minutes on low heat, stirring gently until the cheese melts completely and creates a creamy, bubbly top layer. The cheese should coat the beans and beef evenly, adding that rich, melty comfort you crave.
Taste and adjust seasoning if needed—sometimes the cheese adds extra saltiness, so you might want to add a pinch more chili powder or black pepper for balance. The chile should be rich, smoky, and just spicy enough to warm you up. Let it rest for 5 minutes off the heat before serving to let the flavors fully settle.
Pro Tips For Making Chili'S Chile
- BROWN THE BEEF FIRST: I learned this the hard way—skipping the initial sear makes the chili taste flat. Cook the ground beef in batches over medium-high heat until it’s deeply browned (not just cooked), breaking it into small pieces as it releases fat. That caramelized crust is where the flavor lives.
- SWEAT THE ONIONS LOW: High heat turns onions bitter, and this chile recipe relies on their sweetness. Cook the diced yellow onion in the same pan (after browning the beef) over low heat for 8–10 minutes, stirring occasionally, until they’re translucent and just starting to soften. No need to rush—this is where the base flavor builds.
- DON’T DUMP THE FAT: After browning the beef, there’s usually 1–2 tablespoons of rendered fat in the pan. That’s gold—don’t pour it out. Use it to sauté the garlic and onions instead of adding extra oil. It adds richness and depth the recipe wouldn’t have otherwise.
- SIMMER, DON’T BOIL: Once everything’s combined, keep the heat at a gentle simmer (small bubbles, occasional stirs) for at least 30 minutes. Boiling burns the tomato sauce and makes the chile taste harsh. If it’s too thick, add a splash of water or broth—but don’t let it bubble wildly. Patience here makes the difference.
Flavor customization for this dish
Spice Level Control
Adjust the heat to your preference by tweaking the chili powder and adding optional ingredients. For mild, use 1 tbsp chili powder and skip the cayenne. For medium, stick to the 2 tbsp chili powder in the recipe.
For spicy, add ½ tsp cayenne pepper or 1 tbsp chipotle powder—I like Penzeys Chipotle Powder for authentic smokiness. 🌶️
Protein Swaps
Ground beef is classic, but you can swap it for ground turkey (use 1 lb 93% lean) or Italian sausage (remove casing first). For a vegetarian version, replace beef with 1 lb crumbled tempeh or extra black beans (add 15 oz more).
If using sausage, reduce the salt to 1 tsp since sausages are already seasoned.
Cheese Variations
While sharp cheddar is traditional, try Monterey Jack for creaminess or pepper jack for a kick. For a smoky twist, add ½ cup crumbled blue cheese at the end. If you're lactose-sensitive, use vegan cheddar shreds (like Violife)—they melt surprisingly well! 🧀
Topping Ideas
Serve with crushed tortilla chips for crunch, sour cream, or diced avocado. For extra richness, top with sautéed onions or crumbled bacon. I love adding pickled jalapeños for tangy heat—just 2-3 slices per bowl. For a Tex-Mex fusion, sprinkle with cilantro and a squeeze of lime.
Slow Cooker Adaptation
For hands-off cooking, brown the beef as directed, then transfer everything (except cheese) to a 6-quart slow cooker. Cook on low for 6-7 hours or high for 3-4 hours.
Stir in cheese during the last 30 minutes to melt. This method keeps the chili thicker and more flavorful—perfect for busy days. ⏳
Smoky Depth Boosters
Infuse extra smokiness by adding 1 tbsp liquid smoke (like Liquid Smoke by Wright) or 1 smoked paprika to the spice mix. For a campfire vibe, char 1 red bell pepper and 1 onion on a grill, then blend into the sauce.
A small piece of smoked gouda (about ½ cup) stirred in at the end adds depth without overpowering. 🔥
Nutrition facts
Frequently asked questions
Can I make this chili in a slow cooker instead of on the stove?
Brown the beef first, then transfer everything except the cheese to a 6-quart slow cooker. Cook on low for 6-7 hours or high for 3-4 hours. Stir in the cheese during the last 30 minutes to melt it perfectly. The slow cooker method actually enhances the flavors, making it even more tender and rich.
How do I adjust the spice level if I don't like heat?
Start by reducing the chili powder to 1 tablespoon instead of 2. Skip any cayenne or chipotle powder, and taste before adding extra salt. For a milder kick, add ½ teaspoon sugar or 1 teaspoon honey at the end to balance the heat. The cheese helps mellow the spices too!
What's the best way to reheat leftover chili?
Reheat gently on the stove over low heat with a splash of water or broth to prevent drying out. For even better results, cover and warm in the microwave for 2-3 minutes, stirring halfway. If the cheese gets grainy, stir in 1 tablespoon milk or sour cream to restore creaminess. Leftovers taste even better the next day!
Can I use turkey or chicken instead of beef?
Yes, but adjust the cooking time. For ground turkey, use 93% lean and cook it until fully done (no pink). For chicken breast, finely dice it and brown well to avoid dryness. If using sausage, reduce the salt to 1 teaspoon since it's already seasoned. The flavor will be lighter but still delicious!
Why did my chili turn out too thin or too thick?
If it's too thin, simmer uncovered for 10-15 extra minutes to reduce. For thickness, stir in 1 tablespoon cornstarch mixed with 2 tablespoons water and simmer for 5 minutes. Avoid over-stirring beans—they release starch and can make the chili gluey. The perfect texture should be thick but still spoonable.