Main Courses
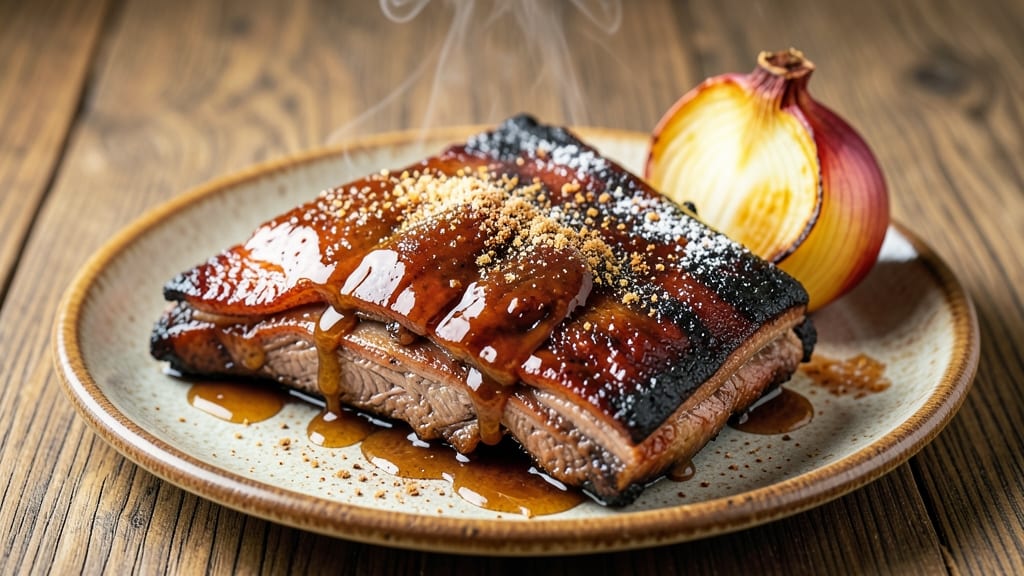
Mastering baked St. Louis-style spare ribs transforms a weeknight into a restaurant-quality feast—crispy, caramelized crust and meat so tender it falls from the bone. Standing on a step stool in my grandmother’s kitchen in Sicily, I learned how slow, dry heat unlocks flavors; this method does the same for ribs.
The secret lies in the dry rub and patient baking, where time works in your favor rather than against it.
This recipe delivers fall-off-the-bone tenderness without a smoker, using just a baking sheet and oven. The dry rub—sugar, spices, and brown sugar—creates a deep, sticky crust that caramelizes beautifully while keeping the meat juicy.
Unlike other methods, this approach avoids sauces until serving, preserving that perfect balance of smoky, spiced flavors. It’s a technique I’ve perfected over years, ensuring every bite delivers the same satisfaction as my Nonna’s dishes.
By the time these ribs emerge from the oven, they’ll be glazed with natural juices, the crust dark and crackly, and the meat so tender it practically melts. The aroma alone will have everyone gathering at the table.
Serve with tangy coleslaw or buttery baked beans to complete the meal—just as St. Louis style intended. Here’s how to achieve it at home.
What makes this recipe stand out is its foolproof method—no guesswork, no stress. The ribs bake uncovered for most of the time, developing that signature crust, then finish wrapped in foil to retain moisture.
Leftovers reheat beautifully, making this the ultimate make-ahead dish for gatherings. Ready to elevate your next meal?
Ingredients for baked st louis spare ribs
Four pounds of meat, a handful of pantry staples, and patience—this is all you need for ribs that rival the best St. Louis barbecue.
| Ingredient | Amount | Notes |
|---|---|---|
| St. Louis Style Spare Ribs 🍖 | 4 lb | Bone-in, meaty ends included |
| Yellow Onion 🧅 | 1 whole | Large, sliced into rings |
| Granulated Sugar 🍚 | ½ cup | White, fine grain preferred |
| Light Brown Sugar 🍚 | ½ cup | Packed firmly for accuracy |
| Smoked Paprika 🌶️ | 2 tbsp | High-quality for smoky depth |
| Garlic Powder 🧄 | 1 ½ tbsp | Freshly ground preferred |
| Ground Black Pepper 🌶️ | 1 tbsp | Freshly cracked for sharpness |
| Diamond Crystal Kosher Salt 🧂 | 1 ½ tbsp | Coarse grain for even coating |
| Ground Cumin 🌿 | 1 tsp | Toasted for richer flavor |
| Ground Mustard 🌶️ | 1 tsp | Dry, for subtle tang |
| Apple Cider Vinegar 🍎 | 2 tbsp | For tenderizing the meat |
| Unsalted Butter 🧈 | 2 tbsp | Melted for basting |
| Fresh Rosemary 🌿 | 1 tbsp | Chopped, for aromatic depth |
The ribs are the star, so prioritize quality cuts—look for meaty ends and minimal membrane. Costco or local butcher shops often carry the best St. Louis-style cuts, but most grocery stores stock them too. If you're buying a whole packer, trim off any excess fat or silver skin for better rub adhesion. The apple cider vinegar marinade (just mix with ribs) tenderizes while adding brightness—don't skip this step, even if it's just overnight in the fridge. For the sugars, Domino or C&H brands work perfectly, but if you've got raw cane sugar, it adds a subtle caramel note worth trying.
No smoked paprika? Substitute regular paprika plus a pinch of liquid smoke—it's a game-changer for that authentic smoky flavor. Short on fresh rosemary? Dried works at one-third the amount, but the fresh herb adds an herbal note that's hard to beat. The vinegar marinade can be swapped for lemon juice or orange juice if you're avoiding vinegar, though the tang is key. For the sugars, turbinado sugar works too—it's coarser but adds a lovely crunch to the crust. And if you're making this ahead, prep the rub a day in advance—it's easier to mix and the flavors meld better overnight.
These ribs reheat like a dream—just 15 minutes at 300°F wrapped in foil with a splash of water. Store leftovers in the fridge for up to 4 days, or freeze for 3 months (they actually taste better after resting). I like to portion them into individual serving bags so I can grab just what I need. The rub keeps well in an airtight container for 3 weeks if you want to make extra—perfect for future grilling sessions.
Why You'll Love This Recipe
- Foil-Wrapped Magic: I swear by the foil trick—just wrap those ribs with onions, sugar, and paprika, then bake. No messy grill, no babysitting the heat, and the tender fall-off-the-bone texture? Chef’s kiss.
- Sweet-Smoky Crunch: That caramelized crust from the brown sugar and smoked paprika? It’s the kind of flavor that makes you close your eyes. The onions add a deep, jammy sweetness that cuts through the richness—like a hug in bite form.
- Tailgate or Tuesday: Between us, these ribs work for everything. Pack them for a football game (they stay warm for hours), toss them in a lunchbox for work, or serve them at a backyard BBQ where everyone’s too busy eating to notice you didn’t slave over a smoker.
Step-by-step instructions for baked St louis style spare ribs
Here's how to transform tough ribs into melt-in-your-mouth perfection with a perfect bark.
Prepare the Ribs for Maximum Flavor
Start by removing the membrane from the ribs—this thin, papery layer on the bone side can prevent tenderizing. Slide your fingers or a butter knife between the meat and membrane, then grab both sides and peel it off. You'll know it's gone when you can see the shiny meat underneath.
Next, trim any excess fat from the ribs, leaving just a thin layer to protect the meat during cooking. Pat the ribs completely dry with paper towels—this step is non-negotiable for that crispy bark. Then, in a small bowl, combine all the dry rub ingredients: the 0.5 cup granulated sugar, 0.5 cup light brown sugar, 2 tbsp smoked paprika, 1.5 tbsp garlic powder, 1 tbsp ground black pepper, 1.5 tbsp Diamond Crystal kosher salt, 1 tsp ground cumin, and 1 tsp ground mustard. Mix well to distribute the spices evenly.
Apply the Dry Rub and Marinate
Generously coat the ribs with the dry rub mixture, pressing it firmly into every nook and cranny. Don't be shy—you want a thick, even layer that will caramelize into that coveted bark. Once coated, place the ribs in a large bowl and pour the 2 tbsp apple cider vinegar over them. The vinegar helps tenderize the meat by breaking down tough fibers.
Cover the bowl with plastic wrap and refrigerate for at least 4 hours, or overnight if possible. This long marinating time allows the rub to penetrate deeply and the vinegar to work its magic. The ribs should be well-coated and ready for the oven.
Preheat and Bake Low and Slow
Preheat your oven to 275°F—this low temperature is key for achieving tender ribs without drying them out. Line a large baking dish with aluminum foil and place the ribs bone-side up on the foil. Pour the 2 tbsp melted unsalted butter over the ribs and sprinkle with the 1 tbsp chopped fresh rosemary. The butter will baste the ribs as they cook, adding richness and helping to create a glossy finish.
Cover the baking dish tightly with another piece of foil to trap steam, which helps tenderize the meat. Bake for 2.5 hours, then remove the foil and increase the oven temperature to 325°F. Continue baking for another 1.5 to 2 hours until the ribs are fork-tender and the internal temperature reaches 195°F. The ribs should pull away from the bone with minimal resistance.
Rest and Serve
Once the ribs are done, transfer them to a cutting board and let them rest for 10 to 15 minutes. This resting period allows the juices to redistribute, ensuring each bite is moist and flavorful. While they rest, slice the 1 whole yellow onion into rings and sauté them in a skillet with a little butter until caramelized. These sweet onions make a perfect topping for your ribs.
Slice the ribs between the bones and serve them with the caramelized onions on top. The ribs should be fall-off-the-bone tender with a crispy, caramelized exterior. If you're serving a crowd, arrange the ribs on a platter and drizzle any remaining pan juices over the top for extra flavor.
Pro Tips For Making Baked St Louis Spare Ribs
- Trim the Fat First: St. Louis-style ribs have that thick membrane layer—peel it off before baking. I used to skip this, and my ribs stayed chewy even after hours. Take a butter knife, slide it under the membrane near the bone, and yank it off in one go. It’s messy but worth it.
- Brown the Ribs Hard: Don’t just sear—get them deep brown in a hot pan with oil before adding the sugar mix. I learned this the hard way: pale ribs mean pale flavor. Work in batches if needed, and don’t rush—3-4 minutes per side until caramelized.
- Mix Dry Sugar First: Combine granulated and brown sugar before adding smoked paprika and onion. This keeps the sugar from clumping and ensures even distribution. I used to sprinkle them separately, and some spots ended up too sweet or dry.
- Tent with Foil Early: After the first 45 minutes, loosely tent the ribs with foil to trap steam. This keeps them from drying out while still letting the sugar crust form. I used to forget, and my ribs turned tough by the end—now I set a timer to check.
Make-ahead tips for this dish
Prep Ahead for Stress-Free Cooking
The dry rub is the heart of this recipe, and you can make it up to 3 weeks in advance—just store it in an airtight container.
I like to mix mine in a glass jar with a tight lid from my Nonna’s kitchen, which keeps it fresh and ready for any grilling session. The longer it sits, the more the spices meld together, deepening the flavor profile.
For the ribs themselves, trim and pat them dry the same day you plan to cook, but don’t apply the rub until just before baking. This keeps the meat fresh and prevents the rub from absorbing moisture prematurely. 💡
Marinate Overnight for Maximum Tenderness
Marinating the ribs in apple cider vinegar for at least 4 hours (overnight is ideal) is non-negotiable for that melt-in-your-mouth texture. I always do this step the night before, so the ribs are ready to go straight into the oven in the morning.
Place them in a ziplock bag or airtight container to keep them refrigerated and prevent spills. The vinegar works its magic by breaking down the tough collagen fibers, ensuring the meat becomes tender without needing hours of cooking.
Trust me, this is the secret to ribs that practically fall apart. 🍖
Bake in Stages for Perfect Crust
This recipe uses a two-stage baking process—first at 275°F to tenderize the meat, then at 325°F to develop that coveted bark. I like to prep the ribs the night before by applying the rub and letting them sit uncovered in the fridge.
This allows the rub to form a crust even before baking, giving you a head start on that caramelized finish. Cover them loosely with foil if you’re prepping ahead, but remove it before baking to let the moisture evaporate and the crust form. 🔥
Freeze for Future Feasts
These ribs freeze beautifully, making them perfect for meal prep or future gatherings. After baking, let them cool completely, then wrap them tightly in plastic wrap followed by aluminum foil. Store in a freezer-safe bag with all the air squeezed out to prevent freezer burn.
They’ll keep for up to 3 months, and when you’re ready to eat, thaw them in the fridge overnight before reheating. For best results, reheat at 300°F for 15-20 minutes wrapped in foil with a splash of water to keep them moist. ❄️
Reheat Leftovers Like a Pro
Leftovers are just as delicious as the first serving—if not more so, since the flavors deepen over time. To reheat, place the ribs in an oven-safe dish, cover with aluminum foil, and bake at 300°F for 15 minutes.
Add a tablespoon of water or beef broth to the dish to keep them from drying out. For a quick stovetop method, warm them in a skillet over medium-low heat for 5-7 minutes, adding a little butter to keep them glossy.
The key is to keep them warm through, not crispy again—just tender and ready to serve. 💫
Prep Sides in Advance
No one wants to be stuck in the kitchen while the ribs rest.
Prep your sides ahead of time so everything is ready to go when the ribs come out of the oven. Caramelized onions can be made a day ahead and stored in the fridge—they’ll just need a quick reheat in the skillet before serving.
For coleslaw or baked beans, make them the night before and keep them chilled. Even the garlic butter for basting can be prepped in advance and melted just before pouring over the ribs. This way, you’re just reheating and assembling when the big moment arrives. ✨
Nutrition facts
Frequently asked questions
Why do St. Louis-style ribs need to bake at two different temperatures?
The two-stage baking method is key for perfect ribs. Starting at 275°F breaks down collagen slowly for tender meat, while finishing at 325°F builds that signature crispy bark. This balance prevents drying while developing deep flavor.
Can I substitute apple cider vinegar for something else?
Yes! Use lemon juice or orange juice in equal amounts. The acidity is what tenderizes the meat—just avoid white vinegar, which lacks the fruity brightness. For extra depth, add a pinch of salt to your substitute.
How do I know when the ribs are fully cooked?
Ribs are done when they reach 195°F internally and the meat pulls away from the bone with slight pressure. Test by inserting a meat thermometer into the thickest part—no pink should remain.
What's the best way to serve these baked ribs?
St. Louis-style ribs shine with tangy sides like coleslaw or baked beans. Top with caramelized onions and serve with pickles or cornbread for a full spread. The vinegar-marinated meat pairs perfectly with cool, crunchy textures.
Can I make this recipe in a slow cooker?
Not ideal for St. Louis-style ribs—they need that high-heat bark. However, you can par-cook them in a slow cooker (3-4 hours on low) then finish in the oven at 325°F for 30 minutes to develop crust. For best results, stick to the oven method.