Breakfast & Brunch
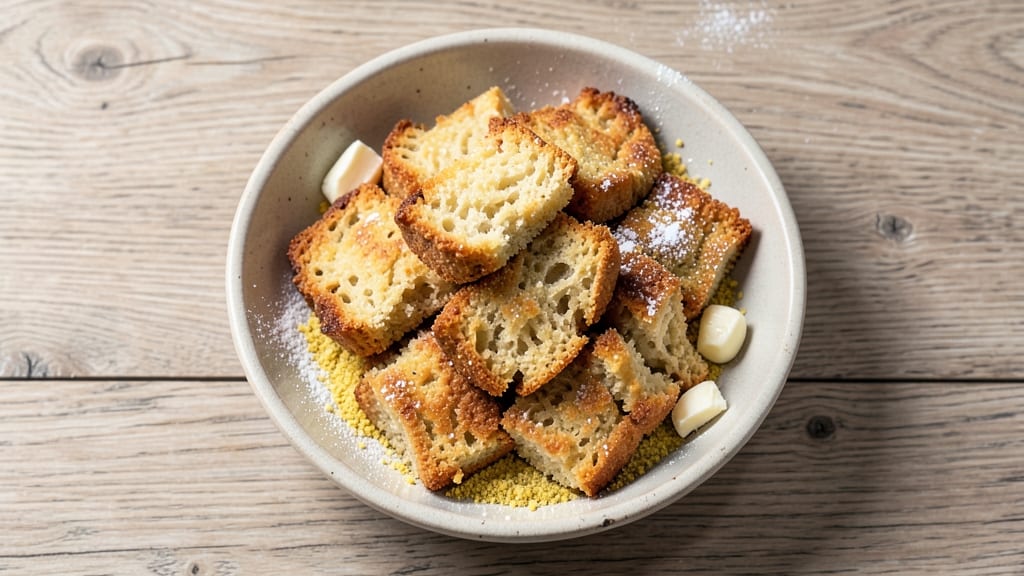
This Amish fritter bread brings a taste of Pennsylvania farmhouse kitchens to your morning table with its golden cornmeal crust and tender interior. The recipe traces back to Amish communities where simplicity and hearty flavors defined their cooking traditions—now you can recreate that warmth in your own kitchen.
What makes this dish special is its perfect balance: crispy edges from the cast-iron skillet meet a fluffy center that soaks up honey or butter beautifully.
The secret to authentic Amish fritter bread lies in the technique: a well-seasoned cast-iron skillet ensures that golden crust, while the right mix of cornmeal and flour creates that signature texture.
Unlike many quick breads, this recipe requires just 15 minutes of active prep followed by 20 minutes of baking—ideal for busy mornings. The honey drizzle isn't just decoration; it adds a touch of sweetness that complements the bread's natural richness.
By the time you pull this bread from the oven, your kitchen will smell like a morning at an Amish market, and every bite will deliver that satisfying contrast of crispy crust and soft interior.
The bread stays warm for hours, making it perfect for breakfast or as a side to savory dishes. Whether you're serving it with jam, butter, or even as a base for French toast, this recipe delivers restaurant-quality results at home.
For those new to Amish cooking, don't worry—this recipe is foolproof, with clear instructions for shaping the dough and achieving that perfect crust. The cultural significance of this dish lies in its simplicity and ability to feed a family with minimal ingredients.
Once you try it, you'll understand why it's a staple in Amish households and why it continues to charm modern cooks.
Ingredients for amish fritter bread
Golden crust meets fluffy interior—just 12 simple ingredients for Amish fritter bread magic.
| Ingredient | Amount | Notes |
|---|---|---|
| All-Purpose Flour 🌾 | 2 cups | Sifted for light texture |
| Fine Yellow Cornmeal 🌽 | 1 cup | Stone-ground preferred |
| Granulated Sugar 🍚 | ¼ cup | Light brown works too |
| Baking Powder 🧂 | 2 tsp | Aluminum-free preferred |
| Salt 🧂 | ½ tsp | Fine sea salt |
| Unsalted Butter 🧈 | ½ cup | Cold, cubed for dough |
| Milk 🥛 | 1 cup | Room temperature |
| Large Eggs 🥚 | 1 whole | Room temperature |
| Pure Vanilla Extract 🌸 | 1 tsp | Imitation-free |
| Honey 🍯 | ¼ cup | Wildflower preferred |
| Vegetable Oil 🫒 | 1 tbsp | For skillet seasoning |
| Cast-Iron Skillet 🔥 | 1 whole | 10-inch, well-seasoned |
That cornmeal is non-negotiable—it’s what gives the bread its signature texture. Bob’s Red Mill or King Arthur brands are my go-to for stone-ground quality, but any fine yellow cornmeal works. The flour? King Arthur or Gold Medal—both bake reliably. Butter needs to be cold when you cut it into the dough (that’s the secret to those flaky layers). I always grab Land O’Lakes unsalted from the store, but if you’ve got European-style butter, even better. The skillet? Preheat it over medium heat while you mix the dough—this ensures even browning. And don’t skip the honey—local wildflower adds depth, but any good honey works.
No cornmeal? Crushed cornflakes in a pinch (toast them first for extra crispiness). Short on butter? Coconut oil works, but the flavor won’t be quite the same. The dough should be sticky but manageable—if it’s too dry, add a splash more milk. For the skillet, if you don’t have cast iron, a nonstick skillet with a little extra oil will do. The honey drizzle? Warm it slightly before pouring—it’ll flow better and caramelize just enough for that golden sheen. Pro tip: if your skillet isn’t seasoned, rub it with a little oil and flour before heating to mimic that cast-iron magic.
Fresh out of the oven, this bread stays warm for hours—perfect for breakfast all morning. Store leftovers wrapped in a clean kitchen towel to keep them soft. Reheat in a 350°F oven for 5-10 minutes for that crispy crust. The dough can be made a day ahead and refrigerated, but let it sit at room temp for 30 minutes before shaping. Freeze portions of the dough for up to 3 months—just thaw before using. And if you’ve got extra? Toss it in the freezer and make French toast later—trust me, it’s even better the next day.
Why You'll Love This Recipe
- Five-Ingredient Magic: I swear, this recipe lives up to its name—just flour, cornmeal, sugar, baking powder, and salt. No weird pantry raids or last-minute grocery runs. Honestly, I’ve made it three times in a row with the same pantry staples, and the dough comes together faster than I can wipe my hands.
- Golden Crunch Delight: That crispy cornmeal crust? It’s the star. The outside gets this addictive golden crunch while the inside stays soft—like a hug from Grandma’s kitchen. I’ll be real: I’ve reheated cold slices the next day, and they’re still ridiculously good.
- Breakfast to Dessert: Serve it warm with butter for breakfast, toast it with jam for a snack, or even crumble it over oatmeal. Between us, I’ve used leftover pieces to top pancakes, and nobody batted an eye. It’s the ultimate blank canvas for whatever you’re craving.
- Budget-Friendly Staple: A single batch costs me pennies and stretches for days. Freeze extras in a bag, and you’ve got instant toast or French toast starter. My kids don’t even notice when I pull it out—it’s that reliable. Plus, no fancy ingredients mean no wasted money on things that’ll just sit in the cabinet.
Instructions for Amish fritter bread: golden cornmeal crust with honey-drizzled warmth
Here's how to create this comforting, crispy-edged bread with a tender interior and that perfect honey drizzle. The secret lies in the cornmeal crust and proper skillet technique.
Prepare the Dough for Perfect Texture
In a large mixing bowl, combine the 2 cups all-purpose flour, 1 cup fine yellow cornmeal, 0.25 cup granulated sugar, 2 teaspoons baking powder, and 0.5 teaspoon salt. Whisk everything together until evenly distributed—this ensures an even rise and consistent texture throughout each serving.
Cut the 0.5 cup unsalted butter into small cubes and add them to the dry ingredients. Use a pastry cutter or your fingers to work the butter into the flour mixture until it resembles coarse crumbs with pea-sized butter pieces remaining. This creates pockets that will make your bread wonderfully flaky.
Make a well in the center and add the 1 cup room-temperature milk, 1 whole large egg, and 1 teaspoon pure vanilla extract. Mix gently with a wooden spoon until just combined—you should still see some dry flour streaks. Overmixing develops gluten, which would make the bread dense instead of light and tender.
Shape and Chill for Ideal Crispiness
Turn the dough onto a lightly floured surface and gently knead just 4-5 times until it comes together. Divide the dough into 4 equal portions (about 1 cup each) and roll each into a 6-inch round. Place them on a parchment-lined baking sheet, spacing them about 2 inches apart.
Cover the baking sheet with plastic wrap and refrigerate for at least 30 minutes, but no longer than 2 hours. This chilling step is crucial—it allows the gluten to relax and prevents the bread from spreading too much in the skillet. The cold dough also helps create that beautiful crispy crust we're after.
Season the Skillet for Perfect Browning
While the dough chills, heat your 10-inch cast-iron skillet over medium heat. Add 1 tablespoon vegetable oil and swirl to coat the bottom evenly. The oil should shimmer but not smoke—this indicates it's ready for cooking. If you see any dry spots, add a tiny bit more oil to ensure even browning.
This step is where the magic happens. The well-seasoned cast-iron skillet creates that signature crispy crust while keeping the interior tender. Don't rush this—wait until the skillet is properly heated through before adding the first piece of dough. You'll know it's ready when a drop of water sizzles and dances across the surface.
Cook Until Golden Brown and Crisp
Working in batches, carefully place one chilled dough round into the hot skillet. Press down gently with a spatula to help it maintain its shape during cooking. Cook for 3-4 minutes on each side until the bottom is golden brown and crispy, and the top is puffed and lightly browned.
I like to press down gently on the fritter during the first minute—this prevents it from curling and ensures even contact with the pan. You'll see the edges start to crisp and pull away slightly—that's your signal to flip. The cornmeal gives these a beautiful texture that's crisp on the outside and tender within.
Serve Warm with Honey Drizzle
Transfer the cooked fritters to a wire rack and let them rest for 2 minutes. This brief resting period allows any residual steam to escape, preventing sogginess. While they're resting, warm the 0.25 cup honey in a small saucepan over low heat until it's just pourable—about 30 seconds.
Serve the warm fritters immediately with a generous drizzle of the honey. The contrast between the crispy crust, tender interior, and sweet honey creates a perfect balance of textures and flavors. Each bite should deliver that satisfying crunch followed by a soft, buttery center—this is classic Amish fritter bread at its best!
Pro Tips For Making Amish Fritter Bread
- Sift the Cornmeal First: I learned this the hard way—lumpy cornmeal makes dense, uneven fritters. Whisk it with the flour and baking powder in a sieve or fine-mesh strainer before mixing. This cuts out clumps and ensures that golden, crispy texture you’re after, especially in the bottom layer where the cornmeal really shines.
- Use Cold Butter: Cut that butter into tiny cubes and toss it straight from the fridge into the dry ingredients. Warm butter melts too fast, turning your dough greasy and sticky before it even hits the pan. Cold butter creates pockets that steam into flaky layers—just like a good biscuit, but with that cornmeal crunch.
- Don’t Overmix the Dough: After adding the wet ingredients, mix just until the dough comes together. I used to beat it like I was kneading bread, and the fritters turned out tough and dry. A few gentle folds with a spatula or your hands is all you need—think soft, slightly shaggy cookie dough, not playdough.
- Fry in Small Batches: Crowding the pan drops the oil temperature fast, leading to greasy, unevenly cooked fritters. Work in batches of 2–3 pieces, and resist the urge to flip too soon. The edges should set in 2–3 minutes before you flip—golden brown, not soggy. Patience here makes all the difference in that crispy exterior.
Flavor customization for amish fritter bread
Sweet Variations
For a caramelized twist, replace half the honey with ½ cup brown sugar and sprinkle ½ cup chopped pecans on top before baking. The pecans toast beautifully in the skillet, adding crunch.
I also love adding 1 tsp cinnamon to the dough for warmth—it pairs perfectly with the honey drizzle. 🍯
Savory Adaptations
Skip the honey and try a herbed butter glaze instead. Mix ¼ cup softened butter with 1 tbsp fresh parsley, ½ tsp garlic powder, and a pinch of salt.
Brush this on warm fritters for a savory breakfast option. For extra depth, add 1 tbsp grated Parmesan to the dough before shaping. 🧀
Spiced Options
Add ½ tsp ground cardamom or ¼ tsp cayenne pepper to the dough for warmth. Cardamom gives a floral note that surprises guests, while cayenne adds subtle heat.
I also like a lemon glaze: mix ¼ cup powdered sugar with 1 tbsp lemon juice and drizzle over warm fritters for brightness. 🌶️
Gluten-Free Swap
Replace 1 cup flour with 1 cup gluten-free 1:1 baking flour (like Bob’s Red Mill or King Arthur). Add ½ tsp xanthan gum to improve texture.
The cornmeal stays the same—it’s naturally gluten-free. For binding, use 1 extra tbsp milk in the dough. The result is still crispy but slightly denser. 🌾
Extra Crispy Trick
For ultra-crispy edges, coat the shaped dough rounds with 1 tbsp melted butter before cooking. Brush the skillet with extra oil and cook at medium-high heat for 4-5 minutes per side.
The butter caramelizes slightly, adding richness. I also recommend doubling the cornmeal in the dough for maximum crunch. 🔥
Make-Ahead Sweetness
Prepare the dough a day ahead and refrigerate. Before baking, brush the chilled rounds with egg wash (1 egg + 1 tbsp milk) and sprinkle with coarse sugar.
This creates a glazed finish that’s perfect for gifting. Store baked fritters in an airtight container with parchment between layers for up to 3 days. 💫
Nutrition facts
Frequently asked questions
Why does Amish fritter bread need cornmeal?
The cornmeal creates that signature crispy crust while keeping the inside tender. It's what gives these fritters their authentic texture and golden color. Without it, you'd lose that classic Amish farmhouse flavor and texture.
Can I make this bread without a cast-iron skillet?
Yes! Use a well-seasoned nonstick skillet with an extra 1 tablespoon of oil. The key is maintaining medium heat and cooking for 3-4 minutes per side to achieve that crispy crust. Just press down gently to help them hold their shape.
How do I store leftover Amish fritter bread?
Keep them warm in an airtight container with parchment between layers for up to 3 days. For reheating, warm in a 350°F oven for 5-10 minutes until crispy again. The dough itself can be refrigerated for 24 hours or frozen for 3 months for future baking.
What's the best way to serve this bread?
Serve warm with a drizzle of honey, fresh berries, or whipped butter. For breakfast, try it with scrambled eggs or bacon. The crispy edges make it perfect for dipping in coffee or as a base for French toast later.
Why did my fritters turn out dense instead of crispy?
Overmixing the dough develops gluten, making the bread dense. Mix just until combined and avoid kneading more than 4-5 times. Also ensure your skillet is properly heated and use medium heat—too high heat can burn the outside before the inside cooks through.