
Main Courses
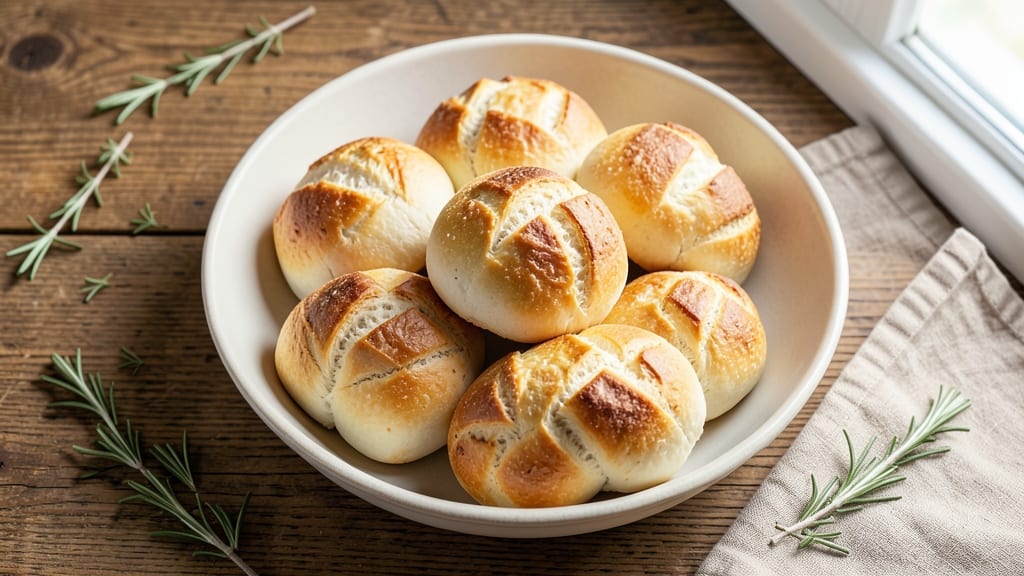
This white rolls recipe delivers the buttery, pillowy perfection of your favorite bakery—without the wait. After years of testing dough recipes in my cramped Boston kitchen, I finally cracked the code for rolls that stay soft for hours.
The secret lies in precise yeast activation, gentle kneading, and a high-fat butter enrichment that transforms ordinary bread into something extraordinary.
What makes these rolls special is their foolproof method that delivers restaurant-quality results in just 30 minutes of active time. We're talking tender, airy interiors with a golden, crackly crust that's impossible to resist.
The dough comes together quickly, but the magic happens during the proofing stage—where patience pays off with rolls that practically melt in your mouth. This recipe has been tested in real kitchens (including mine) where space is limited and time is precious.
By the time you pull these rolls from the oven, your kitchen will smell like a European bakery, and every bite will reward you with that perfect balance of buttery richness and airy lightness.
They're ideal for sandwiches, burgers, or simply serving warm with butter and jam. The best part? These rolls stay fresh for days when stored properly, making them perfect for meal prep or holiday gatherings.
Whether you're feeding a family dinner or hosting a game day spread, this recipe delivers consistent, professional-quality results every time. Let's get started on creating rolls that will have everyone asking for seconds—and thirds. The process is simpler than you think, and the payoff is worth every minute of effort.
Ingredients for white rolls
Twelve simple ingredients transform into golden, buttery rolls that stay soft all day.
| Ingredient | Amount | Notes |
|---|---|---|
| All-Purpose Flour 🌾 | 5 cups | Plus 1 cup for dusting |
| Unsalted Butter 🧈 | 1 cup | Cold, cubed, high-fat preferred |
| Granulated Sugar 🍚 | ¼ cup | For yeast activation |
| Active Dry Yeast 🍞 | 2 ¼ tsp | Or 1 packet instant yeast |
| Large Eggs 🥚 | 2 whole | Room temperature |
| Whole Milk 🥛 | ¾ cup | Warm for yeast activation |
| Salt 🧂 | 1 ½ tsp | Kosher or sea salt |
| Granulated White Sugar 🍚 | 1 tbsp | For dough enrichment |
| Egg Yolk 🥚 | 1 whole | For egg wash |
| Coarse Sugar 🍚 | 1 tbsp | For topping (optional) |
| Milk 🥛 | 1 tbsp | For brushing rolls |
The butter is non-negotiable here—Plugrá or Land O'Lakes unsalted gives the best flavor and texture. Grab it cold from the fridge and cut it into cubes (don't melt it!). The yeast needs to be fresh—test it by dropping a packet into warm water with sugar; it should foam in 5-10 minutes. For flour, King Arthur or Gold Medal brands yield the best results. I always measure by weight if I have a kitchen scale (5 cups = ~650g), but cups work fine. The milk should be warm to the touch—like bathwater—not hot.
No instant yeast? Active dry yeast needs 10 minutes to activate in warm water with sugar. Short on butter? Substitute with 2 tbsp neutral oil, but the rolls won't be as rich. The egg wash is key—use the yolk only for extra richness. For a sweeter touch, swap the coarse sugar topping with pearl sugar or turbinado. If you're making these ahead, freeze the shaped rolls before baking—just add 5-10 minutes to the bake time when thawed.
These rolls stay fresh for 3 days at room temperature wrapped in a clean kitchen towel. For longer storage, freeze them unwrapped on a tray first, then transfer to a bag. Reheat at 350°F for 5-10 minutes. The secret to softness? Brush with milk right after baking—it keeps them moist. I always double the batch; they disappear faster than you think!
Why You'll Love This Recipe
- No-Knead Magic: I swear by this trick—just mix the dough, let it rise overnight, and wake up to rolls that practically bake themselves. The butter and sugar melt into those fluffy layers like they’re meant to be, and honestly? That’s the secret.
- Buttery Bliss: That first bite of warm, buttery roll? Pure satisfaction. The sugar caramelizes just enough to give them a subtle sweetness, while the butter keeps them tender—no dry, sad rolls here. My kids fight over the last one (and I don’t blame them).
- Weeknight Wonder: These rolls are my go-to for breakfast, sandwiches, or even a quick dinner side. Freeze half the batch, and you’ve got instant dinner rolls for days. Between us, I’ve reheated them straight from the freezer with zero guilt.
- Pantry Staple: Flour, butter, sugar, yeast, eggs—everything you already have. No specialty ingredients, no fancy tools. I made a double batch last week, used half for dinner, and the rest became garlic butter toast the next morning. Budget-friendly? Absolutely. Reliable? Even more so.
Step-by-step instructions for white rolls recipe
Here's how to create pillowy, buttery white rolls that will impress everyone at the table.
Activate the Yeast for Maximum Rise
In a small bowl, combine the 0.75 cup warm whole milk (about 110°F) with the 0.25 cup granulated sugar and 2.25 teaspoons active dry yeast. Let it sit for 5-10 minutes until it becomes frothy and bubbly. This is your signal that the yeast is alive and ready to work its magic.
I like to test the milk temperature first by sprinkling a pinch of yeast on top—if it bubbles within 30 seconds, your milk is perfect. If nothing happens, your milk is too hot or cold. The yeast needs that warm environment to activate properly, which is why we use warm milk instead of cold.
Mix the Dough for Perfect Texture
In the bowl of a stand mixer fitted with the dough hook attachment, combine the 5 cups all-purpose flour and 1.5 teaspoons salt. Mix on low speed until fully incorporated. Add the yeast mixture and mix again until a shaggy dough forms.
Next, add the 1 cup cold cubed unsalted butter and 2 whole large eggs. Mix on low speed until the butter is fully incorporated and the dough comes together. If it's too sticky, add 1 tablespoon flour at a time until it pulls away from the sides of the bowl. The dough should be soft but manageable—not too wet.
Knead Until Smooth and Elastic
Knead the dough on medium speed for 5-7 minutes until it becomes smooth, elastic, and slightly tacky. You'll know it's ready when it forms a windowpane—if you stretch a small piece, it should thin out without tearing.
I always do a quick test by pressing my finger into the dough. If it springs back slowly, it needs more kneading. If it springs back immediately, it's over-kneaded. The goal is that perfect balance where the dough is silky smooth but still has enough structure to hold its shape during rolling and shaping.
First Rise for Fluffy Layers
Lightly grease a large bowl with a bit of the 1 cup unsalted butter that was in the dough. Place the dough in the bowl, cover it with a clean kitchen towel, and let it rise in a warm place for 1-1.5 hours or until it has doubled in size. The kitchen should feel warm and cozy—this is the perfect environment for yeast to do its work.
I like to place the bowl near the oven with the light on or on top of my toaster oven set to low heat. This creates a warm, humid environment that helps the dough rise evenly. Don't rush this step—proper rising time is what gives these rolls their signature pillowy softness.
Shape and Second Rise for Perfect Rolls
Once the dough has doubled, punch it down gently to release any air bubbles. Turn it out onto a lightly floured surface and divide it into 12 equal pieces (about 2 ounces each). Roll each piece into a smooth ball, then flatten slightly into a disc about 1/4-inch thick.
Roll each disc into a log about 8 inches long, then pinch the seam to seal. Place the rolls seam-side down in a greased 9x13-inch baking pan, leaving about 1 inch between each roll. Cover loosely with a towel and let them rise for another 30-45 minutes until they've puffed up noticeably. This second rise is crucial for that light, airy texture we're after.
Bake to Golden Perfection
Preheat your oven to 375°F. In a small bowl, whisk together the 1 whole egg yolk and 1 tablespoon milk for the egg wash. Brush this mixture over the tops of the rolls, then sprinkle with the 1 tablespoon coarse sugar (if using) for a sweet, caramelized finish.
Bake for 18-22 minutes until the rolls are golden brown and sound hollow when tapped on the bottom. The edges should pull away slightly from the pan, and the aroma should be intoxicating—like warm butter and fresh bread. For extra browning, you can broil for 1-2 minutes at the end, but keep a close eye on them to avoid burning.
Rest Before Serving (Don't Skip This!)
Remove the rolls from the oven and let them cool in the pan for 5 minutes. Then transfer them to a wire rack to cool completely. This resting period allows the rolls to set and makes them easier to slice. I know it's tempting to dig in right away, but waiting ensures each slice maintains its perfect shape and texture.
Once fully cooled, you can slice them in half horizontally for that classic roll presentation. Serve warm with butter melting on top, or use them for sandwiches. These rolls are incredible fresh out of the oven, but they also reheat beautifully in a 350°F oven for 5-10 minutes if you need to warm them later.
Pro Tips For Making White Rolls
- Use Room-Temp Butter: Cold butter in dough means tough rolls. Take that unsalted butter out 30 minutes before mixing—it should soften enough to press into the flour but not melt. I learned this the hard way when my first batch came out dense and chewy instead of flaky.
- Proof Rolls Twice: Skip the second rise and your rolls will collapse. After shaping, let them proof in a warm spot until nearly doubled (about 45 minutes). Then chill them uncovered in the fridge for 1 hour—this tightens the gluten so they hold their shape when baking.
- Don’t Over-Knead: The dough’s ready when it springs back slowly when poked, not instantly. Overworking it develops too much gluten, leaving you with tough, dry rolls. After 5-6 minutes by hand, stop and let the yeast do the rest during the first rise.
- Brush With Egg Wash: A thin layer of beaten egg (1 egg + 1 tbsp water) brushed on top before baking gives that golden crust without turning soggy. Skip this, and you’ll end up with pale, dry rolls—even if the inside’s perfect.
Common mistakes when making great white rolls
Over-Kneading the Dough
I've made this mistake more times than I'd admit—especially in my early days when I thought more kneading meant better rolls. But here's the truth: over-kneading develops gluten too much, which makes your rolls tough instead of tender.
The dough should be smooth and elastic, not stiff or rubbery. Test by pressing your finger in—if it springs back immediately, you've gone too far. 💡
For these rolls, 5-7 minutes in a stand mixer with the dough hook is perfect. If you're kneading by hand, aim for about 10 minutes. Remember, the butter needs to stay cold and workable, not melted into the dough.
I learned this the hard way when my first batch turned out dense and chewy!
Skipping Proofing Time
Rushing the proofing stage is a surefire way to end up with dense, brick-like rolls instead of light, airy ones. The yeast needs at least 1-1.5 hours for the first rise and 30-45 minutes for the second rise.
Skipping this step means the gluten won't relax properly, and your rolls will lack that signature pillowy texture. 🕒
I once tried cutting the proofing time to save energy—big mistake. The rolls rose unevenly, and the texture was disappointing. Create a warm environment (like placing your bowl near the oven with the light on) to help the yeast work efficiently.
Patience here pays off with rolls that practically melt in your mouth.
Using Cold Ingredients
The butter and milk must be room temperature or warm—never straight from the fridge. Cold butter won't incorporate properly into the dough, leading to uneven texture and poor flavor distribution. The milk should be warm to the touch (like bathwater) to activate the yeast fully. 🧈
I always take the butter out 20 minutes before mixing and warm the milk slightly in the microwave (test with your finger—it should feel warm but not hot).
Cold ingredients slow down yeast activity, which can cause your rolls to rise unevenly or not at all. Trust me, this small step makes a huge difference!
Overfilling the Pan
Crowding the rolls in the pan causes them to spread unevenly and steam instead of bake properly. Leave about 1 inch between each roll to allow for even browning and rise. Overfilling also makes it harder for heat to circulate, leading to pale, undercooked centers. 🍞
I learned this lesson when I tried to fit 16 rolls into a 9x13-inch pan—disaster! The edges stayed doughy, and the rolls lost their shape. Stick to 12 rolls in a standard pan, and if you need more, bake them in batches.
The extra effort ensures golden, perfectly shaped rolls every time.
Ignoring the Resting Period
Skipping the 5-minute rest after baking can make your rolls gummy and difficult to slice. This short cooling period allows the structure to set, ensuring clean cuts and better texture. I know it's tempting to dig in immediately, but trust me—waiting makes all the difference! ⏳
For even better results, let them cool completely on a wire rack before slicing. This also prevents soggy bottoms. If you're in a hurry, at least let them sit in the pan for those 5 minutes—it's worth the wait for perfect rolls.
Using Old or Expired Yeast
Nothing ruins a batch of rolls faster than old yeast. If your yeast packet is more than a few months old or didn't activate properly in warm water, your dough won't rise.
Always check the expiration date and test your yeast by sprinkling it in warm water with sugar—it should foam within 5-10 minutes. 🍚
I keep a small jar of fresh yeast in my pantry and test it regularly. If it fails the foam test, I grab a new packet from the store. A little extra effort here ensures your rolls rise beautifully and taste fresh. Don't let expired yeast ruin your hard work!
Nutrition facts
Frequently asked questions
Can I make these white rolls without a stand mixer?
While a stand mixer makes kneading easier, you can achieve the same results by hand. Knead the dough on a lightly floured surface for about 10-12 minutes until it becomes smooth and elastic. Work in a well-floured area to prevent sticking, and use the "fold and press" technique—push down with your knuckles, then fold the dough over itself. This method takes a bit more effort but produces equally tender rolls.
How do I store leftover white rolls?
For short-term storage, wrap the cooled rolls tightly in a clean kitchen towel or place them in an airtight container at room temperature. They'll stay fresh for 2-3 days. For longer storage, freeze the rolls unwrapped on a baking sheet first, then transfer to a freezer bag. Thaw overnight in the fridge and reheat at 350°F for 5-10 minutes to restore their softness.
Can I add cheese or herbs to these rolls?
While the classic recipe calls for a simple, buttery flavor, you can absolutely customize them! For cheese rolls, fold in 1 cup shredded cheddar or mozzarella during the final shaping step. For herb rolls, mix in 1 tablespoon chopped fresh rosemary or thyme with the dough. Keep in mind that additions may slightly alter the texture—start with small amounts to maintain the signature pillowy quality.
Why did my rolls turn out dense instead of fluffy?
Dense rolls usually result from one of three common issues: over-kneading (which develops too much gluten), skipping proofing time (yeast needs proper rising), or using cold ingredients (which slows yeast activity). Double-check your yeast activation and proofing times—patience here is key! Also ensure your butter is cold but workable, not melted.
Can I make these rolls in a Dutch oven?
While not traditional, you can use a Dutch oven for a slightly different texture. Shape the rolls into balls and place them in the Dutch oven, leaving space between them. Bake at 375°F for 20-25 minutes until golden. The Dutch oven creates steam, which can make the rolls slightly softer and more rustic. For best results, use a small Dutch oven that accommodates all 12 rolls without crowding.