
Side Dishes
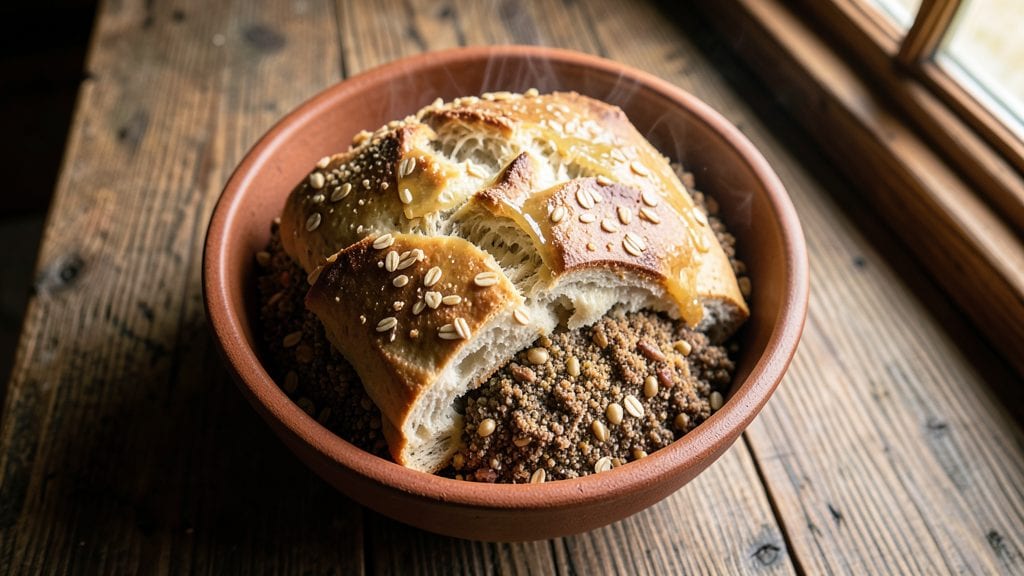
This Viking bread recipe brings the bold flavors of ancient Nordic baking to your kitchen with its crispy crust and hearty grain base. Inspired by Viking culinary traditions, this bread uses simple, whole ingredients like barley, rye, and oats—just as they would have centuries ago.
The result is a rustic loaf with a satisfying crunch and a tender interior that’s perfect for soaking up stews or pairing with hearty meats.
What sets this recipe apart is its authenticity—no refined flours or modern shortcuts, just whole grains ground to create a flavorful, nutty base. The dough requires minimal kneading and a long fermentation, which develops deep, complex flavors.
Baking at high heat ensures that crispy crust you crave, while the interior stays soft and inviting. This isn’t just bread; it’s a taste of history brought to life in your own kitchen.
The process is straightforward but rewarding, with steps designed to mimic traditional Viking techniques. You’ll mix, ferment, shape, and bake a loaf that smells like a hearth fire and tastes like a journey back in time.
Whether you’re serving it at a feast or enjoying it with a simple meal, this bread delivers rustic charm and satisfying texture in every bite.
Ready to bake like a Viking? This recipe is your gateway to creating a loaf that’s as impressive as it is delicious. Let’s get started on crafting bread that’s truly timeless.
Ingredients for viking bread
Whole grains and ancient techniques bring Viking-inspired bread to life with bold flavors.
| Ingredient | Amount | Notes |
|---|---|---|
| Barley Flour 🌾 | 2 cups | Whole grain, freshly ground preferred |
| Rye Flour 🌾 | 1 ½ cups | Dark rye for authentic flavor |
| All-Purpose Flour 🌾 | ½ cup | For structure and rise |
| Oat Flakes 🥣 | ½ cup | Steel-cut or rolled, toasted |
| Active Dry Yeast 🍞 | 1 tbsp | Freshly opened, not expired |
| Warm Water 💧 | 1 ½ cups | 105-110°F for yeast activation |
| Honey 🍯 | 2 tbsp | Raw or wildflower preferred |
| Salt 🧂 | 1 ½ tsp | Fine sea salt for balance |
| Olive Oil 🫒 | 2 tbsp | Extra-virgin for richness |
| Whole Wheat Flour 🌾 | ½ cup | For added texture and nutrition |
| Flaxseeds 🌰 | 1 tbsp | Ground for binding and nuttiness |
| Sesame Seeds 🌻 | 1 tbsp | For topping and crunch |
Barley and rye are the heart of this bread—look for stone-ground flours at specialty stores like Whole Foods or King Arthur Flour for the best texture. If you can't find pre-ground barley, toast whole barley grains in a dry pan until fragrant, then grind them yourself. The oat flakes add chewiness, so toast them lightly before mixing to deepen their flavor. For yeast, Bob's Red Mill active dry yeast is reliable, but check the expiration date—old yeast won’t activate properly. The honey should be raw or wildflower to avoid overpowering the grain flavors with processed sweetness.
No barley flour? Substitute with more rye or whole wheat—just reduce the all-purpose flour slightly to keep the dough from getting too light. Running short on rye? Buckwheat flour works in a pinch, though it’ll give a slightly different taste. If you don’t have sesame seeds, poppy seeds or sunflower seeds add a nice crunch instead. For the honey, maple syrup or agave can stand in, but they’ll make the bread slightly denser. The flaxseeds are optional but add a nice nutty depth—if you skip them, add an extra tablespoon of water to the dough to compensate for the lost binding.
This dough needs time—at least 8 hours of cold fermentation for maximum flavor, but up to 24 hours if you’re patient. Store the dough in the fridge between kneading and shaping to slow fermentation. Once baked, let the bread cool completely on a wire rack—cutting into it too soon makes it gummy. The crust stays crisp for 2 days at room temperature, but the interior is best eaten within 3 days. For longer storage, wrap tightly in foil and freeze—it’ll keep for up to 3 months. Toast slices before serving to revive the crunch.
Why You'll Love This Recipe
- No-Knead Magic: I swear by the no-knead method here—just mix, let it rise, and bake. The oat flakes add chewy texture without a single punch of effort from me.
- Earthy & Bold: That mix of rye and barley flour gives it a deep, nutty richness you won’t find in regular bread. Honestly, it’s the kind of flavor that makes you slow down and actually taste your meal.
- Weeknight & Picnic Star: Tastes amazing fresh from the oven but also holds up perfectly for sandwiches or packed lunches. Between us, it’s my go-to for both lazy Fridays and outdoor adventures.
- Pantry-Friendly Power: Uses basic ingredients you likely already have, and the dough keeps well for days. I’ll be real: this bread saved me during that month I burned toast three times.
Step-by-step instructions for Viking bread recipe
Here's how to transform ancient grains into a bread with a crispy crust and hearty texture.
Activate the Yeast and Mix Wet Ingredients
In a large bowl, combine the 1.5 cups warm water (about 105-110°F) with the 2 tbsp honey and 1 tbsp active dry yeast. Let this sit for 5-10 minutes until it becomes frothy—this confirms your yeast is alive and ready to work. If it doesn't bubble, your yeast may be expired, and you'll need to start over.
Next, add the 2 tbsp olive oil and 1.5 tsp salt to the yeast mixture. Stir gently to dissolve the salt completely. The honey will give your bread a subtle sweetness while helping to feed the yeast during fermentation. This step creates the foundation for your dough's flavor and rise.
Combine Dry Ingredients for Texture and Flavor
In a separate large bowl, whisk together the 2 cups barley flour, 1.5 cups rye flour, 0.5 cup all-purpose flour, 0.5 cup whole wheat flour, and 0.5 cup oat flakes. The rye and barley flours give this bread its authentic Viking-inspired flavor, while the all-purpose and whole wheat flours add structure. The oat flakes will contribute a delightful crunch.
Add the 1 tbsp ground flaxseeds to the dry mixture and stir well. The flaxseeds act as a natural binder, helping to hold the dense dough together. This combination of ancient grains creates a bread that's both nutritious and packed with complex flavors you won't find in modern commercial breads.
Form the Dough and First Rise
Gradually pour the wet ingredients into the dry ingredients while stirring with a wooden spoon. Mix until just combined—you should have a thick, shaggy dough that's slightly sticky. Avoid overmixing at this stage, as the dense flours don't require much development.
Transfer the dough to a lightly oiled bowl, cover with a damp kitchen towel, and let it rise in a warm place for 1.5 to 2 hours, or until it has nearly doubled in size. The warm environment helps activate the yeast and creates the air pockets that will give your bread its light, open crumb. You'll know it's ready when you poke the dough gently and it springs back slowly.
Shape and Second Rise for Crispy Crust
Turn the risen dough out onto a lightly floured surface and gently shape it into a round loaf about 8 inches in diameter. The round shape helps create an even crust and makes slicing easier. Place the shaped dough on a parchment-lined baking sheet and cover again with a damp towel.
Let the dough undergo a second rise for 30 to 45 minutes. This final rise is crucial for developing the bread's crispy crust and airy interior. The dough should puff up noticeably during this time. While it rises, preheat your oven to 375°F—this high temperature will help create that authentic Viking bread crust you're after.
Bake for Crispy Perfection
Once the dough has risen, brush the top with a little water and sprinkle the 1 tbsp sesame seeds evenly over the surface. The sesame seeds will add a delightful crunch and visual appeal to your bread. Bake in the preheated oven for 35 to 40 minutes, until the crust is deep golden brown and sounds hollow when tapped on the bottom.
For the crispiest crust possible, I recommend baking for the full 40 minutes. The dense flours in this recipe need time to fully cook through while developing that satisfying crunch. Let the bread cool on a wire rack for at least 20 minutes before slicing—this resting period allows the moisture to redistribute, preventing a gummy interior.
Pro Tips For Making Viking Bread
- Bloom the Yeast First: Skip the guesswork—mix the yeast with warm water and a pinch of sugar 5 minutes before adding it to the dough. This way, you’ll see it foam and bubble, proving it’s alive and ready to work (yes, even if you’re using that old jar of yeast you’ve had for months).
- Toast Your Oat Flakes: Dry-toast the oat flakes in a skillet over medium heat for 2-3 minutes until golden and fragrant. Cold oats soak up moisture and dilute flavor—this step adds crunch and depth, like a Viking’s secret weapon.
- Knead Until Silky: This dough’s dense and sticky, so resist the urge to rush. Knead by hand for 8-10 minutes until it’s smooth and springs back when poked (like a well-trained warrior). Over-kneading? It’ll toughen, but under-kneading means a gummy loaf.
- Proof in a Warm Spot: Ditch the oven for proofing—place the dough in a bowl over a slow cooker with 1 inch of hot water (set to low). Keeps it consistently warm (85°F/29°C) without babysitting, and you’ll avoid the sad, flat loaf that happens when your kitchen’s too cold.
Creative variations of these flavors
Nordic Flatbread Twist
Transform this Viking bread into a thin, crispy flatbread by rolling the dough to ¼-inch thickness before baking. Use a cast-iron skillet over medium-high heat for 2-3 minutes per side, brushing with melted butter for extra richness.
This method mimics traditional Viking flatbreads, perfect for wrapping around smoked fish or cheeses. 🌾
Sweet Viking Honey Loaf
Boost the sweetness by adding ¼ cup chopped dried apricots or 2 tbsp cinnamon to the dough. Brush the baked loaf with extra honey mixed with 1 tsp lemon zest for a dessert-style bread. Vikings enjoyed sweetened breads during feasts—this version is ideal for breakfast or snacking.
Seed-Encrusted Rustic Boule
Shape the dough into a free-form boule and press 1 tbsp poppy seeds and 1 tbsp sesame seeds into the top before baking. The seeds add texture and a nutty crunch, while the irregular shape gives it a rustic, artisanal look.
Bake at 400°F for 30 minutes to enhance the crust’s depth.
Whole-Grain Viking Crackers
Slice the baked loaf into ¼-inch thick pieces and bake at 300°F for 10-15 minutes until completely dry. These crispy crackers are perfect for dipping in stews or pairing with cheese. Store in an airtight container for up to 1 week—they’ll stay crunchy for days.
Savory Herb Variation
Add 1 tbsp chopped fresh rosemary or thyme to the dough for a fragrant twist. Brush the baked loaf with garlic-infused olive oil and sprinkle with flaky sea salt. This version pairs beautifully with Viking-inspired stews or roasted meats. 🌿
Gluten-Free Adaptation
Replace 1 cup of the all-purpose flour with 1 cup gluten-free oat flour and add 1 tbsp psyllium husk powder to bind the dough. The texture will be slightly denser but still delicious. Use a gluten-free baking stone for even crispiness.
Nutrition facts
Frequently asked questions
What makes this Viking bread different from regular bread?
This recipe uses barley and rye flours as the base, just like Viking bakers would have centuries ago. The combination creates a nutty, dense texture with a crispy crust that modern white bread can't match. The long fermentation also develops deeper, more complex flavors. Plus, it's packed with whole grains and seeds for extra nutrition—no refined flours here!
Can I make this bread without a stand mixer?
This dough is sticky but doesn't require kneading like traditional bread. Just mix with a wooden spoon until combined, then let the yeast do the work during fermentation. The oat flakes and flaxseeds help bind the dough naturally, so you won't need a mixer. A simple bowl and spoon are all you need!
How do I know when the dough has risen enough?
Look for the dough to nearly double in size and feel noticeably puffy when pressed gently. It should spring back slowly (not quickly) when you poke it with a finger. For the second rise, it should puff up again by about 30-50%. If it's not rising, your kitchen might be too cold—try placing the bowl near a warm oven with the light on.
Why does my Viking bread taste bland?
Bland flavor usually means the dough didn't ferment long enough or the crust didn't brown properly. Try fermenting overnight in the fridge for deeper flavor, and bake at 400°F for the last 10 minutes to darken the crust. Also, ensure you're using fresh yeast and raw honey—processed ingredients can mute the taste. A sprinkle of sesame or poppy seeds on top adds crunch and flavor too!
Can I make this bread in a Dutch oven?
Yes! Shape the dough into a boule and bake in a preheated Dutch oven at 425°F for 30 minutes. The enclosed heat creates a steam bath that gives an even crusty exterior and soft interior. Just brush the crust with water before baking for extra shine. This method is perfect for achieving that artisan bakery quality at home!