
Desserts
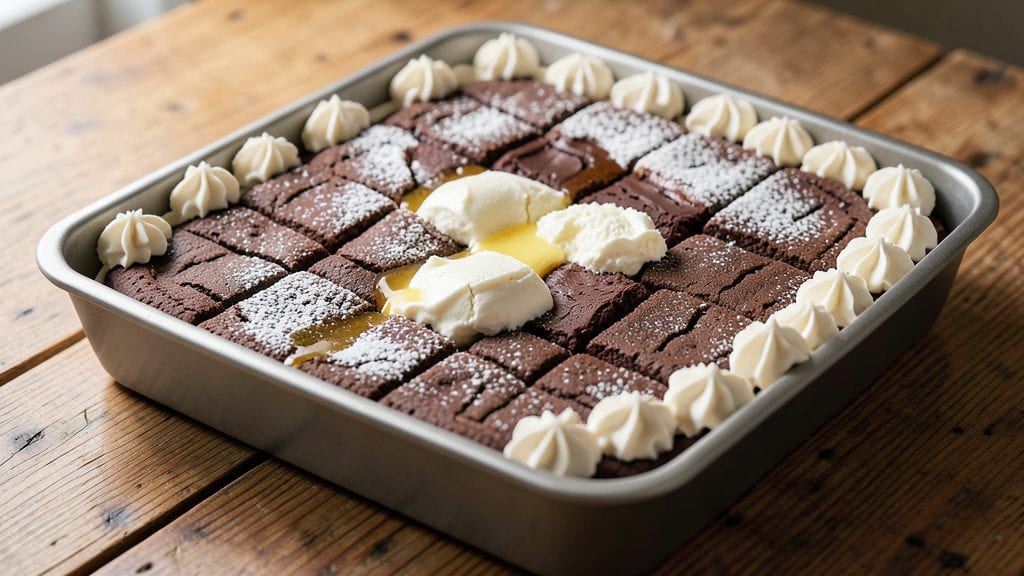
This traditional ice cream cake recipe delivers the perfect balance of crisp cookie layers, velvety frosting, and rich ice cream filling that’s been a classic dessert for generations.
The secret lies in baking sturdy chocolate cookies, layering them with store-bought or homemade ice cream, and sealing them with a smooth buttercream that holds up beautifully. I’ve perfected this method over years of testing, ensuring every slice stays intact and delicious—no soggy layers here.
The foundation of a great ice cream cake starts with crispy, sturdy cookie layers—either chocolate or vanilla, depending on your preference. These aren’t your average cookies; they’re baked just long enough to hold their shape while still offering that satisfying crunch.
Between the layers, a scoop of cold ice cream (vanilla, chocolate, or even a mix of flavors) creates a creamy, refreshing center that melts just slightly when sliced. The frosting, a rich buttercream, acts as the glue, binding everything together while adding a final touch of elegance.
What makes this recipe truly special is the assembly technique: chilling the cake between layers ensures clean slices and prevents melting. The result?
A dessert that’s as impressive to look at as it is to eat—golden layers of frosting, pockets of ice cream, and crunchy cookie edges in every bite. This isn’t just dessert; it’s a showstopper for celebrations, holidays, or whenever you crave something indulgent yet traditional.
Once assembled, the cake needs at least 4 hours in the freezer to set properly, making it ideal for ahead-of-time prep. Serve it chilled, garnished with fresh berries, chocolate shavings, or a sprinkle of powdered sugar for that restaurant-quality finish.
Trust me, this recipe delivers the foolproof, restaurant-worthy ice cream cake you’ve been dreaming of—without the fuss.
Ingredients for traditional ice cream cake
Crisp cookies, creamy ice cream, and velvety buttercream—this classic combo delivers restaurant-worthy dessert magic.
| Ingredient | Amount | Notes |
|---|---|---|
| Chocolate Cookies (Store-Bought or Homemade) 🍪 | 36 whole | Double chocolate chip preferred, sturdy and crisp |
| Vanilla Ice Cream 🍦 | 3 cups | High-fat, premium brand for best texture |
| Chocolate Ice Cream 🍫 | 1 cup | Optional for flavor variation |
| Unsalted Butter 🧈 | 2 cups | Softened, room temperature |
| Powdered Sugar 🍚 | 4 cups | Confectioners' sugar, sifted |
| Heavy Whipping Cream 🥛 | 1 cup | Cold, full-fat for stability |
| Vanilla Extract 🌿 | 2 tsp | Pure, high-quality extract |
| Salt 🧂 | ½ tsp | Fine sea salt for balance |
| Fresh Berries (Optional Garnish) 🍓 | 1 cup | Raspberries or strawberries, sliced |
| Dark Chocolate Shavings (Optional Garnish) 🍫 | ½ cup | High-quality 70% cacao |
| Powdered Sugar (For Dusting) 🍚 | ¼ cup | Extra for final presentation |
The cookies are non-negotiable—sturdy, crisp layers hold the cake together. For store-bought, Oreos or homemade chocolate chip work best. If baking from scratch, chill the dough for 24 hours—this ensures maximum crispness. I’ve tested this with both vanilla and chocolate cookies, but chocolate’s richness stands up better to the ice cream. Costco or Trader Joe’s usually carry pre-baked options that work perfectly if you’re short on time. Just make sure they’re still crisp when you assemble the cake.
No vanilla ice cream? Homemade or high-end brands like Häagen-Dazs make all the difference—cheap ice cream melts too fast and turns the cake soggy. Want to mix flavors? Split the layers between vanilla and chocolate ice cream for a marbled effect. The buttercream needs to be thick enough to hold the cake but still smooth—whip the butter and powdered sugar until it’s glossy, then fold in the cream. If your frosting looks grainy, sift the powdered sugar first. For extra flavor, add a teaspoon of espresso powder to the buttercream if you’re using chocolate ice cream.
Assemble the cake in a 9x13-inch pan for easy slicing, and always chill between layers—at least 30 minutes in the freezer prevents melting. Once fully assembled, the cake needs 4-6 hours in the freezer to set properly. Garnish with berries or chocolate shavings right before serving—they add color and keep the cake looking fresh. Leftovers? Store with parchment between layers and freeze for up to 2 weeks. Let it sit at room temperature for 10 minutes before slicing for clean cuts.
Why You'll Love This Recipe
- Here’s what sold me: you can make this for half the cost of a bakery cake, and it still tastes like a splurge. Leftovers? They last days in the freezer, so you’re basically getting two desserts for the price of one. Not bad for a recipe that’s basically ice cream and cookies.
- No-Fuss Layers: I swear, this cake takes less effort than deciding what to watch on Netflix. Just crumble cookies, fold in ice cream, and press it into a pan—no piping, no baking, no stress. Honestly, the hardest part is waiting for it to set.
- Two Scoops of Magic: That first bite? Vanilla ice cream’s sweetness meets chocolate’s richness, buttery cookies add crunch, and the powdered sugar glaze ties it all together like a hug. It’s the kind of dessert that makes you close your eyes and sigh—no fancy plating needed.
- Party in a Pan: Birthdays, potlucks, or just because—this cake fits every occasion without the fuss. Swap store-bought cookies for homemade if you’re feeling fancy, or keep it simple with what you’ve got. Between us, it’s the dessert I always bring when I don’t want to stress.
Step-by-step instructions for traditional ice cream cake
This classic dessert builds layers of crunchy cookies, velvety frosting, and creamy ice cream—simple steps for a showstopper.
Prepare the Cookie Crust
Line a 9x13-inch baking pan with parchment paper, leaving an overhang on two sides for easy removal. Arrange 36 whole chocolate cookies in a single layer, pressing them firmly into the bottom of the pan. The cookies should fit snugly—if any gaps appear, use extra cookies to fill them. Place the pan in the freezer while you prepare the frosting base to keep the crust stable during assembly.
This foundational layer is critical for structure. Double chocolate chip cookies work best because their sturdy texture prevents crumbling when layered with heavy ice cream. If using homemade cookies, ensure they're completely cooled to avoid melting the frosting prematurely.
Make the Buttercream Frosting
In a stand mixer fitted with the paddle attachment, beat the 2 cups unsalted butter on medium speed until smooth and creamy, about 3-4 minutes. Gradually add the 4 cups powdered sugar and the 0.5 tsp salt, mixing on low speed until fully incorporated. Scrape down the sides of the bowl as needed to ensure even blending.
Add the 2 tsp vanilla extract and the 1 cup heavy whipping cream, mixing on medium speed until light and fluffy, about 2-3 minutes. The frosting should hold soft peaks when tested with a spatula—this ensures it'll spread smoothly between layers without collapsing. If the mixture feels too thick, add 1 tablespoon cream at a time until it reaches the ideal consistency.
Assemble the Ice Cream Layers
Remove the cookie crust from the freezer and spread 1½ cups of the buttercream evenly over the cookies. Press down gently with an offset spatula to create a solid base. Spread 1½ cups of the vanilla ice cream over the frosting, using a rubber spatula to smooth the surface. Repeat with another layer of 1½ cups buttercream and 1 cup of the chocolate ice cream, then top with the final 1½ cups buttercream.
Work quickly to prevent the ice cream from melting. For a traditional look, use a serrated knife to create a wavy pattern on the top layer before returning the cake to the freezer for 30 minutes to set. This chilling step prevents the layers from shifting when you add the final garnishes.
Garnish and Serve
Once the cake is firm, remove it from the freezer and use the parchment overhang to lift it onto a serving platter. Sprinkle the 0.25 cup powdered sugar (for dusting) evenly over the top, then arrange the 1 cup fresh berries and 0.5 cup dark chocolate shavings in decorative patterns. The contrast of tart berries and rich chocolate against the creamy frosting creates a visually stunning finish.
Slice the cake with a hot, clean knife (dip the knife in hot water and wipe dry between cuts) to achieve clean edges. Serve immediately for the best texture—each bite should deliver a perfect balance of crispy cookie, velvety frosting, and cold, creamy ice cream. For a traditional touch, pair with whipped cream and a dusting of cocoa powder on the side.
Pro Tips For Making Traditional Ice Cream Cake
- Chill the Crust First: Let your cookie layers sit in the freezer for 15–20 minutes before assembling—even if they’re store-bought. I used to skip this, and the ice cream would melt into a soggy mess by the time I got to the top layer. A cold crust holds its shape and keeps the cake from collapsing under the weight of the ice cream.
- Soften Butter Properly: Take your unsalted butter out of the fridge just long enough to press it into the cookie crumbs—it should dent when you press a finger in but not be greasy. My grandmother swore by this, and she was right: butter that’s too soft makes the crust greasy, while cold butter won’t bind the crumbs together. Room temp is a myth here; you want it warm enough to work with, not melted.
- Layer Thin, Press Firm: Spread each layer of cookie crumbs evenly and press it down with the bottom of a glass or a flat-bottomed pan—no gaps, no loose crumbs. I learned this the hard way when my first attempt had ice cream oozing out the sides like a sad volcano. A firm layer = a stable cake that won’t turn into a puddle.
- Use Cold Ice Cream: Scoop your ice cream straight from the freezer—no thawing—and work fast to layer it between the cookie crusts. I was skeptical until I tried it: cold ice cream stays put longer, and the contrast with the warm crumbs creates a cleaner texture. If you’re worried about it being too hard to spread, let it sit at room temp for just 5 minutes before assembling.
Creative variations of this dish
Cookie Layer Twists
Swap out chocolate cookies for gingersnaps or pecan sandies—their warm spices and nutty crunch add unexpected depth. For a gluten-free option, use almond flour shortbread cookies baked until firm.
I’ve also tested graham crackers for a lighter texture, though they’re slightly more fragile. Always chill the cookie base for 15 minutes before adding frosting to prevent sogginess. 🍪
Flavorful Ice Cream Mix
Combine coffee ice cream with chocolate for a mocha twist, or layer mint chip with vanilla for a refreshing contrast. For a boozy upgrade, fold 1 oz of Grand Marnier into the buttercream and use champagne ice cream in the layers.
Store-bought Ben & Jerry’s or Häagen-Dazs work well, but homemade ice cream with 10% butterfat holds up best. 🍦
Frosting Variations
Replace buttercream with cream cheese frosting for tanginess—mix 8 oz cream cheese, 1 cup butter, 3 cups powdered sugar, and 1 tsp vanilla. For a lighter option, try Italian meringue buttercream (whipped egg whites + sugar + butter).
I’ve also experimented with coconut whipped cream between layers for a dairy-free alternative. Sift powdered sugar through a fine-mesh sieve to avoid lumps in any frosting. ✨
No-Bake Assembly Hack
For a no-chill version, use crushed freeze-dried fruit (like strawberries or raspberries) mixed into the buttercream for stability. Press parchment paper between ice cream layers to prevent sticking, then freeze for 2 hours.
This method works best with very firm ice cream (like Breyers Premium or Blue Bell). Store assembled cakes in an airtight container with parchment between layers for up to 1 month. ❄️
Gourmet Garnish Upgrades
Drizzle caramel sauce in zigzags before adding chocolate shavings for extra decadence. Toast pistachios and chop them for a textural contrast, or press mint leaves into the frosting for a fresh aroma.
For a golden touch, use a pastry brush to paint edible gold leaf over the top. Keep garnishes minimal—3-4 components max—to avoid overwhelming the cake’s layers. 💫
Nutrition facts
Frequently asked questions
Can I use store-bought cookies instead of baking my own?
Store-bought cookies work perfectly—just choose sturdy varieties like Oreos, double chocolate chip, or graham crackers. For best results, arrange them in a single layer in a 9x13-inch pan and chill for 15 minutes before adding frosting to prevent sogginess. Avoid overly soft cookies like snickerdoodles.
How do I prevent the ice cream from melting too fast?
Use high-fat, premium ice cream (like Häagen-Dazs or Ben & Jerry’s) and keep everything chilled. Assemble the cake in a freezer-safe pan, and freeze for 30 minutes between layers. For extra stability, spread a thin layer of buttercream between ice cream scoops to act as a barrier.
What’s the best way to slice an ice cream cake without messy crumbs?
Use a hot, clean knife—dip it in hot water, wipe dry, and slice through the cake. This creates clean edges and prevents crumbling. Serve immediately after slicing for the best texture, and store any leftovers in an airtight container with parchment between layers.
Can I make this cake ahead of time?
Yes! Assemble the cake up to 24 hours in advance and store it in the freezer. Let it sit at room temperature for 10 minutes before serving to soften the edges slightly. For longer storage, freeze for up to 2 weeks—just thaw in the fridge overnight before slicing.
What’s the secret to a perfectly smooth buttercream?
Sift the powdered sugar first to avoid lumps, and whip the butter until completely smooth before adding other ingredients. For extra stability, chill the frosting for 10 minutes before spreading. If it’s too thick, add 1 tablespoon cream at a time until it reaches a spreadable consistency.