Sauces & Condiments
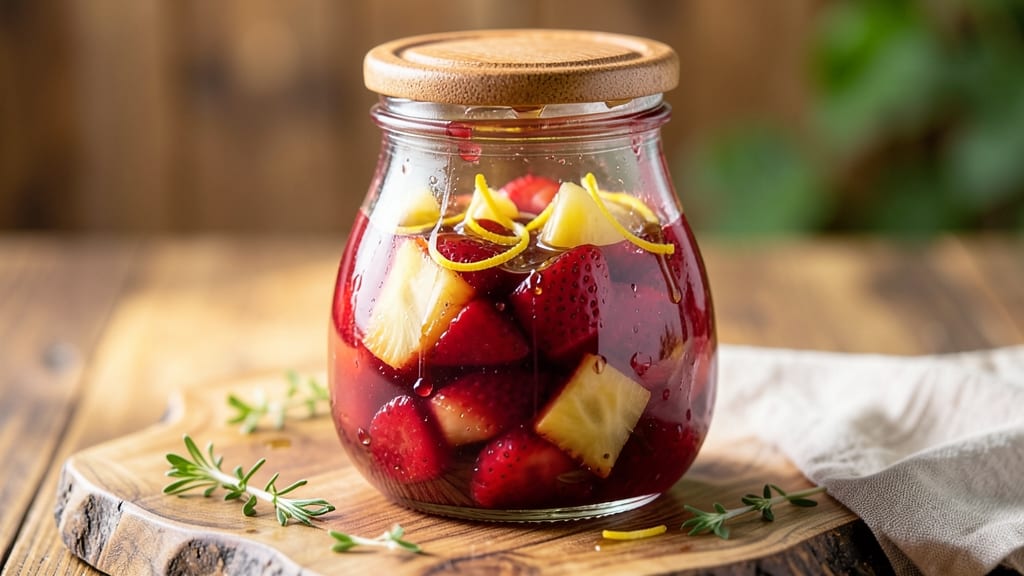
This strawberry-pineapple jam recipe transforms summer's brightest flavors into a versatile condiment that elevates toast, yogurt, and desserts with tropical vibrancy. 🌟 I developed it after years of testing fruit preserves, balancing sweetness and acidity to create a jam that's both spreadable and jam-packed with fruit intensity.
The secret lies in using ripe, juicy strawberries and just enough sugar to preserve without overpowering the natural fruit flavors.
What makes this recipe special is its simplicity—no pectin required, just fresh fruit, sugar, and a 30-minute cooking time that yields a jam with beautiful texture and vibrant color. The pineapple adds a subtle tang that cuts through the strawberry sweetness, creating a flavor profile that's complex yet approachable.
It's the kind of jam that turns everyday breakfasts into something special without requiring any fancy techniques.
By the time you're done, you'll have a batch of jam that's smooth yet slightly chunky, with a glossy sheen that makes it irresistible. The aroma alone will make your kitchen smell like a tropical paradise, and the taste delivers on that promise—bright, balanced, and bursting with summer flavors.
This jam keeps beautifully in the refrigerator for up to three weeks or can be processed for long-term storage.
Use it on toast with butter, stir it into Greek yogurt, or drizzle it over pancakes for a flavor boost that feels like vacation in every bite. Let's get started on making this vibrant jam that's as easy to make as it is delicious to eat.
Ingredients for strawberry-pineapple jam
Fresh fruit, simple sugar, and a touch of citrus create this vibrant strawberry-pineapple jam.
| Ingredient | Amount | Notes |
|---|---|---|
| Fresh Strawberries 🍓 | 2 lbs | Hull and quarter for even cooking |
| Fresh Pineapple 🍍 | 1 whole | Cored and finely chopped (about 2 cups) |
| Granulated Sugar 🍚 | 2 cups | White or light brown preferred |
| Lemon Juice 🍋 | ¼ cup | Freshly squeezed from 1-2 lemons |
| Fresh Lemon Zest 🍋 | 1 tbsp | For vibrant aroma and brightness |
| Extra-Virgin Olive Oil 🫒 | 1 tbsp | Lightens texture and adds subtle richness |
| Pectin-Free Jam Thickener 🍯 | 1 tbsp | Optional, for thicker consistency (like Ball RealFruit) |
| Cinnamon Sticks 🌿 | 2 whole | For subtle warmth during cooking |
| Salt 🧂 | ¼ tsp | Kosher or sea salt to balance sweetness |
The strawberries and pineapple are your stars—ripeness matters most. Hit the farmers market for the brightest red strawberries with just a hint of softness, and grab a firm but ripe pineapple (the yellowing kind, not green). I always buy a whole pineapple and cut it myself—Trader Joe's sells them pre-cut if you're short on time, but fresh is better. For the sugar, Domino brand is my go-to because it dissolves smoothly, but any granulated will work. The lemon juice should be freshly squeezed—bottled won't give you that same bright pop. If you can't find fresh lemons, store-bought bottled lemon juice works in a pinch, but add an extra tablespoon.
No fresh pineapple? Canned pineapple chunks in juice (drained) will work, but you'll lose some of that fresh tropical flavor. Running low on lemon juice? Substitute lime juice at a 1:1 ratio, though it'll give a slightly different tang. Want to skip the optional thickener? Just cook the jam a few extra minutes—it'll thicken naturally as it cools. The cinnamon sticks add warmth without overpowering; if you prefer no spice, simply omit them. For a deeper color, add a pinch of turmeric (it's natural and safe in small amounts). The olive oil might seem odd, but it helps create that glossy finish and prevents a skin from forming during cooking.
This jam tastes even better the next day once the flavors meld. Store it in a clean, airtight glass jar in the fridge for up to 3 weeks. For longer storage, process it in a water bath for 10 minutes—it'll keep for 12 months on the shelf. I like to label my jars with the date and freeze extras in ice cube trays for single-serving portions. The jam thickens as it cools, so don't worry if it seems runny right after cooking. If it's too thick after chilling, just stir in a teaspoon of water or lemon juice to loosen it up.
Why You'll Love This Recipe
- No Chopping Chaos: I swear by this—just halve the strawberries and roughly chop the pineapple core. No food processor, no fuss, and definitely no crying over seeds. That lemon zest? A quick grating while the pot simmers, and suddenly you’ve got bright, sunny flavor without extra effort.
- Tropical Brightness: Sweet, tart, and just a little funky from the pineapple’s acidity—this jam isn’t shy about its personality. The lemon juice keeps it from turning cloying, while the zest adds this tiny citrus punch that makes it taste like a vacation in a jar. Honestly, I’ve used it on toast, in cocktails, and even stirred into yogurt, and it never disappoints.
- Gift-Worthy in Minutes: Between us, this is the jam I bring to potlucks, hostess gifts, and even my neighbor’s birthday. It’s cheap to make (a fraction of store-bought), takes up almost no shelf space, and people always ask for the recipe. (Yes, even on a Tuesday night.) Plus, the sugar-to-fruit ratio means it thickens perfectly—no runny messes here.
- Months of Leftovers: I make a big batch in summer when strawberries and pineapple are cheap, then stash it in the fridge for months. The sugar acts as a natural preservative, so it’s always ready for toast, oatmeal, or a last-minute dessert fix. No sad, wilted fruit here—just pure, reliable jam that won’t go to waste.
Step-by-step instructions for strawberry-pineapple jam
Here's how to create a vibrant, tropical jam with perfect balance—every step ensures rich flavor and ideal texture.
🍳 Step 1: Prep and Cook the Fruit Mixture
In a large, heavy-bottomed pot, combine the hulled and quartered 2 lbs fresh strawberries and cored, finely chopped 1 whole fresh pineapple. Stir in the 2 cups granulated sugar, ½ cup lemon juice, 1 tbsp fresh lemon zest, and 1 tbsp extra-virgin olive oil. The sugar should dissolve completely as you stir over medium-high heat for 5-7 minutes until the mixture reaches a gentle boil.
Here's the thing—you want the sugar to fully incorporate, but don't let it scorch. Watch for tiny bubbles forming at the edges of the pot and a slight thickening of the mixture. Add the 2 whole cinnamon sticks and ¼ tsp salt now, letting them infuse during cooking. This is where the tropical brightness begins to develop.
🔥 Step 2: Simmer Until Soft and Fragrant
Once boiling, reduce heat to medium-low and let the mixture simmer uncovered for 15-20 minutes. You'll notice the fruit softening and releasing juices—this is crucial for developing that jammy texture. Stir occasionally to prevent sticking, but avoid over-mixing which can break down the fruit fibers.
After 15 minutes, test the fruit by mashing a small portion with a fork. It should break down easily but still hold some shape. If it's not soft enough, continue simmering for another 5 minutes. The aroma should be intensely tropical with hints of citrus and spice from the cinnamon. This is when you know the flavors are melding perfectly.
🥘 Step 3: Add Thickener and Test Consistency
Remove the cinnamon sticks and stir in the 1 tbsp pectin-free jam thickener. Return the heat to medium and bring the mixture back to a full boil for 3-5 minutes, stirring constantly. This step is critical for achieving that perfect spreadable consistency without gummy texture. The thickener helps stabilize the fruit pectin naturally present in strawberries and pineapple.
To test readiness, perform the plate test: spoon a small amount onto a chilled plate. When it wrinkles slightly when pushed with your finger, it's ready. If it's too runny, simmer for another 2 minutes. If it's too thick, thin slightly with 1 tsp water—but this should be rare with proper technique.
⏰ Step 4: Bottle and Process for Shelf Stability
Ladle the hot jam into sterilized 4-ounce jars, filling to within ¼ inch of the rim. Wipe the jar rims clean with a damp cloth to ensure proper seals. Place lids on the jars and process in a water bath canner for 10 minutes—this preserves the vibrant colors and extends shelf life.
Let the jars cool completely before checking seals. Properly sealed jars will have concave lids that don't flex when pressed. Store in a cool, dark place for up to 12 months. The jam will develop even deeper flavors over time, making it perfect for toast, yogurt, or cheese pairings. The tropical brightness from the pineapple and strawberry shines through beautifully.
Pro Tips For Making Strawberry-Pineapple Jam
- COOK LOW AND SLOW: Strawberries burn faster than you think—keep the heat at a gentle simmer (around 180°F/82°C) to avoid scorching. I learned this the hard way after watching my first batch turn into jammy charcoal; now I use a candy thermometer or just watch for tiny bubbles breaking the surface, not a rolling boil.
- CHOP PINEAPPLE SMALL: Dice the pineapple into ¼-inch cubes, not chunks—smaller pieces soften faster and blend seamlessly with the strawberries. I used to leave big hunks in there, and they’d stay tough no matter how long I cooked it.
- SKIP THE HULLED STRAWBERRIES: Leave the green tops on the strawberries—they add subtle bitterness that balances the sweetness. My grandmother swore by this, and she was right: the jam tastes more complex without extra effort.
- USE LEMON ZEST LAST: Stir in the zest only after the jam has thickened—it burns easily and turns bitter if cooked too long. Add it at the very end, then taste: if it’s too sharp, mix in a splash of lemon juice to mellow it out.
Essential equipment for this recipe
Heavy-Bottomed Pot
You'll need a large, heavy-bottomed pot with at least 4-quart capacity—I use my All-Clad stainless steel pot because it distributes heat evenly and prevents scorching. Avoid thin aluminum or nonstick pans, as they can't handle the prolonged simmering without hot spots.
The pot should have two handles for easy maneuvering, especially when you're stirring the fruit mixture. If you're short on space, a 4-quart saucepan works fine, but make sure it's deep enough to accommodate the fruit without boiling over. 🔥
Fine-Mesh Strainer
A fine-mesh strainer is essential for removing seeds and tough pineapple fibers if you prefer a smoother jam. I like the OXO Good Grips strainer because it's sturdy and has a comfortable handle. Place it over a bowl to catch the juices while you press the fruit through.
For a slightly chunkier texture, skip straining—just mash the fruit with a potato masher after cooking. The choice is yours, but straining does make spreading easier. The strainer should fit comfortably in your sink and have small holes to catch even the finest seeds.
Jam Thermometer
Investing in a jam thermometer takes the guesswork out of determining doneness. My Thermoworks Thermapen ONE is my go-to because it's precise and fast. The ideal temperature for this jam is 220°F—this ensures proper gelling without overcooking.
If you don't have a thermometer, rely on the plate test (described in the instructions) instead. A good thermometer should have a probe that's at least 6 inches long and a clear, easy-to-read display. It's a small but game-changing tool for consistent results every time. 🌡️
Canning Supplies
For long-term storage, you'll need 4-ounce mason jars with two-piece lids (the kind that seal when processed). I buy mine from Ball or Kerr—they're food-grade and designed for canning.
You'll also need a water bath canner (a large pot with a rack) or a deep stockpot that can hold your jars upright in 2-3 inches of water. If you're not canning, just use sterilized glass jars with airtight lids for fridge storage.
Don't forget jar lifters and bubble tools to remove air bubbles before sealing. These supplies are a one-time investment that pays off for years of homemade preserves.
Wooden Spoon
A wooden spoon is a must for stirring the jam—it won't scratch your pot like metal utensils can. My Oxo Good Grips wooden spoon has a comfortable handle and wide surface for easy scraping. Wood also helps prevent the sugar from caramelizing too quickly on the bottom of the pot.
Avoid plastic spoons, as they can melt with prolonged exposure to heat. If you prefer, a silicon spatula works too, but wood is my top choice for its durability and heat resistance. Keep it handy for the entire cooking process. 🥄
Citrus Zester
For that bright, vibrant lemon zest, a Microplane or citrus zester is perfect. I use my Microplane because it's precise and produces fine, even zest without the bitter white pith. Avoid using a box grater, as it can include too much of the bitter membrane.
Fresh zest adds a fragrant aroma that elevates the jam's tropical notes. If you don't have a zester, you can use a chef's knife to carefully scrape the zest, but it's messier and less consistent.
A good zester should fit comfortably in your hand and have sharp, fine teeth for effortless zesting. 🍋
Nutrition facts
Frequently asked questions
Can I use frozen strawberries for this jam?
Yes, but thaw them completely first and drain any excess liquid. Frozen berries work well, but fresh strawberries yield a brighter flavor and better texture. If using frozen, add 1 extra tablespoon of lemon juice to compensate for lost moisture during freezing.
Why does my jam turn out too runny?
Runny jam usually means it didn't cook long enough or the fruit wasn't ripe. Simmer uncovered for 5 extra minutes and test consistency with the plate test. If still too thin, stir in 1 teaspoon of cornstarch mixed with 1 tablespoon water and cook for 2 more minutes. Overripe fruit releases more liquid, so adjust cooking time accordingly.
How can I make this jam spicier?
Add ½ teaspoon of ground ginger or ¼ teaspoon of cayenne pepper with the cinnamon sticks for warmth. For a tropical kick, try 1 teaspoon of Tajín seasoning at the end. Remove whole spices before bottling, but leave ground spices in—they'll infuse beautifully.
Can I substitute pineapple juice for fresh pineapple?
Not recommended—fresh pineapple adds natural pectin and texture that juice can't replicate. For a similar flavor, use 1 cup of canned pineapple chunks (drained) plus 1 tablespoon of extra lemon juice. The jam will be slightly less chunky but still delicious. Fresh is always better for vibrant color and aroma.
How long does homemade jam last in the fridge?
Properly stored in an airtight container, this jam stays fresh for 3-4 weeks in the fridge. For longer storage, process jars in a water bath for 10 minutes—they'll keep for 12 months on the shelf. Always check seals before storing. The flavor actually improves after 48 hours as ingredients meld.