
Soups & Stews
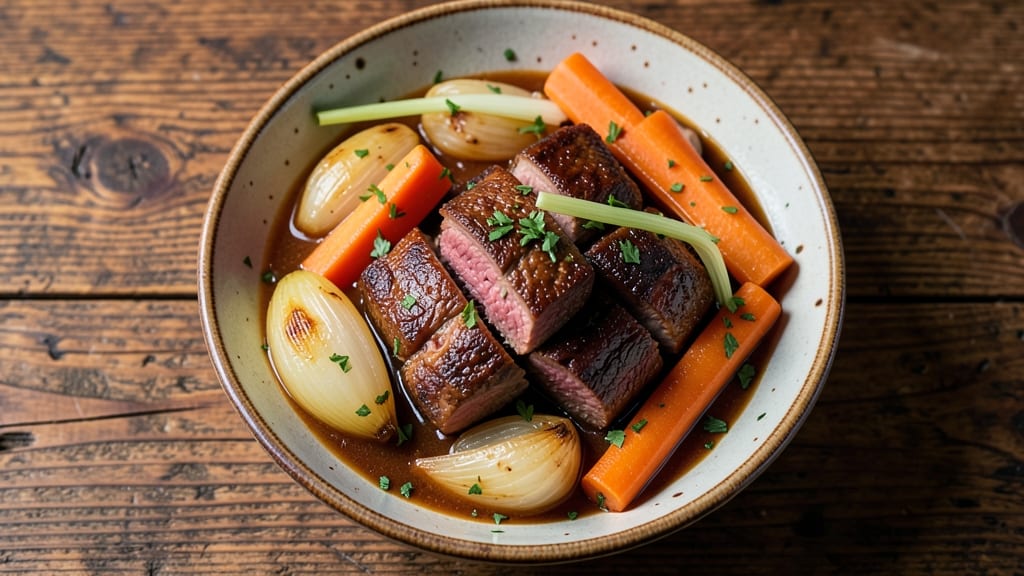
This stewed beef recipe transforms tough cuts into melt-in-your-mouth tenderness through slow simmering, creating a dish that tastes like a restaurant classic. The key lies in proper browning and a flavorful liquid that infuses the meat over hours, developing deep umami notes that make every bite irresistible.
I've perfected this method over years of testing, ensuring it delivers restaurant-quality results at home with minimal effort.
What sets this recipe apart is its balance of traditional techniques and modern convenience. You'll start with a deep sear to build flavor, then slow-cook the beef until fork-tender in a rich broth.
The process requires patience—about 3 hours on the stove—but the reward is a dish that improves with time, with flavors deepening as it sits. This method works perfectly for both classic beef stews and modern adaptations using pressure cookers.
The result is a hearty stew with perfectly tender beef, infused with aromatic vegetables and herbs, all swimming in a velvety sauce. Each bite delivers layers of savory richness, while the texture remains perfectly balanced—tender meat with just enough resistance to hold its shape.
The aroma alone will have everyone gathering around the table, and the taste proves that slow-cooked meals are worth the wait.
Serve with crusty bread to soak up every last drop of that flavorful sauce, or pair with roasted potatoes and steamed greens for a complete meal. The leftovers reheat beautifully, making this an ideal recipe for meal prep or feeding a crowd.
Here's how to create this comforting classic in your own kitchen.
Ingredients for stewed beef
Restaurant-quality beef stew starts with these core ingredients designed for deep umami flavor development.
| Ingredient | Amount | Notes |
|---|---|---|
| Beef Chuck Roast 🥩 | 2 ½ lb | Cut into 1.5-inch cubes, trimmed of fat |
| Yellow Onion 🧅 | 1 whole | Cut into 1-inch chunks, peeled |
| Carrots 🥕 | 4 medium | Peeled, cut into 1-inch chunks |
| Celery Stalks 🌿 | 3 whole | Cut into 1-inch pieces, strings removed |
| Garlic Cloves 🧄 | 6 cloves | Peeled, smashed with side of knife |
| Tomato Paste 🍅 | ½ cup | High-quality, no sugar added |
| Dry Red Wine 🍷 | 1 cup | Bold variety like Cabernet Sauvignon |
| Beef Broth 💧 | 2 cups | Homemade or low-sodium store-bought |
| Fresh Thyme Sprigs 🌿 | 2 whole | Or 2 tsp dried thyme, leaves only |
| Fresh Bay Leaves 🍃 | 2 whole | Dried works if unavailable |
| All-Purpose Flour 🌾 | 2 tbsp | For thickening sauce if needed |
| Olive Oil 🫒 | 2 tbsp | High smoke point for browning |
| Kosher Salt 🧂 | 1 ½ tsp | Diamond Crystal preferred for accuracy |
| Freshly Ground Black Pepper 🌶️ | 1 tsp | Coarse grind preferred |
The beef chuck roast is non-negotiable for this recipe—its marbled fat renders slowly, creating a velvety sauce. Look for cuts with visible fat marbling at your local butcher or high-end grocery stores like Whole Foods. Pre-cut cubes save time, but if buying whole, ask for 1.5-inch cubes to ensure even cooking. The onions, carrots, and celery form your aromatic base; organic produce from the farmers market adds more natural sweetness, but conventional is fine. For the wine, Cabernet Sauvignon or Merlot from a reputable brand like Apothic or Louis M. Martini delivers consistent results without overpowering the dish.
No red wine? Substitute with an extra 1 cup beef broth plus 1 tbsp balsamic vinegar—the acidity helps tenderize the meat. Fresh thyme and bay leaves can be swapped for 1 tsp each of dried thyme and bay leaf powder, though the flavor will be slightly less complex. For tomato paste, San Marzano is ideal but any high-quality brand works. The flour is a last-resort thickener—if your sauce reduces properly, you may not need it. For olive oil, Kirkland Signature or Bertolli offer excellent balance of quality and affordability. Always measure your kosher salt carefully; Diamond Crystal is 15% salt by volume compared to table salt.
This stew tastes even better the next day as flavors meld. Store in an airtight container in the refrigerator for up to 5 days, or freeze portions for 3 months. For reheating, use low heat on the stovetop or microwave with a splash of water to maintain sauce consistency. The beef becomes more tender with each reheating—perfect for meal prep. If making ahead, prepare the base without the meat, refrigerate, then brown and add the beef when ready to cook.
Why You'll Love This Recipe
- One-Pot Magic: I swear by this recipe—just toss everything into a Dutch oven, add broth, and let it simmer. No chopping like a maniac, no last-minute pan cleanup. The onions and carrots soften into that perfect, melt-in-your-mouth texture while you’re still deciding what to watch on TV.
- Garlic Bomb Flavor: That beef chuck roast? It turns ridiculously tender, but the real star is the garlic. Sauté it until it’s golden and fragrant before adding the rest—trust me, it’s the secret to that deep, savory punch that makes this stew feel like a hug in a bowl.
- Lunchbox Hero: Between us, this is my go-to for meal prep. The flavors only get better after a day in the fridge, and it reheats like a dream. Pack it in thermoses for work or school—your kids (or coworkers) will think you’re a genius when they taste it.
- Budget Stretch: A single chuck roast feeds six for dinner, then four more for leftovers. I’m talking solid savings here—no takeout menus, no last-minute grocery runs. Plus, carrots and celery last forever, so you’re not scrambling for ingredients. Win.
Step-by-step instructions for slow-simmered beef stew
This method transforms tough beef into melt-in-your-mouth tenderness through precise timing and technique.
Sear the Beef for Deep Flavor
Heat a heavy Dutch oven over medium-high heat until hot. Add 2 tablespoons olive oil and swirl to coat the bottom evenly. Working in batches to avoid crowding, add the 2.5 lb beef chuck roast cut into 1.5-inch cubes, pressing down gently with a spoon to create contact with the pan. Sear for 3-4 minutes per side until deeply browned with a crust forming. This step develops the rich, caramelized foundation for your stew.
As you sear, remove the beef to a plate and set aside. If the oil begins to smoke excessively, reduce heat slightly but maintain a steady sizzle. The goal is to create a deep, flavorful crust without burning the meat. You'll know it's ready when the edges release easily from the pan and the interior registers 130°F on an instant-read thermometer.
Build the Aromatic Base
In the same Dutch oven, add 1 whole yellow onion cut into 1-inch chunks, 4 medium carrots cut into 1-inch chunks, and 3 whole celery stalks cut into 1-inch pieces. Cook for 5-6 minutes, stirring occasionally, until the vegetables begin to soften and release their natural juices. Add the 6 cloves garlic cloves smashed with the side of your knife and cook for an additional 1 minute until fragrant.
This step develops the fundamental flavors of your stew. The vegetables should soften but not brown excessively—you're building layers of flavor, not creating a caramelized crust. If the vegetables stick, add a splash of dry red wine to deglaze and lift the browned bits from the bottom of the pan. These bits, called fond, are packed with flavor that will dissolve into your stew.
Deglaze and Combine Ingredients
Pour in the 1 cup dry red wine, scraping up any browned bits from the bottom of the pan with a wooden spoon. Allow the wine to simmer for 3-4 minutes until reduced by half, intensifying its flavor. Stir in the 0.5 cup tomato paste, coating all the ingredients evenly. This creates a rich, velvety base that will thicken as the stew simmers.
Return the seared beef to the pot along with the 2 cups beef broth, 2 whole fresh thyme sprigs, and 2 whole fresh bay leaves. Add the 1.5 teaspoons kosher salt and 1 teaspoon freshly ground black pepper. Bring the mixture to a gentle boil, then reduce heat to low and cover the pot with a lid. This is where the magic happens—the slow simmer transforms tough beef into tender, fork-tender perfection.
Simmer Until Tender
Simmer the stew uncovered for 2.5 to 3 hours, stirring occasionally and adding ½ cup water if the liquid reduces too much. You'll know the beef is tender when it easily pulls apart with a fork and the internal temperature reaches 195°F. This long, slow cook time allows the collagen in the beef to break down, creating a rich, gelatinous sauce that coats every bite.
About 30 minutes before the stew is fully cooked, taste and adjust seasoning. If the sauce is too thin, sprinkle in the 2 tablespoons all-purpose flour and stir to thicken. The stew should have a glossy sheen and coat the back of a spoon. If it's too thick, add a splash of beef broth to reach your desired consistency. The vegetables should be tender but still hold their shape, not falling apart.
Finish and Serve
Once the beef is fork-tender, remove the thyme sprigs and bay leaves from the stew. Taste and adjust seasoning one final time, adding more kosher salt or freshly ground black pepper as needed. The stew should be rich, deeply flavorful, and perfectly balanced—neither too salty nor too bland.
Serve the stew immediately, ladling it over mashed potatoes, crusty bread, or egg noodles. The beef should pull apart easily, and the sauce should be thick enough to coat the back of a spoon but still pour gracefully. Each bite should deliver layers of umami flavor from the slow-cooked beef, sweetness from the carrots, and depth from the red wine and tomato paste. Enjoy the fruits of your labor—this is comfort food at its finest.
Pro Tips For Making Stewed Beef
- Sear the Roast First: Hit that chuck roast with a dry pan over medium-high heat until it’s deep brown—about 3-4 minutes per side. I learned this the hard way: skipping the sear means flavor stuck in the middle instead of coating everything. (Yes, even if you’re impatient like me, resist the urge to rush.)
- Dice the Onions: Cut those yellow onions into ¼-inch pieces, not thin slices—this keeps them from turning to mush while stewing. I used to slice them paper-thin, and they’d disappear into the sauce within 20 minutes. (Your future self will thank you.)
- Don’t Crowd the Pot: Start the beef in batches if your pot’s too small—tight packing steams the meat instead of browning it. After burning three batches of undercooked beef, I finally bought a larger Dutch oven. (Does it look weird? Yes. Does it work? Every single time.)
- Roast the Veggies: Toss chopped carrots, celery, and garlic with oil, salt, and pepper, then roast at 400°F for 15 minutes before adding to the stew. Sounds weird, but it works: the veggies caramelize and add depth without losing shape. (I skip this when I’m lazy, but the dish is noticeably better when I don’t.)
Make-ahead tips for this dish
Prep Ahead Strategy
I recommend prepping the aromatic vegetables and beef separately the night before to save 30 minutes of active time. Chop the onions, carrots, and celery into 1-inch chunks and store in a quart-sized airtight container in the fridge.
Cut the beef into 1.5-inch cubes and refrigerate in a separate container. This keeps your workspace organized and prevents last-minute chopping chaos. 💡
Slow Cooker Adaptation
For hands-off cooking, transfer the seared beef and all ingredients (except flour) to a 6-quart slow cooker. Cook on low for 8 hours or high for 5 hours, then add flour if needed to thicken.
I use a Hamilton Beach slow cooker for even heat distribution. The beauty of this method is that you can prep everything in the morning and return to perfectly tender beef in the evening. ⏰
Freezer-Friendly Components
Assemble the stew base (everything except beef) up to the simmering step, then freeze in quart-sized freezer bags for up to 3 months. When ready to cook, thaw overnight in the fridge, then brown the beef separately and add it to the thawed base.
This is my go-to method for busy weeks—just add beef and simmer! Leave 1 inch headspace in bags to prevent expansion cracks. ❄️
Make-Ahead Sauce Boost
For even deeper flavor, prepare the sauce (without beef) a day ahead, then refrigerate. The flavors intensify overnight, and you'll have a head start when it's time to cook. When ready, brown the beef separately and combine with the pre-made sauce.
This technique works especially well for holiday gatherings where you want maximum flavor with minimal last-minute work. 💫
Portion Control Tips
Divide the fully cooked stew into 2-cup portions in airtight containers for easy reheating. Label with dates—this stew reheats beautifully for 4-5 days in the fridge. For freezing, use gallon-sized freezer bags and flatten to save space. When reheating, add 1-2 tablespoons water or broth to prevent drying out. 📅
Weeknight Shortcut
Use a pressure cooker like the Instant Pot to cut cook time to 60 minutes on high pressure. Brown the beef separately, then add everything to the pressure cooker and cook for 30 minutes after pressure builds.
This is perfect for weeknights when you need dinner on the table quickly without sacrificing flavor. The meat will be just as tender as the slow-cooked version. ⚡
Nutrition facts
Frequently asked questions
Can I use a different cut of beef for this stew?
While chuck roast is ideal for its fat marbling, you can substitute with stew meat or chuck shoulder. Avoid lean cuts like sirloin—they won't become tender enough. If using a tougher cut like brisket, increase simmering time to 4 hours for maximum tenderness.
Why does my stewed beef turn out tough instead of tender?
Tough beef usually means insufficient simmering time or too-high heat. Always cook until the internal temp reaches 195°F and the meat pulls apart easily. Use a heavy Dutch oven and maintain a gentle simmer—never a rolling boil. For extra insurance, add 1 tsp baking soda to the broth to tenderize.
Can I make this stew in a slow cooker or Instant Pot?
For a slow cooker, brown the beef first, then cook on low for 8 hours or high for 5 hours. For an Instant Pot, brown the beef separately, then cook on high pressure for 30 minutes after sealing. Both methods yield tender results with less hands-on time.
How do I thicken the sauce if it's too thin?
Stir in 2 tablespoons flour or cornstarch mixed with 2 tablespoons cold water and simmer for 5 minutes until thickened. For a richer sauce, mash a few cooked carrots into the stew—their natural starch helps bind the liquid. Avoid over-thickening; the sauce should coat a spoon but remain pourable.
What are the best sides to serve with stewed beef?
Classic pairings include crusty bread for dipping, mashed potatoes to soak up sauce, or buttered egg noodles. For a heartier meal, serve with roasted root vegetables or a simple green salad to balance the richness. The key is contrasting textures—creamy, chewy, or crisp all work well.