
Desserts
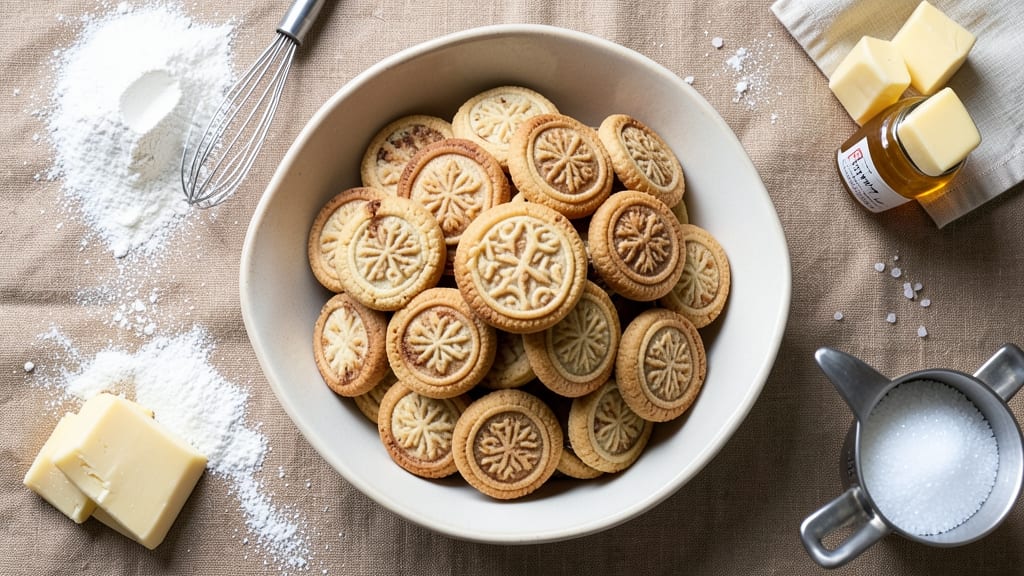
This stamped cookie recipe transforms holiday baking from messy to magical with just a few simple tools and precise techniques. The secret lies in perfectly rolled dough that holds intricate designs without cracking, creating cookies that look like they came from a professional bakery.
I developed this method after years of holiday baking frustrations—no more dough sticking to the rolling pin or stamps losing their details.
What makes these cookies special is the combination of a sturdy dough formula and proper stamping methods that ensure crisp edges and tender centers every time.
You'll need just five key ingredients and about 20 minutes of active time, with the rest handled by your oven while you prepare the next batch. The dough's precise fat-to-flour ratio prevents spreading while maintaining that classic cookie texture.
By the time you pull these from the oven, you'll have beautifully stamped cookies with sharp designs that stay intact, golden edges, and a tender interior that melts in your mouth.
The best part? They're ready in just 10-12 minutes per batch, making them perfect for holiday gatherings when time is limited but presentation matters most.
These cookies work beautifully with holiday-themed stamps for Christmas, Hanukkah, or New Year's celebrations, or use seasonal shapes for Easter or Thanksgiving. The dough can be made ahead and chilled for up to 48 hours, giving you flexibility for busy baking days.
Let's get started on creating your holiday cookie masterpiece.
Ingredients for stamped cookie
Five simple ingredients plus a stamp set transform ordinary baking into holiday magic.
| Ingredient | Amount | Notes |
|---|---|---|
| All-Purpose Flour 🌾 | 2 ½ cups | Sifted for light texture |
| Unsalted Butter 🧈 | 1 cup | Cold, cubed for even mixing |
| Granulated Sugar 🍚 | ½ cup | Superfine preferred for smoothness |
| Vanilla Extract 🌿 | 1 tsp | Pure vanilla preferred |
| Salt 🧂 | ½ tsp | Fine sea salt preferred |
| Cookie Stamps 🎄 | 1 set | Holiday-themed designs recommended |
| Powdered Sugar 🍚 | ¼ cup | For dusting finished cookies |
The butter needs to be cold—pull it from the fridge 10 minutes before mixing. Land O'Lakes or Plugrá brands stay firm longest. The flour? Always sift it—King Arthur or Gold Medal work best for that light texture. If you're in a pinch, Trader Joe's sells pre-sifted flour. Skip the superfine sugar? Regular granulated works, but your cookies might be slightly grainier. The vanilla matters too—imitation smells like perfume, pure tastes like vanilla.
No cookie stamps? Use holiday cookie cutters instead—just roll the dough slightly thicker. Short on powdered sugar? Regular sugar crushed in a food processor works in a bind. The dough can be rolled out on parchment paper for easy stamping, or directly on your counter if you've got a well-floured surface. Pro tip: Chill the dough 30 minutes before stamping—it rolls cleaner and holds designs better. And if you're feeling fancy, use a rolling pin with a marble base for even pressure.
Dough keeps for 48 hours wrapped in plastic in the fridge. Roll it into balls and freeze for up to 3 months—just bake straight from frozen. The finished cookies stay crisp for 5 days in an airtight container. Double the batch—holiday guests disappear these fast. And save the powdered sugar dusting for last—it melts off if you bake too long.
Why You'll Love This Recipe
- I make these year-round: for Christmas cookie swaps, teacher gifts, or just because I crave something sweet. Stamp them with holiday shapes or keep it classic—either way, they disappear fast. My kids’ friends always ask for the recipe.
- Five-Ingredient Magic: I swear by this recipe—just flour, butter, sugar, vanilla, and a pinch of salt. That’s it. No fancy mix-ins, no last-minute ingredient hunts. The simplicity lets the buttery richness and vanilla sing without competition.
- Buttery Vanilla Bliss: The moment those cookies hit the oven, the aroma of warm butter and vanilla fills my kitchen. Crisp edges give way to a soft, melt-in-your-mouth center—like a hug in cookie form. Honestly, I’ve never met a cookie that balances these textures better.
- Holiday or Snack Attack: I make these year-round: for Christmas cookie swaps, teacher gifts, or just because I crave something sweet. Stamp them with holiday shapes or keep it classic—either way, they disappear fast. My kids’ friends always ask for the recipe.
Step-by-step instructions for stamped cookies recipe
Here's how to create festive holiday cookies with crisp edges and perfect stamped designs every time.
Mix Dry Ingredients for Light Texture
In a medium bowl, combine the 2.5 cups all-purpose flour, 0.5 cup granulated sugar, 0.5 teaspoon salt, and 1 teaspoon vanilla extract. I like to use a whisk for this step to ensure everything is evenly distributed and there are no lumps in the dry ingredients. Sift the flour first if possible—this prevents dense pockets in your cookies and gives that perfect light texture we're after.
Real talk: Don't skip sifting if you can help it. I've made this mistake before, and the cookies turned out flat and heavy instead of crisp and delicate. The goal is to create a fine, airy base that will hold its shape when stamped and baked.
Cut Cold Butter into Dry Mixture
Add the 1 cup unsalted butter, cut into small cubes, to the dry ingredients. Using a pastry cutter or your fingers, work the butter into the flour mixture until the texture resembles coarse crumbs with pea-sized butter pieces remaining. This cold butter technique is crucial—it creates pockets of steam during baking that give those beautiful crisp edges.
Here's the thing—don't overwork the mixture. You want to see some butter still visible when you're done. If you press too hard, you'll end up with a dense dough instead of that perfect crumbly texture that holds its shape when stamped. The butter should be cold but not rock-hard when you start.
Shape and Chill the Dough
Gather the dough into a single ball and divide it into 4 equal portions (about 8 ounces each). Flatten each portion into a 1-inch thick disc and wrap tightly in plastic wrap. Chill in the refrigerator for at least 30 minutes, or up to 24 hours. This resting period is what makes the difference between flat cookies and perfectly stamped holiday shapes.
Don't be tempted to skip the chilling. Cold dough holds its shape beautifully when stamped and prevents the designs from spreading during baking. I like to chill mine overnight—it makes the next steps so much easier, and the flavor develops more deeply during that time.
Roll and Stamp for Holiday Designs
Preheat your oven to 350°F and line two baking sheets with parchment paper. On a lightly floured surface, roll one chilled dough disc to about 1/8-inch thickness. Use your holiday-themed cookie stamps to press designs into the dough, pressing firmly but not so hard that you crack the dough. I find that working quickly keeps the dough from warming up too much.
Here's where it gets fun—use the set of cookie stamps to create your holiday designs. Press gently but firmly to get clear, crisp impressions. You'll notice the dough will spring back slightly after removing the stamp—that's normal. The key is to press straight down without twisting, which can cause the dough to tear.
Bake to Golden Perfection
Transfer the stamped cookies to the prepared baking sheets, spacing them about 1 inch apart. Bake for 8-10 minutes until the edges are just beginning to turn golden brown. Watch them carefully—they bake quickly and can go from perfect to overdone in seconds. Rotate the pans halfway through for even baking.
When they're done, remove from the oven and let cool on the baking sheet for 2 minutes before transferring to a wire rack. While still warm, dust the cookies with the 0.25 cup powdered sugar for that classic holiday finish. The sugar will melt slightly and create a beautiful, snowy effect that looks amazing against the crisp edges.
Pro Tips For Making Stamped Cookie
- Chill the Dough First: I learned this the hard way—rolling warm dough into thin sheets always leads to uneven stamping and spreading. Pop the dough in the fridge for 30 minutes before rolling, even if the recipe doesn’t say to. This keeps the edges crisp and the centers thick enough to hold the stamp details without collapsing.
- Use Cold Butter, Not Room-Temp: That buttery richness comes at a cost if your butter’s too soft. Cut the cold butter into cubes and pulse it in the food processor with the flour until it resembles coarse crumbs—no melting allowed. This prevents flat cookies and keeps the texture tender without turning greasy.
- Don’t Overmix the Dough: I used to beat the dough like I was kneading bread, and my cookies turned out dense and tough. Mix the dry ingredients first, then cut in the butter, and stop as soon as the dough clumps together. Overworking it develops gluten, and nobody wants a chewy stamped cookie.
- Stamp While the Dough’s Firm: Press the stamp into dough that’s just thick enough to resist sticking—about ¼-inch. If it’s too soft, the details will smear; if it’s too stiff, the stamp won’t leave a clean imprint. Roll the dough between parchment sheets to avoid sticking, and press firmly but not aggressively.
Troubleshooting this dish
Dough Too Sticky
If your dough feels too sticky when rolling, it's likely too warm or needs more flour. First, chill the dough for an extra 15-20 minutes to firm it up.
If that doesn't help, sprinkle a tiny bit more flour (1 tablespoon at a time) onto your rolling surface and work it into the dough gently with your hands. Avoid over-flouring, though—this can make your cookies dry.
I've found that King Arthur flour absorbs moisture better than some other brands, so it might need slightly less flour overall. 🌾
Stamps Not Impressing Clearly
Blurry or faint stamp impressions usually mean the dough is too soft or you're not pressing hard enough. First, ensure your dough is properly chilled—it should be firm but not rock-hard. Press straight down with even pressure (about 5-10 pounds of force) for 2-3 seconds per stamp.
If your stamps are old or worn, they might need sharpening. I keep mine in the freezer for 10 minutes before use—the cold metal helps create sharper impressions. 🎄
Cookies Spreading Too Much
Excessive spreading happens when the dough is too warm or the butter melts too quickly. Double-check that your butter was cold when mixed in—it should still have some firm pieces when you finish combining. Also, ensure your oven is fully preheated to 350°F before baking.
If your kitchen runs hot, try baking at 325°F instead. Another trick: use a light-colored baking sheet (like aluminum) to reflect heat more evenly. 🔥
Dough Cracking When Stamped
Cracking occurs when the dough is too dry or you're pressing too aggressively. If your dough feels dry, add 1 teaspoon of milk or water and knead lightly to redistribute moisture. When stamping, press gently but firmly—think of it like pressing a warm cookie cutter into dough.
If your stamps have sharp edges, they're more likely to crack delicate dough. I recommend Wilton holiday stamps for their precision and durability. 💫
Cookies Burning Before Baking Through
This usually means your oven runs hot or the cookies are too close to the heating element. First, check your oven temperature with an oven thermometer—many ovens run 25°F hotter than set. If your cookies burn on the bottom, rotate the baking sheets halfway through.
For even more control, place a baking stone on the lower rack to distribute heat better. I also like to use the middle rack for more consistent results. ⏰
Powdered Sugar Melting Off
If your powdered sugar dusting melts or slides off, it's likely because the cookies cooled too quickly or you used too much sugar. Let cookies cool on the baking sheet for 3-4 minutes before dusting—this gives the sugar time to set slightly.
Use a fine-mesh sieve to apply powdered sugar evenly. For extra hold, lightly spray the cookies with cooking spray before dusting, then chill on a wire rack for 5 minutes to help the sugar adhere. ✨
Nutrition facts
Frequently asked questions
Can I use regular sugar instead of superfine sugar?
Yes, you can substitute regular granulated sugar, but your cookies may have a slightly grainier texture. For best results, pulse the sugar in a food processor for 10-15 seconds to break up the crystals. The superfine sugar creates a smoother dough that rolls and stamps more easily.
How do I store leftover stamped cookies?
Store cookies in an airtight container at room temperature for up to 5 days. For longer storage, freeze them for up to 3 months—just thaw at room temperature for 10 minutes before enjoying. The powdered sugar dusting will stay intact if stored properly.
What if I don't have cookie stamps?
No problem! Use holiday-themed cookie cutters instead. Roll the dough slightly thicker (1/4-inch) to compensate for the lack of detailed impressions. You can also create simple designs with a fork or knife for a rustic look. The dough's texture will still hold its shape beautifully.
Can I make this dough ahead of time?
The dough can be prepared and chilled for up to 48 hours before stamping. For even better results, shape it into balls and freeze for up to 3 months. Just bake straight from frozen—add 1-2 extra minutes to the baking time. This makes holiday baking so much easier!
Why does my dough crack when stamping?
Cracking usually happens when the dough is too dry or you're pressing too hard. First, ensure your dough is properly chilled—it should be firm but pliable. Press straight down with even pressure (like a cookie cutter) rather than twisting. If needed, add 1 teaspoon of milk or water and knead lightly to restore moisture.