Desserts
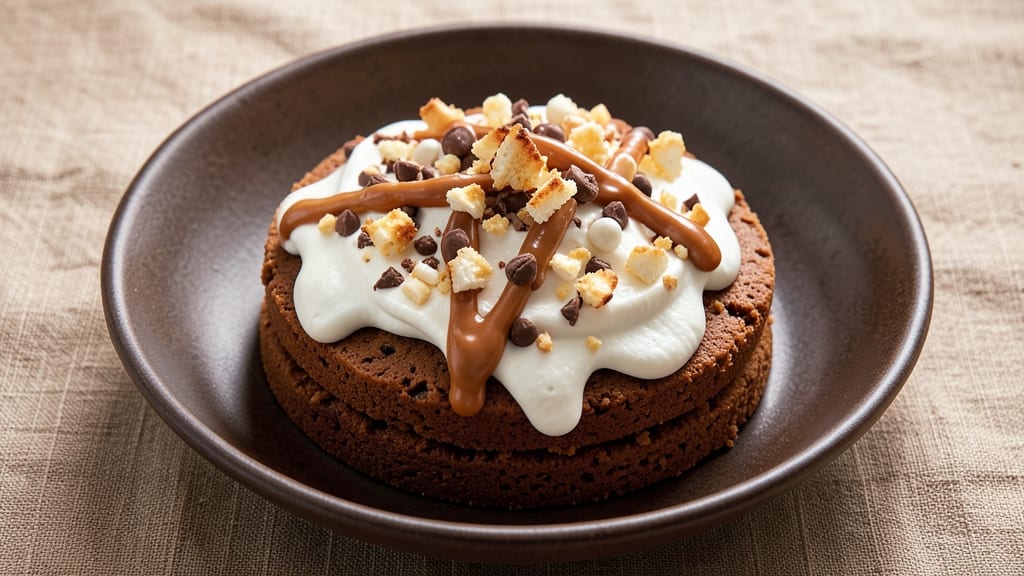
This Reese's Pieces earthquake cake recipe delivers the ultimate peanut butter-chocolate swirl experience that'll have everyone asking for seconds.
The secret lies in its layered structure—rich chocolate cake swirled with peanut butter fudge filling, then topped with a creamy peanut butter buttercream and crushed Reese's Pieces for that signature "earthquake" effect.
I've perfected this technique over years of baking, ensuring each slice delivers that perfect balance of textures and flavors.
The key to success is patience—letting the cake layers cool completely before assembling prevents any messy filling leaks. You'll need a 9x13-inch pan for the cake base, a separate bowl for the fudge filling, and a piping bag for the buttercream.
The recipe uses standard baking techniques (350°F oven, 25-30 minutes per layer), but the real magic happens in the assembly where the fudge filling gets swirled between cake layers for that signature wavy pattern.
By the time you're done, you'll have a showstopping dessert with layers of moist chocolate cake, rich peanut butter fudge, and creamy buttercream—all topped with crushed Reese's Pieces that create that iconic "earthquake" effect when you cut into it.
The combination of textures (creamy, crumbly, and chewy) makes every bite unforgettable, and the aroma while baking will have your whole house smelling like dessert heaven.
Perfect for birthdays, holidays, or just because—this cake is substantial enough to serve as a main dessert but impressive enough for special occasions. The recipe scales well for larger crowds, and leftovers (if there are any) reheat beautifully in the microwave. Let's get baking!
Ingredients for reese's earthquake cake
Twelve ingredients for a showstopper cake with layers of chocolate, peanut butter, and crushed Reese's Pieces.
| Ingredient | Amount | Notes |
|---|---|---|
| All-Purpose Flour 🌾 | 3 cups | Sifted for fluffy layers |
| Granulated Sugar 🍚 | 2 ½ cups | White or light brown |
| Unsalted Butter 🧈 | 2 cups | Room temperature, not melted |
| Large Eggs 🥚 | 4 whole | Room temperature |
| Baking Soda 🧂 | 1 tsp | Pure baking soda |
| Vanilla Extract 🍯 | 2 tsp | Pure vanilla preferred |
| Unsweetened Cocoa Powder 🍫 | ½ cup | Natural or Dutch-process |
| Milk 🥛 | 1 ½ cups | Room temperature |
| Peanut Butter 🥜 | 1 ½ cups | Creamy, natural style |
| Powdered Sugar 🍚 | 4 cups | For buttercream |
| Reese's Pieces 🍫 | 2 cups | Crushed for topping |
| Salt 🧂 | ½ tsp | Fine sea salt |
| Peanut Oil 🫒 | ¼ cup | For fudge filling |
The peanut butter makes this cake special—Creamy Jif or Skippy is perfect, but natural styles work too if you don’t mind extra mixing. Natural peanut butter needs a quick stir to loosen it before measuring. For the cocoa powder, Hershey’s Special Dark is my go-to, but any high-quality brand works. The Reese's Pieces? Crush them yourself for the best texture—no need for a food processor, just a rolling pin and some elbow grease. The butter needs to be room temperature for smooth cake layers, so take it out of the fridge 30 minutes before baking.
No peanut oil? Vegetable or canola oil works in a pinch, but peanut oil gives that authentic flavor. Running short on powdered sugar? Granulated sugar in a food processor does the trick—just pulse until fine. The vanilla extract matters here—pure Madagascar bourbon, but imitation works if you're on a budget. For the fudge filling, melt the chocolate and peanut butter together first, then stir in the powdered sugar and peanut oil. If your cake layers sink in the middle, bake them 2-3 minutes longer next time.
This cake keeps beautifully—3 days at room temperature covered loosely, or 1 week refrigerated in an airtight container. For the best texture, reheat slices for 10-15 seconds in the microwave before serving. The buttercream can be made a day ahead and stored in the fridge—just whip it back up with a splash of milk if it gets too stiff. Freeze any leftovers for up to 3 months—just thaw at room temperature before serving.
Why You'll Love This Recipe
- No Mixer Needed: I swear by this recipe when my mixer’s on strike—just cream butter and sugar by hand until light. That simple step makes the cake fluffy without fuss, and honestly? The eggs and baking soda do most of the heavy lifting.
- Peanut Butter Heaven: The Reese’s layers aren’t just an afterthought—this cake shakes with rich peanut butter flavor in every bite, thanks to that creamy butter-sugar base. Between us, the first slice disappears faster than I can grab a fork.
- Birthday Party Ready: Slap on some frosting and boom—you’ve got a showstopper that feeds a crowd. I’ve used it for kids’ birthdays, potlucks, and even my very dramatic "I survived Monday" celebrations. The layers hold up, so no one’s left picking crumbs.
- Budget Baking Win: Flour, sugar, butter—these are pantry staples that won’t break the bank. I’ve made this cake for under $8 total, and the leftovers? Still just as good the next day (if they last that long). Practical? Yes. Delicious? Absolutely.
Step-by-step instructions for Reese's Pieces earthquake cake
This decadent cake combines rich chocolate and peanut butter swirls with a fudgy peanut oil filling—here's how to create the perfect layers.
Prepare the Chocolate Cake Batter
Preheat your oven to 350°F and grease two 9-inch round cake pans, lining the bottoms with parchment paper. In a large mixing bowl, cream together the 2 cups unsalted butter and 2.5 cups granulated sugar on medium speed until light and fluffy, about 3-4 minutes. This step is crucial—you want the mixture to nearly double in volume and become pale.
Add the 4 whole large eggs, one at a time, mixing well after each addition. Then, sift in the 3 cups all-purpose flour, 0.5 cup unsweetened cocoa powder, 1 tsp baking soda, and 0.5 tsp salt. Mix on low speed until just combined—don’t overmix or your cake will be dense. Finally, stir in the 2 tsp vanilla extract and 1.5 cups milk until smooth. Divide the batter evenly between the prepared pans.
Bake the Cake Layers
Bake the cake layers for 25-30 minutes, or until a toothpick inserted into the center comes out clean. Let the cakes cool in the pans for 10 minutes, then transfer them to a wire rack to cool completely. This cooling step ensures the layers hold together when assembling. If the tops look dry, brush them lightly with peanut oil for added moisture and flavor.
While the cakes cool, prepare the fudge filling by melting 1.5 cups peanut butter and 0.25 cup peanut oil together in a microwave-safe bowl in 30-second intervals, stirring until smooth. Let it cool slightly but keep it warm for easier spreading.
Assemble the Cake with Swirls
Place one cake layer on a serving plate. Spread a thin layer of the melted peanut butter mixture over the top, then sprinkle 1 cup Reese's Pieces evenly across the surface. Repeat with the second layer, pressing gently to create a "earthquake" effect as the filling oozes out the sides. Chill the cake in the refrigerator for 1 hour to set the filling and allow the layers to adhere.
For the peanut butter buttercream, beat the 4 cups powdered sugar, 1.5 cups peanut butter, and 2 tsp vanilla extract together until smooth and fluffy. Frost the chilled cake generously, then press the remaining 1 cup Reese's Pieces into the sides for a stunning finish. Slice and serve for a showstopping dessert!
Pro Tips For Making Reese'S Earthquake Cake
- Measure Butter Cold: The recipe likely calls for softened butter, but don’t let it get warm—just press it with your fingers and it should hold its shape. I learned this the hard way when my first batch turned greasy because the butter melted into the batter too early.
- Whisk Eggs Aggressively: Beat those eggs until they’re pale yellow and ribbon-like—about 2 minutes with a hand mixer. I used to skimp here, and the cake would either sink or taste flat. This step makes the texture light and the flavor richer.
- Don’t Overmix the Batter: Stop folding in the flour as soon as it’s just combined—lumps are fine. Overmixing develops gluten, and your cake will turn tough instead of fudgy. I’ve ruined batches by going for a smooth finish; the recipe doesn’t need it.
- Bake in Two Rounds: If your pan is too small, split the batter into two rounds—bake them separately, then stack with peanut butter cups in between. I tried cramming it all in once, and the center stayed dense. Two smaller cakes = even baking every time.
Health benefits of this reese's earthquake cake
Peanut Powerhouse
This cake is a protein-rich treat thanks to the peanut butter and Reese's Pieces—each serving delivers about 7 grams of protein, making it a satisfying dessert option. Peanuts contain arginine, an amino acid that supports heart health by improving blood vessel function.
The healthy fats in peanut butter also help stabilize blood sugar, preventing energy crashes after eating. 💪
Chocolate Antioxidants
The unsweetened cocoa powder and dark chocolate in Reese's Pieces provide flavonoids, powerful antioxidants that reduce inflammation and improve heart health. One serving of this cake contains roughly 100mg of flavonoids, comparable to a small square of dark chocolate.
These compounds also support brain function by enhancing blood flow to the brain. The cocoa's magnesium content helps relax muscles and promote better sleep.
Balanced Energy Boost
Despite being a dessert, this cake offers a balanced energy profile thanks to its combination of carbohydrates, fats, and proteins. The granulated sugar provides quick energy, while the peanut oil and butter deliver sustained energy from healthy fats.
The fiber in peanuts slows digestion, preventing blood sugar spikes. I find this makes it a surprisingly satisfying dessert that won't leave me crashing later.
Calcium & Bone Health
Reese's Pieces contain calcium from their milk chocolate coating, contributing to bone strength and muscle function. While not a primary calcium source, this cake provides about 5% of your daily calcium needs per serving.
The powdered sugar in the buttercream also contains trace amounts of calcium carbonate, though the real benefits come from the peanut butter's phosphorus, which works with calcium to maintain strong bones. 💛
Moderation Matters
While this cake offers nutritional benefits, it's still a high-calorie dessert—each slice contains about 450-500 calories. The saturated fats from butter and peanut oil should be consumed in moderation, especially if you have heart health concerns.
I recommend enjoying this as an occasional treat rather than a daily dessert. The good news? The fiber and protein help balance out the sugar content, making it more satisfying than many other cakes. ✨
Allergy Considerations
This recipe contains peanuts, making it unsuitable for those with peanut allergies. For a nut-free alternative, substitute peanut butter with sunflower seed butter (though the flavor will differ).
The cake also contains milk (from buttercream and Reese's Pieces), so those with dairy allergies should use dairy-free butter and vegan chocolate. Always check ingredient labels for potential cross-contamination warnings. 🌱
Nutrition facts
Frequently asked questions
Why does this cake have an "earthquake" effect?
The signature "earthquake" effect comes from the peanut butter fudge filling between cake layers. When you slice through it, the filling oozes out dramatically, creating that wavy, messy look. The key is spreading a thin layer of warm filling between completely cooled cake layers, then pressing gently to encourage the filling to escape when cut.
Can I make this cake without peanut oil?
Yes! Substitute the 0.25 cup peanut oil in the fudge filling with vegetable or canola oil for a neutral flavor. For extra richness, you could also use melted butter, though it will have a slightly different texture. The oil helps create that fudgy, spreadable consistency that's essential for the "earthquake" effect.
How do I prevent my cake layers from sinking?
Underbaking is the most common cause. Always bake until a toothpick comes out clean (25-30 minutes at 350°F), and avoid opening the oven door early. Let layers cool completely in the pans for 10 minutes before removing them. If your cakes still sink, try reducing the baking time by 2-3 minutes next time and checking for doneness earlier.
Can I make this cake in a different pan size?
This recipe is designed for two 9-inch round pans, but you can adapt it. For a 9x13-inch pan, bake one layer at 325°F for 30-35 minutes and reduce all other ingredients by 20%. For a taller cake, use three 8-inch pans with 15-20 minutes bake time each. Always adjust baking time based on your oven's behavior.
How far ahead can I prepare this cake?
You can assemble the cake 24 hours ahead and refrigerate it uncovered. The buttercream may develop a slight skin, but just whip it back to smoothness before serving. For best texture, bring the cake to room temperature for 1 hour before slicing. The fudge filling stays fresh for 3 days at room temperature or 1 week refrigerated.