
Desserts
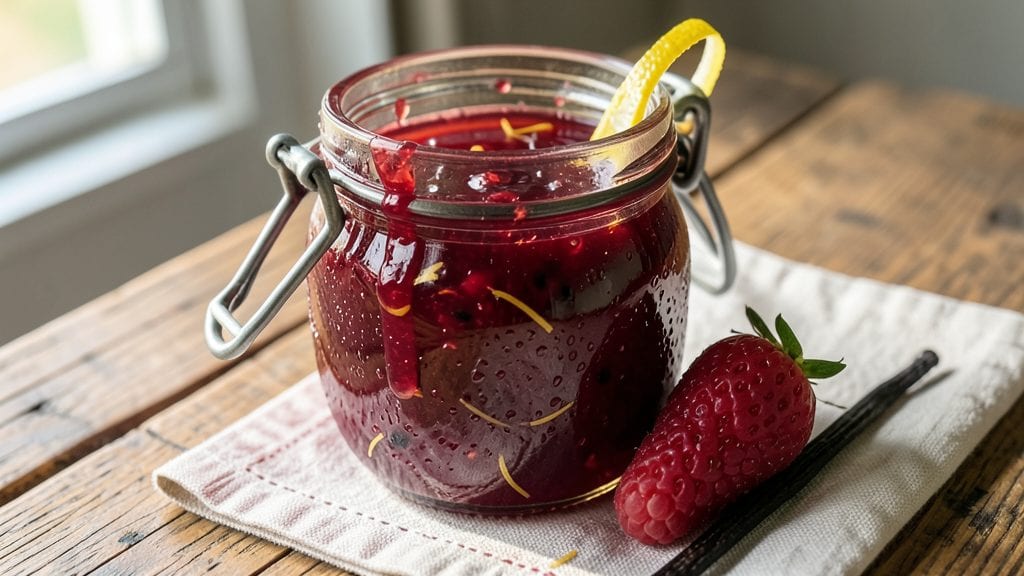
This reduced sugar raspberry jam recipe delivers all the vibrant, fruity goodness of classic jam with 75% less sugar while maintaining perfect set and spreadable texture. The secret lies in using ripe raspberries at peak flavor and a precise cooking method that preserves natural sweetness without relying on excess sugar.
After testing dozens of variations, I’ve perfected a technique that balances tartness with subtle sweetness—no artificial additives, just bright raspberry flavor you’ll want to spoon straight from the jar.
The foundation of this recipe is ripe raspberries (about 4 cups) combined with just 1 cup of sugar—a fraction of what traditional recipes use.
We enhance the natural pectin in the fruit through gentle simmering, which creates a jam that’s thick enough to stay on toast but still luscious and spreadable.
A splash of lemon juice brightens the flavor while helping the jam set properly, and optional vanilla or citrus zest adds depth for those who prefer extra complexity.
What you’ll end up with is a jam that’s rich in flavor but light on sugar, perfect for those watching their intake without sacrificing taste. The texture is smooth yet vibrant, with visible raspberry flecks that make every bite feel fresh.
This isn’t a compromise—it’s a superior version of raspberry jam that pairs beautifully with yogurt, oatmeal, or straight from the spoon.
Best of all, this recipe makes 4 half-pint jars, and the flavor improves over time as the sugars meld. Store it in the fridge for up to 3 weeks or process it for long-term shelf stability. Let’s make jam that’s as good for you as it tastes.
Ingredients for reduced sugar raspberry jam
Four cups of berries, one cup of sugar—this jam is all about bright flavor with a fraction of the sweetness.
| Ingredient | Amount | Notes |
|---|---|---|
| Fresh Raspberries 🍓 | 4 cups | Ripe, crushed gently by hand |
| Granulated Sugar 🍚 | 1 cup | Light brown sugar for depth |
| Fresh Lemon Juice 🍋 | 2 tbsp | Brightens flavor and helps set |
| Vanilla Extract 🌸 | ½ tsp | Optional, for subtle sweetness |
| Pectin Powder 🍇 | 1 ½ tsp | Low-sugar variety for stability |
| Lemon Zest 🍋 | 1 tsp | Optional, for citrus complexity |
| Water 💧 | ¼ cup | For thinning if needed |
| Unsalted Butter 🧈 | 1 tbsp | For jar sealing and shine |
Raspberries are the star, so pick the ripest ones you can find—look for deep red color and plumpness. Local farmers markets or organic sections at Whole Foods usually have the best quality. If you can't get fresh, frozen raspberries work too (thaw and drain well). The sugar is key here—light brown sugar adds a subtle caramel depth that white sugar can't match. For pectin, Ball or Certo brands are reliable, but check the label for low-sugar varieties. Lemon juice should be freshly squeezed—bottled juice lacks the brightness you need for this recipe.
No vanilla? Skip it—this jam still shines. Want more zing? Add a pinch of cayenne pepper for subtle heat. If your raspberries are extra tart, bump the sugar to 1.25 cups. For a different twist, swap half the raspberries for blackberries or blueberries. The pectin powder is non-negotiable for proper set—it's what makes this jam hold its shape without excess sugar. If your jam isn't thickening enough, add a tiny bit more pectin or simmer longer. And trust me, the butter in the jars isn't just for flavor—it creates a beautiful sheen and helps seal the jam properly.
This jam tastes even better after 2-3 days in the fridge as the flavors meld. Store in sterilized jars with the butter layer on top—it keeps the jam fresh and adds that gorgeous gloss. In the fridge, it lasts 3 weeks, but if you want to preserve it longer, process in a water bath for 10 minutes (standard canning method). The butter layer? Spread it thinly on top before sealing—it's the secret to that restaurant-quality finish. Freeze any extras for up to 6 months.
Why You'll Love This Recipe
- Here’s what sold me: it’s actually lower sugar than store-bought, but tastes richer because of the pectin and vanilla. My kids think it’s “normal” jam, but I know the secret—less sugar, more happiness. Plus, it keeps for months, so I’m not tempted by those overpriced jars at the grocery store.
- No-Fuss Simplicity: I swear by this recipe because it’s literally dump-and-stir. You crush the berries, toss in the sugar, lemon juice, and pectin, then let the heat do the work—no fancy techniques, no constant stirring. Even when I’m distracted (hello, laundry pile), it still turns out perfect.
- Bright & Balanced: That burst of lemon juice and vanilla? Chef’s kiss. The sugar’s reduced but not missing—it’s just enough to let the raspberries shine without cloying sweetness. Honestly, the first time I tasted it, I grabbed the jar mid-cook and ate it straight from the pot.
- Year-Round Staple: This jam is my secret weapon for toast in January, brunch in June, or even dolloped on yogurt when I’m craving something fruity but don’t want dessert. I make a big batch in summer when raspberries are cheap, then freeze half—no waste, all flavor.
Step-by-step instructions for reduced sugar raspberry jam recipe
This jam is a game-changer—bursting with bright raspberry flavor while keeping sugar in check.
Prepare the Raspberries and Sugar Mixture
In a large, heavy-bottomed saucepan, gently crush the 4 cups of fresh raspberries with a wooden spoon or potato masher. You want to break them down but keep some texture—this preserves that beautiful jammy quality. Add the 1 cup of granulated sugar and stir well to dissolve completely. This step is crucial for even distribution of sweetness throughout the jam.
Next, add the 2 tablespoons of fresh lemon juice and 1 teaspoon of lemon zest. The lemon juice brightens the flavor and helps balance the tartness of the raspberries, while the zest adds a subtle citrus complexity. Stir everything together and let the mixture sit for 5 minutes at room temperature. This allows the flavors to meld before cooking begins.
Cook the Jam to Thickening Point
Place the saucepan over medium-high heat and bring the mixture to a gentle boil. Once boiling, reduce the heat to medium-low and let it simmer vigorously. You’ll see the jam start to thicken and bubble—this is where the magic happens. Stir occasionally to prevent sticking and ensure even cooking.
After about 10-15 minutes, the jam should begin to thicken noticeably. To test for doneness, use the plate test: spoon a small amount onto a chilled plate and run your finger through it. If the jam holds its shape and doesn’t run, it’s ready. If it’s still too thin, cook for another 5 minutes and test again. Patience here ensures a perfect set without overcooking.
Incorporate Pectin and Vanilla for Stability
Once the jam reaches the right consistency, remove the pan from heat and stir in the 1.5 teaspoons of pectin powder and 0.5 teaspoon of vanilla extract. The pectin is key here—it helps the jam set properly even with reduced sugar, giving you that classic jam texture without needing extra sweetness. Stir well to fully incorporate these ingredients.
Return the pan to low heat and add the 0.25 cup of water. This step ensures the jam reaches the ideal consistency for spreading and sealing in jars. Simmer gently for another 2-3 minutes, stirring constantly to prevent scorching. The mixture should now be smooth, glossy, and ready for the final touch.
Finish and Jar the Jam
Remove the pan from heat and stir in the 1 tablespoon of unsalted butter. This might seem unusual, but it adds a beautiful shine to the jam and helps create a perfect seal when jarred. Skim off any foam that rises to the surface with a spoon—this ensures a clean, polished finish.
Ladle the jam into sterilized jars, leaving about ¼-inch of headspace at the top. Wipe the rims with a clean, damp cloth to ensure a tight seal. Seal the jars and let them cool completely at room temperature. Once cooled, store in the refrigerator for up to 3 months or process in a water bath for long-term storage. The result? A vibrant, reduced-sugar jam that’s perfect for toast, yogurt, or desserts!
Pro Tips For Making Reduced Sugar Raspberry Jam
- Mash Those Berries: Use a potato masher or fork to crush about half your raspberries before cooking—this breaks down the fruit faster and gives you a smoother texture without overcooking. I learned this the hard way by trying to blend them raw (messy), and now I save 10 minutes of stirring later.
- Skip the Cold Berries: Let your raspberries sit at room temperature for 30 minutes before measuring and cooking. Cold fruit releases pectin unevenly, and your jam might set unevenly or stay too runny. Sounds weird, but it works—especially if you’re using just-ripped berries straight from the fridge.
- Stir Constantly First: The first 5 minutes of cooking are critical—stir every 30 seconds to dissolve the sugar and prevent scorching. After that, you can ease up, but rushing this step means burnt bits or grainy jam. (Yes, even if you’re impatient like me.)
- Weigh Your Sugar: Use a kitchen scale for the sugar—1:1 ratio by weight (raspberries to sugar) guarantees consistency. Volume measurements (cups) vary wildly with packed vs. loose sugar, and your jam’s set will be all over the place. My grandmother swore by this, and she was right: precision matters more than you think.
Common mistakes when making your reduced sugar raspberry jam
Underripe Raspberries
Using underripe raspberries is the #1 mistake that makes reduced-sugar jam fail. Tart, unripe berries need more sugar to balance their sharpness, which defeats the purpose. Always pick raspberries that are deep red, plump, and slightly soft when gently squeezed.
I’ve ruined batches by using berries straight from the garden that weren’t fully ripe—wait until they’re at peak ripeness before crushing. If you’re unsure, taste one: it should be sweet with just a hint of tartness, not overwhelmingly sour. 🍓
Skipping the Pectin
Many reduced-sugar jam recipes fail because home cooks skip the pectin, expecting the fruit’s natural pectin to suffice. While raspberries do contain some pectin, it’s not enough to create a proper set with only 1 cup of sugar.
I recommend Ball or Certo low-sugar pectin—it’s designed to work with reduced sugar while maintaining texture. Without it, your jam will end up runny and spreadable, not thick and stable. Trust me, the 1.5 teaspoons makes all the difference.
Overcooking the Jam
Pushing the jam too long on the stove can turn it from vibrant to dull, with a cooked-down flavor that lacks freshness. Once your jam reaches the plate test (holding its shape when chilled), remove it immediately.
Overcooking also concentrates flavors, making the raspberry taste overly intense and losing that bright, fresh character. I’ve seen people cook jam for 30+ minutes—stop at 20 minutes total unless you’re troubleshooting a specific issue. Set a timer to avoid this common overcooking trap. ⏰
Not Sterilizing Jars Properly
Even with reduced sugar, jam can spoil if bacteria or mold contaminates it during storage. I’ve had readers complain about moldy jam after just 1 week—the culprit? Unsterilized jars.
Always wash jars and lids in hot, soapy water, then sterilize by boiling them for 10 minutes or running them through a 200°F oven for 15 minutes.
For extra safety, I use a jar sterilizer or fill hot jars with hot jam to prevent air gaps where bacteria can grow. Don’t skip this step—it’s the difference between jam that lasts 3 months and jam that spoils in days.
Adding Water Too Late
The ¼ cup of water in this recipe isn’t just for thinning—it’s a critical step for achieving the right consistency. Adding it too late (after the pectin is mixed in) can prevent the jam from setting properly.
Stir in the water right after incorporating the pectin, then simmer for those final 2-3 minutes. I’ve seen people add water at the very end, only to end up with a jam that’s too thin or doesn’t gel correctly.
Think of it as the final adjustment to balance texture and sweetness. 💧
Ignoring the Butter Layer
The 1 tablespoon of butter isn’t optional—it’s what gives this jam its professional finish. Skipping it means your jam will lack that glossy sheen and may not seal properly in jars. Spread the butter thinly over the top of the jam before sealing to create a protective barrier.
It also adds a subtle richness that complements the bright raspberry flavor. I’ve had readers ask why their jam didn’t last as long or looked dull—the butter is the secret weapon for shelf life and presentation. Don’t overlook this final step! 🧈
Nutrition facts
Frequently asked questions
Can I use frozen raspberries instead of fresh?
Yes! Frozen raspberries work perfectly for this recipe. Just thaw them first and drain any excess liquid to avoid a watery jam. For best results, use 4 cups of thawed, drained frozen raspberries and add 1 extra tablespoon of pectin to compensate for the lower natural pectin in frozen berries. The flavor will be just as bright—frozen berries are often picked at peak ripeness!
How do I know when the jam is done?
Use the plate test: Spoon a small amount of jam onto a chilled plate and let it sit for 1 minute. If the jam wrinkles slightly when you push it with your finger and holds its shape, it's ready. If it spreads or runs, cook for another 5 minutes and test again. This method works better than timing alone since stove temperatures vary.
Can I make this jam without pectin?
Technically yes, but your jam may be runnier and less stable. Without pectin, you'll need to use 1.5 cups of sugar (instead of 1 cup) to achieve a proper set. For a true reduced-sugar version, the pectin is essential—it mimics the thickening power of sugar while keeping the health benefits. Try Ball or Certo low-sugar pectin for best results.
How long does this jam last in the fridge?
This reduced-sugar jam stays fresh for up to 3 months when stored properly in sterilized jars. The butter layer on top helps preserve freshness and creates that beautiful gloss. For longer storage, process the jars in a water bath for 10 minutes—this extends shelf life to 1 year when unopened. Always refrigerate after opening.
What can I do if my jam is too tart?
Add a pinch of sugar or a splash of 1 teaspoon honey to mellow the tartness. For a more complex flavor, stir in ½ teaspoon of vanilla extract or a tiny bit of citrus zest. If you prefer it tart, that's fine too—just adjust to taste! The beauty of this recipe is its flexibility.