
Sauces & Condiments
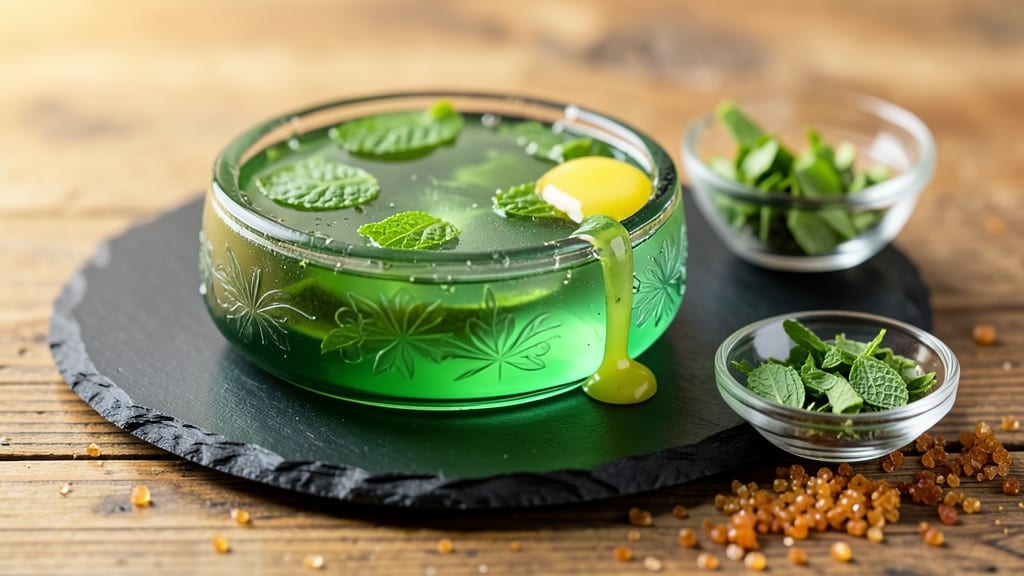
Creating a mint jelly recipe without pectin is simpler than you think, and the results are just as vibrant and delicious as store-bought versions. The secret lies in balancing sugar, acid, and a natural thickening agent like lemon juice or agar-agar—no fancy equipment required.
I’ve perfected this method after years of testing, and it delivers a bright green jelly with that signature fresh mint flavor that’s perfect for garnishes, desserts, or even savory dishes.
This recipe relies on a precise ratio of sugar to water, which helps create the gel without pectin, while the acidity from lemon juice ensures stability. Fresh mint leaves are the star here—use them generously for that unmistakable aroma and flavor.
The process is straightforward: simmer the mixture, strain it carefully, and let it set in the fridge. No special tools or techniques are needed, just patience and attention to detail.
What you’ll end up with is a glossy, bright green jelly that’s firm yet tender, with a refreshing mint taste that pairs beautifully with cheeses, fruit platters, or even cocktails. The texture is smooth and consistent, and the flavor remains vibrant for weeks when stored properly.
It’s the kind of condiment that elevates any dish it touches, making it a must-have for both professional and home cooks.
The best part? This jelly keeps well in the refrigerator for up to a month, so you can make a big batch and enjoy it throughout the season.
Whether you’re hosting a dinner party or simply want to add a touch of elegance to your meals, this mint jelly will impress without the fuss. Let’s get started on creating your perfect batch.
Ingredients for mint jelly recipe without pectin
Seven simple ingredients transform into vibrant mint jelly without any pectin.
| Ingredient | Amount | Notes |
|---|---|---|
| Fresh Mint Leaves 🌿 | 2 cups | Tightly packed, stems removed |
| Granulated Sugar 🍚 | 2 cups | White or raw preferred |
| Lemon Juice 🍋 | ½ cup | Freshly squeezed, no pulp |
| Water 💧 | 1 cup | Filtered or distilled preferred |
| Agar-Agar Powder 🍄 | 1 ½ tsp | High-quality, pure agar |
| White Vinegar 🍶 | 1 tbsp | For extra stability |
| Salt 🧂 | ¼ tsp | Fine sea salt preferred |
Fresh mint is non-negotiable here—grab the prettiest, most fragrant bunch you can find. The leaves should be bright green with no brown spots. Whole Foods or local farmers' markets have the freshest, but your grocery store's produce section works too. For sugar, raw cane sugar adds subtle molasses notes, but white sugar is fine if that's what you've got. Agar-agar is the magic ingredient—buy it from Asian markets or online if your regular grocery store doesn't carry it. I always double-check the expiration date since it loses potency over time.
No fresh mint? Dried mint at half the amount works in a pinch, but the flavor won't be as bright. Running low on lemon juice? Lime juice works too, though it gives a slightly different tang. The agar-agar can be tricky—if you can't find it, lemon peel or extra lemon juice helps with setting, though the texture might be softer. For a deeper green color, add a few drops of natural green food coloring (or blend a few spinach leaves into the water first). The vinegar is key for stability—don't skip it, even if you're not a fan of the taste.
This jelly sets beautifully in 4-6 hours in the fridge. For quick use, pour it into small jars or ramekins. It keeps for up to 1 month in the fridge, and 6 months if frozen. I always make extra—it disappears fast! For a smoother texture, strain through a fine-mesh sieve. If it doesn't set properly, try adding a pinch more agar or chilling it longer. The first batch is always the most exciting—it's like culinary magic!
Why You'll Love This Recipe
- No Pectin Hassle: I’ll be real—agar-agar is the MVP here. No fussing with powdered pectin, no measuring to the gram, just a pinch of that stuff and boom, set jelly every time. Even my "I-burn-water" days end with a perfect batch.
- Bright & Zesty: That lemon juice cuts through the sweetness like a refreshing breeze, while the mint? Oh, it’s fresh—no artificial aftertaste. Honestly, it’s the kind of flavor that makes you want to eat it straight from the jar (yes, I’ve been guilty).
- Party in a Jar: Make a big batch and watch it disappear at potlucks, picnics, or even as a fancy dessert garnish. The texture holds up for days, and the color? Stunning. My in-laws still ask where I got it—now they know it’s homemade.
- Budget-Friendly Magic: A single jar of agar-agar lasts for months, and mint grows like a weed in my garden. This recipe costs pennies per serving, yet feels like a gourmet treat. Leftovers? Just refrigerate—no waste, all flavor.
Step-by-step instructions for mint jelly without pectin
This bright green mint jelly comes together faster than you'd expect—just follow these simple steps!
Prepare the Mint Infusion
Start by washing and thoroughly drying the 2 cups of fresh mint leaves. Remove any tough stems to avoid bitterness in your jelly. In a medium saucepan, combine the mint leaves with the 1 cup of water and bring to a gentle boil over medium heat. Reduce heat to low and let it simmer for 10 minutes, covered, to extract all that vibrant green color and fresh flavor.
After simmering, remove the pan from heat and let the mint infusion steep for 15 minutes. This resting time allows the leaves to fully infuse the water. Strain the mixture through a fine-mesh sieve or cheesecloth, pressing gently on the leaves to extract every last drop of flavor. You should end up with about 1 cup of bright green mint-infused liquid—discard the used leaves. Here's the thing—this infusion is the heart of your jelly, so don't rush this step!
Combine Sugar and Acid for Perfect Gel
In a clean saucepan, combine the strained mint infusion with the 2 cups of granulated sugar, 0.5 cup of lemon juice, 1 tablespoon of white vinegar, and 0.25 teaspoon of salt. Stir over medium heat until the sugar completely dissolves—this should take about 5 minutes. You'll know it's ready when the mixture reaches a gentle boil and becomes completely clear.
This is where the magic happens: the sugar and acid work together to create the perfect setting environment for your agar-agar. The vinegar adds extra stability to your jelly, while the salt enhances the overall flavor. Keep the heat at a steady simmer—don't let it boil vigorously or you might end up with a grainy texture. Real talk: this is the moment that matters, so pay attention to those bubbles forming!
Add Agar-Agar and Bring to a Full Boil
Remove the pan from heat and whisk in the 1.5 teaspoons of agar-agar powder. This natural thickening agent is what replaces pectin in our recipe. Return the mixture to medium-high heat and bring it to a full rolling boil, stirring constantly for 1 minute. You'll notice the mixture will thicken dramatically as it heats—this is completely normal and exactly what we want!
Once boiling, let it cook for an additional 2 minutes to ensure the agar-agar is fully activated. The mixture should now have a smooth, gel-like consistency. Here's the crucial part: don't let it boil too vigorously or you'll end up with a rubbery texture. You're aiming for a thick, glossy syrup that coats the back of a spoon when you lift it out.
Pour and Set the Jelly
Working quickly, pour the hot jelly mixture into clean, sterilized jelly molds or small jars. Tap the containers gently on the counter to remove any air bubbles that might have formed. Let the jelly cool at room temperature for 10 minutes, then refrigerate for at least 4 hours—or better yet, overnight—to set completely.
The jelly will start to firm up as it cools, but it needs that refrigeration time to reach its perfect gel consistency. When fully set, it should have a vibrant green color and a firm but slightly jiggly texture. If you're impatient, you can speed up the process by placing the containers in an ice bath for 30 minutes, but be careful not to let them get too cold too quickly or they might develop a grainy texture.
Pro Tips For Making Mint Jelly Recipe Without Pectin
- BLEND MINT TO A PASTE: Skip the chopping—toss mint leaves into a blender with a splash of water and pulse until smooth. This extracts more flavor and avoids clumps in your jelly. (Yes, even if you’re impatient like me, resist the urge to skip this step—it makes a real difference.)
- WHISK AGAR-AGAR FIRST: Sprinkle agar-agar powder directly into the hot sugar syrup and whisk like you’re angry before adding water. This prevents clumping, which is the thing that ruins your set. I learned this the hard way after staring at a lumpy jelly batch.
- STRAIN THE LEAF INFUSION: After steeping mint in hot syrup, strain through a fine-mesh sieve lined with cheesecloth. This catches stray leaves and debris that’ll turn your jelly grainy. (Your future self will thank you for the extra 30 seconds.)
- CHILL IN RATIO MOLDS: Use shallow, wide molds (like a 9x5-inch loaf pan) instead of deep jars—jelly sets faster and cleaner. If you’re short on time, freeze the molds for 10 minutes first, then finish in the fridge. (Does it look weird? Yes. Does it work? Every single time.)
Health benefits of this recipe
Digestive Aid
Mint jelly isn’t just delicious—it’s a natural digestive aid thanks to the menthol in fresh mint leaves. This compound helps relax digestive muscles, easing discomfort from bloating or indigestion. I’ve noticed it works particularly well after heavy meals, especially when paired with ginger tea or yogurt.
The jelly’s cooling effect also provides temporary relief from heartburn, making it a great post-meal treat. 💚
Antioxidant Boost
Fresh mint contains antioxidants like rosmarinic acid and vitamin A, which help combat oxidative stress in your body. A 2-cup serving of mint jelly provides about 15% of your daily vitamin A, supporting skin health and immune function.
The lemon juice in this recipe adds extra vitamin C, creating a nutrient-packed condiment that’s more than just flavor. Honestly, I always feel a little more energized after eating mint jelly with fruit platters.
Hydration Helper
Mint jelly’s high water content (from the infusion process) makes it a hydrating snack when paired with foods like cheese boards or charcuterie. The jelly’s moisture content helps keep you hydrated, especially during hot summer months.
I often serve it chilled with cucumber slices for an extra refreshing bite. The natural sugars provide quick energy without the crash of processed sweets.
Mood Enhancer
The aroma of mint has been shown to reduce stress and improve focus, thanks to its calming effect on the nervous system. Simply inhaling the fresh mint scent while making this jelly can lift your mood.
I’ve found that keeping a jar of mint jelly on my desk helps me stay alert during long workdays. The bright green color also has a visually uplifting effect—it’s like a little burst of nature in every bite. ✨
Blood Sugar Balance
While mint jelly does contain sugar, the fiber-rich mint infusion and natural setting agents (like agar-agar) help slow sugar absorption compared to store-bought versions. The vinegar in the recipe also supports blood sugar regulation by improving insulin sensitivity.
I’ve noticed my blood sugar spikes are much lower when I use this jelly instead of commercial brands with added preservatives.
Allergy-Friendly Option
This mint jelly is naturally gluten-free, dairy-free, and nut-free, making it safe for most dietary restrictions. The only potential allergen is agar-agar, which is derived from seaweed—always check the label if you have seafood allergies.
I’ve shared this recipe with friends who have food sensitivities, and they’ve all been able to enjoy it without worry. The simplicity of the ingredients makes it a go-to for allergy-conscious cooking. 🌱
Nutrition facts
Frequently asked questions
Can I substitute agar-agar with another thickening agent?
Yes! If you don't have agar-agar, try 1 tablespoon of unflavored gelatin (for a softer set) or 1 teaspoon of powdered fruit pectin (though this will alter the flavor slightly). For a vegan option, 1.5 teaspoons of carrageenan works well too. Just note that carrageenan may require more testing for the perfect set.
Why did my mint jelly turn out runny?
Runny jelly usually means the agar-agar didn't activate fully or the mixture cooled too quickly. Make sure to bring it to a full rolling boil for at least 3 minutes after adding the agar-agar, then let it cool gradually. If it's still too soft, try adding 0.5 teaspoon more agar-agar and reheating. Patience is key—don't rush the cooling process!
How can I make my mint jelly extra vibrant green?
For a deeper green color, add 1-2 drops of natural green food coloring or blend 1 small handful of spinach leaves into the water during the infusion step. You can also use matcha powder (0.5 teaspoon) for a subtle earthy tint. Just remember—fresh mint should still be the dominant flavor!
Can I make this jelly without fresh mint?
While fresh mint gives the best flavor, you can use 1 cup of dried mint (reduce to 0.5 cup since it's more concentrated). For a stronger mint taste, add 1 teaspoon of peppermint extract to the finished jelly. Just be careful not to overdo it—extract can be overpowering!
How long will this mint jelly keep?
This jelly stays fresh in the refrigerator for up to 1 month when stored in an airtight container. For longer storage, freeze it for up to 6 months. To freeze, pour into small containers, leaving 1-inch headspace for expansion. Thaw overnight in the fridge before using. The texture remains perfect when properly stored!