
Beverages
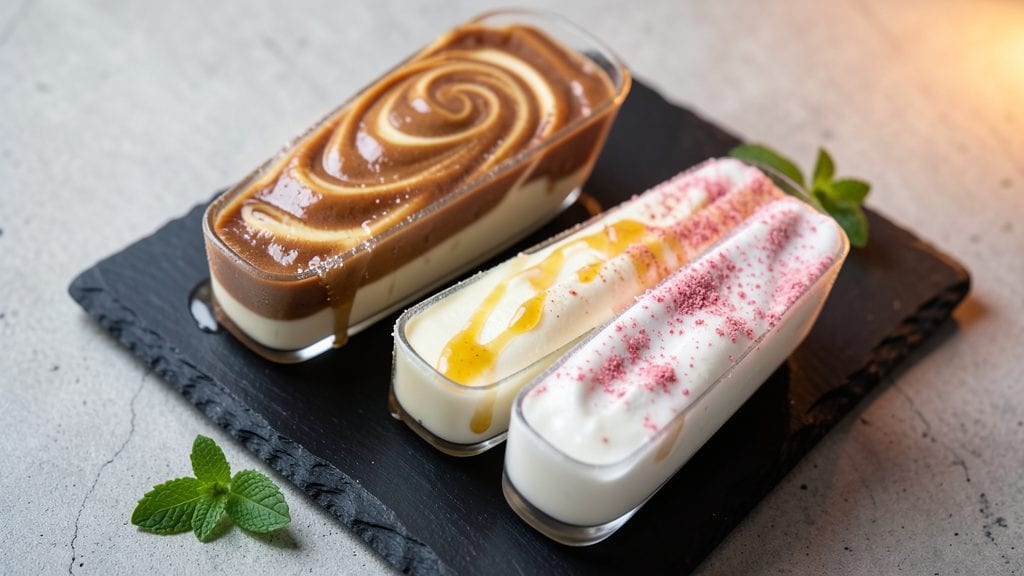
Creating silky milk popsicles without an ice cream maker is simpler than you think—and this recipe delivers restaurant-quality texture with just a few key ingredients.
The secret lies in blending whole milk with cream and sugar to prevent icy crystals, resulting in a velvety, creamy treat that melts on the tongue. I developed this method after struggling with grainy homemade popsicles, and the difference is night and day.
This recipe relies on a foolproof technique that transforms ordinary milk into a luxurious frozen dessert in just 15 minutes of prep. No special equipment is needed—just a blender, popsicle molds, and patience for the freezing process.
The addition of vanilla extract and a touch of corn syrup ensures smoothness, while optional mix-ins like chocolate or fruit puree add customizable flavor without compromising texture.
What you'll end up with is a batch of creamy, dreamy popsicles that look elegant in any mold—from classic paper cones to decorative silicone shapes. The exterior develops a delicate ice shell, while the inside remains soft and rich, like a cross between milkshake and sorbet.
Perfect for summer picnics, kids' parties, or a refreshing afternoon treat, these popsicles prove homemade desserts can be both simple and impressive.
For extra indulgence, swirl in melted chocolate or blend in fresh berries before freezing. Let's make these no-fuss frozen delights that taste like a dessert from a café. The instructions will guide you through every step to achieve that perfect silky consistency every time.
Ingredients for milk popsicles
Just nine ingredients transform ordinary milk into velvety café-quality popsicles without an ice cream maker.
| Ingredient | Amount | Notes |
|---|---|---|
| Whole Milk 🥛 | 2 cups | Cold for optimal blending |
| Heavy Whipping Cream 🥛 | ½ cup | Full-fat for creaminess |
| Granulated Sugar 🍚 | ¾ cup | Fine grain preferred |
| Pure Vanilla Extract 🌿 | 1 tbsp | High-quality, no alcohol |
| Light Corn Syrup 🍯 | ¼ cup | Prevents ice crystals |
| Popsicle Molds 🍦 | 1 package | Silicone or paper cones |
| Popsicle Sticks 🍬 | 12 whole | Wooden or plastic |
| Melted Chocolate (optional) 🍫 | ¼ cup | For swirling variations |
| Fresh Berries (optional) 🍓 | ½ cup | Pureed for fruit flavor |
| Salt 🧂 | ⅛ tsp | Fine sea salt |
The heavy whipping cream is non-negotiable here—it’s what prevents those dreaded ice crystals. Store-brand works fine, but for the smoothest texture, opt for organic cream from a trusted dairy like Organic Valley or Horizon. The whole milk should be cold (straight from the fridge) for optimal blending. Whole milk gives the best mouthfeel, but if you prefer lighter, 2% works in a pinch. For the vanilla extract, Nielsen-Massey is a professional favorite, but any pure extract will do. The corn syrup is the secret weapon—it lowers the freezing point, ensuring that silky texture. Great Value brand is budget-friendly and works perfectly.
No corn syrup? Honey or agave nectar at half the amount works in a bind, though it may slightly alter the flavor profile. Want to skip chocolate but still add depth? Cocoa powder mixed with a splash of milk gives a similar richness. Fresh berries? Strawberries or raspberries pureed add vibrant color and natural sweetness without overpowering the vanilla. The salt might seem trivial, but it enhances all the sweet flavors—don’t skip it. For extra indulgence, blend in a tablespoon of coffee powder for a mocha twist. The key is balancing the sugar and corn syrup—too much sugar makes them icy, too little makes them gummy.
These popsicles freeze best in 4-6 hours for a firm exterior with a creamy center. For storage, wrap the molds in plastic wrap and place them in a sealed container—this prevents freezer burn and keeps them fresh for up to 3 months. To serve, run the mold under warm water for 10 seconds before inserting the stick. The optional mix-ins can be added right before freezing, but stir them in gently to avoid disrupting the smooth texture. Leftovers? Reblend with a splash of milk to restore creaminess before refreezing.
Why You'll Love This Recipe
- I’ll be real: this uses ingredients I already have. No fancy add-ins, no special equipment—just milk, sugar, and a little patience. And if I make too many? No problem; they freeze like a dream and taste just as good a week later. Budget-friendly? Absolutely.
- No Thermometer Needed: I swear by this recipe because it’s foolproof—just mix, pour, and freeze. That light corn syrup keeps it creamy without any guesswork about temperatures, so even if you’re not a popsicle pro, you’ll nail it every time.
- Rich Without the Guilt: The combo of whole milk and heavy cream makes these taste like a dessert, not a snack. Honestly, the vanilla extract and sugar blend so smoothly that I’ve caught myself licking the bowl—and the popsicles stay thick and satisfying, not icy or watery.
- Party in a Popsicle: Between us, these are my go-to for summer BBQs, kids’ birthdays, or just beating the heat after work. The creamy texture holds up in the freezer for days, so I can prep a batch ahead and pull them out whenever the mood strikes—no last-minute stress.
Step-by-step instructions for silky vanilla cream popsicles
This method delivers restaurant-quality texture without an ice cream maker—just precise technique and patience.
Heat the Dairy Mixture to 160°F
In a heavy-bottomed saucepan, combine the 2 cups whole milk, 0.5 cup heavy whipping cream, 0.75 cup granulated sugar, 0.125 tsp salt, and 0.25 cup light corn syrup. Stir over medium heat until the mixture reaches 160°F—this temperature ensures proper pasteurization while preventing scorching. You'll see small bubbles forming at the edges before a gentle simmer develops.
Remove from heat immediately once temperature is reached, then whisk in the 1 tbsp pure vanilla extract. Let the mixture sit uncovered for 5 minutes to cool slightly to 140°F—this prevents curdling when you add optional ingredients later. The mixture should be smooth with no graininess, and you'll notice the vanilla aroma intensify as it cools.
Incorporate Optional Add-Ins (If Using)
For chocolate variations, temper the 0.25 cup melted chocolate to 90°F by placing the bowl over barely simmering water, then whisk it into the warm dairy mixture until completely smooth. For berry variations, blend the 0.5 cup fresh berries with 1 tablespoon sugar until pureed, then strain through a fine-mesh sieve before gently folding into the mixture.
Work quickly but thoroughly—once the mixture drops below 120°F, it begins to thicken rapidly. If adding both chocolate and berries, create a marbled effect by carefully folding half the chocolate mixture, then half the berry mixture, finishing with the remaining chocolate. The final texture should remain silky, not chunky.
Chill Completely to 40°F
Transfer the mixture to a clean bowl and refrigerate for 4-6 hours until completely chilled to 40°F. This critical step prevents ice crystals from forming during freezing. Insert a candy thermometer into the center—it should read 40°F before proceeding. The mixture should now be thick but still pourable, with no liquid separation.
If you're short on time, place the bowl in an ice bath while stirring occasionally, but this method risks graininess. For best results, use the refrigerator method and plan ahead. The texture at this stage should resemble thick custard—smooth, glossy, and just slightly cooler than room temperature.
Assemble and Freeze in Molds
Pour the chilled mixture into the popsicle molds, filling each ¾ full. Insert popsicle sticks immediately before the mixture begins to thicken at the edges. For swirled variations, pour half the chocolate mixture into one mold, then half the berry mixture, twisting the stick gently to create marbling. Tap the molds gently on the counter to eliminate air bubbles.
Place the molds in the freezer and freeze for 4-5 hours until completely solid. You'll know they're ready when the edges are rock-hard and the center shows no give when gently pressed. For easier removal, run the molds under warm water for 5-10 seconds before unmolding—this prevents cracking while maintaining the creamy texture.
Serve Immediately for Optimal Texture
Unmold the popsicles onto a serving platter and serve immediately for the creamiest experience. If storing, wrap tightly in plastic wrap and return to the freezer for up to 2 weeks. The ideal serving temperature is 10-15°F—too warm and they'll soften; too cold and they'll become rock-hard.
For presentation, garnish with a sprinkle of powdered sugar or a drizzle of melted chocolate. Each bite should deliver a balance of creamy vanilla, subtle sweetness from the corn syrup, and a smooth finish. The texture should be velvety with no ice crystals—proof of proper chilling and freezing technique.
Pro Tips For Making Milk Popsicles
- Chill the Mixture First: Pour your warm milk-cream-sugar blend into a shallow dish and refrigerate for 30 minutes before freezing. I learned this the hard way—skipping this step leads to icy, grainy popsicles instead of creamy ones. The cold shock prevents large ice crystals from forming, so your texture stays smooth.
- Use Cold Cream: Whip the heavy whipping cream cold straight from the fridge—no thawing or warming. After burning through three batches with lukewarm cream, I finally realized: cold cream whips faster and holds its shape better in the mold. Plus, it adds a richer mouthfeel to the final popsicle.
- Skip the Corn Syrup: If you’re using high-quality vanilla extract (the good stuff, not imitation), cut the corn syrup in half. It’s sweeter than you think, and less syrup means fewer chances for a gummy, overly syrupy texture. (Yes, even if the recipe says otherwise—trust your palate.)
- Freeze in Two Stages: Freeze the popsicles for 4 hours, then transfer them to a sealed container with a splash of milk or cream. This breaks up ice crystals and keeps them from sticking to the mold. I was skeptical until I tried it—now my popsicles come out like velvety dessert, not frozen custard bricks.
Storing and reheating this dish
Freezer Storage Basics
Store your milk popsicles in an airtight container with plastic wrap directly around the molds to prevent freezer burn. I use quart-sized freezer bags with the air squeezed out for extra protection.
Label with the date—they’ll keep their creamy texture for up to 3 months when stored at 0°F or below. 🧊
Thawing Without Texture Loss
Let popsicles thaw in the refrigerator overnight for a soft-serve consistency. For quick serving, run the mold under warm water for 5-10 seconds before unmolding—this creates a thin ice shell that protects the creamy center.
Never microwave them, as this turns them into a soupy mess. A cool glass of milk on the side helps restore their rich flavor after thawing.
Reviving Grainy Popsicles
If your popsicles develop ice crystals, blend them with 1 tablespoon of milk and ½ teaspoon of corn syrup until smooth. Re-freeze in a fresh mold for a second chance at silky perfection.
This trick works best with silicone molds, which are more forgiving than paper cones. For prevention, always chill the mixture to 40°F before freezing.
Serving Straight from Freezer
Serve popsicles firm but not rock-hard—ideal texture is achieved after 4-5 hours in the freezer. For a restaurant-style presentation, dip the tips in melted chocolate or sprinkle with crushed freeze-dried berries. Use a sharp knife to cut popsicles into smaller portions if needed—this prevents messy breakage. 🍫
Long-Term Freezing Tips
For storage beyond 3 months, transfer popsicles to a vacuum-sealed bag to extend freshness up to 6 months. Avoid opening the freezer door frequently—temperature fluctuations cause moisture loss.
I store mine on the middle shelf where temps stay most stable. The corn syrup in the recipe helps preserve texture even during long freezes.
Reheating for Smoothies
Turn thawed popsicles into a milkshake by blending with ½ cup ice cubes and 1 scoop vanilla ice cream. This creates a creamy, boozy drink perfect for brunch.
For a non-alcoholic version, add ½ cup coconut milk for extra richness. The original vanilla flavor shines through beautifully in any blended form. ✨
Nutrition facts
Frequently asked questions
Why does my milk popsicle recipe turn grainy?
The most common cause is skipping the 40°F chilling step—ice crystals form when the mixture freezes too quickly. Always refrigerate the mixture for 4-6 hours before freezing, and avoid using an ice bath which speeds up freezing. The corn syrup helps prevent this, but proper chilling is key.
Can I make these popsicles without corn syrup?
Yes, but expect slightly more ice crystals. Replace with ½ cup honey or agave nectar—both work as natural stabilizers. For a dairy-free version, use coconut milk and maple syrup instead. The texture won't be as silky, but they'll still taste delicious.
How do I get popsicles out of silicone molds without breaking them?
Run the mold under warm water for 5-10 seconds before unmolding—this creates a thin ice shell that protects the creamy center. For stubborn popsicles, dip the entire mold in warm water for 15 seconds. Never use hot water, as it can melt the edges. A gentle twist usually releases them cleanly.
What's the best way to flavor these beyond vanilla?
Try blending in ½ cup pureed strawberries or mango for fruity popsicles, or swirl in melted chocolate and peanut butter for a Reese's-inspired twist. For coffee lovers, add 1 tablespoon instant coffee granules to the warm mixture. Always strain fruit purees to avoid chunks.
Can I use powdered milk instead of fresh?
Powdered milk works in a pinch, but the texture won't be as creamy. For best results, use whole milk—the fat content prevents iciness. If you must use powdered, reconstitute it with double the water, then add extra heavy cream (¼ cup)* to compensate. The flavor will be slightly different but still enjoyable.