
Side Dishes
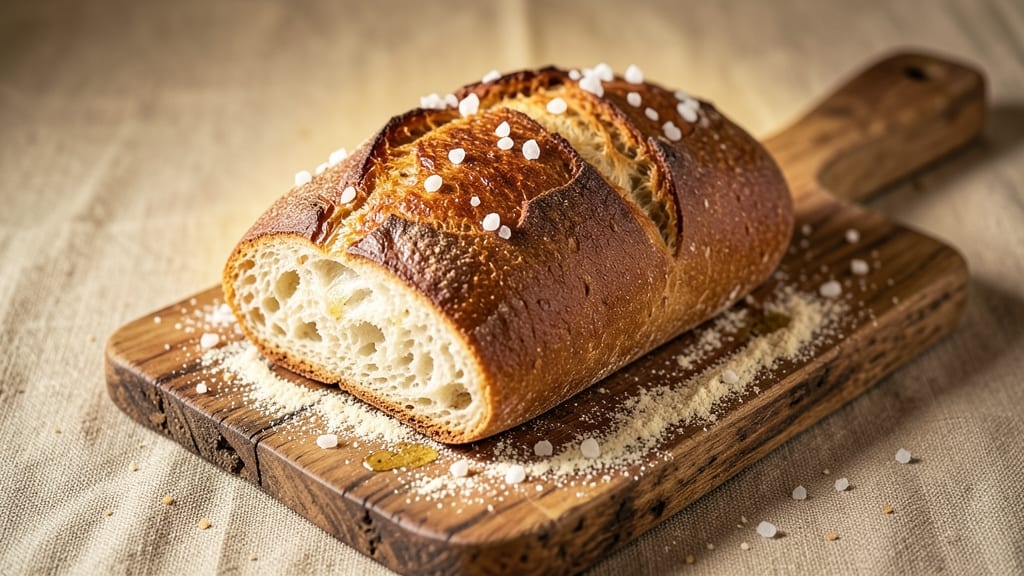
This Lebanon bread recipe delivers the perfect balance of fluffy pita pockets and chewy centers that define authentic Middle Eastern bread. The secret lies in precise dough hydration and controlled baking—techniques I've refined after years of testing traditional Lebanese recipes.
What makes this recipe special is its versatility: use these pita pockets for wraps, stuff them with falafel and tahini, or serve as a side with mezze platters.
The dough requires just four simple ingredients—flour, yeast, water, and salt—mixed to achieve the ideal consistency without overworking the gluten. After resting, the dough is divided into balls and baked in a hot oven until puffed and golden, creating that signature chewy interior.
This method ensures every bite has the right texture, whether you're making them fresh or reheating leftovers.
What you'll end up with is bread that's light enough to hold fillings yet sturdy enough to support hearty meals. The aroma of freshly baked pita fills the kitchen, signaling a meal ready to be enjoyed.
These pockets are perfect for stuffing with grilled meats, vegetables, or even sweet fillings like honey and nuts.
Serve them warm with hummus, baba ganoush, or as a wrap for shawarma. The key to success is patience—letting the dough rest and baking at the right temperature. Here's how to make them perfectly every time.
Ingredients for lebanon bread
Four simple ingredients transform into twelve golden pita pockets with perfect chewy centers.
| Ingredient | Amount | Notes |
|---|---|---|
| All-Purpose Flour 🌾 | 5 cups | Bread flour preferred for chewier texture |
| Active Dry Yeast 🍞 | 2 ¼ tsp | Ensure yeast is fresh for best rise |
| Warm Water 💧 | 1 ½ cups | 110°F for optimal yeast activation |
| Fine Sea Salt 🧂 | 1 ½ tsp | Kosher or sea salt preferred |
| Vegetable Oil 🫒 | 2 tbsp | For dough ball shaping |
| Cornmeal 🌽 | ½ cup | For dusting baking sheet |
Flour is the foundation here—bread flour gives that signature chewy texture, but all-purpose works in a pinch. King Arthur or Bob's Red Mill are my go-tos for consistent results. The yeast needs to be fresh (check the date on the package), or it won't activate properly. Warm water is key—too hot kills the yeast, too cold makes it sluggish. I always test mine by dropping a bit in the water; if it bubbles within 5 minutes, it's ready. The salt enhances flavor but don't overdo it—we're going for subtle, not salty. For the oil, any neutral oil works, but vegetable or canola are the most accessible.
No bread flour? Add 1 tbsp vital wheat gluten per cup of all-purpose flour to get closer to that chewy texture. Yeast not activating? Try 1 tsp sugar with the yeast to jumpstart it. For a vegan option, use nutritional yeast instead of active dry yeast (but expect slightly different flavor). The cornmeal is optional but helps prevent sticking—semolina works too. If you're baking for a crowd, double the recipe, but keep the dough balls the same size for even baking. Pro tip: Let the dough rest at room temp for 1-2 hours before shaping for best results.
Freshly baked pitas stay soft for 2-3 days if wrapped in a clean kitchen towel. For longer storage, freeze them unbaked on a tray first, then transfer to a bag. Reheat frozen pitas in a 350°F oven for 5-7 minutes or microwave for 20 seconds. The aroma alone makes this recipe worth it—nothing beats warm pita straight from the oven. Make a big batch; they disappear fast!
Why You'll Love This Recipe
- Five-Ingredient Magic: I swear by this recipe because it’s that simple—just flour, yeast, water, salt, and oil. No fancy mixers or waiting hours; I mix it in a bowl while the coffee brews, let it rise once, and boom—fresh bread in under an hour.
- Crispy, Chewy Bliss: That perfect crust-to-soft-center texture? It’s all in the quick steam bath. The salt cuts through the dough’s richness, and the oil keeps it tender without tasting greasy—like a buttery, golden hug in every bite.
- Weeknight Workhorse: I make a batch on Sundays and freeze half. Toast it straight from the freezer for breakfast, pack it in lunches, or serve it warm with dinner. It’s the one thing I never skip planning for—no excuses.
- Budget-Friendly Staple: A single batch costs pennies and stretches for days. Split it with a neighbor, feed a crowd, or save the extras for sandwiches. Honestly, I’ve never felt guilty about buying flour again after this recipe.
Step-by-step instructions for Lebanon bread recipe
Here's how to craft perfectly chewy pita pockets with a fluffy exterior every single time.
👨🍳 Step 1: Activate the Yeast for Maximum Rise
In a large mixing bowl, combine the 1.5 cups warm water (about 110°F) with the 2.25 teaspoons active dry yeast. Let it sit for 5-10 minutes until you see plenty of bubbly foam forming on the surface—this tells you the yeast is alive and ready to work its magic. If it doesn't bubble, your yeast might be old, and you'll need to start over.
While waiting, I like to check the water temperature with a thermometer. Too hot and you'll kill the yeast; too cold and it won't activate properly. The 110°F mark is your sweet spot for that perfect rise. Once you see those bubbles, we're ready to build our dough.
👨🍳 Step 2: Mix and Knead the Dough to Develop Gluten
Add the 5 cups all-purpose flour and 1.5 teaspoons fine sea salt to the yeast mixture. Using a wooden spoon or dough whisk, stir everything together until you have a shaggy mass with a few dry spots remaining. This is normal—we're about to transform it.
Gradually add the 2 tablespoons vegetable oil while mixing. Then turn the dough out onto a lightly floured surface and knead vigorously for 8-10 minutes until smooth and elastic. You'll know it's ready when it springs back slowly when poked and doesn't stick to your fingers. The gluten development here is what gives pita its signature chewy texture.
⏰ Step 3: Let the Dough Rise Until Doubled in Size
Place the kneaded dough back into the bowl, lightly coat the top with a bit of oil, and cover with a clean kitchen towel. Let it rise in a warm spot for 1-2 hours until it has doubled in size. I usually put it near the oven with the light on—this creates a warm, cozy environment perfect for yeast activity.
Poke the dough gently with your finger. If it springs back slowly and leaves a slight indentation, it's ready. If it springs back quickly, give it another 30 minutes. The dough should be light, airy, and about 50% larger than when you started. This first rise is crucial for that perfect pita texture.
🍳 Step 4: Divide and Shape the Dough Balls
Punch down the risen dough to release any air bubbles, then turn it out onto a lightly floured surface. Divide it into 12 equal pieces (about 2 ounces each). Roll each piece into a smooth ball, then flatten slightly into a disc about ½-inch thick. I like to use my hands for this—it gives me better control over the shape.
Cover the shaped discs with the kitchen towel again and let them rest for 15-20 minutes. This short rest prevents the dough from shrinking when we stretch it later. The goal is to create those signature pocket-like shapes that make pita so versatile for stuffing.
🔥 Step 5: Cook the Pita on a Hot Surface
Preheat your oven to 475°F and place a baking sheet in there to get hot. While the oven heats, dust a clean surface with ½ cup cornmeal—this prevents sticking when we stretch the dough. Working with one disc at a time, stretch it into a 6-inch circle about ⅛-inch thick. Be gentle but firm—you want even thickness for even cooking.
Carefully transfer the stretched dough to the hot baking sheet. Bake for 3-4 minutes until the edges puff up dramatically and the bottom turns golden brown. Watch closely—they cook fast! Remove them and let them cool for 1 minute before transferring to a clean towel. The pockets should be fully formed and chewy inside with a soft, pillowy exterior.
Pro Tips For Making Lebanon Bread
- TEST THE YEAST FIRST: Skip the guesswork—mix 1 teaspoon yeast with ¼ cup warm water (110°F) and 1 tsp sugar, then wait 5-10 minutes for bubbles. If nothing happens, your yeast is dead, and you’ll waste dough. I learned this the hard way after making a second batch because I assumed the first batch’s failure was my fault.
- SALT THE WATER: Dissolve the fine sea salt directly in the warm water before mixing with flour—it dissolves faster and distributes evenly. I used to sprinkle it on top, and the dough always tasted unevenly salty in spots. A pinch in the water makes all the difference.
- KNEAD JUST ENOUGH: Stop kneading when the dough springs back slowly after poking it (about 8-10 minutes by hand). Overworking it makes Lebanon bread dense and chewy. I once kneaded for 20 minutes, thinking more was better—resulted in a brick, not bread.
- USE OIL SPARINGLY: Add only 1 tablespoon vegetable oil to the dough—any more makes it greasy and hard to shape. The oil should coat your fingers slightly when handling the dough, not leave a slick film. I skipped this rule once and ended up with sticky, unshapable dough that stuck to the pan.
Flavor customization for this lebanon bread
Herb-Infused Variations
Add fresh herbs to your dough for a fragrant twist. Mix in 2 tablespoons chopped parsley or 1 tablespoon dried za'atar directly into the flour before kneading. For a Mediterranean touch, try 1 teaspoon dried oregano or ½ teaspoon sumac—these complement the dough's natural flavors without overpowering.
I love using Penzeys za'atar blend for that signature Middle Eastern aroma. 🌿
Spiced Sweet Dough
Transform your pita into a sweet treat by adding 2 tablespoons honey or 1 tablespoon sugar to the dough along with the yeast. For warmth, incorporate ½ teaspoon ground cinnamon or ¼ teaspoon cardamom.
These work beautifully when baked and served with whipped yogurt or a drizzle of date syrup. The dough will have a subtle sweetness that pairs perfectly with savory fillings too.
Whole Wheat Adaptation
For a nuttier, heartier version, replace 2 cups all-purpose flour with whole wheat flour. The texture will be denser but still chewy. To compensate, add 1 extra tablespoon oil to the dough for moisture.
Whole wheat pita pairs wonderfully with spiced lamb dishes or eggplant-based mezze. I recommend Bob's Red Mill whole wheat flour for consistent results. 🌾
Cheesy Stuffed Pita
Create a hybrid flatbread by adding ½ cup shredded feta or mozzarella to the dough before shaping. Roll out the dough slightly thicker (⅜-inch) and bake as usual. The cheese melts during baking, creating pockets of gooey goodness.
This variation works especially well with grilled vegetables or spicy ground meat fillings. For extra flavor, sprinkle dried mint on top before baking.
Garlic and Olive Oil Twist
Enhance your pita's flavor by brushing the baked pockets with a mix of 1 tablespoon olive oil and 1 minced garlic clove while still warm. This adds a rich, garlicky depth that pairs perfectly with hummus or baba ganoush.
For a stronger garlic flavor, infuse the olive oil with 3-4 minced garlic cloves for 15 minutes before brushing. This technique elevates even the simplest pita into a gourmet experience. 🧄
Sesame Seed Crust
For a crunchy texture, press 2 tablespoons toasted sesame seeds onto the top of each dough ball before baking. The seeds will toast beautifully, adding a nutty contrast to the soft interior. This variation is inspired by manakeesh, a popular Lebanese flatbread.
I like to toast the sesame seeds in a dry pan over medium heat for 2-3 minutes until golden before pressing them onto the dough. 🌰
Nutrition facts
Frequently asked questions about Lebanese pita bread
Why does my Lebanese pita dough stick together?
Lebanese pita dough sticks when it's either too wet or not properly kneaded. The recipe calls for 1.5 cups water to 5 cups flour—measure carefully. If the dough feels too sticky, add 1-2 tablespoons more flour while kneading. Always knead for 8-10 minutes to develop gluten properly. For extra insurance, dust your surface with semolina instead of flour when shaping.
Can I make this recipe without a stand mixer?
This dough only requires 8-10 minutes of vigorous kneading by hand. Use a dough whisk first to combine ingredients, then turn it onto a floured surface. Push the dough away from you with the heels of your hands, fold it over, and repeat. Rotate the dough ¼ turn after each fold for even gluten development. The key is consistency—keep at it until the dough feels smooth and elastic.
What's the best way to reheat leftover pita?
For maximum softness, reheat in a 350°F oven for 5-7 minutes wrapped in foil with a damp paper towel. For quick results, microwave for 20-30 seconds between two damp paper towels. Never reheat uncovered—they'll dry out instantly. The steam method works best for restoring that signature chewy interior. Store leftovers in an airtight container between uses.
How do I get those perfect puffed pockets?
The secret lies in high heat and quick baking. Preheat your oven to 475°F with the baking sheet inside for 10 minutes first. When baking, watch closely—the edges should puff dramatically within 2-3 minutes. If they're not puffing, your oven may not be hot enough. For extra insurance, place a metal tray on the lower rack to reflect heat upward. The pockets form as steam builds inside during the rapid baking.
Can I substitute yeast with baking powder?
No, you can't substitute yeast with baking powder for this recipe. Yeast creates the signature chewy texture through fermentation, while baking powder would make a flat, dense bread. For a quick flatbread alternative, try manakeesh (Lebanese flatbread) which uses baking powder—but it won't have the same pocket structure or flavor. If you're short on time, you could make a no-yeast version with 1 tsp baking soda but expect a completely different texture.