
Desserts
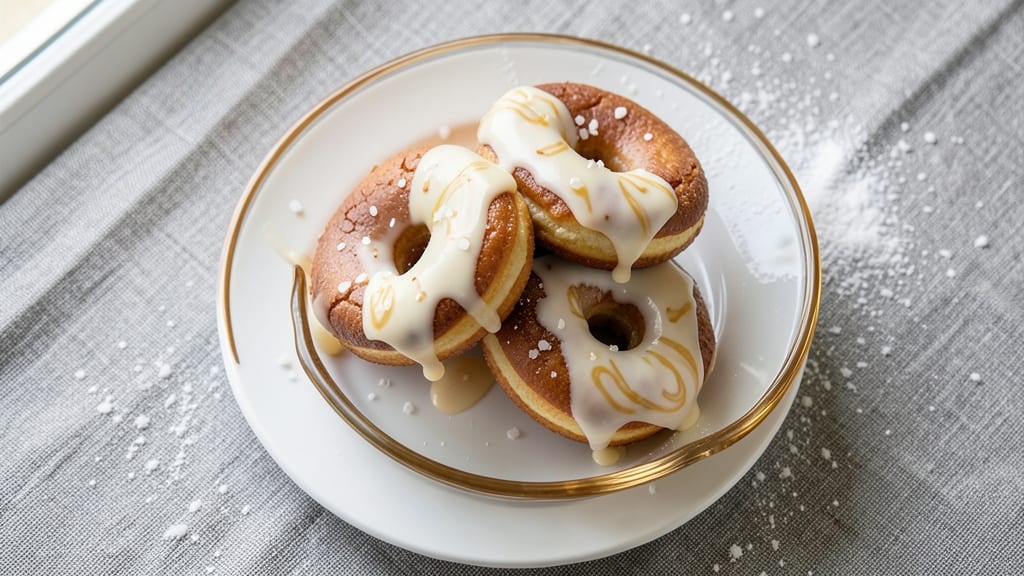
Icing filled donuts are the kind of dessert that turns a simple afternoon into a celebration—warm, fluffy dough wrapped around gooey icing that oozes out with every bite.
Standing on a step stool in my grandmother’s kitchen in Sicily, I learned how to balance crispy edges with pillowy centers, and this recipe brings that same magic to your kitchen.
The secret is patience: letting the dough rise just right and frying at the perfect temperature so the exterior gets golden while the inside stays tender.
This recipe delivers foolproof results with just a few key ingredients and a little time—about 30 minutes of active work, plus rising time. You’ll start with a simple yeast dough that’s light and airy, then fry it to golden perfection before injecting it with your choice of icing.
The contrast between the crispy shell and creamy filling is what makes these donuts irresistible, and I promise, once you try them, you’ll never go back to store-bought again.
Imagine biting into a warm donut, the icing melting over your tongue while the dough stays soft and fluffy inside. That’s the kind of dessert that makes people pause mid-bite, eyes wide with delight.
Whether you’re making them for a party or just treating yourself, this recipe is worth every minute—especially when you see that first donut come out of the fryer, golden and glistening, ready to be filled with your favorite icing.
Pro tip: Use a piping bag with a small tip to fill the donuts neatly, and don’t overfill—just enough so the icing peeks out when you bite in. Serve them warm with a sprinkle of powdered sugar or a drizzle of melted chocolate for the full experience. Let’s get started!
Ingredients for icing filled donut
Twelve ingredients. One magical dough. Perfect golden shells hiding pillowy centers—this is your donut game-changer.
| Ingredient | Amount | Notes |
|---|---|---|
| All-Purpose Flour 🌾 | 4 cups | Sifted for light texture |
| Granulated Sugar 🍚 | ½ cup | White or light brown |
| Instant Yeast 🍞 | 2 ¼ tsp | Active dry works too |
| Unsalted Butter 🧈 | ½ cup | Cold, cubed for dough |
| Large Eggs 🥚 | 2 whole | Room temperature preferred |
| Whole Milk 🥛 | ¾ cup | Warm for activation |
| Salt 🧂 | 1 tsp | Fine sea salt preferred |
| Vegetable Oil 🫒 | 3 cups | For frying, 350°F |
| Powdered Sugar 🍚 | 2 cups | For icing, sifted |
| Vanilla Extract 🌿 | 1 tbsp | Pure alcohol-free if preferred |
| Heavy Cream 🥛 | ½ cup | Cold for icing stability |
| Lemon Juice 🍋 | 1 tsp | Freshly squeezed |
The flour is non-negotiable here—King Arthur or Gold Medal make all the difference. I always grab the organic flour from Whole Foods when I can, but the regular grocery store stuff works fine too. The yeast? Fresh is best—check the expiration date, and if it's been sitting in your pantry for months, toss it. Warm the milk to about 110°F (like a warm bath) to activate the yeast. The butter should be cold—cut it into small cubes so it doesn't melt into the dough too fast. And don't skip the sifting—it keeps your donuts light and airy, not dense. Trust me, your grandma's kitchen magic starts here.
No powdered sugar? Confectioners' sugar from the store works, but if you're in a pinch, blend regular sugar in a food processor for a second. The vanilla extract can be imitation if that's what you've got, but pure extract makes a world of difference. Short on heavy cream? Whipped cream cheese works too, though it'll be slightly tangier. The lemon juice is key—it keeps the icing from getting grainy. If you don't have fresh, bottled lemon juice is fine. And for the oil? Peanut or canola oil both work—just keep it at 350°F for that perfect golden fry. No deep fryer? A heavy pot with 2 inches of oil does the trick.
The dough keeps for 24 hours in the fridge, covered tightly. The icing? Good for 3 days if stored in an airtight container. I like to make the dough the night before and let it rise overnight—saves time in the morning. Fry the donuts right before serving so they stay crispy. The icing can be made ahead, but fill the donuts just before eating so the shell stays crisp. And here's a pro tip: Keep a thermometer handy—the oil temp drops as you fry, so adjust the heat as needed. These donuts freeze beautifully too—fill and freeze them, then reheat in the oven for 5 minutes at 350°F.
Why You'll Love This Recipe
- No Yeast Hassle: I mix up the dough in my stand mixer while scrolling through my phone—no waiting for it to rise. The instant yeast gets it puffy and ready in under an hour, so I’m not stuck babysitting a bowl all morning.
- Creamy Sugar Bomb: That first bite of warm dough with the gooey vanilla icing inside? It’s like dessert meets breakfast without trying too hard. The butter-rich dough stays tender while the sugar filling melts just enough to make every bite feel special.
- Breakfast or Snack: Honestly, these work for anything. I keep a batch in the fridge for quick breakfasts, pack them in lunchboxes for kids (they disappear fast), and even serve them at brunch—no one judges when they’re this good.
- Budget-Friendly Staples: Flour, sugar, butter, eggs—these are the basics I already have. No fancy ingredients, no last-minute grocery runs. And the leftovers? They freeze like a dream, so I’m never scrambling for a last-minute treat.
Step-by-step instructions for icing filled donuts
Here's how to make perfectly fluffy donuts with a glossy glaze and pillowy centers.
Mix the Dough for Maximum Fluffiness
In a large bowl, combine the 4 cups all-purpose flour, 0.5 cup granulated sugar, 2.25 teaspoons instant yeast, and 1 teaspoon salt. Whisk everything together until you see no more flour pockets. This dry mix is your foundation for light, airy donuts.
In a separate bowl, melt the 0.5 cup unsalted butter in the microwave for 20 seconds or until just soft. Add the 2 whole large eggs, 0.75 cup warm whole milk, 1 tablespoon vanilla extract, and 1 teaspoon lemon juice. Whisk until completely smooth—this liquid mixture should be silky and homogeneous.
Pour the wet ingredients into the dry ingredients and stir with a wooden spoon until just combined. The dough will be shaggy at first, but don't overmix—you're looking for a soft, slightly sticky texture. When you press the dough with your finger, it should hold together but still feel tender.
Knead and Rest for Perfect Texture
Turn the dough onto a lightly floured surface and knead for 5-7 minutes until smooth and elastic. You'll know it's ready when it springs back slowly when poked. The dough should be soft but not sticky—add just enough flour if needed to prevent sticking.
Place the dough in a lightly greased bowl, cover with a damp towel, and let it rise in a warm place for 1 to 1.5 hours or until doubled in size. I like to place my bowl in a slightly warmed oven with the light on—this creates a perfect rising environment. The dough should feel light and airy when you press it gently with your finger.
Shape and Fry for Golden Perfection
Punch down the risen dough and turn it out onto a floured surface. Roll it to about ½-inch thickness and cut out 2-inch rounds using a donut cutter or glass. For filled donuts, cut a ½-inch hole in the center of each round using a smaller cutter or the handle of a spoon.
Heat 3 cups vegetable oil in a deep fryer or heavy pot to 350°F. Fry the donuts in batches for 1 to 2 minutes per side until they're golden brown all over. They should float in the oil and develop a crisp exterior while maintaining a soft center. Use a slotted spoon to remove them and drain on paper towels.
Prepare the Vanilla Cream Filling
While the donuts are still warm, prepare the filling by whisking together 2 cups powdered sugar, 0.5 cup cold heavy cream, and 1 tablespoon vanilla extract until smooth and glossy. The mixture should be thick enough to pipe but still flow easily—add a splash more cream if needed.
Use a piping bag fitted with a small round tip to fill the donuts through the holes. Be generous but not overflowing—you want a nice, even layer that will be completely enclosed when you seal the donuts. If you don't have a piping bag, a plastic bag with a small corner cut works perfectly.
Seal and Glaze for Showstopping Results
To seal the filled donuts, press the edges of the holes gently with your fingers while the filling is still soft. This creates a clean finish. Let the donuts cool for 5 minutes to set the filling.
For the glaze, whisk together the remaining 2 cups powdered sugar with 2-3 tablespoons warm water (or milk) until smooth. Drizzle generously over the cooled donuts, allowing the excess to drip down the sides for that classic donut look. The glaze should be thick enough to coat but still shiny—adjust with more powdered sugar if needed.
Pro Tips For Making Icing Filled Donut
- Let Yeast Bloom First: Mix the instant yeast with warm water and sugar before adding to the dry ingredients—wait 5 minutes until it bubbles. I learned this the hard way: skipping this step means your donuts rise slower and taste duller, like they’re holding back.
- Cut Butter Cold: Grate your unsalted butter (yes, grate it) and freeze it for 10 minutes before mixing into the dough. Cold butter creates flaky layers that stay intact when frying, so your donuts don’t turn into greasy blobs. Trust me, your future self will notice the difference.
- Test Dough Stiffness: The dough should hold its shape when pressed but still feel slightly tacky—not sticky, not dry. If it cracks when you press it, add 1 tablespoon flour at a time. If it sticks to your fingers, chill it 10 minutes. This isn’t the prettiest method, but it’s the tastiest.
- Fry in Batches of 3: Crowding the fryer lowers the oil temperature, leading to soggy donuts. Three at a time is the sweet spot—golden in 2-3 minutes, not 5. Use a slotted spoon to flip them once when the first side is deep brown. No, you can’t rush this.
Pro cooking tips for this recipe
Oil Temperature Control
This is the single most critical step for perfect donuts—maintaining oil at 350°F makes all the difference. I use a candy thermometer clipped to the side of my pot because oil cools as you fry. If your donuts brown too quickly, lower the heat slightly.
The ideal donut should float in the oil and turn golden in 1-2 minutes per side. Too hot? They'll burn outside before cooking through inside. Too cool? They'll be greasy and dense. 🌡️
Dough Thickness Matters
Roll your dough to a consistent ½-inch thickness—any thicker and the center won't cook properly, any thinner and the donuts will be too crispy. I use a rolling pin with measurement markings to ensure uniformity.
For filled donuts, cut a ½-inch hole in the center using a smaller cutter or even the handle of a spoon. The hole should be clean and even so the filling doesn't leak during frying. 🍩
Filling Technique
Pipe the filling while the donuts are still warm—this helps it set quickly and prevents leaks. I use a pastry bag with a ½-inch round tip, but a plastic bag with a tiny corner snipped works too. Fill each donut about ⅔ full—overfilling causes messy spills during sealing.
Press the edges gently with your finger to close the hole while the filling is still soft. Let them rest 5 minutes before glazing so the filling firms up slightly. 💫
Glaze Consistency
The glaze should coat the back of a spoon but still drip slightly when drizzled. Start with 2 tablespoons warm water for every 2 cups powdered sugar, then adjust as needed. Too thick? Add a splash more water.
Too thin? Whisk in more powdered sugar. I like to glaze the donuts right before serving so they stay crisp, but if you must make them ahead, store them in an airtight container with parchment paper between layers. 🍯
Donut Cutter Alternatives
No donut cutter? No problem. Use a glass (like a mason jar) for the outer circle and a smaller glass or thimble for the hole. A cookie cutter works too—just make sure it's clean and sharp. For extra flair, cut the dough into fun shapes like stars or hearts.
The key is consistency in thickness—½-inch is ideal for even cooking. I once used a plastic lid from a butter tub when I forgot my cutter, and it worked perfectly! 🎨
Frying Safety
Always fry donuts over a stovetop with a splatter guard or in a deep fryer with a lid. Keep a heat-resistant spatula and tongs nearby to avoid burns. Never leave the stove unattended—oil can ignite if it gets too hot.
I also keep a fire extinguisher within reach, just in case. For extra safety, place a metal bowl of water nearby to smother any grease fires.
When you're done frying, pour the oil into a heatproof container and store it in a cool, dark place for up to 1 month. 🔥
Nutrition facts
Frequently asked questions
Can I bake these donuts instead of frying them?
For baked versions, preheat your oven to 375°F and brush the cut-out donuts with oil before baking on a parchment-lined sheet for 10-12 minutes until golden. The texture will be slightly denser than fried, but still delicious. For filled donuts, bake first, then fill while still warm to prevent cracking.
How do I store leftover filled donuts?
Store filled donuts in an airtight container at room temperature for up to 2 days, separated by parchment paper. For longer storage, freeze them (filled and glazed) for up to 1 month. Reheat in a 350°F oven for 5 minutes to restore crispness. The glaze may need refreshing after freezing.
What's the best way to fill donuts without a piping bag?
Use a plastic bag with a tiny corner snipped off or a zip-top bag with the corner cut. Squeeze gently to fill each donut through the hole. For extra control, chill the filling slightly before piping to prevent leaks. If the filling oozes out during frying, your hole may be too large—aim for ½-inch diameter.
Can I make the dough ahead of time?
Yes! Make the dough up to 24 hours ahead and refrigerate it covered. Let it sit at room temperature for 30 minutes before shaping to make rolling easier. The cold dough will rise more slowly, so extend the rising time by 30-60 minutes. For best results, bring the dough to room temp before frying.
Why did my donuts turn out dense instead of fluffy?
Overmixing the dough or under-rising are the most common causes. Make sure your yeast is fresh and the milk is warm (110°F). Also check your oil temperature—if it's too cool (below 350°F), the donuts won't cook properly inside. For extra fluffiness, let the dough rise until it's doubled in size and springs back slowly when poked.