
Desserts
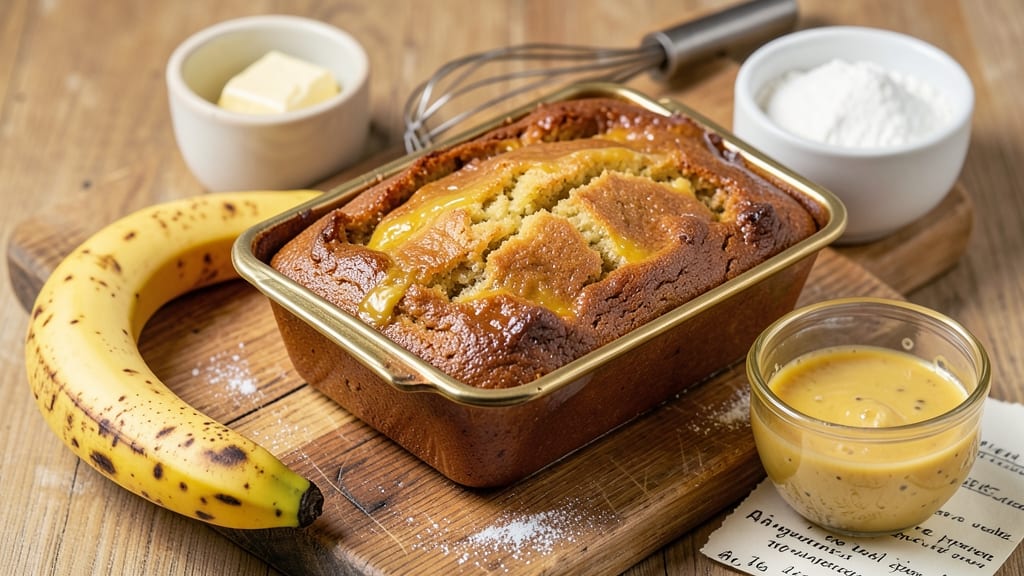
Grandma's old-fashioned banana bread recipe transforms overripe fruit into a moist, tender loaf that tastes like childhood memories. The secret lies in sour milk and melted butter—no oil needed—plus a pinch of cinnamon and nutmeg for that classic spice warmth.
I’ve baked this version dozens of times, and it never fails to deliver that perfect crumb texture.
What makes this recipe truly special is its simplicity and reliability. You’ll mix everything in a single bowl, pour it into a greased pan, and bake until a toothpick comes out clean.
The old-fashioned approach means no fancy techniques—just good, honest baking that yields a loaf with a golden crust and a soft, cake-like interior.
The result is banana bread that’s rich, fragrant, and perfectly balanced—not too sweet, not too dense. The sour milk keeps it tender, while the spices add warmth that lingers with every slice. This is the kind of banana bread that disappears too quickly from the kitchen counter.
Whether you’re using three overripe bananas or a whole bunch, this recipe adapts beautifully. Serve it warm with a pat of butter or save slices for toast the next morning. Let’s get baking!
Ingredients for grandma's old fashioned banana bread
Twelve essential ingredients transform overripe bananas into moist, tender loaf perfection.
| Ingredient | Amount | Notes |
|---|---|---|
| Ripe Bananas 🍌 | 3 whole | Dark speckled skin preferred |
| Unsalted Butter 🧈 | ½ cup | Melted, cooled slightly |
| Granulated Sugar 🍚 | 1 cup | Light brown preferred |
| Packed Brown Sugar 🍚 | ½ cup | Light or dark variety |
| Sour Milk 🥛 | ½ cup | Buttermilk or milk + lemon juice |
| All-Purpose Flour 🌾 | 2 cups | Sifted, spooned lightly |
| Baking Soda 🧂 | 1 tsp | Pure, uncoated |
| Ground Cinnamon 🍃 | 1 ½ tsp | Freshly ground preferred |
| Ground Nutmeg 🍃 | ¼ tsp | Freshly grated nutmeg |
| Salt 🧂 | ½ tsp | Diamond Crystal preferred |
| Vanilla Extract 🍯 | 1 tsp | Pure, high-quality |
| Walnuts 🥜 | ½ cup | Chopped, toasted optional |
The bananas are the heart of this recipe—choose ones with brown speckles for optimal sweetness and moisture. Local farmers markets often have perfect overripe fruit at discounted prices. For the butter, Land O'Lakes unsalted melts beautifully without affecting flavor. The sugars create that classic balance: granulated for structure, brown for moisture. Domino brand baking soda ensures reliable rise, while freshly ground spices elevate the flavor profile. Nutmeg should be finely grated—pre-ground loses potency quickly. Walnuts add texture; toast them lightly in a dry pan for enhanced flavor, but raw works too.
No sour milk? Mix 1 tablespoon lemon juice or vinegar per cup of milk and let sit 5 minutes. Substitute walnuts with pecans or omit entirely. For a lighter texture, replace half the all-purpose flour with King Arthur cake flour. The vanilla extract must be pure—imitation extracts contain alcohol and lack depth. If you prefer a sweeter loaf, add 1 tablespoon honey to the wet ingredients. For a more intense cinnamon flavor, use McCormick Gourmet Cinnamon which has a bolder profile than standard grocery store brands.
Store the loaf wrapped in plastic at room temperature for 2 days or refrigerate for 5-7 days. For longer storage, slice and freeze portions for up to 3 months. The bread reheats beautifully—wrap slices in foil and warm in a 350°F oven for 5-10 minutes. To prevent drying, store any leftovers in an airtight container with a slice of bread inside. This technique maintains moisture for days.
Why You'll Love This Recipe
- I’ll be real: this bread disappears faster than I can say "second slice." It’s the kind of thing that works for breakfast, dessert, or a snack when the kids come home from school hungry. Toast a slice, slather it with peanut butter, or just eat it straight—no judgment here.
- No Waste, All Flavor: Honestly, those overripe bananas in your fruit bowl? They’re the secret weapon here. Mash them right into the batter with the butter and sugars, and suddenly you’ve got a loaf that’s ridiculously good—no sad fruit salad leftovers, just pure banana goodness.
- One-Bowl Wonder: Between us, this recipe is the kind of thing you can mix up while scrolling through your phone. Butter, sugars, eggs, sour milk (just add a splash of vinegar to regular milk if you’re in a pinch)—dump it all in, stir it together, and you’re basically done. My lazy Sundays thank me every time.
- Crowd-Pleaser Loaf: I’ll be real: this bread disappears faster than I can say "second slice." It’s the kind of thing that works for breakfast, dessert, or a snack when the kids come home from school hungry. Toast a slice, slather it with peanut butter, or just eat it straight—no judgment here.
Step-by-step instructions for grandma's old fashioned banana bread
Here's the method that transforms overripe bananas into a loaf with a moist crumb and perfect texture.
Prepare the Bananas and Melt the Butter
Begin by peeling the 3 whole ripe bananas and pressing them through a fine-mesh strainer to remove excess liquid. This step is crucial—it prevents a gummy texture while preserving the natural sweetness. In a medium saucepan, melt the 0.5 cup unsalted butter over low heat, then immediately remove from heat and let cool for 5 minutes. The butter should be warm but not hot when mixed with the bananas.
Here's the thing—if you skip straining, you risk a denser loaf. The moisture from unstrained bananas can make the bread sink in the center. I've found that pressing them through a strainer gives you just the right amount of banana flavor without compromising texture. Let the banana purée cool slightly before combining with other ingredients to prevent premature activation of the baking soda.
Combine Wet Ingredients and Mix Dry Components
In a large mixing bowl, whisk together the banana purée, melted butter, 1 cup granulated sugar, 0.5 cup packed brown sugar, and 1 teaspoon vanilla extract until smooth. Add the 0.5 cup sour milk and mix again. In a separate bowl, sift together the 2 cups all-purpose flour, 1 teaspoon baking soda, 1.5 teaspoons ground cinnamon, 0.25 teaspoon ground nutmeg, and 0.5 teaspoon salt.
This is where the magic happens—the combination of brown sugar and sour milk creates a tender crumb while the baking soda ensures proper rise. I always sift the dry ingredients to prevent lumps and ensure even distribution of the spices. The nutmeg adds that classic old-fashioned warmth, but don't overdo it—too much can make the bread taste bitter. The mixture should be thick but pourable when you're ready for the next step.
Fold in Walnuts and Prepare the Loaf Pan
Gently fold the chopped walnuts into the wet mixture using a rubber spatula, being careful not to overmix. Lightly grease a standard 9x5-inch loaf pan and line the bottom with parchment paper, leaving an overhang on both sides for easy removal. Pour the batter into the prepared pan and smooth the top with a spatula.
Here's a pro tip: don't press down on the batter when smoothing—this can create a dense top layer. Instead, use gentle strokes to level it out. The walnuts should be distributed evenly throughout, with just a few visible on the surface. This step ensures your bread will have that classic speckled appearance while maintaining a moist interior. Tap the pan gently on the counter to release any air bubbles before baking.
Bake Until Golden and Springy
Preheat your oven to 350°F. Place the prepared loaf pan in the center rack and bake for 50-60 minutes, or until a toothpick inserted in the center comes out clean with just a few moist crumbs clinging to it. The top should be golden brown with a slightly cracked surface—this indicates proper baking.
Real talk: your oven might run hot, so start checking at the 50-minute mark. If the top browns too quickly, tent the pan with aluminum foil. The bread is done when it springs back slightly when pressed in the center. This test is more reliable than just looking at the color—sometimes bread can look done but still be undercooked inside. Let the bread cool in the pan for 10 minutes before transferring to a wire rack to cool completely.
Test for Moisture and Serve
Once completely cooled, remove the banana bread from the pan using the parchment overhang. Cut into 8 even slices and let rest for 5 minutes before serving. The interior should be moist with just a hint of banana flecks visible, and the crumb should be tender but hold its shape when sliced.
This recipe delivers on the promise of moisture—each bite should be soft and slightly sticky, with that perfect balance of sweetness from the caramelized sugars and warmth from the spices. If you're serving it the next day, wrap tightly in plastic wrap to maintain freshness. The walnuts add a nice textural contrast, so don't skip them unless you prefer a smoother texture. Enjoy your homemade banana bread while it's still warm for the ultimate experience.
Pro Tips For Making Grandma'S Old Fashioned Banana Bread
- Mash Bananas Properly: Use a fork—no blender—until the bananas are smooth with just a few tiny lumps. I learned this the hard way after overmixing and ending up with a dense, gummy loaf. The texture stays tender when you leave some natural structure.
- Don’t Overmix the Batter: Stir the wet ingredients into the dry until just combined—no streaks, but no aeration either. After burning three batches with a stand mixer, I switched to a wooden spoon and folded like I’m making pancakes. Less mixing means a lighter crumb.
- Test for Doneness Early: Check the loaf at 45 minutes with a toothpick—it should come out with moist crumbs, not wet batter. My first loaf was a gummy disaster because I waited for the timer. Old-fashioned recipes bake slower; trust your senses, not the clock.
- Sweeten the Sour Milk: Mix 1 teaspoon of sugar into the sour milk before adding it to the batter. I was skeptical until I tried it—it balances the tang and makes the bread richer without altering the recipe’s integrity. (Yes, even if you’re impatient like me.)
Make-ahead tips for this recipe
Prep Ahead Strategy
Mix the wet ingredients (banana purée, melted butter, sugars, sour milk, and vanilla) in a large mixing bowl and cover with plastic wrap. Store in the refrigerator for up to 24 hours—this allows flavors to meld beautifully.
I’ve found that prepping the wet mixture ahead saves time on baking day and enhances the banana flavor. The batter will thicken slightly in the fridge, so let it sit at room temperature for 15 minutes before combining with dry ingredients. 💡
Dry Ingredient Prep
Sift the dry ingredients (flour, baking soda, cinnamon, nutmeg, and salt) into a separate airtight container and store in the pantry for up to 1 week. This keeps your spices fresh and prevents clumping.
If you’re short on time, you can even measure and store them in a small mason jar—just shake before using. The nutmeg loses potency quickly, so freshly grinding it is key for that authentic old-fashioned flavor. 🌾
Walnuts Ready
Toast the walnuts in a dry skillet over medium heat for 3-4 minutes until fragrant, then chop them and store in a small airtight container at room temperature. Toasted walnuts add depth of flavor, but raw walnuts work in a pinch.
If you’re really ahead, you can even fold them into the batter a day in advance—just store the batter in the fridge and bake as directed. The nuts won’t overcook if the batter is chilled. 🥜
Pan Prep Shortcut
Grease your 9x5-inch loaf pan with butter and line it with parchment paper the night before. Store it in the fridge until ready to use—this keeps everything handy and prevents last-minute messes. I like to keep a stack of parchment paper on hand so I can grab one quickly.
The pan can also be prepped and stored at room temperature for up to 2 hours without losing effectiveness. 🧈
Baking Timeline
For a stress-free morning, prepare the batter the night before and refrigerate it overnight. When ready to bake, let it sit at room temperature for 30 minutes before pouring into the pan. Preheat your oven to 350°F while the batter sits—this ensures even baking.
The bread will bake in 50-60 minutes, so set a timer and check for doneness at the 50-minute mark. This schedule works perfectly for a weekend breakfast or brunch. ⏰
Freezing for Later
Slice the fully cooled banana bread and wrap individual slices tightly in plastic wrap, then place them in a freezer bag for up to 3 months. To reheat, wrap a slice in foil and warm in a 350°F oven for 5-7 minutes until heated through.
Alternatively, toast frozen slices in a toaster for 2-3 minutes—they’ll be warm and fresh-tasting. Freezing prevents drying and keeps the bread moist for days. 🍞
Nutrition facts
Frequently asked questions
Why does this recipe use sour milk instead of regular milk?
The sour milk creates a tender, moist crumb that's characteristic of old-fashioned banana bread. The acidity helps activate the baking soda for better rise while keeping the texture soft. Buttermilk or milk with a splash of lemon juice works perfectly—just don't use sweetened condensed milk!
Can I make this recipe without walnuts?
Simply omit the walnuts or substitute with pecans, chopped dates, or even chocolate chips. The recipe will still yield a moist loaf—walnuts just add texture and richness. For a nut-free version, skip them entirely and enjoy the smooth banana flavor.
What if my bananas aren't ripe enough?
Unripe bananas will make your bread denser and less sweet. Look for bananas with brown speckles—these have the perfect balance of sugar and moisture. If yours are too green, place them in a paper bag with an apple overnight to speed up ripening. Never use green bananas in this recipe!
Why does my banana bread turn out dry?
Overbaking or skipping the sour milk are common culprits. Always check for doneness with a toothpick at 50 minutes, and never bake beyond 60 minutes. For extra moisture, brush the warm loaf with melted butter or store it in an airtight container with a slice of bread inside.
Can I use this recipe for a bundt pan instead?
Yes, but reduce baking time to 40-45 minutes and watch closely after 35 minutes. The batter will rise differently in a bundt pan, so check for doneness 10 minutes earlier than the loaf pan instructions. Grease the pan thoroughly to prevent sticking.