
Breakfast & Brunch
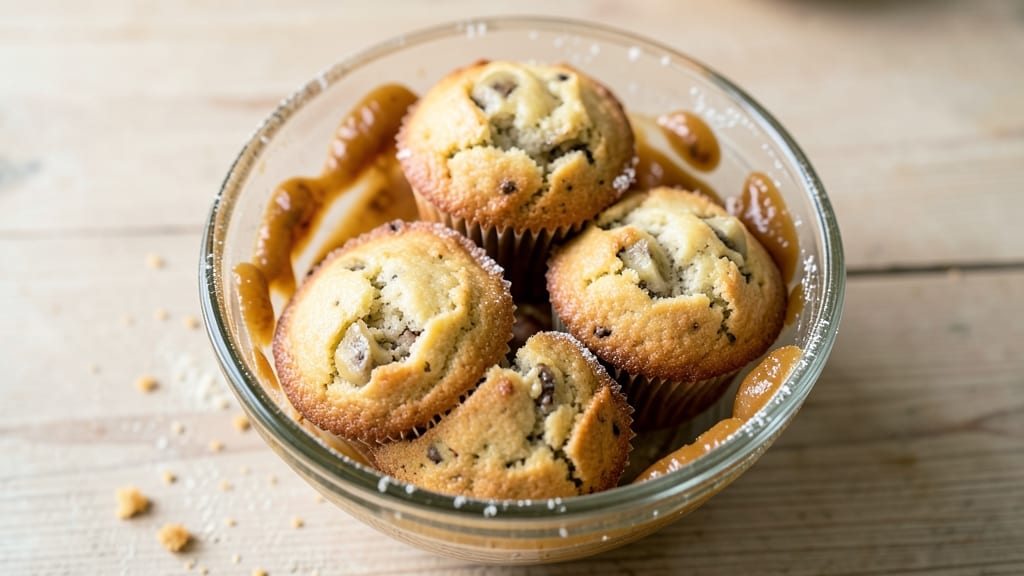
This easiest banana muffin recipe turns overripe bananas into moist, fluffy muffins with zero fuss—no mixer, no stress, just 20 minutes of hands-on time.
I perfected it after burning through three batches of dense, dry muffins, and now it’s the go-to recipe for busy mornings when I need breakfast on the table fast.
The secret lies in gently folding mashed bananas into the batter (no overmixing!) and using a foolproof baking powder blend that guarantees rise every time.
What makes this recipe truly beginner-friendly is the single-bowl method, which means fewer dishes and less cleanup. You’ll mix everything in one bowl—flour, sugar, baking powder, eggs, and of course, those ripe bananas—then let the oven work its magic.
No special equipment, no advanced techniques, just reliable results that taste like they came from a bakery. The muffins stay tender for hours, making them perfect for meal prep or grabbing on the go.
By the time they emerge from the oven, you’ll have golden, dome-topped muffins with a subtle caramelized edge and a crumb so light it practically melts. The texture is moist but not gummy, and the flavor is pure comfort—warm banana notes with just enough sweetness to satisfy.
Top with a sprinkle of cinnamon or a drizzle of honey if you’re feeling fancy, but honestly, they’re perfect as-is straight from the pan.
For those who love customization, try adding chocolate chips, chopped walnuts, or a swirl of peanut butter into the batter. Or, for extra indulgence, press a cinnamon-sugar streusel into the tops before baking. The recipe scales easily too—double or halve the batch to match your needs. Let’s get baking!
Ingredients for easiest banana muffin
Twelve simple ingredients for muffins that taste homemade—no mixer, no stress, just perfect morning magic.
| Ingredient | Amount | Notes |
|---|---|---|
| All-Purpose Flour 🌾 | 2 ½ cups | Sifted for best texture |
| Granulated Sugar 🍚 | 1 cup | White or light brown |
| Baking Powder 🍞 | 2 tsp | Double-acting preferred |
| Salt 🧂 | ½ tsp | Fine sea salt |
| Ripe Bananas 🍌 | 3 large | Mashed, ~1.5 cups total |
| Large Eggs 🥚 | 2 whole | Room temperature |
| Unsalted Butter 🧈 | ½ cup | Melted, full-fat |
| Vanilla Extract 🥛 | 1 tsp | Pure extract preferred |
| Milk 🥛 | ½ cup | Any kind works |
| Ground Cinnamon 🌿 | 1 tsp | For dusting tops |
| Semisweet Chocolate Chips 🍫 | 1 cup | Optional, for add-ins |
The bananas are your secret weapon here—black spots only. Grab a few from the back of your fruit bowl (the ones you’d normally toss). Whole Foods or Trader Joe’s usually have the ripest selection if you need to buy. For the flour, King Arthur or Bob’s Red Mill are my go-tos—they bake up lighter. The baking powder? Diamond Crystal is double-acting, so it’s the only kind I’ll use. If you’re short on time, just use what’s in your pantry, but measure it carefully—too much or too little throws off the rise.
No ripe bananas? Unripe ones won’t work—they need that natural sweetness and soft texture. Short on butter? Coconut oil or vegetable oil in a 1:1 swap keeps things moist, though butter gives that classic flavor. Vanilla extract is non-negotiable here—imitation stuff tastes like sad perfume. Milk can be any kind, even almond milk, but whole milk adds richness. For the chocolate chips, Ghirardelli or Enjoy Life are my picks, but any brand works. Pro tip: fold them in at the very end so they stay melty pockets in every bite.
These muffins keep for 3 days in an airtight container at room temperature, or 1 week in the fridge. Freeze them for 3 months by wrapping individually in parchment—just thaw overnight on the counter. I always make a double batch because they disappear fast. The best part? They reheat beautifully—30 seconds in the microwave brings them back to warm, gooey perfection. Leftovers? Toss them in a lunchbox or freeze for grab-and-go breakfasts.
Why You'll Love This Recipe
- No Mash Needed: I’ll admit, I used to panic over overripe bananas—until I realized you can just slice them straight into the batter. No food processor, no sticky mess, just chop and mix. That’s right: the only prep is peeling and cutting.
- Sweet-Spiced Magic: The sugar and baking powder team up to create this tender crumb, while the bananas add natural sweetness that doesn’t need extra syrup. Honestly, the first bite makes you wonder why you ever bought packaged muffins.
- Breakfast or Snack: These disappear fast—whether I pack them for lunch, toss one in my purse for a 3 PM crash, or serve them warm with coffee. (Yes, even on a Tuesday night.) The simplicity makes them work everywhere.
- Pantry Staple Power: Flour, sugar, and a pinch of salt? You’re already stocked. And since they keep for days (or freeze perfectly), I can bake a batch and forget about it. Budget-friendly doesn’t get much better than this.
Step-by-step instructions for easiest banana muffins
Here's how to make moist, flavorful banana muffins in one bowl with minimal effort.
Mash the Bananas Thoroughly
Start by peeling the 3 large ripe bananas and placing them in a large mixing bowl. Using a fork or potato masher, mash them until completely smooth with no visible lumps. You should end up with about 1.5 cups of mashed banana. The riper the bananas, the sweeter and more flavorful your muffins will be, but they should still be soft enough to mash easily.
Set the mashed bananas aside while you prepare the other ingredients. This step is crucial because well-mashed bananas create a tender crumb in your muffins. If you notice any large chunks, press them through a fine-mesh sieve to ensure a completely smooth texture.
Mix Wet Ingredients Together
In the same bowl with the mashed bananas, add the 0.5 cup unsalted butter (melted and slightly cooled) and the 0.5 cup milk. Stir to combine completely. Then add the 2 whole large eggs and the 1 teaspoon vanilla extract, mixing well after each addition. The mixture should be smooth and well incorporated.
Next, whisk in the 1 cup granulated sugar until fully dissolved. This creates a sweet base that balances the natural banana flavor. The mixture might look slightly curdled at first, but don't worry—it will come together as you add the dry ingredients. If you're using chocolate chips, fold them in now using a spatula to distribute them evenly throughout the batter.
Combine Dry Ingredients Gradually
In a separate bowl, whisk together the 2.5 cups all-purpose flour, 2 teaspoons baking powder, 0.5 teaspoon salt, and 1 teaspoon ground cinnamon. Sift the flour mixture directly into the wet ingredients in the mixing bowl. Using a spatula, gently fold everything together just until combined—you should still see some flour streaks.
Overmixing develops gluten, which can make your muffins tough instead of tender. Mix just until the dry ingredients are incorporated and the batter comes together. The batter will be thick but pourable. If it seems too thick, add an additional 1-2 tablespoons of milk to reach a smooth consistency that can be easily spooned into muffin cups.
Prepare and Fill Muffin Tins
Preheat your oven to 350°F. Line a standard 12-cup muffin tin with paper liners or lightly grease the cups with butter. Using a large spoon or ice cream scoop, divide the batter evenly among the muffin cups, filling each about 2/3 full. The batter should mound slightly above the cup edges—this is normal and will settle as it bakes.
Sprinkle a pinch of ground cinnamon over each muffin top for extra flavor and a decorative touch. This step is optional but adds a nice visual appeal and subtle cinnamon flavor. Don't skip preheating your oven—this ensures even baking and helps create that perfect dome shape on your muffins.
Bake to Golden Perfection
Bake the muffins for 18-22 minutes, or until a toothpick inserted into the center comes out clean. The tops should be golden brown with a slight crack in the center. Every oven is different, so start checking at the 18-minute mark. If the tops brown too quickly, tent the muffin tin with foil to prevent over-browning while the centers finish baking.
When the muffins are done, remove them from the oven and let them cool in the pan for 5 minutes. Then transfer them to a wire rack to cool completely. The muffins will firm up as they cool, making them easier to handle. Serve warm for the best texture, or store in an airtight container at room temperature for up to 3 days.
Pro Tips For Making Easiest Banana Muffin
- Mash Bananas Thoroughly: I learned this the hard way—lumpy banana bits sink to the bottom and leave your muffins looking like they’ve got a secret layer of fruit salad. Use a fork first to break them up, then press through a mesh strainer or mash with the back of a spoon until it’s smooth enough to drink. (Yes, I’ve done that too.)
- Weigh Your Flour: Scooping flour from the bag packs in air, and suddenly your muffins turn out dense instead of light. Use a kitchen scale and measure by weight—1 cup of all-purpose flour is actually 125 grams, not whatever you eyeball. Your future self will thank you when the muffins rise properly.
- Don’t Overmix the Batter: The second you start folding in the flour, stop when it’s just combined. Overmixing develops gluten, and your muffins will turn out tough instead of tender. A few lumps are fine—think of it as the muffin’s natural texture.
- Preheat Pan and Oven: Cold pans and ovens make muffins bake unevenly, leading to a gummy center or dry crust. Pop your muffin tin in the oven while it preheats (350°F/175°C), then add the batter immediately. The tin will heat up faster, and your muffins will bake through evenly—no more guessing if they’re done.
Pro cooking tips for this recipe
Banana Mashing Mastery
Never skip the thorough mashing of your bananas—this is where the magic happens for that signature moist texture. Use a fork or potato masher, but for extra smoothness, press the mashed bananas through a fine-mesh sieve to eliminate any lumps.
I’ve found that overripe bananas with black spots create the sweetest, most flavorful muffins—just avoid ones that are mushy or fermented. The goal is 1.5 cups of completely smooth purée, which blends seamlessly into the batter. 🍌
Batter Consistency Control
The secret to tender muffins lies in gentle folding, not vigorous mixing. Once you combine the wet and dry ingredients, stop mixing as soon as the flour disappears—overmixing develops gluten, leading to dense, tough muffins.
If your batter looks too thick, add 1-2 tablespoons of milk to loosen it. I test consistency by spooning a small amount onto a plate—it should slide off easily but still hold its shape. This balance ensures muffins that are light yet sturdy. 💪
Oven Temperature Precision
Your oven’s accuracy makes all the difference—350°F is non-negotiable for these muffins. Invest in an oven thermometer (like the Thermoworks Oven Thermometer) to confirm your oven isn’t running hot or cold.
If your muffins brown too quickly, tent the pan with foil after 12 minutes to prevent over-browning while the centers finish baking. The toothpick test is foolproof: insert it into the center, and if it comes out clean (or with a few moist crumbs), they’re done. 🌡️
Banana Substitutions
No ripe bananas? Try 1 cup unsweetened applesauce or 1 cup pumpkin puree for a similar texture, but reduce the sugar to ½ cup to balance sweetness. For a tropical twist, swap in 1 cup mashed mango—it adds a bright, fruity note.
I’ve also used 1 cup mashed sweet potato (with ½ tsp extra cinnamon) for a spiced variation. Just remember: the moisture level must stay consistent to avoid dry muffins. 🌿
Baking Powder Boost
Not all baking powders are created equal—Diamond Crystal is double-acting, meaning it releases gas twice: once when wet and again when heated. If you’re using another brand (like Arm & Hammer), check the box—some are single-acting and require ½ teaspoon extra for the same rise.
For extra fluffiness, add ¼ teaspoon baking soda to the dry ingredients, but don’t skip the baking powder entirely. This combo ensures muffins that are light, airy, and perfectly domed. ✨
Post-Bake Pro Tips
Let muffins cool in the pan for exactly 5 minutes—this helps them set slightly before transferring to a wire rack. For extra-crisp edges, brush the tops with melted butter right after baking.
To reheat, wrap muffins in a damp paper towel and microwave for 15-20 seconds to restore that warm, gooey texture. Store leftovers in an airtight container with parchment paper between layers to keep them fresh. 💡
Nutrition facts
Frequently asked questions
Can I use unripe bananas for this recipe?
No, this recipe relies on ripe bananas with black spots—they're naturally sweeter and softer, which creates the perfect moist texture. Unripe bananas won't mash properly and will make your muffins dense. If you're desperate, you could use 1 cup unsweetened applesauce as a substitute, but reduce the sugar to ½ cup to balance the sweetness.
Why did my muffins turn out dense instead of light?
Dense muffins usually happen from one of three things: overmixing the batter (which develops gluten), using unripe bananas, or not measuring ingredients accurately. The key is to fold the dry ingredients into the wet just until combined—stop as soon as the flour disappears. Also, make sure your baking powder is fresh (old baking powder loses its lift).
Can I make these muffins without eggs?
Yes! Replace the 2 eggs with 2 tablespoons ground flaxseed mixed with 6 tablespoons water (let it sit for 5 minutes to thicken) or ½ cup unsweetened applesauce. For best results, reduce the milk by 2 tablespoons to maintain the right moisture balance. The texture will be slightly different but still delicious.
How do I store banana muffins to keep them fresh longer?
Store them in an airtight container at room temperature for up to 3 days, or refrigerate for 1 week. For longer storage, freeze individual muffins wrapped in parchment paper for up to 3 months. To reheat, microwave for 15-20 seconds wrapped in a damp paper towel for that fresh-baked taste.
What's the best way to add chocolate chips without sinking?
Fold them in at the very end, right before spooning the batter into the muffin tin. Use a spatula to gently mix them in—this keeps them distributed evenly and prevents them from sinking to the bottom. For extra insurance, chill the batter for 10 minutes before baking, which helps the chocolate stay put.