Desserts
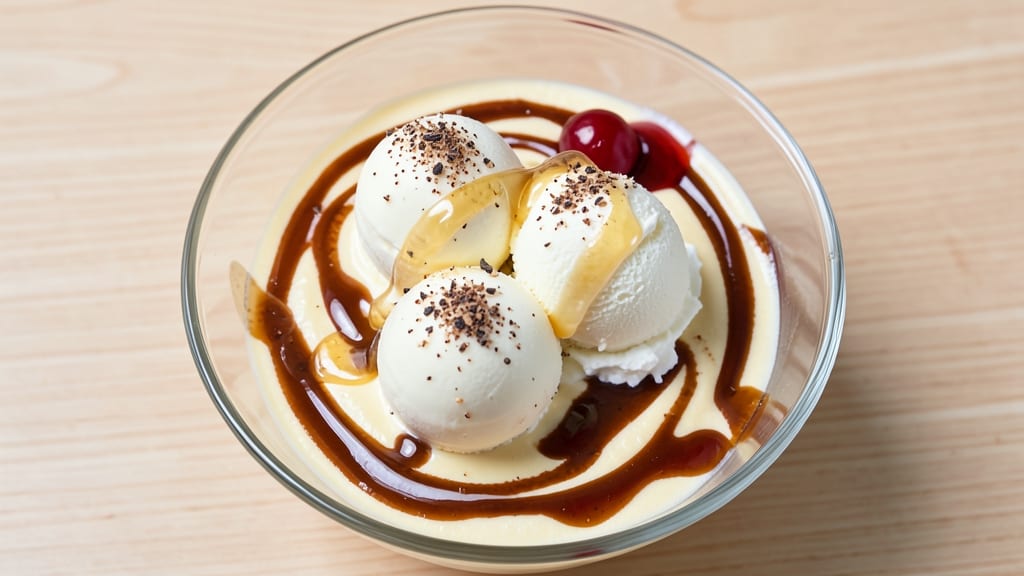
Creating Dr Pepper Ninja Creami ice cream at home delivers that nostalgic soda shop experience with a velvety vanilla base and bold swirls of authentic Dr Pepper flavor.
This isn't just any homemade ice cream—it's a dessert that captures the fizzy, caramelized essence of the soda itself, perfect for satisfying cravings without the guilt of store-bought versions.
The key lies in extracting the soda's flavor through a simple reduction process before churning it into creamy perfection with your Ninja Creami machine.
What makes this recipe stand out is its balance of simplicity and professional results. You'll need just a handful of ingredients—heavy cream, vanilla, sugar, and of course, Dr Pepper—and about 30 minutes of active time, with the rest handled by your ice cream maker.
The secret weapon? A concentrated soda syrup that delivers that signature Dr Pepper tang without overpowering the creamy texture. This method ensures every spoonful has that familiar soda kick while maintaining a smooth, restaurant-quality consistency.
The result is a creamy, dreamy ice cream with vibrant swirls of Dr Pepper that look as good as they taste. The vanilla base provides a smooth foundation, while the soda swirls add bursts of caramelized flavor that remind you of childhood soda fountain trips.
Whether you're serving it at a summer gathering or treating yourself to a nostalgic dessert, this recipe delivers professional-quality results with minimal effort. Ready to make your own? Let's get started with the ingredients.
For those who want to elevate it further, consider adding crushed peppermint candies or caramel drizzle for extra texture and visual appeal. The possibilities are endless, but the foundation—bold soda flavor in a creamy base—is what truly makes this dessert unforgettable.
This recipe isn't just about recreating a favorite flavor; it's about perfecting it at home.
Ingredients for dr pepper ice cream ninja creami
Just eight ingredients transform your Ninja Creami into nostalgic soda shop magic.
| Ingredient | Amount | Notes |
|---|---|---|
| Heavy Whipping Cream 🥛 | 2 cups | Full-fat for best texture |
| Granulated Sugar 🍚 | ¾ cup | White or brown preferred |
| Pure Vanilla Extract 🌿 | 2 tsp | High-quality, not imitation |
| Dr Pepper Soda 🥤 | 2 cups | Regular, not diet version |
| Unsalted Butter 🧈 | 2 tbsp | For swirl base |
| Light Corn Syrup 🍯 | ½ cup | For smooth texture |
| Salt 🧂 | ¼ tsp | Fine sea salt |
| Vanilla Bean Paste 🌿 | 1 tbsp | Optional for extra flavor |
| Crushed Peppermint Candies 🍬 | ¼ cup | Optional garnish |
The soda is the star, so grab Dr Pepper's classic version—not the diet kind. Costco or Walmart usually have it on sale, and you'll need two cups for the syrup. For the cream, full-fat heavy whipping cream is non-negotiable—it churns better and tastes richer. I like Land O'Lakes or Organic Valley for consistency. The vanilla matters too—Nielsen-Massey or McCormick pure extract keeps it authentic. Skip the imitation stuff, trust me. The corn syrup might surprise you, but it's what gives that professional ice cream texture—Karo is the brand I always use.
No Dr Pepper? Cherry Coke or root beer syrup works in a pinch, but you'll lose that signature caramelized flavor. Running low on corn syrup? Honey or agave at half the amount gets you close, though the texture might be slightly softer. The vanilla bean paste is optional but adds a depth that regular extract can't match—Gourmet Gift Baskets sells it in small jars. For the peppermint candies, Altoids or Life Savers work great, but crush them yourself for better texture. Want to skip the candies? A drizzle of caramel sauce before serving adds that soda shop touch without extra effort.
This ice cream keeps beautifully—up to 1 week in an airtight container. For best texture, let it sit out for 10 minutes before scooping. Freeze any extras for up to 3 months. I always make a double batch because it disappears fast. Store the soda syrup separately if you want to keep it around for other recipes—it's versatile stuff. The crushed peppermint candies? Keep them in a sealed container to prevent moisture loss, and they'll stay fresh for months.
Why You'll Love This Recipe
- No-Fuss Ninja Freeze: Honestly, this takes less effort than ordering takeout. Just whip the cream, fold in that creamy Dr Pepper syrup (yes, you can reduce the soda first), and toss it in the ice cream maker—no churning, no waiting hours. The butter keeps it rich without the headache of tempering eggs.
- Coke’s Cousin, Better: Between us, this isn’t just vanilla ice cream with soda in it. The caramel notes from the Dr Pepper cut through the sweetness like a perfect balance—smooth, slightly spiced, and with that just-a-hint-of-cherry magic. Add a sprinkle of crushed Oreos for texture, and it’s like a nostalgic hug in dessert form.
- Party Trick Ready: I’ve served this at BBQs, movie nights, and even as a very fancy dessert for my book club. No one bats an eye—it’s creamy, it’s fun, and you can make a gallon without breaking a sweat. Freeze it in a loaf pan for easy scooping, or let it soften slightly for a messy-but-loved sundae bar.
Step-by-step instructions for Dr Pepper Ninja Creami ice cream
Here's how to make this ultra-creamy soda ice cream with perfect swirls every time.
Whip the Cream and Butter Base
In a large mixing bowl, combine the 2 cups heavy whipping cream, 2 tbsp unsalted butter, and 0.25 tsp salt. Use an electric mixer to whip on medium-high speed until soft peaks form—about 3-4 minutes. The butter should be fully melted into the cream, creating a smooth, velvety texture.
This is where the magic starts. I like to scrape down the sides of the bowl with a rubber spatula every minute or so to make sure everything incorporates evenly. You want the mixture to be completely smooth and thick enough to hold its shape when you lift the bowl.
Sweeten and Flavor the Base
Add the 0.75 cup granulated sugar, 0.5 cup light corn syrup, 2 tsp pure vanilla extract, and 1 tbsp vanilla bean paste to the whipped cream mixture. Mix on low speed just until everything is fully combined—about 30 seconds. The sugar and corn syrup will help create that signature creamy texture while keeping the ice cream soft.
Here's the thing—don't overmix. You want to maintain those soft peaks from the whipping stage. The mixture should look like thick, glossy pudding at this point. If it starts to look grainy, give it another 10 seconds on low speed to smooth it out completely.
Prepare the Dr Pepper Swirl
In a separate bowl, gently mix the 2 cups Dr Pepper soda with the 0.25 cup crushed peppermint candies until the candies are evenly distributed. This mixture will create those iconic swirls throughout your ice cream. I like to use a spoon to stir just until combined—no need to crush the candies further, just make sure they're dispersed evenly.
This step is crucial for that perfect balance of soda flavor and candy texture. The peppermint candies add a fun crunch that contrasts beautifully with the creamy base. Keep this mixture ready—you'll need to add it to the ice cream base while it's still soft.
Combine and Freeze for Perfect Texture
Gently fold about half of the Dr Pepper mixture into the cream base using a spatula, being careful not to deflate the whipped cream. Then, fold in the remaining soda mixture until just combined. The ice cream should look marbled with swirls of brown soda throughout.
Pour the mixture into a loaf pan or airtight container, pressing down gently to eliminate air bubbles. Cover with plastic wrap, pressing it directly onto the surface to prevent ice crystals. Freeze for at least 6 hours, preferably overnight. This long freeze time ensures the perfect creamy texture without being too hard.
Serve with Style
When ready to serve, let the ice cream sit at room temperature for 5-10 minutes before scooping. This makes it easier to serve without getting ice cream stuck to your scoop. The finished product should be ultra-creamy with beautiful swirls of Dr Pepper throughout, and those peppermint candies will add a delightful crunch with every bite.
For the best experience, serve immediately in small scoops. The contrast between the cool, creamy base and the fizzy soda swirls makes this a showstopper dessert that's perfect for any occasion. Enjoy!
Pro Tips For Making Dr Pepper Ice Cream Ninja Creami
- CHILL THE SODA FIRST: Grab a can of Dr Pepper straight from the fridge—room temperature soda loses its fizz fast when mixed with cold cream. I learned this the hard way after my first batch turned out flat and fizzy. Pop it in the freezer for 10 minutes if you’re impatient, but don’t let it get slushy.
- WHIP CREAM TO STIFF PEAKS: Stop mixing the moment the cream holds a peak when you lift the whisk—no more, no less. Overwhipping turns it buttery, and underwhipping means your ice cream won’t set properly. I used to eyeball it and ended up with grainy texture every time. A quick stab test with a knife tells you when it’s ready.
- USE COLD BUTTER FOR SMOOTHNESS: Take the unsalted butter straight from the fridge and cut it into small cubes before mixing. Cold butter blends in without melting into greasy streaks, which ruins the creamy texture. I was skeptical until I tried it—now my batches look and taste like store-bought.
- STIR IN SODA LAST: Fold the Dr Pepper into the whipped cream mixture after everything else is combined. Adding it early makes the sugar dissolve unevenly, leading to clumps. Do it gently with a spatula—this isn’t a smoothie, and you don’t want to deflate the air bubbles.
Common mistakes when making this dish
Overwhipping the Cream
One of the most common mistakes is overwhipping the cream base, which can turn your ice cream into butter. I’ve seen this happen when people whip the cream beyond soft peaks, especially when adding sugar and syrup. The goal is to reach stiff peaks—not butter.
If your cream starts to look grainy or curdle, you’ve gone too far. To avoid this, whip just until soft peaks form, then mix the other ingredients gently on low speed for only 30 seconds. 🥛
Skipping the Soda Reduction
Some recipes call for just mixing Dr Pepper directly into the ice cream, but that leads to a watery, fizzy mess. The key is reducing the soda first to concentrate its flavor.
Simmer 2 cups Dr Pepper in a saucepan over medium heat for 10-12 minutes until it reduces to about ½ cup. This step ensures rich, bold flavor without making the ice cream icy. If you skip this, your ice cream will taste weak and fizzy. 🥤
Poor Swirl Integration
Folding the Dr Pepper mixture into the cream base too aggressively can deflate the whipped cream, leading to a dense, icy texture. Instead, use a spatula to gently fold in the soda mixture in two batches, alternating between the cream and soda.
Think of it like folding in batter—just until combined. Overmixing here ruins the creamy consistency. I like to rotate the bowl while folding to create even swirls. ✨
Freezing Too Quickly
Rushing the freezing process is a surefire way to end up with rock-hard ice cream. The mixture needs time to set properly. Freeze for at least 6 hours, but overnight is ideal.
If you’re short on time, place the container in the freezer for 2 hours, then transfer it to the coldest part of your freezer for the remaining time. Skipping this step leads to ice crystals and a grainy texture. Patience pays off here! ❄️
Ignoring the Resting Time
Letting the ice cream sit at room temperature for 5-10 minutes before scooping might seem trivial, but it’s crucial. This step ensures the ice cream softens slightly, making it easier to serve without clumping.
If you scoop it straight from the freezer, you’ll struggle with a solid block, and the texture will suffer. I always set a timer to remind myself—it’s worth the wait! ⏰
Using Diet Dr Pepper
This is a dealbreaker. Diet Dr Pepper lacks the caramelized sweetness and depth of the original, so your ice cream will taste flat and artificial. Stick to the regular version—it’s the only way to capture that nostalgic soda shop flavor.
If you’re concerned about sugar, reduce the granulated sugar in the recipe by 2 tablespoons to balance the sweetness. Trust me, the flavor difference is night and day. 🚫
Nutrition facts
Frequently asked questions
Can I make this without a Ninja Creami machine?
Yes! While the Ninja Creami machine creates ultra-smooth texture, you can make a similar version in an ice cream maker. Churn the mixture for 20-25 minutes until thick and creamy. For no-churn options, freeze the mixture in a loaf pan for 6+ hours, stirring with a fork every 1 hour to break up ice crystals. The texture won't be as silky, but it'll still taste delicious.
How do I store leftover Dr Pepper ice cream?
Transfer to an airtight container and store in the freezer for up to 1 week for best quality. For longer storage, freeze for 3 months. To prevent freezer burn, press plastic wrap directly on the surface before sealing. Thaw in the fridge overnight before serving.
Can I use other sodas instead of Dr Pepper?
Try Cherry Coke, root beer, or even orange soda for different flavor profiles. The reduction technique works best for carbonated sodas with caramel notes. For citrusy sodas like Sprite, reduce the sugar by 1-2 tablespoons since they're sweeter. The key is balancing the soda's natural sweetness with the ice cream base.
Why does my ice cream turn icy after freezing?
This happens when air bubbles form during freezing or the mixture wasn't properly combined. To fix it, press plastic wrap directly on the surface before freezing to minimize air exposure. For future batches, ensure all ingredients are at room temperature before mixing and fold the soda mixture gently to avoid incorporating air. If already icy, let it sit at room temperature for 10 minutes to soften slightly before scooping.
What's the best way to serve this ice cream?
For a restaurant-style presentation, serve in waffle cones with a drizzle of caramel sauce and crushed peppermint candies on top. For adults, add a splash of Dr Pepper syrup or a cherry on top. Keep it cold by pre-chilling your serving dishes in the freezer for 10 minutes before adding the ice cream. The contrast of warm caramel with cold ice cream makes it even more indulgent!