Snacks
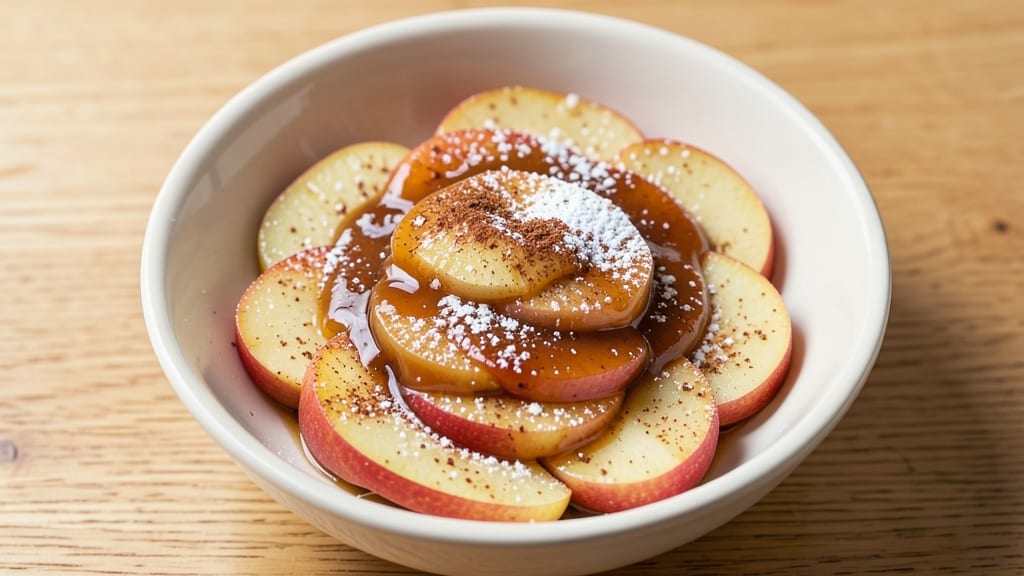
This dipped apples recipe turns ordinary fruit into a caramelized cinnamon crunch in just 15 minutes—no fancy tools or baking skills needed. This recipe starts with crisp apple slices tossed in a warm cinnamon-sugar mixture that creates an irresistible texture contrast: tender fruit paired with a sweet, spiced crust.
I developed it after years of perfecting the balance between quick cooking and restaurant-quality flavor, ensuring every bite delivers that satisfying crunch without sacrificing natural sweetness.
The secret lies in the two-stage process: first, a quick dip in melted butter and cinnamon-sugar while hot, then a final toss in powdered sugar for that signature crunch. You'll use firm apples like Honeycrisp or Fuji, sliced into even rounds to ensure consistent cooking.
The result is a snack that feels indulgent yet stays light enough for an afternoon treat or dessert alternative. This method works equally well with whole apples for a handheld version or sliced for sharing.
What you'll end up with is a platter of golden-brown apples with crispy edges and tender centers, their aroma filling your kitchen with warm cinnamon notes. The caramelized sugar creates a delicate crust that shatters with each bite, revealing juicy apple underneath.
Serve immediately for maximum crunch or store briefly in the fridge for a quick, satisfying snack when cravings strike. This recipe proves you don't need complexity to create something extraordinary.
For variations, try swapping the cinnamon-sugar for a savory mix of smoked paprika and parmesan, or experiment with chocolate dipping for a decadent twist. The technique remains the same—just adjust the seasonings to match your taste preferences.
Whether you're prepping for a party or satisfying an afternoon sweet tooth, this method delivers professional results in record time.
Ingredients for dipped apples
Firm apples, rich butter, and aromatic spices transform into irresistible caramelized bites in minutes.
| Ingredient | Amount | Notes |
|---|---|---|
| Honeycrisp Apples 🍎 | 2 lb | Firm, cored, sliced into 1/4-inch rounds |
| Unsalted Butter 🧈 | ½ cup | Cold, cubed for even melting |
| Granulated Sugar 🍚 | 1 cup | Superfine preferred for smoother coating |
| Ground Cinnamon 🌿 | 3 tbsp | Freshly ground for optimal aroma |
| Powdered Sugar 🍚 | ½ cup | For final crispy coating |
| Lemon Juice 🍋 | 1 tbsp | Freshly squeezed to prevent browning |
| Diamond Crystal Kosher Salt 🧂 | ¼ tsp | Fine grain for balanced flavor |
| Vanilla Extract 🥛 | ½ tsp | Pure, high-quality vanilla |
| Heavy Cream 🥛 | ¼ cup | Optional for richer caramelization |
The Honeycrisp apples are non-negotiable for this recipe—their crisp texture and balanced sweet-tart flavor create the perfect canvas for the cinnamon-sugar crust. Local farmers markets or specialty grocers often carry them at peak season, but any firm variety like Fuji or Gala will work in a pinch. Avoid soft or mealy apples, as they won't hold their shape during the dipping process. For optimal results, slice the apples just before dipping to prevent browning. The unsalted butter should be cold when cubed—this ensures even melting and prevents the sugar from clumping. Plugrá or Land O'Lakes brands are reliable choices for consistent quality, though European-style butter like Kerrygold will elevate the flavor profile if available.
No superfine sugar? Pulse regular granulated sugar in a food processor for 10-15 seconds to achieve a similar texture. Running short on cinnamon? Nutmeg or cardamom at half the amount adds warmth without overpowering, though traditionalists may argue it's not the same. The lemon juice serves a dual purpose—it prevents browning while adding a subtle brightness that cuts through the sweetness. For a richer caramelization, the heavy cream creates a glossy finish, though it's optional for those watching fat content. If substituting apples, pears or Asian pears work well but require slightly less cooking time due to their softer texture.
Prepared apples should be served immediately for maximum crunch, though they'll hold their texture for up to 2 hours at room temperature if stored in a single layer on a wire rack. For make-ahead convenience, assemble the cinnamon-sugar mixture and store it in an airtight container for up to 1 week, then toss the apples in it just before serving. The finished dips keep their crisp edges for 3-4 days in the refrigerator when stored between layers of parchment paper. For a party platter, arrange them on a parchment-lined tray and chill for 10 minutes before serving to enhance the caramelized effect.
Why You'll Love This Recipe
- No-Core Chopping Needed: I swear by Honeycrisp apples for this—tender enough that you don’t even need to slice all the way to the center. Just quarter them, and you’re halfway done before the butter’s even melted.
- Butter-Sugar Magic: That first bite? Warm apples with a caramelized butter-sugar crust, then dusted with cinnamon—it’s like dessert hugs you. The powdered sugar finish? Pure, effortless elegance.
- Breakfast or Snack Hero: Honestly, I make these for both. Serve them warm with yogurt in the morning, or pack them cold for lunch. The cinnamon keeps them interesting, so they never feel like a repeat.
- Leftovers? Still Amazing: Between us, I’ve reheated these apples three days later and they’re still just as good. The butter keeps them moist, and the sugar crust stays crispy—no sad, dry fruit here.
Step-by-step instructions for caramelized cinnamon dipped apples
This method delivers perfectly balanced sweetness, warm spice, and crispy texture every time.
Prepare the Apples for Even Cooking
Peel and core the 2 lb honeycrisp apples, then slice them into even ¼-inch rounds using a mandoline or sharp knife. The uniform thickness ensures consistent caramelization. Immediately place the sliced apples in a large bowl and toss with 1 tablespoon lemon juice—this prevents browning while you work.
Arrange the apple slices in a single layer on a parchment-lined baking sheet. You want them to touch lightly but not overlap completely, allowing the caramel to flow between slices. Preheat your oven to 375°F while you prepare the next components. This temperature creates the ideal balance between quick caramelization and gentle cooking of the apple flesh.
Create the Caramel Base
In a medium saucepan, melt the ½ cup unsalted butter over medium heat until completely liquid. Add the 1 cup granulated sugar and 3 tablespoons ground cinnamon, stirring constantly for 2 minutes until the sugar dissolves and the mixture becomes smooth. Here's where it gets crucial: remove the pan from heat and immediately whisk in the ½ teaspoon vanilla extract and ¼ teaspoon diamond crystal kosher salt.
Return the pan to low heat and let the mixture simmer gently for 3 minutes, stirring occasionally. You're looking for a thick, glossy caramel that coats the back of a spoon. If it thickens too quickly, add 1 tablespoon water to loosen it slightly. The optional ¼ cup heavy cream can be whisked in now for a richer caramel, but only if you're using it—this step creates the foundational flavor that will coat every apple slice.
Dip and Arrange for Perfect Caramelization
Working quickly, use a fork to lift each apple slice and dip it into the caramel mixture, ensuring complete coverage on all sides. Return the dipped apples to the baking sheet in a single layer, slightly overlapping if needed. The caramel should be thick enough to cling to the apples without dripping excessively. Place the baking sheet in the preheated oven for 8-10 minutes, until the edges of the apples begin to bubble and the caramel turns a deep amber color.
Watch closely during this time—overcooking will burn the caramel while undercooking leaves it sticky. Rotate the baking sheet halfway through if your oven has hot spots. The apples should be tender when pierced with a knife but still hold their shape. Remove from the oven and let cool for 5 minutes before proceeding to the final coating.
Add the Crispy Powdered Sugar Coating
In a shallow dish, combine the ½ cup powdered sugar with the remaining ¼ teaspoon diamond crystal kosher salt. While the apples are still warm, gently roll each piece through the powdered sugar mixture, pressing lightly to adhere. This creates the signature crispy exterior that contrasts beautifully with the soft, caramelized apple underneath. Work quickly as the apples cool and the coating may become less effective.
Arrange the finished apples on a wire rack set over a baking sheet to catch any excess sugar. Let them cool completely for 10 minutes before serving. The contrast between the warm, spiced caramel center and the cool, crispy exterior is what makes these apples truly special. Serve immediately while the caramel is still glossy and warm, or store in an airtight container for up to 3 days—though they're best enjoyed fresh.
Pro Tips For Making Dipped Apples
- CUT APPLES EVENLY: Honeycrisp apples have a core that’s trickier to slice than you’d think—use a mandoline or sharp knife, and cut parallel to the table (not the apple’s natural angle) for uniform thickness. Uneven pieces mean some burn while others stay raw.
- USE ROOM-TEMP BUTTER: Cold butter clumps into lumpy sauce—soften it in the microwave for 10 seconds (yes, even if it’s just slightly warm) before mixing with sugar and cinnamon. The sauce will coat the apples smoothly, not cling in greasy globs.
- SKIP THE OVERCROWDED PAN: Tossing apples in a single layer (even if it takes two batches) guarantees they caramelize, not steam. I learned this the hard way—crowded pans turn the butter into a sad, buttery soup instead of golden, crispy bites.
- SWAP POWDERED FOR GRANULATED: Powdered sugar makes the topping look fancy but dissolves into mush when warm. Use granulated sugar instead—it clings to the butter better and gives those dips a satisfying crunch when chilled. (Save the powdered sugar for dusting after.)
Creative variations of this recipe
Spiced Caramel Variations
Swap the cinnamon for 2 tbsp smoked paprika and 1 tsp cayenne for a smoky-sweet twist that pairs perfectly with sharp cheddar. I use Monte Cristo smoked cheddar for that deep, nutty flavor—it melts beautifully into the caramel while adding a savory depth.
For a Middle Eastern-inspired version, replace cinnamon with 1 tbsp ground cardamom and 1 tsp orange zest, then finish with a sprinkle of toasted pistachios for crunch. 🌶️
Chocolate-Dipped Luxury
For a decadent dessert version, melt 8 oz dark chocolate (I recommend 70% Valrhona) with 2 tbsp heavy cream until smooth, then dip whole apples or slices halfway. Let the chocolate set at room temperature for 20 minutes, then roll in crushed pecans or sea salt flakes.
This method works best with Rome apples—their firm texture holds up better to the chocolate coating. Store in the fridge for up to 5 days in an airtight container.
Savory Herb Crust
Transform this into a savory snack by tossing the apples in a mix of 2 tbsp olive oil, 1 tbsp fresh thyme, 1 tsp garlic powder, and ½ tsp black pepper. After baking, sprinkle with grated parmesan and everything bagel seasoning for a brunch-worthy bite.
I love serving these with whipped goat cheese for dipping—it cuts through the richness beautifully. This version keeps well for 3 days refrigerated and reheats perfectly in a 350°F oven for 5 minutes.
Tropical Fruit Fusion
Swap apples for mango or pineapple slices (peeled and dried slightly) and use a dipping mix of ½ cup brown sugar, 1 tbsp lime zest, and ½ tsp chili powder. The natural sweetness of the fruit balances the heat, creating a perfect balance.
For extra flair, add toasted coconut flakes to the powdered sugar coating. This tropical version is a crowd-pleaser at summer parties and holds its texture for up to 4 days when stored properly. 🌴
Boozy Caramel Upgrade
Infuse the caramel with 2 tbsp bourbon or 1 tbsp Grand Marnier while simmering for a sophisticated twist. The alcohol burns off quickly, leaving behind rich, warm notes that elevate the flavor profile. I recommend Maker's Mark bourbon for its deep caramel undertones.
For a non-alcoholic version, use 2 tbsp apple cider instead—it adds a subtle tartness that complements the sweetness. This enhanced caramel works equally well with all variations above. 🥃
Kid-Friendly Fruit Leather
For a fun, interactive version, spread the caramel mixture thinly on a parchment-lined baking sheet and arrange apple slices in a single layer. Bake at 350°F for 10 minutes until the caramel sets slightly, then roll the whole sheet into a log.
Chill for 1 hour, then slice into "fruit leather" strips. Kids love assembling their own dips by rolling apple slices in the caramel and sugar mix—it’s a great way to get them involved in the kitchen! 🍎✨
Nutrition facts
Frequently asked questions
Can I use whole apples instead of slices?
For handheld treats, core whole apples and make a small slit near the stem to help the caramel penetrate. Dip them halfway and place on a rack to set. Whole apples work best with firm varieties like Honeycrisp or Granny Smith, and they create a fun, easy-to-hold snack perfect for parties.
Why did my caramel turn grainy?
Grainy caramel usually means the sugar didn't dissolve completely or the mixture cooled too quickly. Stir constantly while heating and remove from heat just before it reaches a smooth consistency. If it happens, whisk in 1 tsp water and reheat gently to restore smoothness. Always use superfine sugar or pulse regular sugar in a food processor first for best results.
How do I make this recipe vegan?
Replace the butter with ½ cup coconut oil (melted) and use ¼ cup coconut cream instead of heavy cream. For the final coating, swap powdered sugar for confectioners' sugar made from coconut sugar. The flavor will be subtly different but still delicious. All other ingredients remain the same.
Can I prepare this ahead of time?
Yes, but with a few adjustments. Make the cinnamon-sugar mixture ahead and store it in an airtight container for up to 1 week. For the apples, slice them just before dipping to prevent browning. Assemble the dips completely and refrigerate for up to 3 days—they'll lose some crunch but still taste great. For maximum crispiness, reheat in a 350°F oven for 5 minutes before serving.
What's the best apple variety for dipping?
Firm, crisp varieties work best: Honeycrisp, Fuji, or Granny Smith hold their shape during cooking. Avoid soft apples like Gala or Red Delicious—they'll turn mushy. For extra tenderness, use Braeburn or Jonagold, but they require slightly less baking time. The key is balancing sweetness and firmness for that perfect bite.