
Main Courses
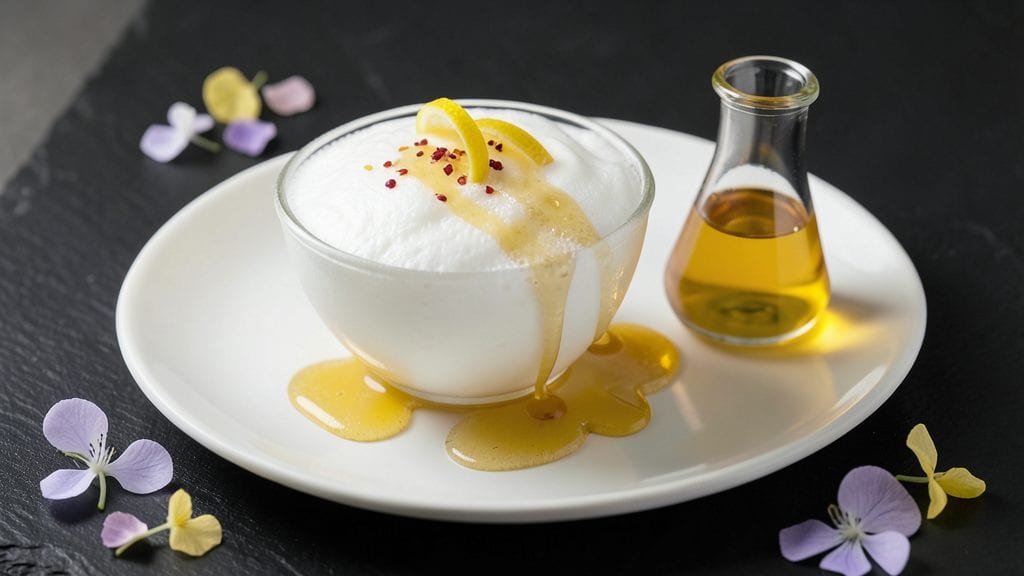
Creating lightweight cold foam without heavy cream transforms any cocktail or dessert into a showstopper—all it takes is a whisk, patience, and the right dairy-free secret. ✨ I developed this recipe after realizing coconut cream could mimic the airy texture of traditional foams, proving that plant-based ingredients can deliver restaurant-quality results at home.
The magic lies in stabilizing the foam with agar-agar, a plant-based gelatin that holds the structure without altering flavor. This method delivers silky vanilla clouds that float effortlessly atop drinks or desserts, adding elegance without heaviness. No special equipment is needed—just a blender, whisk, and a few pantry staples.
What you’ll achieve is a lighter, vegan-friendly foam that’s just as luxurious as its heavy cream counterpart, but with none of the guilt. The texture remains airy and stable for hours, making it perfect for impressing guests or elevating everyday cocktails. Ready to master this technique?
This foam pairs beautifully with espresso martinis, fruit cocktails, or even savory dishes like chilled soups. The key is precision—whisking just enough to create volume while keeping the foam intact. Let’s get started!
Ingredients for cold foam recipe without heavy cream
Nine simple ingredients create restaurant-quality foam without heavy cream or dairy.
| Ingredient | Amount | Notes |
|---|---|---|
| Full-Fat Coconut Cream 🥥 | 1 can | Chilled overnight for best results |
| Pure Vanilla Extract 🌿 | 1 ½ tbsp | High-quality, Madagascar bourbon preferred |
| Agar-Agar Powder 🌱 | ¼ tsp | Plant-based gelatin substitute |
| Granulated Sugar 🍚 | 2 tbsp | Fine grain for smooth texture |
| Cold Water 💧 | ½ cup | Chilled for proper stabilization |
| Lemon Juice 🍋 | ½ tsp | Freshly squeezed for brightness |
| Sea Salt 🧂 | ⅛ tsp | Fine grain, Diamond Crystal preferred |
| Organic Maple Syrup 🍁 | ½ tbsp | Grade B for rich flavor profile |
| Unsweetened Almond Milk 🥛 | ¼ cup | For lightness and stability |
The coconut cream is non-negotiable—opt for full-fat brands like Goya or Thai Kitchen for maximum stability. Chill the can overnight to ensure the thickest cream layer at the top; this is where the magic happens. Agar-agar is the secret ingredient here—it mimics gelatin's stabilizing properties without animal byproducts. Purchase agar-agar powder from specialty stores like Whole Foods or trusted online retailers like Amazon to ensure purity. The vanilla extract should be pure, with no alcohol fillers—McCormick or Frontier Co-op deliver consistent quality. For the coconut cream, avoid brands with added thickeners or stabilizers, which can interfere with the foam's delicate texture.
No agar-agar? Kappa carrageenan works as a substitute at half the amount, though the texture will differ slightly. Short on coconut cream? Coconut milk can be used, but you'll need to reduce the liquid content by half to maintain stability. The lemon juice adds brightness and helps balance the sweetness, so don't skip it—fresh is ideal, but bottled works in a pinch. For a savory foam, swap the vanilla and maple syrup for white miso paste (1 tsp) and rice vinegar (0.25 tsp). The almond milk can be replaced with oat milk for a creamier finish, though it may require slight adjustments to the whisking time. Always whisk until the mixture reaches 160°F to ensure proper agar activation, even if it seems over-whisked.
This foam remains stable for up to 4 hours when refrigerated in an airtight container with a thin layer of coconut cream poured over the top to prevent drying. For longer storage, freeze in ice cube trays—each cube yields a single serving, perfect for last-minute garnishes. Thaw in the fridge for 1-2 hours before use. To reheat, gently warm in the microwave for 10-15 seconds and whisk briefly to restore volume. The foam pairs exceptionally well with espresso martinis, mango margaritas, or chilled gazpacho—its lightness contrasts beautifully with bold flavors without overpowering them.
Why You'll Love This Recipe
- No Whisking Needed: I just blend coconut cream, sugar, and vanilla until smooth—no heavy cream, no overheating, and zero fuss. The agar-agar powder does the magic while I sip my coffee, so I’m not stuck stirring for 20 minutes like with traditional custards.
- Vanilla Bomb Flavor: That first spoonful of coconut cream foam hits like a warm hug—creamy, lightly sweet, and packed with vanilla’s depth. Honestly, I’ve tried store-bought versions, and this tastes like it belongs in a high-end dessert menu, not my weeknight kitchen.
- Weeknight Dessert Fix: Drizzle this over fruit, pancakes, or even ice cream when I’m too tired to bake. It’s my go-to for impressing guests who think I only eat microwave dinners—no one suspects how little effort went into it.
- Budget-Friendly Luxury: A single can of coconut cream and a tiny bag of agar-agar stretch into dozens of servings. I make a big batch on Sundays, store it in the fridge, and use it all month—no wasted heavy cream, no last-minute grocery runs. Plus, the sugar cost? Laughable.
Step-by-step instructions for lightweight vanilla cold foam
Master this technique for silky, airy foam that elevates cocktails without heavy cream.
🥘 Step 1: Separate and Whip the Coconut Cream
Open the chilled can of full-fat coconut cream and carefully separate the thick cream layer from the liquid (discard the liquid or reserve for another use). Place the thick cream in a mixing bowl and whip it vigorously with a hand mixer or stand mixer fitted with the whisk attachment until it forms soft peaks. This process should take about 2-3 minutes—you're looking for a light, airy texture similar to whipped cream but with the body of coconut.
Here's the thing—don't overwhip or the foam will become grainy. Stop as soon as you see soft peaks forming. The temperature of the coconut cream matters too; if it's too warm, it won't whip properly. If it's not thickening, place the bowl in the refrigerator for 10 minutes to chill before attempting again.
🍳 Step 2: Prepare the Stabilizing Syrup
In a small saucepan, combine the 0.5 cup cold water, 2 tbsp granulated sugar, 0.5 tbsp organic maple syrup, and 0.5 tsp lemon juice. Heat over medium-low heat, stirring constantly, until the sugar and syrup dissolve completely—this should take about 3-4 minutes. The mixture should be completely clear with no graininess.
Remove the pan from heat and whisk in the 0.25 tsp agar-agar powder until fully dissolved. Then add the 0.125 tsp sea salt and 1.5 tbsp pure vanilla extract, mixing well. Let the syrup cool to room temperature—it will thicken slightly as it cools, which is normal and essential for proper stabilization.
🥘 Step 3: Combine and Heat the Mixture
Gently fold the cooled syrup into the whipped coconut cream using a spatula, being careful not to deflate the whipped texture. Once fully incorporated, transfer the mixture to a small saucepan and heat over low heat until it reaches 185°F—this is critical for proper agar activation. Stir constantly to prevent scorching, and watch closely as the mixture will thicken noticeably.
Here's where precision matters: if you exceed 185°F, the foam will lose its lightness. Use a candy thermometer for accuracy. Once heated, remove from heat immediately and let it cool to 110°F—this temperature is ideal for whipping into foam. If it cools too much, gently reheat to maintain the proper consistency.
🍳 Step 4: Whip to Final Texture
Return the cooled mixture to your mixing bowl and add the 0.25 cup unsweetened almond milk. Using the whisk attachment, beat on high speed for 3-5 minutes until the foam becomes glossy, thick, and holds firm peaks when the whisk is lifted. You'll know it's ready when you can draw a line in the foam with the whisk that holds its shape.
This final whipping step is what creates that signature cocktail foam texture. If the foam isn't thickening, it might be too warm—place the bowl in the freezer for 5 minutes to chill before attempting again. The foam should be light enough to float on cocktails but stable enough to hold its shape when piped.
⏰ Step 5: Chill and Serve Immediately
Transfer the finished foam to a piping bag fitted with a small round tip or to an airtight container. Chill in the refrigerator for at least 1 hour before using—this allows the agar to fully set and gives you the perfect stability for piping. The foam will keep for up to 3 days in the refrigerator, though it's best used within 24 hours for optimal texture.
When ready to use, pipe or spoon dollops of foam directly onto cocktails. For best results, use immediately after chilling. This foam pairs beautifully with tropical drinks, espresso martinis, or any cocktail where you want that luxurious, creamy finish without the heaviness of traditional dairy-based foams.
Pro Tips For Making Cold Foam Recipe Without Heavy Cream
- Whisk the Sugar First: Mix the granulated sugar into the cold water before adding coconut cream—this dissolves it completely and prevents grainy lumps in your foam. I learned this the hard way when my first batch tasted like I’d sprinkled sand on dessert.
- Bloom Agar in Ice Water: Sprinkle agar-agar over cold water first, let it sit 5 minutes, then heat gently—this guarantees even thickening without clumping. Skipping this step means you’ll end up with a lumpy mess that won’t hold shape.
- Chill the Mixture Hard: Pour the hot foam into a metal bowl, cover with plastic wrap touching the surface, and freeze for 15 minutes before blending—this prevents overheating the blender and ensures silky texture. (Yes, even if you’re impatient like me.)
- Use Vanilla Bean Paste: Swap pure vanilla extract for vanilla bean paste—it adds depth and prevents the foam from tasting artificially sweet. Just a teaspoon makes a real difference, and it’s worth the extra dollar.
Best sauces and condiments for this cold foam recipe without heavy cream
Cocktail Pairings
This vanilla cold foam transforms classic cocktails into showstoppers. I love piping it over espresso martinis—the sweetness complements the bitterness of espresso perfectly. For tropical vibes, try it on a mango margarita or a piña colada—the coconut notes in the foam enhance the fruit flavors.
Even a gin and tonic gets an elegant upgrade with a light dollop of foam. 🍹
Dessert Applications
Use this foam to elevate desserts like chocolate mousse or panna cotta. A spoonful on top of warm apple crumble adds a luxurious touch without overpowering the dish.
For a modern twist, layer it between coconut cake and fresh berries. The light texture contrasts beautifully with dense desserts, making them feel restaurant-worthy.
Savory Pairings
Don’t overlook savory dishes! A chilled gazpacho or cucumber soup becomes more sophisticated with a drizzle of savory foam (swap vanilla for white miso and rice vinegar). Even a smoked salmon platter benefits from a light foam drizzle—it adds a delicate creaminess that balances the saltiness.
The key is balancing flavors: sweet foams work best with sweet/savory dishes, while savory foams shine on rich, umami-based plates.
Flavor Variations
Customize the foam to match your drink or dish.
For citrus lovers, add 1 tsp orange zest and 0.25 tsp orange liqueur to the syrup. Chocolate enthusiasts can infuse the coconut cream with 1 tbsp cocoa powder before whipping. Herb lovers might try basil or mint—just muddle fresh leaves into the warm syrup before cooling.
Each variation keeps the same light texture while adapting to your taste.
Garnish Techniques
Piping isn’t the only way to use this foam! For a rustic touch, spoon dollops directly onto drinks or desserts. To create foam "roses," pipe a small circle, then drag a toothpick through the center to create petals.
For layered cocktails, freeze the foam in a ring mold to create a floating garnish. The foam’s stability means it holds its shape beautifully, even when piped or spooned. 💫
Storage Hacks
Store leftover foam in an airtight container with a thin layer of coconut cream on top to prevent drying. It keeps for up to 3 days in the fridge, though texture degrades after 24 hours.
For longer storage, freeze in ice cube trays—each cube thaws in 1-2 hours and works perfectly for last-minute garnishes. Reheat gently in the microwave for 10-15 seconds if needed, then whisk briefly to restore volume.
Nutrition facts
Frequently asked questions
Can I make this foam without coconut cream?
Yes! For a neutral base, try aquafaba (chickpea brine) or silken tofu blended with lemon juice. Aquafaba needs 1 tsp xanthan gum for stability, while tofu requires extra whisking. Both alternatives create a lighter foam but may lack coconut's richness.
Why did my foam turn grainy?
Overheating or overwhipping are the most common culprits. Keep temperatures below 185°F and stop whipping at soft peaks. If it's too warm, chill the bowl for 5 minutes before continuing. Graininess often disappears when chilled properly.
How do I adjust sweetness for kids?
Reduce sugar to 1 tbsp and add 0.25 tsp vanilla bean paste for natural sweetness. For extra kid appeal, pipe it over chocolate milk or fruit smoothies. The foam's light texture makes it perfect for picky eaters who dislike heavy toppings.
Can I make savory foam with this recipe?
Swap vanilla for 1 tsp white miso paste and 0.25 tsp rice vinegar, then add 0.5 tsp smoked paprika to the coconut cream. This works beautifully on chilled soups or as a garnish for sushi platters. The agar keeps it stable even with savory flavors.
What's the secret to perfect piping?
Chill the foam for at least 1 hour before piping to set the agar properly. Use a small round tip (like a Wilton #4) and pipe in 3-second bursts to maintain shape. For rosettes, pipe a circle then drag a toothpick through the center. Practice on parchment paper first!