
Soups & Stews
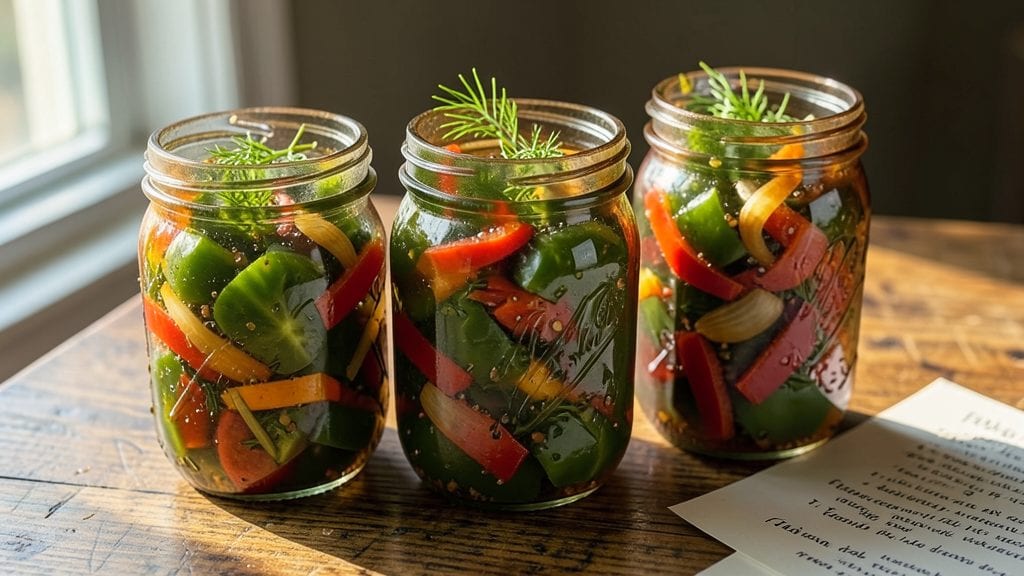
This canned green tomato relish recipe transforms summer's tartest harvest into a zesty, vinegar-kissed condiment that bridges sweet and tangy perfection. The secret lies in balancing crisp green tomatoes with sharp apple cider vinegar and aromatic herbs—each bite delivers a Southern-style punch that elevates sandwiches, burgers, or even grilled meats.
I developed this recipe after years of testing canning techniques, ensuring the texture stays chunky and vibrant while the flavors deepen with time.
The process is straightforward but requires precision: sterilizing jars, measuring ingredients to the gram, and processing for the exact recommended time to preserve that bright, herbaceous zing.
You'll need green tomatoes at their peak (just before they ripen), along with onions, bell peppers, and a blend of spices that includes mustard seed and black pepper for depth. The relish's tangy-sweet profile makes it a versatile condiment that keeps well for up to a year.
What you'll achieve is a relish with a satisfying crunch from the tomatoes and onions, balanced by the vinegar's bite and a touch of sweetness from the sugar. The herbs—dill, parsley, and thyme—add layers of freshness that cut through richness, making this relish a standout on any table.
Whether you're canning for your family or gifting jars to neighbors, this recipe delivers professional-quality results every time.
Perfect for meal prep, holiday gifting, or stocking your pantry with homemade goodness, this relish is a game-changer for preserving summer's bounty. The key to success lies in the canning process—sterilization, proper sealing, and accurate processing times—to ensure safety and flavor retention.
Let's get started on creating a relish that tastes like summer all year round.
Ingredients for canned green tomato relish
Summer's tartest harvest meets vinegar and herbs in this zesty, crunchy relish.
| Ingredient | Amount | Notes |
|---|---|---|
| Green Tomatoes 🍅 | 4 lbs | Firm, unripe, no blemishes |
| Yellow Onions 🧅 | 2 medium | Yellow or white preferred |
| Red Bell Peppers 🌶️ | 2 whole | Seeds and ribs removed |
| Apple Cider Vinegar 🍏 | 1 ½ cups | Raw, unfiltered preferred |
| Granulated Sugar 🍚 | 1 ½ cups | White or raw cane sugar |
| Fresh Dill 🌿 | ½ cup | Chopped, stems removed |
| Fresh Parsley 🌿 | ¼ cup | Chopped, flat-leaf preferred |
| Fresh Thyme 🌿 | 1 tbsp | Leaves only, chopped fine |
| Mustard Seeds 🌶️ | 1 tsp | Yellow or brown preferred |
| Ground Black Pepper 🌶️ | 1 tsp | Freshly ground preferred |
| Salt 🧂 | 1 ½ tsp | Diamond Crystal kosher |
| Pint-Sized Mason Jars 🍯 | 8 jars | With lids and bands |
Green tomatoes are the star—pick them at peak firmness, just before they start softening. Local farmers markets usually have the best selection, but grocery stores work too if you snag the firmest ones. Yellow onions add depth, so grab medium-sized ones—they're milder than large. Red bell peppers? Trader Joe's has the sweetest ones in season. For vinegar, Bragg's raw apple cider vinegar has that perfect tang, but any raw, unfiltered kind works. Sugar balances the acidity, so don't skimp on quality—Domino or C&H are reliable brands. The herbs? Fresh is non-negotiable here—dill and parsley should be vibrant, thyme should smell aromatic. If you're short on time, frozen herbs work in a pinch, but fresh is always better.
No fresh dill? Dried dill at one-third the amount gets you close, but it won't have that same bright punch. Swap red bell peppers for jalapeños if you want heat, or yellow bell peppers for a milder kick. Running low on mustard seeds? Ground mustard at half the amount works, but texture will differ. The sugar can be swapped for honey or maple syrup if you prefer, but it'll change the texture slightly—more syrupy. For vinegar, white vinegar in a pinch, but the flavor won't be as complex. And if you're canning for the first time, pickle crispers are worth the investment—they make crushing the veggies so much easier.
This relish keeps beautifully—1 year unopened in a cool, dark pantry, and 6 months once opened in the fridge. I always make extra jars for gifts—mason jars with pretty ribbons make fantastic presents. For best texture, store the jars upright until fully cooled, then seal tightly. If you notice any jars not sealing properly during processing, they'll be safe to eat but won't last as long. The relish actually improves with age, so don't be afraid to make a big batch. Freezing is an option too—up to 12 months in airtight containers, though texture may soften slightly.
Why You'll Love This Recipe
- No-Chop Shortcuts: I swear by the food processor for this one—toss in the green tomatoes, onions, and bell peppers whole, hit pulse, and boom, you’re done. The vinegar and sugar do the rest while you sip coffee and pretend you’re not cooking.
- Sweet-Tangy Magic: That first bite of bright green tomatoes, kissed by vinegar’s bite and sugar’s caramelized edge? It’s like summer in a jar—crunchy, fruity, and just a little sassy. The bell peppers sneak in a subtle sweetness that makes it irresistible.
- Potluck Hero: Bring this to a picnic, BBQ, or holiday table, and watch it disappear. It’s the one dish that everyone grabs—no one cares if it’s "fancy," because it’s ridiculously good with sandwiches, burgers, or just straight from the spoon.
- Pantry Goldmine: A few jars of this mean zero wasted green tomatoes (hello, late-season garden!) and a backup for when you’re too tired to chop. Plus, the vinegar and sugar stretch your dollar—you’ll have leftovers begging to be used, not tossed.
Step-by-step instructions for Southern-style green tomato relish
Here's how to transform fresh garden produce into a tangy, sweet-savory relish that'll keep for months.
Prep and Sterilize Your Jars and Equipment
Start by washing all 8 pint-sized mason jars with hot, soapy water and rinse thoroughly. Place them upside down on a baking sheet and put in a 250°F oven for 10 minutes to sterilize. While they're heating, prepare your workspace by laying out a clean cutting board and gathering all your ingredients - the 4 lbs green tomatoes, 2 yellow onions, and 2 red bell peppers. The sterilization step is critical to prevent mold and ensure your relish stays fresh for up to a year.
As the jars sterilize, chop the green tomatoes into ¼-inch dice - they should be firm but not mushy. Cut the yellow onions into ⅛-inch slices and remove the seeds and ribs from the red bell peppers, then chop them into ¼-inch pieces. This uniform size ensures even cooking and consistent texture throughout your relish. Keep all chopped vegetables in separate bowls until ready to use.
Cook the Vegetable Mixture
In a large, heavy-bottomed pot, combine the chopped green tomatoes, yellow onions, and red bell peppers. Add 1.5 cups apple cider vinegar and 1.5 cups granulated sugar, stirring well to distribute evenly. Bring the mixture to a boil over medium-high heat, then immediately reduce to medium-low heat and let it simmer uncovered for 20 minutes. You want the vegetables to soften but not break down completely - they should still hold their shape with just a slight softness.
After 20 minutes, stir in the 0.5 cup fresh dill, 0.25 cup fresh parsley, 1 tbsp fresh thyme, 1 tsp mustard seeds, 1 tsp ground black pepper, and 1.5 tsp salt. Simmer for another 10 minutes, stirring occasionally. The mixture should thicken slightly and develop a rich, aromatic fragrance. Taste a small spoonful - the balance of sweet, tangy, and herby flavors should be developing nicely. If it needs more sweetness, add 1 tablespoon granulated sugar; if it needs more acidity, add 1 teaspoon apple cider vinegar.
Fill and Process the Jars
Using a ladle or large spoon, carefully ladle the hot relish into the sterilized pint-sized mason jars, leaving ½-inch headspace at the top. Tap the jars gently on the counter to remove any air bubbles that may have formed. Wipe the rims with a clean, damp cloth to ensure a perfect seal. Place the lids on the jars and screw on the bands until fingertip-tight - not too tight, just until you feel slight resistance.
Process the jars in a boiling water bath for 30 minutes to create a vacuum seal. Start timing as soon as the water reaches a full rolling boil. After processing, remove the jars and let them cool undisturbed for 12 hours - this allows the lids to seal completely. You'll hear a satisfying "ping" as the jars seal, indicating they're properly preserved. Store in a cool, dark place for up to a year, though the flavor will be best within the first 6 months.
Test and Store Your Relish
Once cooled, check that the lids have sealed by pressing down on the center - if it doesn't pop back up, your jar is properly sealed. Remove any jars that didn't seal and refrigerate them for immediate use. The relish should have a vibrant green color with visible chunks of tomato, onion, and pepper, all bathed in a glossy, slightly thickened vinegar sauce. The flavors should be perfectly balanced - sweet from the sugar, tangy from the vinegar, and fresh from the herbs.
Use your relish as a condiment for sandwiches, a topping for burgers, or a tangy addition to charcuterie boards. The acidity from the vinegar and the sweetness from the sugar create a perfect balance that makes this relish incredibly versatile. Store sealed jars in a pantry or cellar, and enjoy the taste of summer all year round. The relish will keep its quality for up to a year, though the flavor will continue to develop and mellow over time.
Pro Tips For Making Canned Green Tomato Relish
- CHOP TOMATOES UNIFORM: Cut them into ¼-inch dice—no bigger, no smaller. I learned this the hard way when my first batch had a mix of tiny specks and thick chunks; the big pieces stayed crunchy while the small ones turned mushy. Consistency is key for even cooking and texture.
- SOFTEN ONIONS FIRST: Cook the onions in a dry skillet for 8-10 minutes until translucent and slightly caramelized before adding them to the relish mix. This prevents them from sitting like raw, bitter chunks in your jars—trust me, you’ll taste the difference.
- VINEGAR LAST, NOT LEAST: Add the apple cider vinegar right before canning, not during the initial cooking. The acidity helps preserve the color of the bell peppers and keeps the green tomatoes bright, but adding it early can make the relish taste harsh and underdeveloped.
- PEPPERS IN THIN STRIPS: Slice the red bell peppers into paper-thin strips—about ⅛-inch wide. Thick slices stay chewy and bland, while thin ones soften just enough to melt into the relish without losing their sweetness. Use a sharp knife and take your time.
Make-ahead tips for this canned green tomato relish
Prep Ahead Strategy
Chop all vegetables 24 hours ahead and store in airtight containers in the fridge. The green tomatoes will soften slightly but maintain their texture. I keep the chopped veggies in separate containers—green tomatoes, yellow onions, and red bell peppers—to prevent browning.
This step saves 30 minutes of prep day-of and ensures consistent texture when cooking. 💡
Vinegar-Sugar Base
Combine the apple cider vinegar and granulated sugar in a jar the night before. This creates a simple syrup that dissolves completely, making your relish smoother. I use a quart-sized mason jar and stir occasionally to help the sugar dissolve faster.
This pre-mix also lets you taste and adjust the sweet-tangy balance before adding the vegetables. 🍏
Herb Infusion Shortcut
Make an herb infusion by steeping dill, parsley, and thyme in ½ cup hot vinegar overnight. Strain and reserve the liquid for adding to your relish during cooking.
This method extracts maximum flavor from the herbs without overpowering the dish. Store the infused vinegar in the fridge until ready to use. ✨
Batch Processing Tips
If canning multiple batches, prepare all jars and lids at once to streamline the process. I sterilize 16 jars at a time in two oven batches. Use a canning rack in your water bath to keep jars upright and prevent them from touching the bottom.
This ensures even heat distribution during the 30-minute processing time. 🔥
Flavor Development Hack
Let the cooked relish mixture sit at room temperature for 1 hour before canning. This allows the flavors to meld together more deeply. I cover the pot loosely with a clean kitchen towel during this time.
The relish will thicken slightly and develop a more complex taste. Don't skip this step—it makes a noticeable difference in the final product. 💫
Storage Organization
Label each jar with the date and contents using a permanent marker. Store jars in a cool, dark pantry or cellar, stacked vertically with a small gap between rows for airflow. I use a wooden crate lined with a towel to protect the jars.
This organization system makes it easy to rotate stock and find older jars first. The relish stays fresh for up to 1 year when stored properly. ❄️
Nutrition facts
Frequently asked questions
Why do green tomatoes need to be firm for this relish?
Firm green tomatoes hold their texture better during canning, preventing mushiness in the final relish. Overripe or soft tomatoes break down too much, creating a runny consistency. Look for tomatoes that dent slightly when pressed but don't feel mushy—this ensures the perfect crunchy bite in every spoonful.
Can I adjust the sweetness or tang in the relish?
Taste the relish after simmering and adjust before canning. For more sweetness, add 1-2 tablespoons granulated sugar per jar. For extra tang, add 1 teaspoon apple cider vinegar. The key is balancing these flavors—start with small adjustments to avoid overpowering the herbs and vegetables.
What if my jars don't seal properly?
If a jar doesn't seal (lid pops up when pressed), refrigerate it immediately and use within 1 week. Check for proper headspace (½-inch), clean rims, and correct processing time (30 minutes). Reprocess unsealed jars with new lids if needed, but never reuse bands—they lose elasticity over time.
How can I make this relish spicier?
Add 1-2 finely chopped jalapeños or ½ teaspoon cayenne pepper to the vegetable mixture before simmering. For heat control, remove seeds from jalapeños. The vinegar helps distribute the spice evenly, so you can adjust to taste—start with less if you're sensitive to heat.
Can I use this relish in cooking instead of as a condiment?
Yes! Stir it into chili, braised meats, or stews during the last 10 minutes of cooking to add brightness. Use it as a glaze for grilled chicken or pork chops by simmering with a splash of broth. The acidity cuts through rich flavors, making it a versatile cooking ingredient beyond just sandwiches.