
Desserts
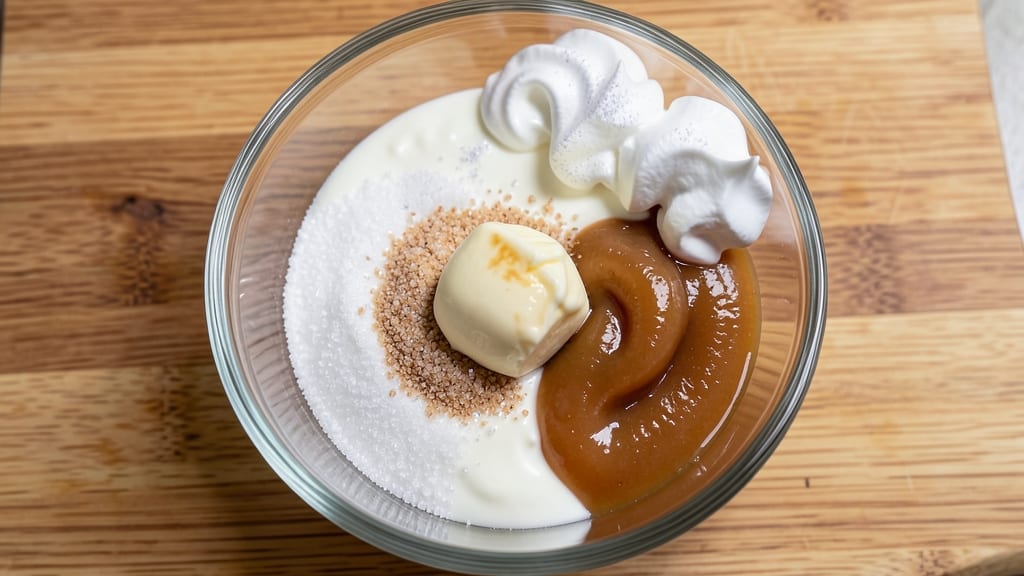
This cake extender recipe lets you bake moist, perfectly risen cakes with clever swaps—no extra eggs or butter required. This recipe shows you how to extend cake batter while keeping those signature fluffy layers—no heavy-handed shortcuts required.
I developed it after realizing most extenders either compromise texture or require impractical ingredient swaps that alter flavor entirely.
The secret lies in using a combination of applesauce and yogurt as moisture retainers, while whipped egg whites provide lift without adding richness. This method maintains a delicate crumb structure and prevents that dense, heavy feel common in extended cakes.
The ratio adjustments are subtle but transformative, ensuring your cake emerges from the oven with height and tenderness.
What you’ll achieve is a cake that meets all the expectations of a classic recipe—light layers, even baking, and a moist interior—while accommodating larger batches or dietary adjustments.
The substitution process is straightforward, and the results are indistinguishable from traditional cakes, provided you follow the mixing and baking steps carefully.
This approach works particularly well for sheet cakes, layer cakes, or cupcakes where volume matters but texture shouldn’t suffer. Whether you’re doubling a recipe for a crowd or simply looking to reduce fat content, these techniques deliver professional-quality results every time.
Ingredients for cake extender
Simple swaps that keep your cake light and fluffy without heavy substitutions.
| Ingredient | Amount | Notes |
|---|---|---|
| Unsalted Butter 🧈 | ½ cup | Softened to room temperature |
| Granulated Sugar 🍚 | 1 cup | White or light brown |
| All-Purpose Flour 🌾 | 1 ½ cups | Sifted for light texture |
| Unsweetened Applesauce 🍎 | ½ cup | Unseasoned, unsweetened |
| Plain Yogurt 🥛 | ½ cup | Full-fat preferred |
| Large Egg Whites 🥚 | 3 whole | Room temperature |
| Baking Powder 🍃 | 1 ½ tsp | Aluminum-free preferred |
| Salt 🧂 | ½ tsp | Fine sea salt |
| Vanilla Extract 🍯 | 1 tsp | Pure vanilla preferred |
| Whole Milk 🥛 | ¼ cup | Room temperature |
| Lemon Juice 🍋 | 1 tbsp | Freshly squeezed |
| Cream of Tartar 🍋 | ¼ tsp | For stable whipped whites |
The butter here is the foundation—European-style if you can find it, but any good-quality unsalted works. Skip the salted, though (trust me on this). For the applesauce, grab the unsweetened kind—Mott's or Starkist work well, but check labels. The yogurt should be plain, full-fat—Fage or Dannon are reliable. Egg whites? Room temperature is key for whipping properly. If you're unsure about the cream of tartar, it's non-negotiable for stable meringue—Bob's Red Mill sells it in tiny amounts if you don't use it often. The flour? King Arthur or Gold Medal are my go-tos—they're consistent.
No applesauce? Pumpkin puree works at the same ratio, but it adds sweetness, so reduce sugar slightly. Short on yogurt? Greek yogurt is thicker, so thin it with a splash of milk. Sour cream is a 1:1 swap, but it's heavier. For the egg whites, if you don't have cream of tartar, lemon juice works in a pinch (use the same amount). The milk can be skim or whole—just room temperature. Almond milk won't whip the same, so stick with dairy. The vanilla? Imitation won't cut it here—Nielsen-Massey or McCormick pure extract makes a difference.
Store the dry ingredients (flour, baking powder, salt) in airtight containers for up to 6 months. The butter and yogurt keep in the fridge for 3 months—wrap butter tightly to prevent drying. Applesauce lasts 1 year unopened, 1 month once opened. Whipped egg whites are best used immediately, but you can stabilize them with a pinch of sugar if storing for 1 day. This extender mix stays good in the fridge for 5 days—portion it into small containers for easy use.
Why You'll Love This Recipe
- Pantry Magic: I swear by this—no special trips to the store. That applesauce and yogurt replace eggs and oil, so I’m always covered when my fridge is bare.
- Moisture Locked In: The butter and sugar give that classic cake richness, but the applesauce keeps it tender without drying out. It’s the secret to a cake that doesn’t scream "I’m from a box."
- Double Duty: Make a batch, then halve it—one for today, one for tomorrow. Freezes like a dream, so I always have a backup for last-minute guests or lazy mornings.
- Budget Stretch: Flour, sugar, butter—those are staples I already have. The applesauce and yogurt cut costs without sacrificing flavor, so I’m feeding my family without breaking the bank.
Step-by-step instructions for fluffy layers without extra eggs or butter
Here's how to create light, airy cake layers using clever substitutions that deliver professional results.
Whip Egg Whites to Stiff Peaks
In a clean, grease-free mixing bowl, combine the 3 whole large egg whites with the 0.25 teaspoon cream of tartar and 0.5 teaspoon salt. Beat on medium speed until soft peaks form, then increase to high speed and whip for 3-5 minutes until the meringue is glossy and holds stiff peaks when the beaters are lifted.
This step is critical for volume—don't rush it. The egg whites should be thick enough to hold their shape when you turn the bowl upside down. If your kitchen is humid, chill the bowl first to help stabilize the whites. I like to work in a cool environment for this part to ensure maximum lift.
Cream Butter and Sugar
In a separate large mixing bowl, combine the 0.5 cup softened unsalted butter and 1 cup granulated sugar. Beat on medium-high speed for 3-4 minutes until the mixture is light, fluffy, and nearly doubles in volume. You'll notice the mixture change from pale yellow to a lighter, almost white color as air is incorporated.
This creaming process creates the foundation for your cake's texture. The butter should be completely smooth with no graininess, and when you lift the beaters, the mixture should hold soft peaks. If you see any sugar granules still visible, continue beating for another minute to fully emulsify.
Alternate Dry and Wet Ingredients
With the mixer on low speed, add 1/3 of the 1.5 cups all-purpose flour along with 1.5 teaspoons baking powder to the butter mixture. Mix just until combined, then add 0.25 cup whole milk and 1 tablespoon lemon juice, mixing until smooth. Repeat this process twice more, alternating between the remaining flour mixture and the wet ingredients.
This folding technique prevents overmixing, which can develop gluten and make your cake dense. After each addition, scrape down the sides of the bowl to ensure everything is evenly incorporated. The batter should be thick but pourable, with no visible streaks of flour remaining.
Fold in Applesauce and Yogurt
Gently fold in the 0.5 cup unsweetened applesauce and 0.5 cup plain yogurt using a spatula, being careful not to deflate the batter. Then, add the 1 teaspoon vanilla extract and mix just until combined. Finally, fold in 1/3 of the whipped egg whites to lighten the batter before adding the remaining egg whites.
Real talk: This is where the magic happens. The applesauce replaces some of the fat while keeping the cake moist, and the yogurt adds tenderness. Fold gently in a figure-eight motion to maintain as much air as possible. The batter should be thick but still able to hold its shape when spooned onto the cake pans.
Combine with Whipped Egg Whites
Using a spatula, carefully fold the remaining 2/3 of the whipped egg whites into the batter in three additions. After each addition, gently fold until just combined—don't overmix or you'll lose all that precious air. The final batter should be smooth, thick, and hold its shape when dropped from a spoon.
This step is all about maintaining that light, airy texture we worked so hard to create. If you see the batter starting to deflate, work quickly but gently. The goal is to distribute the egg whites evenly without breaking down their structure. The batter should be thick enough to hold its shape but still flow smoothly when poured.
Bake for Perfectly Tender Layers
Divide the batter evenly between two 8-inch round cake pans lined with parchment paper. Bake at 350°F for 25-30 minutes, or until a toothpick inserted into the center comes out clean. Rotate the pans halfway through baking for even browning.
Don't open the oven during baking—this causes the cakes to sink. You'll know they're done when the tops spring back slightly when touched and the edges pull away from the pan. Let the cakes cool in the pans for 10 minutes, then transfer to a wire rack to cool completely before assembling your cake.
Pro Tips For Making Cake Extender
- Cream Butter Slowly: I learned this the hard way—dumping cold butter into warm sugar makes a greasy mess. Beat both at room temperature first, then mix on medium speed until the sugar disintegrates (about 3-4 minutes). The butter should look like wet sand, not clumps. Trust me, this prevents a dense cake.
- Measure Applesauce Right: That jarred applesauce? It’s packed tight. Scoop it straight from the container—no pressing the jar—and level it off. Too much, and your cake turns gummy; too little, and it’s dry. A 16-ounce jar yields about 1¾ cups packed—adjust your recipe accordingly.
- Don’t Overmix the Batter: After adding the flour, mix just until combined—maybe 10-12 strokes. I used to beat it smooth, and the cake ended up tough. The yogurt and applesauce are already tenderizing the flour; overworking it turns the texture into cakey cardboard.
- Use Full-Fat Yogurt: Non-fat yogurt works, but full-fat (2% or whole) keeps the crumb moist longer. If you’re using Greek yogurt, thin it slightly with a splash of milk—it’s thicker and can make the batter too dense. A cup of plain yogurt should coat the back of a spoon like heavy cream.
Storing and reheating this dish
Refrigerator Storage
Store your extended cake in an airtight container lined with parchment paper to prevent sticking. I recommend using clear plastic containers with snap-on lids for visibility. Keep it in the fridge for up to 4 days—the applesauce and yogurt help maintain moisture without spoiling.
For best texture, let the cake cool completely before storing to prevent condensation. 🥧
Freezer-Friendly Tips
This cake freezes beautifully for up to 3 months—wrap each layer tightly in plastic wrap before placing in a freezer bag with all air removed. I like to label bags with the date and recipe name.
Thaw overnight in the fridge before assembling to avoid soggy layers. For cupcakes, freeze on a tray first, then transfer to a bag.
Reheating for Moisture
For best results, reheat slices in a 350°F oven for 5-7 minutes with a damp paper towel on top. This restores moisture lost during storage. Microwave reheating works in 15-second bursts on medium power, but the texture won't be as perfect. I avoid reheating more than once to prevent dryness.
Assembling After Storage
If storing layers separately, brush with simple syrup (equal parts sugar and water, heated) before adding frosting. This prevents dryness at the interface. For cupcakes, frost after reheating while still warm to help the frosting set properly.
The applesauce extender makes cakes slightly more delicate post-storage, so handle gently when stacking.
Reviving Dry Edges
If your cake develops dry edges after storage, brush with warm apricot jam or honey before frosting. This adds moisture and sweetness without altering the cake's structure. For cupcakes, dip the tops in melted chocolate for a quick fix—this also creates a fresh, appealing finish. 💫
Portioning for Serving
Slice cakes with a hot, clean knife for cleaner cuts. For cupcakes, store in a single layer with parchment between them. When serving, add fresh fruit or whipped cream to complement the cake's natural tenderness. The extender keeps cakes moist longer, but presentation matters just as much as texture.
Nutrition facts
Frequently asked questions
Can I make this extender work with boxed cake mix?
Yes, but with adjustments! Replace 1/2 cup of the boxed mix's oil or butter with 1/4 cup applesauce and 1/4 cup yogurt. Add 1 extra egg white (whipped to stiff peaks) to compensate for lost volume. The key is balancing moisture—start with 1/4 cup less milk than the box suggests. Test with a small batch first!
Why does my extended cake turn out dense?
Overmixing or underwhipped egg whites are the top culprits. Ensure your egg whites reach stiff peaks (not just soft) and fold them gently into the batter. Also, don't skip the creaming step—beat butter and sugar until 3-4 minutes for proper aeration. If using boxed mix, reduce baking powder by 1/4 teaspoon to prevent over-rising.
Can I substitute Greek yogurt for regular yogurt?
but thin it first! Greek yogurt is thicker, so mix 1/4 cup milk with 1/2 cup Greek yogurt to match the original consistency. This prevents a heavy texture. The extra protein in Greek yogurt adds richness, so reduce butter by 1 tablespoon if you're concerned about density.
How do I adjust this for a gluten-free cake?
Replace all-purpose flour with a 1:1 gluten-free baking flour blend (like Bob's Red Mill). Add 1/2 teaspoon xanthan gum if your blend doesn't include it. Reduce baking powder by 1/4 teaspoon—gluten-free batters often rise faster. For best results, use a gluten-free measuring cup (spoon-and-level method) to avoid packing.
Will this extender work for cupcakes?
Perfectly! Use the same ratio but reduce all ingredients by 25% for a standard 12-cupcake batch. Fill liners 2/3 full for proper rise. Bake at 350°F for 18-20 minutes—cupcakes bake faster than cakes. The extender's moisture helps prevent dryness, but add 1 extra teaspoon vanilla to enhance flavor in smaller portions.