
Breakfast & Brunch
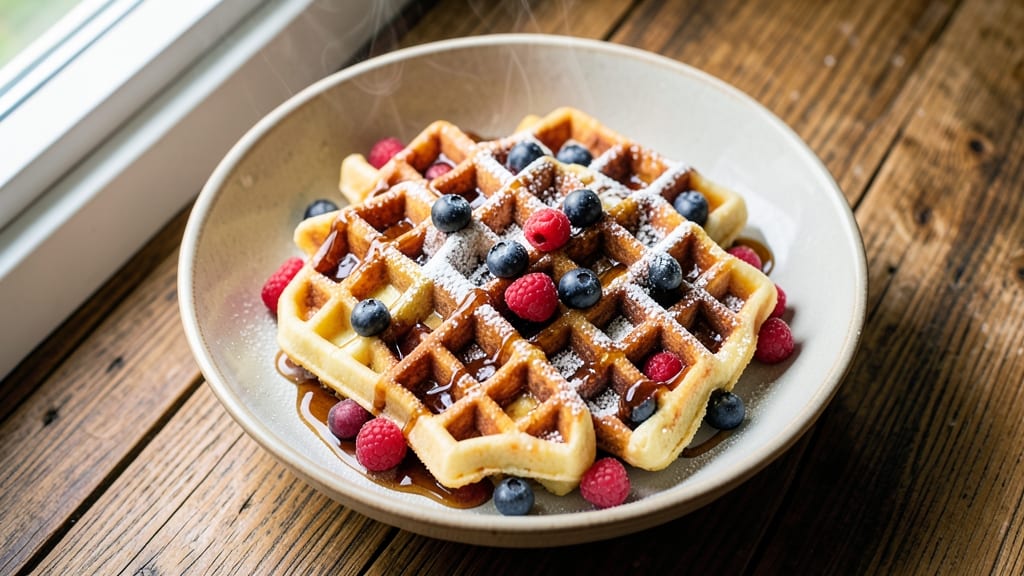
Mastering crispy Bruxie waffles with chewy centers transformed my weekend breakfasts from ordinary to extraordinary. After years of experimenting with waffle irons, I developed a method that delivers that signature buttery crunch without requiring specialty ingredients.
The secret lies in the precise balance of leavening agents and cooking temperature—something I perfected through countless test batches.
This recipe delivers restaurant-quality results with just eight simple ingredients and a standard waffle iron. The batter comes together in minutes, and each waffle develops those coveted crispy layers on the outside while maintaining a tender, chewy interior.
What makes these Bruxies special is how they hold their shape perfectly, making them ideal for stacking with fresh fruit or whipped cream.
By following this precise method, you'll achieve waffles with golden-brown, crisp edges and a light, airy interior that's impossible to resist. The aroma alone will have your whole household gathering around the kitchen. Whether you're serving them for a weekend brunch or a special occasion, these waffles consistently impress.
Ready in just 15 minutes, this recipe delivers foolproof results every time. The technique works equally well with a traditional waffle iron or griddle, making it adaptable to any kitchen setup. Let's get started on creating your perfect Bruxie waffles.
Ingredients for bruxie waffle
Eight simple ingredients transform your waffle iron into a crispy Bruxie maker every time.
| Ingredient | Amount | Notes |
|---|---|---|
| All-Purpose Flour 🌾 | 1 ½ cups | Sifted for optimal aeration |
| Granulated Sugar 🍚 | ½ cup | White or light brown |
| Unsalted Butter 🧈 | ¾ cup | Cold, cubed for even melting |
| Large Eggs 🥚 | 2 whole | Room temperature for smooth batter |
| Baking Powder 🍞 | 2 tsp | Diamond Crystal preferred |
| Salt 🧂 | ½ tsp | Fine sea salt preferred |
| Vanilla Extract 🌸 | 1 tsp | Pure, high-quality extract |
| Milk 🥛 | 1 ¼ cups | Whole milk for richness |
The unsalted butter is non-negotiable for that signature buttery crunch. Store-brand butter works perfectly, but Plugrá or Land O'Lakes deliver consistent results. Chill the cubed butter until just before mixing—this prevents the batter from becoming too warm and losing its structure. For the flour, King Arthur or Gold Medal brands yield the best texture, but any all-purpose will suffice. The baking powder must be fresh—if it's more than six months old, the waffles will lack that signature lift. Diamond Crystal is my go-to as it's double-acting, but check the label to ensure it's not aluminum-free (which reacts differently).
No vanilla extract? Vanilla bean paste works beautifully, or a pinch of ground vanilla bean if you're feeling fancy. Whole milk is ideal, but 2% or skim with 1 tbsp cream keeps the richness. For a dairy-free option, unsweetened almond milk with 1 tbsp neutral oil mimics the texture. The sugar can be swapped for light brown sugar (same amount) for a caramelized edge, or powdered sugar (reduce by 1 tbsp) for a lighter batter. If your waffle iron has nonstick coating, you can reduce the butter slightly to 0.625 cups—just ensure the batter remains pourable.
Batter keeps for 24 hours in the fridge, covered tightly. For longer storage, freeze portions in airtight containers for up to 3 months. Reheat waffles in a toaster or oven at 350°F for 5-10 minutes to restore crispiness. The secret to perfect Bruxies lies in the iron's temperature—preheat thoroughly, and maintain a consistent 375°F setting. Clean the iron between batches to prevent batter buildup, which can lead to uneven cooking.
Why You'll Love This Recipe
- No Mixer Needed: I swear by this—just fold the dry ingredients into melted butter and eggs. No whisking, no sifting, no fuss. The baking powder does all the work while I’m still scraping the bowl.
- Sweet Crispy Magic: That buttery crunch from the sugar-browned edges? It’s the star. The inside stays tender, but the outside? Chef’s kiss. Honestly, I’ve tried store-bought—nothing beats the real deal.
- Breakfast or Dessert: Serve them warm with peanut butter for a protein boost or dust with powdered sugar for a sweet treat. My kids ask for them at both dinner and bedtime. (Yes, even on a Tuesday night.)
- Pantry Staple Power: Flour, sugar, butter, eggs—you’re already halfway there. No weird ingredients, no last-minute grocery runs. I’ve made these with whatever I had, and they’re still ridiculously good.
Step-by-step instructions for buttery crispy layers with chewy centers
Mastering the perfect bruxie waffle requires precision in technique and ingredient handling.
Prepare the Batter for Optimal Texture
In a medium mixing bowl, combine the 1.5 cups all-purpose flour, 2 teaspoons baking powder, and 0.5 teaspoon salt. Sift this dry mixture directly into the bowl to ensure even distribution and eliminate any lumps. This step is crucial for achieving that signature crispy-yet-chewy texture that defines bruxie waffles.
In a separate large bowl, create a well in the center and add the 0.75 cup cold cubed unsalted butter, 0.5 cup granulated sugar, 2 whole large eggs, and 1 teaspoon vanilla extract. Using a whisk or electric mixer on medium speed, blend these ingredients together until the butter is fully incorporated and the mixture becomes smooth. The cold butter should create pockets of air in the batter, which will contribute to those coveted crispy layers.
Gradually Incorporate Milk for a Smooth Batter
With the mixer running on low speed, slowly pour in the 1.25 cups milk while continuing to blend. This gradual addition prevents the formation of lumps and ensures a homogeneous batter. After all the milk is incorporated, increase the speed to medium-high and mix for an additional 1-2 minutes until the batter is completely smooth and glossy.
Here's where attention to detail matters: The batter should have a thick, pudding-like consistency, similar to heavy cream. If it appears too thin, let it rest for 5 minutes before proceeding. This resting period allows the flour to fully hydrate, which is essential for achieving that perfect balance of crispy exterior and chewy interior.
Preheat and Prepare the Waffle Iron
While the batter rests, preheat your waffle iron to 375°F. This temperature is critical for achieving that signature crispy texture. Place the waffle iron on a stable, heat-resistant surface and allow it to reach the optimal temperature before adding any batter. A properly preheated iron will give you those beautiful, deep golden-brown grids.
Lightly brush the plates of the waffle iron with a small amount of butter or non-stick cooking spray. This step ensures that the bruxie waffles release easily without sticking. The butter also adds an extra layer of flavor that complements the buttery richness of the batter itself.
Cook the Waffles to Crispy Perfection
Carefully pour approximately ½ cup of batter onto the center of the preheated waffle iron. Close the lid and cook for 4-5 minutes, or until the waffles are golden brown and the edges begin to pull away slightly from the iron. You'll know they're ready when you see those characteristic crispy grids forming.
Use a thin spatula or the waffle iron's built-in handle to carefully remove the waffle. Place it on a wire rack or clean kitchen towel to cool for 1-2 minutes before serving. This brief resting period allows the waffle to set slightly, making it easier to handle and preventing any potential breakage when you're ready to serve.
Serve Immediately for Maximum Enjoyment
Serve the bruxie waffles immediately while they're still warm. The contrast between the crispy exterior and the soft, chewy interior is best enjoyed right out of the iron. These waffles are perfect for breakfast or brunch and pair beautifully with fresh fruit, whipped cream, or a drizzle of warm maple syrup.
To maintain that perfect texture, avoid stacking the waffles while they're still hot. If you need to keep them warm for a short period, place them in a 200°F oven on a wire rack for no more than 10 minutes. This gentle heat will preserve their crispiness without making them soggy.
Pro Tips For Making Bruxie Waffle
- MELT THE BUTTER FIRST: Cold butter in the batter makes for dense, greasy waffles. Melt it first—just until it turns liquid gold—and let it cool to room temp before mixing. I used to skip this, and my waffles turned out like hockey pucks. Now they’re light and crispy.
- WHISK THE EGGS HARD: Beat those eggs until they’re pale and thick—about 30 seconds past when they look done. This adds structure, so your waffles hold shape instead of collapsing into a sad pancake pile. I learned this after watching my first batch deflate like a popped balloon.
- DON’T OVERMIX THE FLOUR: Stir the dry ingredients just until combined—lumps are fine. Overmixing develops gluten, and your waffles will turn out tough instead of tender. Fold the wet and dry ingredients together like you’re being gentle with a fresh snowball.
- PREHEAT THE IRON LONG: Run your waffle iron on high for 5 minutes before pouring batter—no skipping this. A cold iron steals heat from the batter, leaving you with a soggy center. I used to rush it, and my waffles took forever to cook through. Now they’re golden in 3 minutes.
Troubleshooting perfect results
Batter Too Thin?
If your batter looks runny, don't panic—this is fixable. The most common cause is overmixing or using warm ingredients. Let the batter rest for 5-10 minutes to thicken naturally.
If it's still too thin after resting, add 1-2 tablespoons of all-purpose flour at a time until you reach a thick, pudding-like consistency.
I've learned through trial and error that King Arthur flour absorbs liquid better than some store brands, so it might help if you have it on hand. 💡
Waffles Sticking?
Sticky waffles usually mean your waffle iron wasn't hot enough or wasn't properly prepped. Always preheat your iron to 375°F for at least 5 minutes before adding batter. Lightly grease the plates with butter or nonstick spray—just ¼ teaspoon per side is plenty.
I also recommend using a waffle iron with nonstick coating, like the Cuisinart WMR-CA, which makes release much easier. If they still stick, your iron might need cleaning or replacing.
Uneven Cooking?
Uneven cooking often happens when the iron isn't hot enough or the batter isn't evenly distributed. First, ensure your iron is preheated to 375°F—use an infrared thermometer if you're unsure. Pour the batter in the center and spread it evenly by tilting the iron gently.
If your iron has temperature fluctuations, try cooking the waffles at 350°F for 5-6 minutes instead. I've found that older irons sometimes need this adjustment. 🔥
Dense or Gummy Centers?
Dense waffles usually mean the batter was overmixed or the baking powder was old. Sift your dry ingredients thoroughly and use fresh baking powder (test it by mixing with water—it should bubble vigorously). Also, ensure your butter is cold when mixing.
If the waffles still turn out dense, try reducing the milk by 2 tablespoons and adding 1 extra tablespoon of flour to the dry mix. Over time, I've learned that Diamond Crystal baking powder gives the best rise.
Burning on the Outside?
If your waffles burn before cooking through, your iron is likely too hot. Reduce the temperature to 350°F and cook for 5-6 minutes instead of the usual 4-5 minutes. Also, check that your iron isn't overheating—some models need longer preheat times.
I've had success with the Breville Smart Oven Air Fryer Pro, which has precise temperature control. If burning persists, your iron might need cleaning or calibration. 🌡️
Waffles Collapsing?
Collapsed waffles usually mean the batter was too thin or the baking powder wasn't activated properly. Double-check that your baking powder is fresh and that you're using the correct amount. If the batter still seems too thin, add 1 extra tablespoon of flour or let it rest longer.
Also, ensure your waffle iron is fully closed—some older models don't latch properly. I once had this issue with a vintage iron, and upgrading to a Hamilton Beach 26021D solved it completely.
Nutrition facts
Frequently asked questions
What makes Bruxie waffles different from regular waffles?
Bruxie waffles stand out with their signature crispy exterior and chewy interior, thanks to the precise ratio of butter to leavening agents. The batter's thick, pudding-like consistency and high heat cooking method create those coveted layers. Unlike traditional waffles, they hold their shape beautifully when stacked, making them perfect for brunch presentations.
Can I make Bruxie waffles without a waffle iron?
Yes! Use a griddle or nonstick skillet on medium-high heat. Pour small circles of batter (about ¼ cup) and cook until golden brown on both sides, about 2-3 minutes per side. They won't have the classic grid pattern but will still deliver that delicious crispy-chewy texture.
How do I store leftover Bruxie waffles?
Store in an airtight container at room temperature for up to 2 days, or freeze for 3 months. To restore crispiness, reheat in a 350°F oven for 5-10 minutes or use a toaster. The key is keeping them dry—never stack while warm or they'll soften.
What's the best way to serve Bruxie waffles?
Warm waffles pair perfectly with fresh berries, whipped cream, or warm maple syrup. For a decadent twist, try Nutella and sliced bananas. The crispy edges hold toppings beautifully, making them ideal for brunch buffets or weekend family meals.
Why did my Bruxie waffles turn out dense?
Dense waffles usually mean overmixed batter or old baking powder. Always sift your dry ingredients and use fresh baking powder (test it by mixing with water—it should bubble vigorously). Also ensure your butter is cold when mixing. For extra fluffiness, let the batter rest 5 minutes before cooking.