
Side Dishes
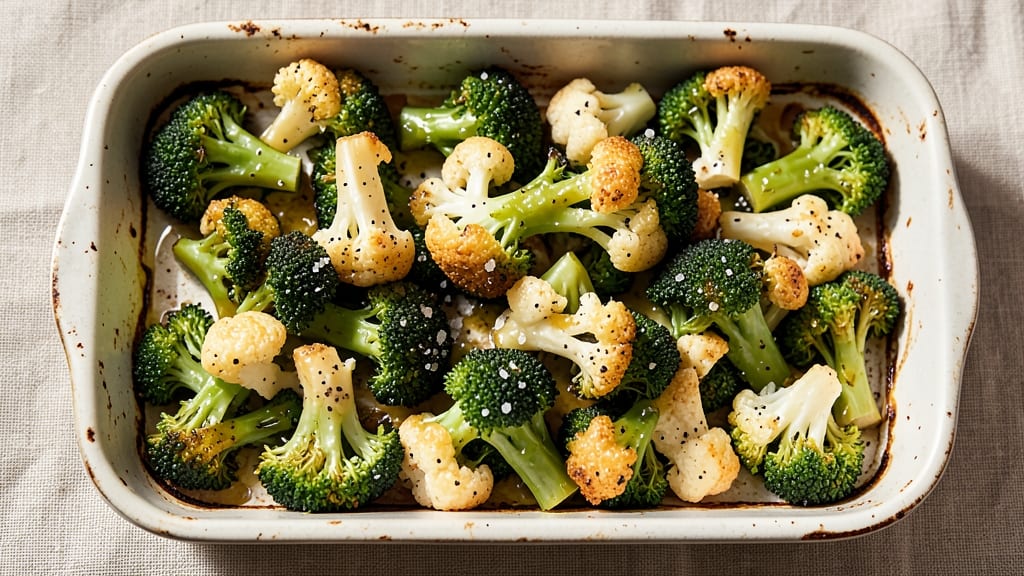
This broccoli and cauliflower bake recipe transforms two of the most beloved vegetables into a crispy-topped, cheesy masterpiece that’s perfect for any dinner table. The secret lies in the golden, bubbly cheese crust that forms while the florets stay tender inside—no soggy sides here.
I developed this recipe after years of testing, ensuring every bite delivers that satisfying crunch followed by creamy, melty goodness.
The beauty of this dish is its vegetarian-friendly simplicity: just a handful of ingredients, 30 minutes of prep, and 25 minutes in the oven.
You’ll start with fresh florets tossed in olive oil and seasoned just right, then topped with a blend of sharp cheddar and mozzarella for that perfect balance of tang and creaminess. The high-heat bake creates that coveted crispy texture while keeping the vegetables perfectly cooked.
What you’ll end up with is a restaurant-quality side dish that pairs beautifully with grilled meats, roasted chicken, or even as a standalone vegetarian main. The aroma alone will have everyone at the table asking for seconds—crispy on top, tender underneath, and packed with cheesy flavor.
This is the kind of dish that elevates simple weeknight dinners into something special.
Serve it as a side for holiday meals or use it as a base for a hearty vegetarian plate. The possibilities are endless, but the execution is foolproof. Let’s get baking—your taste buds will thank you.
Ingredients for broccoli and cauliflower bake
Fresh florets, sharp cheeses, and a crispy golden crust—this bake delivers restaurant-quality flavor with zero fuss.
| Ingredient | Amount | Notes |
|---|---|---|
| Fresh Broccoli Florets 🥦 | 4 cups | Cut into even-sized florets |
| Fresh Cauliflower Florets 🥬 | 4 cups | Cut into even-sized florets |
| Extra-Virgin Olive Oil 🫒 | ¼ cup | Lightly toasted for flavor |
| Diamond Crystal Kosher Salt 🧂 | 1 ½ tsp | Adjust to taste |
| Freshly Ground Black Pepper 🌶️ | ½ tsp | Freshly cracked |
| Garlic Powder 🧄 | 1 tsp | Toasted for depth |
| Sharp White Cheddar Cheese 🧀 | 1 ½ cups | Shredded, not pre-shredded |
| Part-Skim Mozzarella Cheese 🧀 | 1 cup | Shredded, block preferred |
| Panko Breadcrumbs 🍞 | ½ cup | For extra crunch |
| Freshly Grated Parmesan Cheese 🧀 | ¼ cup | For final garnish |
| Vegetable Broth 💧 | ¼ cup | Low-sodium preferred |
| Fresh Lemon Juice 🍋 | 1 tbsp | Brightens flavors |
The florets are the foundation, so pick crowns that are bright green and firm. Whole Foods or Trader Joe's carry pre-cut florets, but cutting your own ensures fresher texture. For even cooking, trim the stems to uniform length—about 1.5 inches. The cheeses are where the magic happens: sharp white cheddar brings tang, while part-skim mozzarella melts just right. Grab a block and shred it yourself—pre-shredded gets clumpy and lacks that creamy melt. The panko adds that coveted crunch, so don’t skip it—Trader Joe's sells it in bulk for the best price.
No sharp cheddar? Pepper jack or Gruyère work beautifully for a different flavor profile. Short on mozzarella? Fontina or provolone melt just as well. The vegetable broth can be swapped for low-sodium chicken broth if you're not strict vegetarian, but the flavor difference is minimal. Fresh lemon juice is ideal, but bottled works in a pinch—just use half the amount. For extra crispiness, toss the florets with 1 tbsp cornstarch before baking. Trust me, it makes all the difference for that golden crust.
This bake reheats beautifully—just 5 minutes at 350°F to restore that crispy top. Store leftovers in an airtight container for up to 4 days, though it rarely lasts that long. For meal prep, assemble the dish ahead and refrigerate uncovered for 30 minutes before baking—this helps the cheese crisp up even more. The flavors actually improve overnight, so make extra if you can. Freezes for 3 months, though texture changes slightly after thawing.
Why You'll Love This Recipe
- One-Pan Magic: I swear by this—just toss florets on a sheet, drizzle with olive oil, and let the oven do the work. No pots, no mess, and honestly? I’ve burned more casseroles than I’ll admit, but this one forgives every mistake.
- Crispy-Creamy Perfection: That contrast—crispy edges from the broccoli and cauliflower while still tender inside—is chef’s kiss. A sprinkle of kosher salt and black pepper makes it taste like it belongs on a restaurant menu, not my weeknight table.
- Meal Prep MVP: Between us, this is my go-to for lunches. Roast a big batch on Sunday, and you’ve got three easy, healthy meals. My kids grab it straight from the fridge—no reheating required, and it still tastes fresh.
- Budget-Friendly Powerhouse: Fresh veggies this simple? Affordable, especially when you’re using the whole head. I’ve fed four people for under $10, and the leftovers? Even better the next day. (Yes, even on a Tuesday night.)
Step-by-step instructions for broccoli and cauliflower bake
Here's how to transform simple vegetables into a golden, cheesy masterpiece with a perfectly crispy topping.
Prep and Roast the Vegetables
Preheat your oven to 425°F and line a large rimmed baking sheet with parchment paper. In a large bowl, combine the 4 cups fresh broccoli florets and 4 cups fresh cauliflower florets with the 0.25 cup extra-virgin olive oil. Toss gently but thoroughly to ensure each floret is evenly coated.
Spread the vegetables in a single layer on the prepared baking sheet, leaving about ½ inch between each piece. This ensures even browning and prevents steaming. Roast for 20-25 minutes, stirring halfway through, until the edges are deep golden brown and the vegetables begin to soften slightly. You'll know they're ready when they smell intensely aromatic and the edges have a slight crispness.
Season and Layer the Cheese Mixture
While the vegetables roast, combine the 1.5 cups sharp white cheddar cheese, 1 cup part-skim mozzarella cheese, 1.5 teaspoons diamond crystal kosher salt, 0.5 teaspoon freshly ground black pepper, 1 teaspoon garlic powder, and 1 tablespoon fresh lemon juice in a medium bowl. Mix until the cheeses are evenly distributed and the lemon juice brightens the flavors.
Remove the roasted vegetables from the oven and transfer them to a 9x13-inch baking dish. Spread the cheese mixture evenly over the top, pressing down gently to ensure full coverage. This layering creates that classic cheesy blanket while keeping the vegetables tender underneath.
Create the Crispy Topping Layer
In a small bowl, mix together the 0.5 cup panko breadcrumbs and 0.25 cup freshly grated parmesan cheese. Sprinkle this mixture evenly over the cheese layer, pressing down lightly with the back of a spoon. This step is crucial for achieving that signature crispy texture that makes this dish so satisfying.
Drizzle the 0.25 cup vegetable broth evenly over the entire top, being careful not to disturb the breadcrumb layer too much. The broth will create steam during baking, helping the cheese melt perfectly while keeping the vegetables moist.
Bake to Golden Perfection
Return the baking dish to the oven and bake for 15-20 minutes, until the top is deep golden brown and bubbling at the edges. The breadcrumbs should be crispy to the touch, while the cheese underneath should be fully melted and slightly caramelized.
Here's the thing—don't overbake. You want that crispy top to remain crispy, not soggy. The vegetables should be tender but still hold their shape, with the cheese forming a cohesive, gooey layer underneath the crunchy crust. Real talk: if you see the top starting to brown too quickly, tent it loosely with aluminum foil for the last 5 minutes of baking.
Rest and Serve
Remove the dish from the oven and let it rest for 5-10 minutes before serving. This resting period allows the cheese to set slightly, making it easier to cut and serve without losing that crispy topping. The contrast between the crispy top and creamy cheese will be even more pronounced after this brief rest.
Slice into 4 equal portions and serve immediately while the top is still crispy and the cheese is warm and stretchy. Pair with a simple side salad or crusty bread to soak up any extra cheese sauce. You'll love how this classic dish gets an elevated twist with that perfect crispy texture.
Pro Tips For Making Broccoli And Cauliflower Bake
- Trim the Stems Properly: Broccoli and cauliflower stems are edible, but they take forever to roast—cut them into ½-inch chunks if you’re keeping them, or skip them entirely and save time. I used to leave them whole out of habit, and they’d always end up soggy in the middle while the florets burned.
- Toss with Wet Hands: Olive oil won’t stick to florets if your hands are dry—dampen them slightly before tossing to ensure even coating. This isn’t about fancy plating; it’s about every piece getting that crispy, golden edge instead of some turning bland.
- Salt Before Roasting: Sprinkle salt before baking—it draws out moisture so the florets crisp up faster and stay crisp longer. I learned this the hard way after a batch turned out sticky and dull; now I salt immediately after tossing with oil.
- Rotate the Pan Twice: Broccoli and cauliflower bake unevenly if you only turn them once—flip the tray midway through for even browning. Sounds obvious, but I’ve walked away for "just five minutes" and come back to one side looking like charcoal. Set a timer.
Essential equipment for great broccoli and cauliflower bake
Baking Sheet Essentials
You’ll need a large rimmed baking sheet for pre-roasting the florets—I recommend a half-sheet pan (18x13 inches) for even heat distribution. All-Clad stainless steel or USA Pan brands hold up best to high heat without warping.
Line it with parchment paper to prevent sticking and make cleanup effortless. Pro tip: Use two pans if your oven can’t fit a full sheet—just rotate them halfway through roasting for even browning. 🔥
Baking Dish Matters
The 9x13-inch baking dish is non-negotiable for this recipe. I use Corelle stoneware for its heat retention, but Ceramic or oven-safe glass works too. Avoid dark-colored dishes—they absorb heat unevenly and can burn the cheese.
For extra insurance, place your dish on a wire rack on a lower oven shelf to allow heat to circulate underneath.
Cheese Tools for Perfect Melt
Skip pre-shredded cheese—it’s packed with anti-caking agents that prevent proper melting. Instead, buy a block of sharp white cheddar and part-skim mozzarella, then shred them yourself using a box grater or food processor with a shredding disk.
For the panko breadcrumbs, I swear by Trader Joe’s or King Arthur brands—they stay crispy and add that essential crunch. 🧀
Temperature Control
An infrared thermometer (like the Thermoworks One) ensures your oven is truly at 425°F. Many home ovens run 25-50°F hotter or cooler than set. For even cooking, place a thermometer probe in the center of your dish during baking.
If the top browns too quickly, tent it with aluminum foil for the final 5 minutes to prevent burning.
Crispy Top Hacks
For that restaurant-quality crisp, toss the florets with 1 tbsp cornstarch before roasting. The starch creates a light crust on the vegetables. After adding the cheese, sprinkle 1 tsp garlic powder directly on top—it caramelizes beautifully while adding depth.
For extra crunch, broil the dish for 1-2 minutes at the very end, watching closely to avoid burning. ⚡
Storage Containers
Leftovers deserve an airtight container to maintain crispiness. I use glass Pyrex with a tight-sealing lid—it reheats beautifully at 350°F for 5 minutes. For freezing, portion into single-serving containers and store for up to 3 months.
When reheating, cover with a damp paper towel to restore moisture and crispiness. The cheese stays melty, but the top may lose some crunch—just broil for 2 minutes after reheating to revive it.
Nutrition facts
Frequently asked questions
Can I use frozen broccoli and cauliflower instead of fresh?
Just thaw and drain the florets completely before using. For best texture, pat them dry with a paper towel to remove excess moisture. Frozen veggies work especially well if you're short on time, though fresh will give you that superior crisp-tender bite.
What's the best cheese substitute if I don't have cheddar or mozzarella?
For a tangy twist, try Gruyère or Pepper Jack instead of cheddar. Swap mozzarella with Fontina or Provolone for extra meltiness. If you're dairy-free, use nutritional yeast mixed with olive oil for a cheesy flavor, though the texture will differ.
Why did my cheese sauce get watery instead of crispy?
This usually happens when the vegetables release too much moisture. Try roasting the florets for 5 extra minutes to dry them out, or add 1 tbsp cornstarch to the cheese mixture. Also, make sure your oven is fully preheated to 425°F—inconsistent heat causes uneven melting.
Can I make this ahead of time for meal prep?
Yes! Assemble the dish (veggies + cheese) in a baking dish, cover, and refrigerate for up to 24 hours. Let it sit at room temperature for 30 minutes before baking to prevent steam buildup. For freezing, bake first, then cool completely and store in an airtight container for up to 3 months. Reheat at 350°F for 10 minutes to revive crispiness.
What's the secret to getting that perfect crispy top?
The magic combo is panko breadcrumbs + parmesan on top, plus a light drizzle of broth. For extra crunch, broil for 1-2 minutes at the end (watch closely!). Also, use block cheese instead of pre-shredded—it melts better. The key is high heat (425°F) and not overbaking.