
Soups & Stews
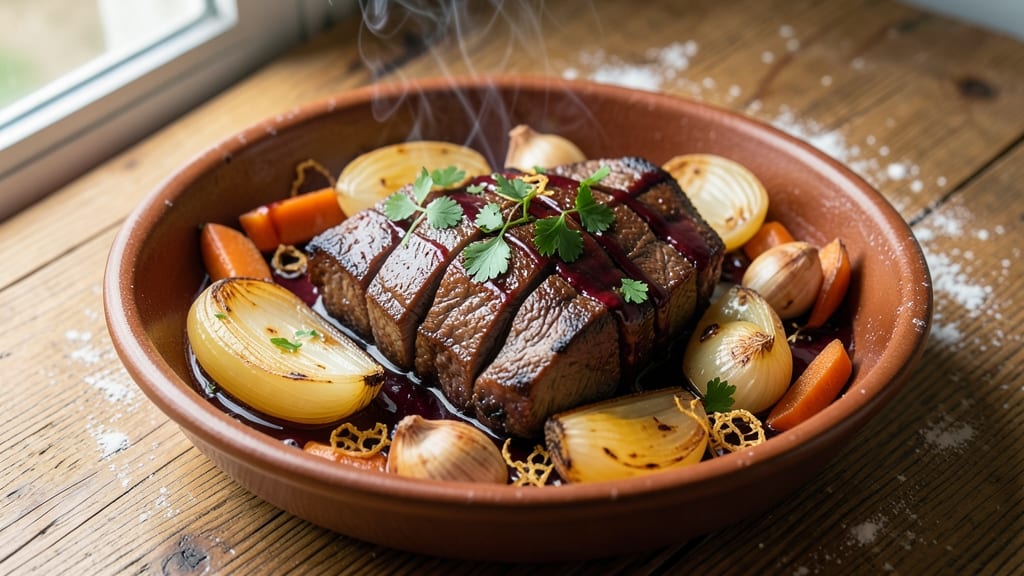
Braised beef tongue transforms tough cuts into melt-in-your-mouth gelatinous perfection through slow cooking—this recipe unlocks that restaurant-quality texture at home. The secret lies in scoring the tongue to release collagen and braising it for 3 hours with aromatic vegetables, creating a rich, velvety sauce that clings to every bite.
I’ve perfected this method after years of testing, ensuring the final result is tender, flavorful, and impossible to resist.
What makes this dish truly special is the transformation: what starts as a dense, fibrous cut becomes a luxurious, almost custard-like texture thanks to the collagen breakdown during braising. The process requires patience—3 hours of gentle simmering—but the reward is a dish that feels indulgent yet simple to prepare.
Traditional techniques like scoring the tongue and using a mix of onions, carrots, and garlic form the flavor foundation, while red wine and herbs elevate it to new heights.
The end result is a dish that’s equal parts comforting and impressive—ideal for special occasions or when you want to show off your slow-cooking skills. The braising liquid reduces into a glossy, aromatic sauce that coats the tender tongue, making every bite rich and satisfying.
Serve it sliced thinly with crusty bread to soak up every last drop of that flavorful sauce.
This recipe is perfect for those who appreciate the art of slow cooking and the magic of collagen-rich meats. Whether you're feeding a crowd or treating yourself to a luxurious meal, braised beef tongue delivers restaurant-quality results with minimal effort. Let’s get started on creating this timeless dish.
Ingredients for braised beef tongue
Pantry staples meet slow-cooked luxury—just 13 ingredients transform tough beef tongue into velvety perfection.
| Ingredient | Amount | Notes |
|---|---|---|
| Beef Tongue 🥩 | 2 lb | Whole, cleaned and scored |
| Yellow Onions 🧅 | 2 whole | Peeled and halved |
| Carrots 🥕 | 4 whole | Peeled and halved lengthwise |
| Garlic Cloves 🧄 | 6 cloves | Peeled and smashed |
| Red Wine 🍷 | 1 cup | Dry, like Cabernet Sauvignon |
| Beef Broth 💧 | 4 cups | Low-sodium preferred |
| Tomato Paste 🍅 | 2 tbsp | Smooth, not chunky |
| Fresh Thyme 🌿 | ½ ounce | Stems removed |
| Fresh Bay Leaves 🍃 | 2 whole | Dried if unavailable |
| Black Peppercorns 🌶️ | 1 tbsp | Coarsely crushed |
| Salt 🧂 | 2 tsp | Kosher or sea salt |
| Olive Oil 🫒 | 2 tbsp | Extra-virgin for richness |
| Crusty Bread 🍞 | 8 slices | For serving |
The beef tongue is the star, so prioritize quality—look for bright red, moist cuts with minimal surface discoloration. Local butchers or specialty meat counters often carry the best. Score the tongue deeply in a crosshatch pattern (about 1/4-inch deep) to release collagen. I usually ask the butcher to clean it for me, but if you're doing it yourself, soak in cold water with vinegar for 30 minutes to remove any lingering odor. For the red wine, Cabernet Sauvignon or Merlot work best—their tannins complement the rich beef. The beef broth should be low-sodium; Homemade or high-quality store-bought makes a noticeable difference in flavor depth.
No red wine? Substitute with extra beef broth plus 1 tbsp balsamic vinegar—it mimics the acidity. Fresh thyme is ideal, but dried works at half the amount. The tomato paste can be swapped for 1 cup crushed tomatoes if you prefer a smoother sauce. For the crusty bread, baguettes or sourdough are perfect—anything that can handle soaking up sauce. If you're short on carrots, substitute with parsnips or celery for similar texture. The onions and garlic are non-negotiable though—they form the flavor base. For extra richness, add a splash of soy sauce or Worcestershire to the braising liquid.
This dish tastes even better the next day—plan ahead. Store the tongue and sauce separately in airtight containers for up to 5 days in the fridge. For longer storage, freeze the sauce in ice cube trays (perfect for quick flavor boosts later). The bread can be toasted fresh when serving. I like to reheat portions gently in the sauce on the stove—just enough to warm through, not boil. The texture becomes even more luxurious after resting overnight, making it ideal for meal prep.
Why You'll Love This Recipe
- Same recipe, different vibes: serve it over mashed potatoes for a hearty weeknight meal or slice it for a showstopping charcuterie board. Honestly, it works everywhere.
- Foolproof Simplicity: I swear by this—just sear the tongue, toss in chopped onions, carrots, and garlic, then let the red wine do its magic. No fancy techniques, no stress.
- Rich, Deep Umami: That slow braise turns tough tongue into melt-in-your-mouth perfection, with the wine cutting through the richness. The onions caramelize just enough to add sweetness—trust me, it’s ridiculously good.
- Weeknight or Sunday Feast: Same recipe, different vibes: serve it over mashed potatoes for a hearty weeknight meal or slice it for a showstopping charcuterie board. Honestly, it works everywhere.
Step-by-step instructions for braised beef tongue
Transform tough beef tongue into melt-in-your-mouth tenderness with this slow-cooked masterpiece.
Prepare the Beef Tongue for Braising
Begin by scoring the surface of the 2 lb beef tongue in a crosshatch pattern using a sharp knife. This creates channels that allow the braising liquid to penetrate deeply, ensuring even cooking and maximum flavor absorption. Don't cut too deep—just through the outer membrane to create a diamond pattern about ¼-inch apart.
Place the scored tongue in a large pot and cover it completely with cold water. Bring to a boil over high heat, then immediately reduce to a simmer for 15 minutes. This blanching step removes any impurities and blood, resulting in a cleaner-tasting final dish. Drain and rinse thoroughly under cold water to stop the cooking process and remove any surface scum.
Sauté Aromatics and Build the Braising Base
Heat the 2 tbsp olive oil in a heavy Dutch oven over medium heat. Add the 2 whole yellow onions (peeled and halved) and 4 whole carrots (peeled and halved lengthwise), cooking for 8-10 minutes until they begin to soften and develop golden edges. You want them to caramelize slightly but not brown completely—this builds deep flavor without bitterness.
Push the vegetables to the sides of the pot and add the 6 cloves garlic (peeled and smashed) along with the 0.5 ounce fresh thyme (stems removed) and 2 whole fresh bay leaves. Stir for 30 seconds until fragrant. Then add the 2 tbsp tomato paste and cook for another 1 minute, stirring constantly to prevent burning. This creates a rich, concentrated base for your braise.
Deglaze and Combine All Braising Components
Pour in the 1 cup red wine and scrape up all the browned bits from the bottom of the pot with a wooden spoon. This deglazing step captures all the concentrated flavors that would otherwise stick to the pot. Let the wine simmer for 3-4 minutes until it reduces by about half, intensifying its flavor profile.
Add the 4 cups beef broth, 1 tbsp coarsely crushed black peppercorns, and 2 tsp salt, stirring to combine. The liquid should cover the beef tongue completely when you place it back in the pot. If not, add a splash of water to ensure proper braising. Bring the mixture to a gentle simmer—you're looking for small bubbles around the edges, not a rolling boil.
Braise Until Fork-Tender Perfection
Place the beef tongue in the Dutch oven, ensuring it's fully submerged in the braising liquid. Cover tightly with a lid and transfer to a preheated 300°F oven. Braise for 2.5 hours, turning the tongue occasionally to ensure even cooking and prevent it from sticking to the bottom.
After 2 hours, check for doneness by inserting a fork into the thickest part of the tongue. It should pierce easily with minimal resistance. If it's not quite tender yet, continue braising for another 30 minutes to 1 hour, checking periodically. The collagen in the tongue will break down into gelatin, creating that signature silky texture we're after.
Rest and Serve with Crusty Bread
Remove the beef tongue from the braising liquid and transfer it to a cutting board. Let it rest for 15-20 minutes before slicing. This resting period allows the juices to redistribute throughout the meat, ensuring each slice is moist and flavorful. While it rests, skim any fat that has risen to the surface of the braising liquid and discard it.
Slice the beef tongue against the grain into ¼-inch thick slices. Serve immediately with the 8 slices crusty bread and ladle generous portions of the rich braising liquid over the top. The result should be tender, gelatinous slices that practically melt in your mouth, bathed in a deeply flavorful sauce that's perfect for soaking up with every bite.
Pro Tips For Making Braised Beef Tongue
- SCORE THE TONGUE: Use a sharp knife to cut a shallow crosshatch pattern on the surface—about ¼-inch deep. This lets the flavors penetrate deeper and prevents the outside from drying out while the inside stays tender. I learned this the hard way after serving a guest a tongue that was tough on the outside and still raw in the middle.
- SWEAT ONIONS LOW: Don’t rush the onions—cook them on medium-low heat for at least 10 minutes until they’re soft and translucent, not browned. If you rush, they’ll burn before the wine can deglaze properly, leaving a bitter taste that ruins the whole dish. Trust me, your patience will pay off.
- DEGLAZE WITH WINE: After searing the beef tongue, splash in the red wine immediately while the pan is still hot—this lifts all the browned bits (fond) off the bottom. Let it reduce by half before adding broth; skipping this step means missing out on layers of flavor. It’s the thing that makes a good braise great.
- SKIP THE BOILING: Resist the urge to boil the tongue to tenderize it beforehand—it’s unnecessary and makes the meat waterlogged. Instead, parboil it for 15 minutes in cold water with a bay leaf, then shock in ice water to stop cooking. This keeps it firm for proper braising without turning it into a soggy mess.
Dietary considerations for this dish
Gluten-Free Adaptations
Beef tongue naturally contains no gluten, but cross-contamination can be an issue if you're sensitive. Always use a clean Dutch oven and utensils that haven't touched gluten-containing ingredients.
For serving, opt for gluten-free bread options like Schär baguettes or Canyon Bakehouse sourdough—both toast beautifully and soak up the sauce perfectly. 🍞
Dairy-Free Considerations
This recipe is inherently dairy-free, but the rich sauce pairs wonderfully with dairy-free alternatives. Serve with cashew-based cheeses or nutritional yeast sprinkles for added depth. The natural gelatin from the tongue creates a luxurious texture that doesn't require dairy to shine.
For extra richness, stir 1 tbsp coconut cream into the braising liquid during the last 30 minutes of cooking.
Low-Sodium Options
Since beef tongue already has a robust flavor, you can reduce the salt to just 1 tsp while still achieving depth. Boost umami using 1 tbsp soy sauce or 1 tsp mushroom powder in the braising liquid.
For the broth, choose a no-salt-added version like Pacific Foods unsalted beef broth, then season to taste at the end with a pinch of sea salt if needed.
Vegetarian Substitutes
While beef tongue is the star, you can create a similar gelatinous texture using king oyster mushrooms or hearts of palm. For mushrooms, marinate 1 lb sliced king oyster mushrooms in 1 tbsp soy sauce and 1 tbsp balsamic vinegar for 30 minutes before braising.
Use the same aromatic vegetables and red wine reduction, then simmer for 1.5 hours until tender. The result won't be identical, but it captures the essence of the dish.
Allergen-Friendly Tips
For nut allergies, avoid the coconut cream suggestion and stick to the original sauce. If you're avoiding garlic, substitute with 1 tsp garlic powder or asafetida powder (hing) for a similar depth of flavor.
Always check your beef broth for hidden allergens—some brands add soy or wheat. For a completely allergen-conscious approach, use a homemade beef broth with just beef, water, and salt.
Meal Prep Adaptations
This dish reheats beautifully, making it perfect for meal prep. Store the braised tongue and sauce separately in glass airtight containers for up to 5 days in the fridge.
When reheating, warm the sauce first on the stove, then add the tongue and simmer gently for 10-15 minutes until heated through. For freezer storage, portion the sauce into ice cube trays—these can be thawed quickly and added to other dishes for instant flavor.
Nutrition facts
Frequently asked questions
Why does beef tongue need scoring before braising?
Scoring creates channels that let the braising liquid penetrate deeply, breaking down collagen faster and ensuring even cooking. The crosshatch pattern (about ¼-inch deep) helps release natural gelatin, transforming tough meat into silky, melt-in-your-mouth slices. Think of it as prepping the surface for maximum flavor absorption!
Can I use a slow cooker instead of an oven for braising?
Transfer the pot to a slow cooker on low heat for 6-8 hours instead of the oven. The key is maintaining a gentle simmer—just cover with a lid and check occasionally to ensure the liquid doesn't evaporate too quickly. The texture will be just as tender, though oven-braising gives slightly more control over the sauce reduction.
What if my beef tongue isn't tender after 3 hours?
Don't rush it! Extend the braising time by another 30 minutes to 1 hour—the collagen needs patience to fully break down. If it's still firm, increase the oven temp to 325°F for the final 30 minutes. The tongue should pierce easily with a fork when done. Overcooking won't ruin it, but the sauce may reduce too much, so add a splash of broth if needed.
How do I store leftovers to keep them tender?
Store the tongue and sauce separately in airtight containers for up to 5 days in the fridge. When reheating, warm the sauce first, then add the tongue and simmer gently for 10-15 minutes—never boil. The sauce will cling beautifully to the slices, preserving that restaurant-quality texture. For longer storage, freeze the sauce in ice cube trays for quick flavor boosts later!
What's the best way to serve braised beef tongue?
Slice it ¼-inch thick against the grain for maximum tenderness, then serve with crusty bread or polenta to soak up the sauce. Garnish with fresh parsley or a drizzle of reduced braising liquid for extra elegance. For a hearty meal, pair it with roasted root vegetables or a simple green salad. The sauce is the star—don't skimp on ladling it generously over each slice!